Film cameras
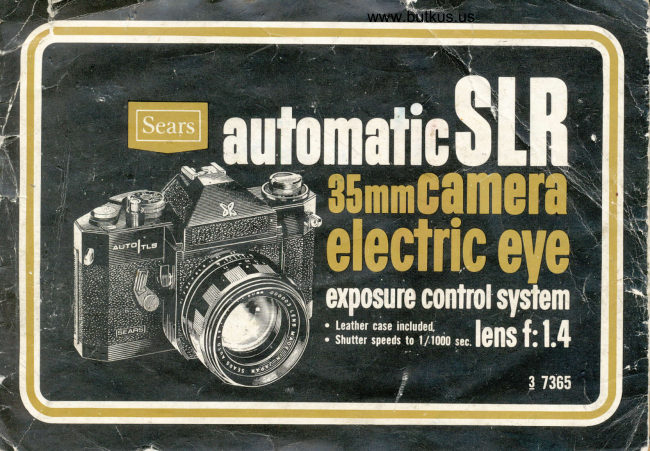
Sears Auto TLS User manual
User manual for Sears Auto TLS. 14 pages in English. Read the original PDF, download or print a copy without registration.
14 pagesEnglish7.8 MB PDF
Loading your manual…Open PDF directly
Document details
- Brand
- Sears
- Model / document
- Sears Auto TLS
- Document type
- User manual
- Language
- English
- Pages
- 14
- File size
- 7.8 MB
- Category
- Film cameras
- Document date
- Not specified in catalog
Search available document text
Find a term, then jump to its page in the original PDF. Image-only pages may not be searchable; check the PDF for exact wording and diagrams.
Page 3 · Read text
Digitally signed by mike butkusmike               DN: cn=mike butkus,
                             o=orphancameras, ou=29,
                               email=mike@butkus.org, c=US
                                 Date: 2019.08.08 10:00:09 -04'00'butkus
View original page 3Page 5 · Read text
\\


       film, Ioading
          Always load camera in shade, never in bright or direct sunlight.
         Use Sears or other good quality standard 35mm (2O or 36-exposure)
              filrh, color or black and white.
          Press Shutter Release Button (D) . . . Pull Back Cover Latch (T) until
        camera back clicks open. Swing open camera back and place fllm
            cartridge into Film Chamber (S).
        To place film cartridge properly make sure that the extended core of
          the film cartridge rests on bottom of camera (Fig, 1). Rotate RewindFie. I        Knob (O) a bit so that Rewind Shaft (R) engages and seats film cart.
          ridge. Pull tapered end of film across back of camera and insert into
               slit in Take-up Spool (Y). Rotate Take.up Spool by advancing Film-wind
          Lever (C) to take up film slack . . . make sure that take-up spool teeth
         engages sprocket holes of film. Close camera back until  it snaps shut.
          Advance Film-wind Lever (C) two or three times depressing Shutter Re.
          lease Button (D) each time until Exposure Counter (E) is automaticatly
          set at "L" ..  . Now you are ready for your first picture. Set the ca.
        mera fbr the film being used. To set film speed, pull up Shutter
         Speed Dial (Bt and rotate it until the ASA number of your fllm is op-
                                                                               sheet            posite. the indicator mark  (f ie.                                           .2). Check film instruction
Fie.2     for correct ASA speed.
                      www.butkus.us                  4
                                                                      )
View original page 5Page 6 · Read text
www.butkus.us


bu,tterg louding
Unscrew Mercury Battery Compartment Cover (U) with a coin. . Place
a mercury battery in the compartment with plus (+) end up (Fie. 3)      Fie. 3
and replace the cover. The mercury battery is the power source of
the Electric Eye and should last for approximately one year. For re-
placement, use Eveready EPX625, Mallory RM625 or equivalent.
eorreet expqsure
Your AUTO TLS has a buit-in thru-the"lens Electric Eye exposure
control system which regulates the lens opening automatically for cor-                                                                             Fie.4rect eXposure. You may also operate the camera manually. Correct
exposure may be achieved in the following ways:
 l.  Electric Eye Exposure Operation
   The camera automatically computes and sets the lens opening for                                                                                                                                                                                                                                                                                                                                                 r
    correct exposure when it is set for Electric Eye exposure control.                                                                                                                                                                                                                                                    I
    Simply set the EE/manual Ring (l) at EE position (Fig. 4), and rotate
    Lens Selection Dial (N) until the speed of your lens comes opposite                                                                                                                                                                                              lI
   the white marker (Fig. 5). For example, if the speed of your Auto
   EE lens is f/1.4, set the Dial at I.4.                                                                                                                                                    I                                                                                     Fic. 5
View original page 6Page 7 · Read text
\.l
www.butkus.us


                                   Turn the Shutter Speed Dial (B) until the desired  shutter speed                           Fie. 6                              number is set opposite the white indicator  line.  Be certain the
                                       Dial is set at a click stop (Fig. 6).
                                                    r.4         Do not set Shutter Speed Dial (B) at "B" when you wish to operate
                                              2            camera on EE exposure control.                                        2
                                                                  )l                                                 i,',:.i::ii\:.::ta::.                                         4           Make sure that the Film-wind Lever (C) is advanced . . . this  is                                                                                                     I 5.6                                                                i                                                ".tzt:ii:::                 8            necessary because the exposure meter switch is incorporated in
                                                                    tl            the Film'wind mechanism, The meter automatically turns " ON "                                         16
                            when Film'wind Lever (C) is advanced and turns " OFF " when
                                   Shutter Release Button (D) is pressed. This switch ccncerves    lncorrect exposure Fig. 7                                  mercury battery energy when the camera is not in use.
                           On the right hand side of the viewfinder notice the  f :stop scale
                                      located between red warning marks. The upper red mark indicates
                                          2            under-exposure and the lower indicates over-exposure. The black                                   I
                                          4            exposure meter needle indicates the f :stop opening at which the
                                   lens is set. The exposure meter needle going beyond either of
                                      the red marks indicates incorrect exposure (Fig,.7).  lf this happens,
                                        adlust shutter speed so that the needle appears within the f :stop
                                        scale (Fig. B).   Correct expcsure      Fie. B                                  6l
View original page 7Page 8 · Read text
www.butkus.us


 454
 -    too


1000

As long as the camera is set for EE operation, the built-in highly
 sensitive CdS exposure meter automatically sets the lens opening
 for optimum exposure and indicates the f :stop number at which
your picture is taken. The red mark which moves in response to
 Lens Selection Dial (N) indicates the area your lens does not cover.
 For your quick reference, the range of EE operation relating shut.
 ter speed and lens opening to the film speed is shown in Fig.9.
 For example, any shutter speed ranging from 1 sec. to 1/10O0 sec.
with lerrs "opening of  f :2 to  f : 16 is available   f ar EE operation
 wherr you use an ASA 1OO film.
View original page 8
Page 9 · Read text
2.  Full Aperture Light Measuring Oparation
   Mount either AUTO EE or NON-EE or any other screw-mount  lens
    onto camera body. Any screw-mount lens that opens to f :5.6 will
   do. Then set Lens Selection Dial (N).
   Note the f :stop number indicated by the exposure meter needle
    in the viewfinder. Rotate EE Manual Ring (l) or f :stop Ring and
    set the same number on the EE/Manual Ring or f :stop Ring.
   Your camera lens is then set for correct exposure.
3.  Stopped-Down Light Measuring Operation
   Mount either AUTO EE or NON-EE or any other screw mount lens
   onto camera body. No setting of lens opening is required for a
    stopped-down light measuring operation. Look into Viewflnder Eye'                                              1.4
    piece (Q) and press Previewer Switch (H). Turn EEiManual Ring
     (l) or the f :stop Ring of your lens while pressing Previewer Switch                                               2,A
                                                                                                                                                                                 B lue    until the exposure meter needle comes over the blue indicator in                                                6
   the Viwflnder (Fig. 1O)   lf your NON'EE lens has an Auto/Manual                                               11
    switch, set it at Auto and then press Previewer Switch.                                                          16  Red
      lf you use an extension ring set, bellows attachment or other ac-
   cessory between the lens and camera body, follow the procedures
    of the stopped-down light measuring operation for setting correct     Fic. 10
    exposu re.
View original page 9Page 10 · Read text
www.butkus.us
                           The shutter speed setting governs the amount of time the film is ex-setting the shutter                                posed to light. "60" (1/60 second) is iecommended for subjects not
                                      in motion. Where motion exists, shutter speeds ranging from llI25
                                to 1 1000 should be used . . .Ir1O00 second speed will " freeze " ex-
                                   tremely fast action. To get mdximum " depth of field'-' (area of sharp
                                focus in front of and behind subject), or when shooting in poorly  lit
                                 areas, speeds ranging from  . 1.130 to 1 second and "8" (bulb) are
                                     available. When using these slower speeds, use a tripod or other
                                firm support to prevent movement of camera and blurred pictures.
                         When set at "B" the shutter will remain open as long as the Shutter
                                 Release Button (N) is depressed (preferably by a cable release acces-
                                 sory). The "B" setting is used for long exposures, (for example, when
                                  using street lights or electric signs as a light source), or under poor
                                        light conditions when flash is not being used.
                            Note: The "8" setting disconnects Electric Eye circuit and the camera
                                    does not operate on EE.
uiewing and             Look into Viewfinder Eyepiece (Q) to compose your picture and focus
                                                                                                   clear                                                                       becomes                                                                                                               in the                                                           Ring                                                                              subject                                                                            (L) until
                                                                                                    apears                                                           When                                                                            your subject           focusing   themicro-prismlens. Rotateimage,Focusingthe center                                                                             circle                                                      area.
                                   sharp in the micro-prism image, your picture has been focused.
                            To take the picture, hold the camera as steady. as you can and press
                                  Shutter Release Button (D) slowly and smoothly. Since you are view-
                              ing through the lens there is no parallax problem  . . . What you are
                                  viewing in the viewfinder will appear in your picture. Even when you
                                   shoot-close-ups there is no danger of accidental cropping as may oc-
                                 cur when the viewfinder is above or to one side of the lens.

                                                   .9
View original page 10Page 11 · Read text
depth of field
An area in front of and behind your subject will also be in sharp focus.
How much area will be sharp in your final picture can be determined
in two ways:
1. Depth of Field Previewer
   Turn EE/Manual Ring (l) off EE and set it at desired f  . stop number
   and press Previewef Switch (H)  Pressing Previewer Switch will
   set the lens at the operiing you have chosen on the EE/Manual
   Ring. Looking at the a(ea of sharpness in the viewfinder then
    allows you to preview the picture before you take it.
2. Depth of Field Scale
   The area of sharpness in front of and behind your subject can be
   determined on the Depth of Field Scale (J). Locate, on the Depth
    of Field Scale, the two f : stop numbers corresponding to the f :stop
    in the viewfinder (FE operation) or  f  : stop you have set on EE/
   Manual Ring (Manual operation). The distance shown on the-
    Distance Scale (K) between these two f :stop numbers will be the
    area of sharpness in your picture (Fig. 1i ).                                                                        Fic. 11
View original page 11Page 12 · Read text
www.butkus.us


                                                  *ofe*',' *'g,,li- d *;d'iii  j
                           By using the'Self-timer, you can also get into the picture. Merely
                             move the Self timer Lever (G) away from the lens (Fig. 72) and press
                               the Shutter Release Button. There will be an about 1O-second delay
                                   before the Self"timer will automatically release the shutter and make
                               the exposure fcr you. Camera should be placed on a tripod or other
                                   sturdy support.                            Fie. 12
                                                                              a
                                           r-"lgrffffff gd.ry t im  i{tl'.Fi",
                               Your camera is equipped with a 5Omm lens, which is the proper focal
                                     length for general-purpose picture taking. You may select additional
                                 lenses from the wide range of AUTO EE or lenses which include ex-
                                   tremely wide angle lenses through long focal length telephoto, includ"
                                     ing telephoto zoom lenses. To remove the lens, continuously turn the
                                    lens in a counterclockwise  direction until it can be removed (Fig. 13).
                           To insert another lens, turn lens in a clockwise direction until lens  is
                                   secured in position.
                           Fic. 131lII
View original page 12Page 13 · Read text
flash pictures
         Your camera has FP and X synchronizations designed to permit flash                             Fig. 1d
          pictures with most types of flash bulbs and also electronic flash. The
          flash connecting cord from your flash gun or electronic flash is con-
         nected to one of the Flash Sockets (M).  lf your electronic flash has
       a direct contact, mount  it onto Hot Shoe (P) and no connecting cord
           is necessary.
          Fig. 14 indicates the synchronization ranges of FP and X. For instance,
         the shutter speed ranging from B to 1/60 sec. is available for. the
          electronic flash unit connected to X Socket.
     unlouding film
        Always unload your camera in the shade, never in bright light.  After
        the last picture on the roll has been taken, press Rewind Button (W).
           Lift up crank on Rewind Knob (O). Turn crank in a clockwise direc.
         tion until the entire roll has been rewound. Tension on the crank
            will decrease noticeably (Fig. 15) when this is accomplished. Open the
       camera back by pulling Back Cover Latch (T) and remove the fllm
           cartridge.
        Have film processed as soon,'as possible                                                                                                Fig. 15

hx.
View original page 13From the M. Butkus archive. Original publisher and archive notices are retained.
Check the model and edition against your equipment.
PDF verified 2026-10-10.