Photography reference
Prontor 500 LK shutter — part 2 Service manual
Service manual for Prontor 500 LK shutter — part 2. 23 pages in English. Read the original PDF, download or print a copy without registration.
23 pagesEnglish4.0 MB PDF
Loading your manual…Open PDF directly
Document details
- Brand
- Prontor
- Model / document
- Prontor 500 LK shutter — part 2
- Document type
- Service manual
- Language
- English
- Pages
- 23
- File size
- 4.0 MB
- Category
- Photography reference
- Document date
- Not specified in catalog
Search available document text
Find a term, then jump to its page in the original PDF. Image-only pages may not be searchable; check the PDF for exact wording and diagrams.
Page 2 · Read text
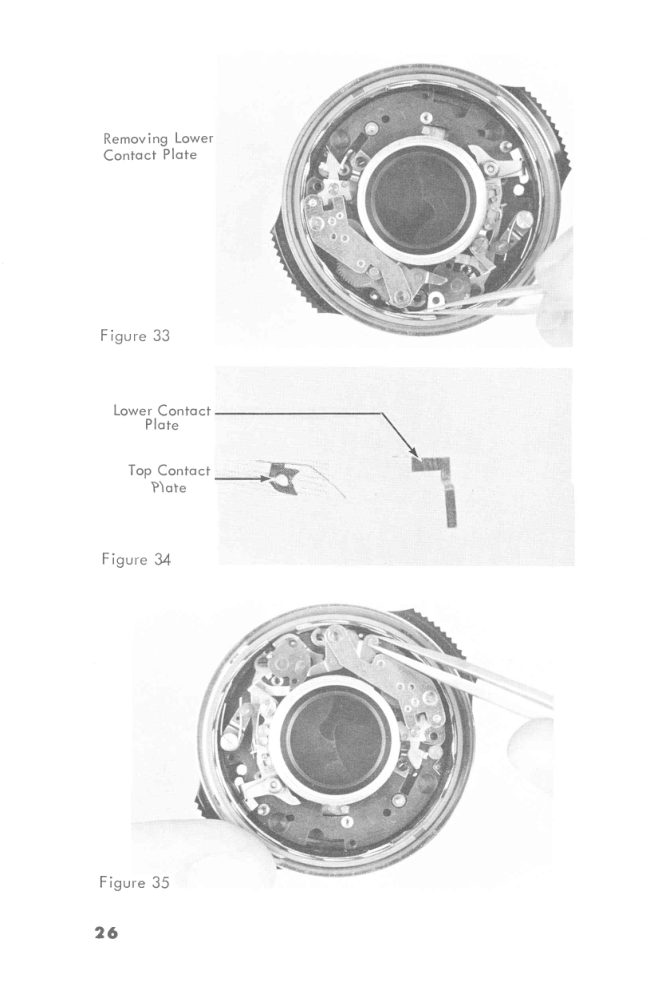
Removing Lower
Contact Plate

Figure 33

Lower Contact
Plate

Top Contact
Plate

Figure 34

Figure 35

26
View original page 2
Page 3 · Read text
With the escapement mechanism out of the shutter, you can
see some rather unique characteristics. For one thing, there is
no spring on the retard lever. Instead, @ hairspring, similar in
appearance to the one in the Compur, serves to move the retard
lever through the gear train. (Unlike the Compur, however, the
timing of this hairspring cannot be lost.) Also, note that there is
only a slight resistance when the retard lever is actuated - even
though the pallet isfully engaged. Since the slowest shutter speed
is 1/15 second, a short gear train and a light, nylon pallet are
all that are necessary for the required retarding action,

From the bottom of the escapement, you can now more clear
ly see the contact closing lever, Figure 36. Note the long, thin
section which fits into the notch in the blade operating ring stud,
. Like the delayed-action mechanism, the speeds escape—
Id not be takenapart. Whena part isdefective, the en~
tire unit is replaced.

"Tail" of
Contact Closing, =
Lever rw A

Figure 36

Since the blade operating ring spring is held by a shouldered
brass stud rather thana screw, care is required to avoid distorting
the spring during removal. Disconnect the long end of the spring
first. Then, using a small screwdriver blade, gently work the coil
up and around the stud, Figure 37.

Contact Closing
Lever "Tail" Fits
in Blade
Operating Ring
Stud Notch Here.

27

www.orphancameras.com
View original page 3
Related documents and language editions
From the M. Butkus archive. Original publisher and archive notices are retained.
Check the model and edition against your equipment.
PDF verified 2026-10-10.