Film cameras
Seneca Folding Scout User manual
User manual for Seneca Folding Scout. 32 pages in English. Read the original PDF, download or print a copy without registration.
32 pagesEnglish3.8 MB PDF
Loading your manual…Open PDF directly
Document details
- Brand
- Seneca
- Model / document
- Seneca Folding Scout
- Document type
- User manual
- Language
- English
- Pages
- 32
- File size
- 3.8 MB
- Category
- Film cameras
- Document date
- Not specified in catalog
Search available document text
Find a term, then jump to its page in the original PDF. Image-only pages may not be searchable; check the PDF for exact wording and diagrams.
Page 1 · Read text
www.butkus.us

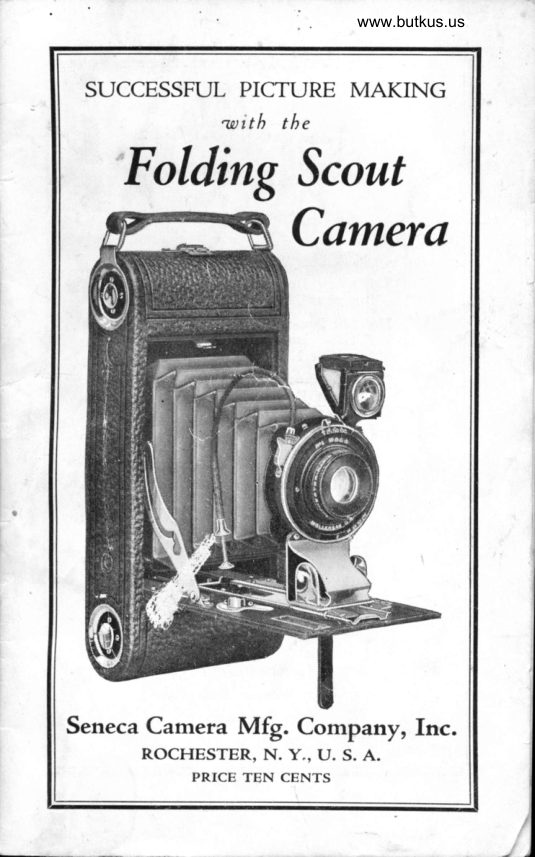
 SUCCESSFUL PICTURE MAKING
            @ith the
  'Folding           Scout
         Camera


Seneca Camera Mfg. Company, fnc.
       ROCHESTER, N. Y., (J. S. A.
              PRICE TEN CENTS
View original page 1Page 2 · Read text
SPECIFY-
      No. 216 Sen-x Film or No. 116 Eastman
        (Yellow Box) N. C. Autographic Film
        for your No. 2A Folding Scout.
      No. 230 Sen-x, Film or No. 130 Eastman
        (Yellow Box) N. C. Autographic Film
         for your No. 2C Folding Scout.
      No. 218 Sen-x Film or No. 124 Eastman
        (Yellow Box) N. C. Autographic Film
         for your No. 3 Folding Scout.
      No. 222 Sen-x Film or No. 122 Eastman
        (Yellow Box) N" C. AutoEraphic Film
        for your No. 3A Foldins Scout.

      Order Film by Number
   Then you are sure of getting the
                correct size


Folding Scout Cameras take good pictures
         with any standard make
              f.lm cartridge
View original page 2Page 3 · Read text
www.butkus.us


     CONTENTS

Panr  I--I oading the Camera
Panr Il-Making the Exposure
Penr Ill--Removing the Film
Penr IV--Developing the Film
Panr V. Making the Prints
                         PossibilitiesPanr VI --Greater
View original page 3Page 4 · Read text
Before Loading
   Before attempting to take pictures with the Folding
Scout Camera, read these pages and learn exactly how to
operate it correctly. Familiarize yourself with the Iens
and shutter, understanding the significance and explor-
ing the operation of the several working parts.
   Although the camera may be loaded in direct sun-
light, it is safer to perform this operation in subdued
light. Sufrcient light will pass through the lens in a
small fraction of a second to change the sensitized sur-
face. In the same amount of time a ray of sunshine may
penetrate the loosened wrapping and destroy the result
of much patient effort.
   Again we say itr-read the directions carefully and
investigate the use of every part before the film is put
into the camera. Finally, see that the shutter is closed
before loading.


    \ilhile the camera is loaded, do not expose the lens
to a strong light until the bellows is extended.


                 PART  I
          Loading the Camera
   I-Hold  the camera in the left hand and, reaching
through under the strap, move the locking device to the
left with the index finger and  lift the hinged part with
the thumb nail.
View original page 4Page 5 · Read text
www.butkus.us


II-I'he  bacl< will corne off easily. See Fig. I.


III-Pull  out the spool pin at either side. See Fig. III.
                          5
View original page 5Page 6 · Read text
www.butkus.us

                                                               lf l(;.   I I I

       l'lirt't'  llrt'  t'rrt1lt.t' sllool irt  tlrc  t'tt<l of  lltt't'lrtrtt't';t   lrt'
rvirrrlirrg  ltt'r'. tirliing  t';rrt' th:rt  tlrt' slot irr llrt  t'trtl ot'  tlrt'
sllool is trcrrr tlrc n'inrliltg  lit'r'.    .\ftt'r'  l)lrlling  ()ul  llrc
spool llin  ;rrrrl tlrt' n'inrling  licr'.  trrrn  llrt'  s'irrrlirrg ktr'rrrrtil it slips into tlrt'slot  of  llrr'  ctrrlll.r' slrool.  Itttslr  ilt
llrt' slrool 1ritr.

                                                                                                                                              \\'       I \'               tt'r  yrrrslring orr t  tlrt' spool I)ins in    l lrr. no                '\  ft'trrlllv ctrrl. tlrop ilr tlrt'lilrrr cirrtritlgt'u'itlr  tltt'tttttrrlrcr'
otr llrt' r'iglrt sitk'. St't' l"ig. l\'.


                                          Irt(;.    tI'

                                                                     {i
View original page 6Page 7 · Read text
www.butkus.us
    \'-llrt'rrk  the gurrrrrrt'<l stir.ker itn(l sllove tlrt' yrrrllt'r
 strill tlrrorruh the sklt of tlrt' crrrlltv sllool. Sct' Fig. \-.
 If  tlrt' l)irl)('r' is Irot pcrfectl.r' strrriglrt, the lihrr l'ill  rurr
ovcr tlrr sllool flang('s on onc sitle .irrst likc ir t'urtain
 rvlrich is nt-rt rollt'd u1l strrriglrt.


                                                                                                                                  Digitally signed by Mike Butkus
                       Mike Butkus DN:org, cn=Mikeemail=mike@butkus.org,Butkus, o, ou=Butkus.c=US
                                                                                                                  Date: 2026.08.08 21:26:02 -04'00'
   YI-'l'rrrn  tlrt' rr'inrling  l<t..r' trvo or three tirrrt's to llinrl
tlrt' pirpcr. St't' I,'ig. \'[.
View original page 7Page 8 · Read text
Vll-Replace the back, making sure that the ridge
at the bottom of the back fits into the groove on the
camera. Then drop the locking device over the pin and
move it to the right, which will lock the back securely.
   VIII-Turn  the rvinding key until a hand appears in
the ruby window. See Fig. VII. A few more turns will
bring No. I into the center of the window; now the fflm
is in position for making the first picture.


                         FIG. VII


   While the camera is loaded, do not expose the lens
to a strong light until the bellows is extended.
View original page 8Page 9 · Read text
www.butkus.us

                PART II
         Making the Exposure
   I-Press the concealed button rvhich allorvs the bed of
the camera to spring forrvard. See Fig. VIII.  Norv pull
dorvn the bed until it autonratically locks into position.


                      FtG. \'rtr
   II-Press firnrlp' upon the eirr clirrnps at tlre llase of
the standard until they yield. Pull forrvard until tlre in-
dicator at the base of the standard (bv the first finger of
the hand) is exactly above the number upon the focusing
scale u'hich corresponds to the nurnber of feet the ob.jt'ct
is distant. See Fig. IX.  fhe l{eniscus Achrornatic
equillrnent is fitted rvith u universal for.usinE attach-
ment. With the thunrb of tlre left hrrnd press dorvlr
upon the focusing attaclrnrent in order to focus uporr
objects ut short distirnces.
   III-1  o take a vcrtical picture, hol<l the carnerir level
,iust at the rvaist line irnd kxrl< dos'n into the finder fronr
directly above. See Fig. X.  'l'hc rectarrgle LENGTH-
WISE, not crossrvise,  rvill shorv exactl.r, s'hat ob.iet:ts rvill
irppear in the llicture.
View original page 9Page 11 · Read text
www.butkus.us

        I \'-'l'o    tirkt'  ir  lrorizorrtirl ylictulr., Irokl  tlrt.  (':rnl('ril
 lrorizotttirll.r'  rtt  tlrt'  rr'irist liltc.  See !'ig.  \1.    'l'rrrn  tlrt'
 to;l of  tlrt' Iin<lt'r to tlte  lt'ft  :rtrtl lool< tlorvrr irgirin  fr<lrrr
 rlirct'tl.r- irltovc, usittg tlre  rt'ctiutglt' ('ltOSS\\'lSl),   not
lcngtltu'ist'.  Ilc  srrrc to hol<l tltt'  t'irtrrcrir k'r't'I.


                                                          lfl(;.       \l

     \'-llt'fort.     :rttt'rrrlrtilrg to rrrirl<t. iln ('\l)()sul't. strr<lr- tlrc
rrst' irlrtl ollt'rirtion of  ct't'r.\' llirrt of  tlrt' slrrrttt'r'.  llt: srrrc
tlrrrt
     I.'irst    'l'ltr  ttltltrr  ittrlirrrlrtr  ltttinls lrt  lltr   ltrttltrr limt
            l'ttt'lor  :
    St't'ontl-7'ltr  lrnttr  intlirttlttr is st,l trl  lltr   ltrttltrr  rlirt-
                    ltlt rrtrl ttt s I o 1t :
     'l'lrirtl--    I n   tt nr.r'ltosrrl srrlitttt of   lil m  is    I urttrrl  inlrt
          posiliott.
    Vl-'l'lrt'  \\'ot'o or IIcx shrrtter is frrrnislrt.rl u'ith thc
.\lt'niscrrs .\t'hrorrrirti<' or ltrrpirl llcctilint'irr lt.ns. It  is
;rlu':rt's r'('ir(lv for rrst.; ir firrrr I)t'(.ssllr(. on t.itlrcr tlrt.;lrrslrcorrl'rlr h:rnil rt'lt'rrst'is irll tlrrit is rt.rlrrirt'rl to o;lcrrrit'it.
                   SNAI' SHOTS
     l')xllosrrrt's irt tlrt'frirctionirl sllt't'rls (.iln l)(' rrr:rrll s'lrt'lr
llrt' t'irtrtt'rit is Irt'l<l irt tlrt' hirrrtl. 'l'he l/l1l(1, l/it}  rrrrtl l,/25
rlr.trote tlrc irylpr'oxirrrirtt'  frirctiolts of  ir st'r.onrl rlrrring
u'hit'lt liglrt is irll<lrvt'rl to pirss throrrgh tlrt.sltrrtttr.to  tlrc
                                             ll
View original page 11Page 12 · Read text
filru. At l/100, snirl) a specding autotrrollile at rt dis-
tirnce; at l/50 include childrt'tr :rt lllrrr'or a nlarl nln-ning srviftl!' : trt l/25 take pictttt'es of citttle grirzirtg itt a
pastrrrt' or of a tnatt rvalking slorvlr'.

             TIME EXI'OSURES
    \\'lren the upller indicator is at T the shutter retttains
opcrr after the first pressure until a second pressure
closes it.  This factor is used rvhen light conditions are
so l)oor that it is necessarv to allorv an exposure longerthan l/25th of a second. 'l'he sull.iect must lte station-
an-; the slightcst motion rvill cirusc a blur.  It  is essen-
tial that the catner:r be lllaccd ulloIt rt tripod or sourerigitl llast'.  .,\ supyrort is provided for both vertical  (st'e
Fig. XII eurd lrorizontal pir:tures. On .r\nastignrat equip-
rrrcnts the slrrrttt'r' h:rs ir I) rrrirrking  f or llulll  relt':rse.
\\'lren the uylper itrdicator is at Il tlre shutter sta.\'s ol)en
until the pr('ssr-lte is relt'irsr:tl. This is rrsed in tttaliing
t'otrrlrirrittivelv short tilnt' t'xlrtlsrtrt's.


                              www.butkus.us


                                  TI(;.   \II
                              l?
View original page 12Page 14 · Read text
Dark Colored W'alls and Hangings and
            More ihan One Window
    Bright sunlight outside.           .20 seconds
   Hazy sun..                    ......40           '(
    Cloudy bright                                     . .. .80    "
    Cloudy dull. .          2 minutes, 40        ((

       Dark Colored Walls and Hangings and
               Only One Window
    Bright sunlight outside                      . .40 seconds
   Hazy sun..                    ......80           ((
    Cloudy bright         ..  . . .2 minutes, 40        '(
   Cloudy dull . .        .....5     "   20        ('
   VIII-If   the lens is of the Rapid Rectilinear typ"*
there u'ill be a combination of glass in front of the shut-
ter. Since there is also one behind the shutter facing the
film, it is called a double lens. The markings below are
8, 16,32, and 64. Set the shutter at T, open it and watch
the relative size of the diaphragm while the indicator is
moved. When the indicator is at 16, the diameter of
that opening is very close to l/16 of the distance from
the diaphragm to the film. Now move the indicator over
to 8, the area of the opening is just twice that of the
former one. Consequently, in a given interval of tinte
twice as much light will pass through the lens at 8 as at
16. Such is the relation between all four numbers. On
that account the lens working at 8 is twice as fast as when
working at 16. With the greater speed possible by the
use of the 8 opening, the lens loses proportionately in
its ability to render clearly objects both near and far
from it.  fhis inability of greater speeds to have a large
region of sharpness or great depth of focus, is not a new
discovery nor a variable quantity, but is the result of a
mathernatical ratio which is as rigid as two times two
rnake four. Speed is gained only at a loss in depth of
focus. That is why it is necessary with the Rapid Rec-
tilinear Lens to be fairly accurate in estimating the dis-
tance between the camera and the object.
----  Fo-ill#Gstructions,  see fT 10, page 1?.
                             14
View original page 14Page 15 · Read text
www.butkus.us

     If the lens is a Meniscus Achromatic, the largest
opening is the 16 stop. The same relation exists between
the stops as upon the Rapid Rectilinear Lens. Since the
laws of optics do not change for any kind of lenses, the
 discussion of depth of focus may be continued frorn
 those principles under the Rapid Rectilinear type. Near
the center of that region of distinctness in a picture, ob-
 jects appear to be sharper than those either to the front
or back. Compare your results with some of the pic-
tures of current events in drug store or cigar store win-
dorvs, especially those of races or rapid motion.
   Norv this sharpness or definition, as it  should be
called, becomes poorer and poorer until it is unfit for
photographic purposes. l'he distance at which ob.iects
are still clearly dcfined marks the limit of the depth of
focus. With the Meniscus Achromatic Lens equipment
on the Folding Scout Camera, the depth of focus extends
from six to one hundred feet and beyond when ob.jects
at twenty-five feet are sharply in focus.
   Pull out the front standard (look back to Fig. IX)
until it locks into position. The camera is now focused
for objects at any distance greater than six feet and is
therefore said to be at universal focus.
  By calling to rnind our remarks .fust a moment agoin regard to definition, a discriminating amateur will
rvonder rvhy he should not be able to get a maximum
sharpness of objects at other distances than twenty-five
feet or thereabouts. So he can. Piess in upon the ear
cla,mps at the base of the standard with the thurnb and
first finger of the right hand and down upon the focus-
ing attachment with the thumb of the left hand. Move
the standard backu'ard or forwa.rd to the desired focus.
  As a basis to work from, set the inclicator at 16 for
pictures of ob,jects in bright sunlight if taken not later
than tu'o-thirtv in u'inter or four-thirty in summer. LTse
the 8 stop for objects in direct sunlight later in the
afternoon or for a corresponding period in the morning.
The 8 stop may also be used for ob.iects in the rniddle
of days when the sun is hardly strong enough to cast a
shadow. Accordingly with a Meniscus Achromatic Lens
whose greatest u'orking aperture is 16, it is not advisable
to attempt snapshots late in the afternoon or upon days
when the sun is not shining brightly.
                              t5
View original page 15Page 16 · Read text
IX-Push the front standartl back as far :rs it will
go and rvind tlre push cord release up over the shutter
and down the otlrcr side. Press d<ln'n upon the side
arlrts. 'I'he bed n'ill close leadilr'. Sce Fig. XIV.


  The stop rnarl<ings on the Shutters rvitlr R. R. or
Achromatic LerS('s irn' in tlrt' L'nifonn Svstem (U. S.
numbcrs). Ilcar this in rnind if vou are consulting ex-
posure book or exl)osure trrctcr.
  X-These instructions are intended only for use
with the F:7.5 Anastigmat lens and should be disre-
garded  if you have the Rapid Rectilinear or the Menis-
cus Achromatic lens. In such cases follow paragraph
eight.
                              l6
View original page 16Page 17 · Read text
www.butkus.us
   'Ihe F:7.5 lens is marked as is customary with all
Anastigmat lenses with diaphragm numbers which are in
the so-called F system. Rapid Rectilinear lenses and
Meniscus Achromatic lenses are marked in the uniform
system. Ihis system differs from the F system above
mentioned.
  The diaphragm or stop numbers are those on the
lower scale and read in order, F:7.5, 11, 16,22r32 and 45.
F:11 is twice the area of F:16, F:16 is twice the area of
F:22 and so on, therefore the exposure necessary to get
the same results on the film is doubled as you pass from
one number to a larger number. Note that the shorter
exposures go with the smaller numbers.
   Assuming that l/100 second gives a good picture  if
F:ll stop is used you would then double the exposure if
stop F:16 were preferred. The proper exposure would
therefore be l/50 second. Similarly if F:22 were used
tlre correct exposure would be 7/25 second.
    It is an invariable law of optics that the larger the
stop the less will be the depth of focus, or the ability of
the'lens to sharply render objects at varying distances
from the Camera.
   In the above example you will note that you have
your choice of giving l/lOO second stop F:11, l/50 sec-
ond stop F:16, l/25 second stop F:22, blut the exposure
at F 222 will have many more objects in focus at the
same time On account of the greater depth of focus with
smaller diaphragm.  If the motion of the object is rela-
tively great and the necessity for speeding up the shut-
ter increases as the camera approaches the moving ob-
ject, you will nbturally use the shorter exposure. If the
object is moving at a very moderate speed you may pre-
fer to use the longer exposure so that you may take ad-
vantage of a smaller diaphragm and inerease the depth
of focus. A little experiment along these lines will read-
ily deterrnine the proper procedure.
  The quality of the pictures produced with an F:7.5
Anastigmat is much higher than with the less expensive
lenses and at the full opening F:7.5 the definition in the
                              t7
View original page 17Page 18 · Read text
corners of the pictures cannot be criticized in any way.
 'l'he relation in speed of F:7.5 to F:11 is, however, not
the same as with the succeeding numbers. The F:7.5
stop is over twice as fast as F:11. About 2% times as
much light is passed, and it is used ordinarily for th:r
higher speed exposures or on dark days.
     It rnay be that you will use an exposure table or ex-
posure meter and you must therefore bear in mind that
the reading in the table or in the meter must be taken
in the F svstem and not in the Uniform System. Atten-
tion to this cletail will insure good results.
   The scale at the top of the shutter is the speed scale
and in addition to the exposures of l/700,1/50, l/25 and
l/70 you will find a T and R marking. T stands for
time exposure and the instructions on page 12 may be
used. Similarly B stands for bulb exposure and is a
useful exposure for portraiture as the shutter will close
instantly when the pressure is released.
   In the case of the Anastigmat and especially with the
larger openings rvhere the depth of focus is less, it  is
necessary to be very accurate in the estirnation of dis-
tance, especially on the shorter distances. For example,
on ten foot and six foot distances, it is good practice to
rneasure from the lens to the object but if a measure is
not available the distance can be paced off and this will
be found more satisfactory than a rough guess. On the
Ionger distances you will have no trouble whatsoever as
an error of a foot or two on the twenty-five foot setting
is not noticeable and if the nearest object is sixty to
sevent-y-five feet away set the distance scale on the one
hundred foot rnark.
View original page 18Page 19 · Read text
www.butkus.us

                PART III
          Removing the Film
   I-After  the last picture has been taken, turn the
winding key ten or twelve times until the paper is en-
tirely wound on the spool.
  Il-Remove the back as before.
   III-Take  out the exposed roll, being careful not to
let it unwind.
  IV-Do  not twist the film on the spool in order to
tighten it;  it is likely to rub the emulsion and conse-
quently to spoil your pictures. The paper needs only to
be wound tightly enough to keep it inside of the flanges.
  V-Reload the camera as explained on page ? antl
replace the back upon the camera in readiness for use
upon the next occasion.
   VI-In  case you are developing your own pictures,
the film is ready for the dark room. If you are havins
your pictures developed and printecl, ask your dealer to
show how you may secure more pleasure frorn the time
spent in photographic work by doing your own finishing.


Seneca Cameras give good results with any standard
           film, but for the best, use Sen-x.


                              l9
View original page 19Page 20 · Read text
PART IV
           Developing the Film
   These directions for developing are not to be regarded
 as absolute, but as general hints from which the ama-
 teur should deviate when he obtains more pleasing re-
 sults. Remember that the value of any rule in photog-
 raphy is gauged by the results secured by following that
 rule. If you find another way of getting a better result,
 use the new way at once; you are gaining experience in
 picture making.
   I-Empty the contents of the Seneca M. Q. tube (both
chemicals) into ten ounces of v'ater and place in a tray
 at your left.
    II-In  the center place a tray of clear, cool water for
 rinsing.
    III-AI   the right, set the tray of acid hypo solution,
for making which complete directions are given upon the
box.
   IV-Exclude  all white light from the room and let
the ruby light be at least one and one-half feet from the
developing tray.
                      Developing
   I-Unroll  the film and detach the entire strip from
the protecting black paper.
   II-With  one end of the strip in each hand, pass it
continuously through the developer. In about one min-
uate the blank spaces between the pictures should begin
to show. By two minutes the images will show some-
what clearly.
   Ill-Continue the development for five or ten minutes
until the contrast between the light and dark parts of
the negative has become very distinct and the image be-
gins to show on the back of the film.  If some negatives,
as you hold them between your eye and the ruby light,
are darker than others, they have been exposed foi a
longer time, but this difference will be easily taken care
of in the printing.  It is only necessary to watch the de-
gree of contrast.
                           20
View original page 20Page 21 · Read text
www.butkus.us

                       Rinsing
   I-After  developing sufficiently, rinse three or four
times in the middle tray of water before you.
    II-If   desired, the exposures may be cut apart and
fixed separately.
                        Fixing
   I-Pass the negatives face down through the solution
two or three times before completely submerging them
in the hypo solution.
    II-If   the negatives were not cut apart, fold the strip
several times without allowing it to crack at the ends.
Press these down so that the solution will reach all parts
of the film. Two or three minutes after the last trace
of milkiness has disappeared,  it is safe to admit white
light to the room. Allow the negatives to remain in the
hypo solution for ten minutes longer.
  III-Remove the negatives to running water and
allow them to remain there for an hour. In case run-
ning water is not available, change the water five times
the first ten minutes, moving the films occasionallX: and
then allow them to soak for an hour.  If  desired, the
water may be changed four or five times during a half
hour of washing. It  is essential that the negatives be
thoroughly washed.
  -IV-Suspend the wet negatives in such a way that
neither' side wiII come in contact with anything while
drying. A Seneca Film Clip will be found to be very
convenient for this purpose as well as for handling the
films while developing.
                Defects in Negatives
Veiled Whites or Fogs
   Film handled too close to ruby light.
   Exposed to rays of white light.
Muddy Effects
   Exhausted developer.
   Forcing under-exposed negatives in development.
   Developing solution too warm.
                             2t
View original page 21Page 22 · Read text
Irregular Light Spots
    Uneven development due to failure to keep all parts
       of the negative evenly moistened during develop-
        ment.
    Uneven immersion in the developing solution.
     Over-exposure.
    Air bells upon the film during development.
. Milky Spots on Negatives
    Failure to keep negatives entirely covered by fixing
    bath or insufficient time for fixing.
                               f)on'ts
    Don't start until the chemicals are thoroughly dis-
 solved.
    Don't use a tray for developing if  it has previously
 been used for hypo solution or final rvashing.
    Don't use chemicals after their strength is gone. A
 hypo solution is exhausted when numerous air bells settle
 around the edge of the tray and remain there. When the
 developing solution loses its strength, it turns brown.
    Don't allow one ray of white light to enter the roorn.
   Don't hold the strip too close to the ruby lamp; it
 nay cause fog.
    Don't let a trace of hypo reach the developer; a drop
 may spoil the whole solution. Rinse your hands and
 wipe upon a clean towel each timc after taking them
 from the hypo solution.
    Don't remove the negatives from the hypo until they
 are thoroughly fixed. Give them plenty of time.
   Don't blame the materials; read the directions over
 again or ask your dealer.
                                          9.)
View original page 22From the M. Butkus archive. Original publisher and archive notices are retained.
Check the model and edition against your equipment.
PDF verified 2026-10-10.