Film cameras
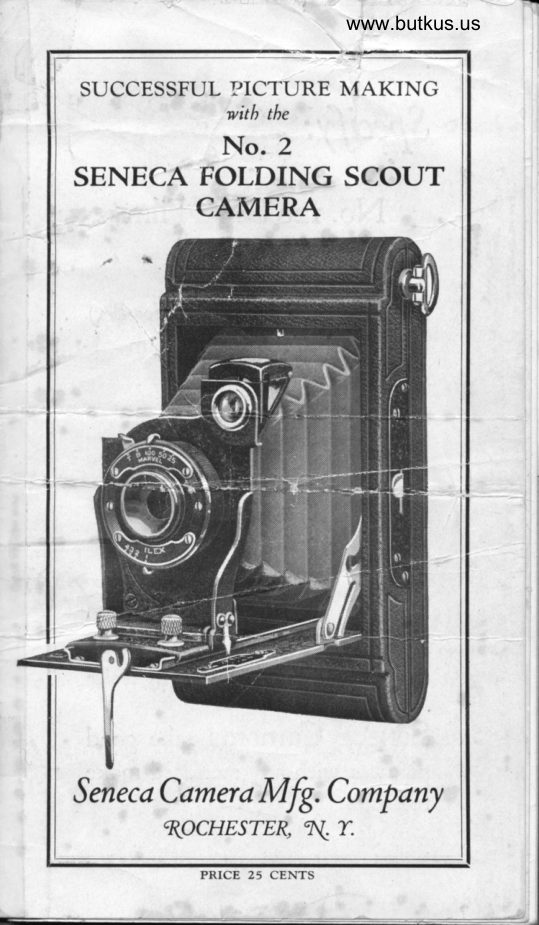
Seneca No. 2 Folding Scout User manual
User manual for Seneca No. 2 Folding Scout. 24 pages in English. Read the original PDF, download or print a copy without registration.
24 pagesEnglish2.9 MB PDF
Loading your manual…Open PDF directly
Document details
- Brand
- Seneca
- Model / document
- Seneca No. 2 Folding Scout
- Document type
- User manual
- Language
- English
- Pages
- 24
- File size
- 2.9 MB
- Category
- Film cameras
- Document date
- Not specified in catalog
Search available document text
Find a term, then jump to its page in the original PDF. Image-only pages may not be searchable; check the PDF for exact wording and diagrams.
Page 1 · Read text
T                          www.butkus.us

 SUCCESSFUL PICTURE L{AKING
                  nith the
          No. 2
SENECA FOLDING SCOUT
      CAMERA


S eneca C amera Mfg. Company
      KOCHESTE& a( r.
View original page 1Page 2 · Read text
Spectfy:

  No. r2o Sen-x Film
               Ofs
No. r2o Eastm an Qbltow Box)
   N. C. Autographic Film
              f"r your
    1(). 2 Seneca
   Foidirg Scout
     Camera

Ask ior Film by number
then you are sure to get the right size

Seneca Cameras take good
pi&ures with any standard make
roll film.
View original page 2Page 3 · Read text
www.butkus.us

          Contents
PART I:  Loading the Camera
PART II:  fuIaking the €xposure
PART III:  Removing the Film
PART IV:  Developing the Film
PART V:  fuIaking the ?rints
                            ?ossibilitiesPART VI:  $reater


        Before Loading
6pEnOnn  attempting to take pictures
I)    with your Seneca Folding Scout, read
this book. Familiarize yourself with the
lens and shutter. Find out what the num-
bers mean. You must do this to take
pictures intelligently.
  Although the camer a may be loaded in
direct sunshine, it is better to do this in
subdued light. One ray of sunshine will
spoil the film, so care must be used.
  Again we say it,-read the directions
carefully and investigate the use of every
part of the camera before loading.
Finally see that the shutter is closed
before loading.
View original page 3Page 5 · Read text
Successf ul P ict rtre    Il,I ahing


             PART I

         Loading the Camera

   I-Push the slide catch upon either side of the
 camera as far as possible away from the end upon
 which the rvinding key is placed. Gently loosen
 the back and lift off. See Fig.  I.


                                        I                                                                                                                                                                                                    I
                                I
                           l
                                                                   It
            www.butkus.usf
                                       Ft,.

                           Fig. I
                                                                                      I
  II-The empty spool in the film chamber at the
end of the camera must be placed in the film cham-
ber next to the winding key.
  III-Turn  out the winding k.y back upon its
hinge and insert the empty spool which was re_
View original page 5Page 6 · Read text
www.butkus.us
 ll'ilh  thc Folding Scout Camcra

moved from the film chamber at the other  end.
Turn the n'inding key until  it slips back into posi-
 tion. See Fig. II.


                 L}

                       Fic. II

  I\'-Place  the camera face dorvn upon a table
before 1'ou and drop into place the film car.tridge
to be exposed. Be sure that the number of the film
 (ll6)  is upon the right side. See Fig. III.


                       Fig. III

  \'-Break the gummed sticker and extend the free
end of the black paper through the slot of the
empty spool, making certain that the film has been
started straight. Failure to take this precaution
may cause the film to roll over the spool flanges
and consequently to stick inside the camera. Now
View original page 6Page 7 · Read text
Y
                                                                                                                                                                                                                                                                                     i
                                                        .S ucccssf ttl Pict ttrc )l uhittgi
 turn the n.inding ke,r- tn.o or three times to bind
 the paper. See Fig. I\'.


    Mike Butkus   Digitally                                                          DN:ou=butkus.org,Date:cn=Mike2021.08.28signedButkus,email=mike@butkus.org,by16:17:53Mikeo=ButkusButkus-04'00'camera manuals,c=US
                               I'ig. I\-
   \rl-Replace the back and push the sli<Ie catches
 as far as possible toward the winding ke).. Ilc srtre
 that tltc back is attachcd securcly.
  VII-Turn the winding key until a hand or O
 appears in the ruby rvindorv. (See Fig. V.) A ferv
more turns tvill bring No. l into the center of the
rvindorv; no\v the film is in position for making the
first pictu re.


                       Fig' t-

           WARNING
  Vhile the cament is loudecl, do not t,xpose tlte
Iens ta o strong light until the bellorcs is extendt,d..
View original page 7Page 8 · Read text
www.butkus.us
 lL'itlr. thc Fo!,lirrtt .\1'prrl Catttr-ru
              PART II
        Making the Exposure
      l-l)rcss  ti.tc concelrietl ltutton u'lrich itllorvs tltc
    lrt',l of the clrtncra tri spring fors-:rrtl. Sec Fig. \''I.
  \cxv prrli tLrtvtt thc lrcd trrrtil it  atttr-rtttltticerlll' locks
   it-tto position.


                         Fig. \-I
  ". Press firml_r' upon the trvo thumb pieces anddrarv the front standard forrvard along the base
ruuners to the desired focus as indicated on the
focusittg scale on the camera bed. See figure VII.


                 Fig. \'II
View original page 8Page 9 · Read text
Srrcccssfrrl Picttrrc Xlahing


                                 I€


                        Fig. VIII
   3. To take vertical pictures hold the Camera
level at the rvaist line. See figure VIII.  Norv look
dorvn into the finder from directly above and 1'ou
rrill  see exactly what objects will  appear in the
picture.
                  www.butkus.us


                       Fig. IX
  4. To take a horizontal picture hold the Camera
horizontally at the waist line. See figure IX. Turn
the whole finder to the left until it is horizontal.
  5. Before taking an exposure, study the use and
operation of every part of the shutter.  Be sure that
    First-The upper indicator points to the proper
          time factor.
   Second-The lorver indicator is set at the proper
            cliaphragm stop.
   Third-An unexposed section of filnt  is turned
           into position.
View original page 9Page 10 · Read text
www.butkus.us
Wi,th the Folding Scou't Camero

  The Trio shutter id used on the No. 2 Folding
Scout model. This shutter is automatic and re-
quires no setting. Besides the usual Time and Bulb
&pot.rt.. it has fractional exposures of l/25, l/50
and 1/100 second.
            Snap Shots
  Exposures at the fractional speeds can be made
when the Camera is held in the hand. The 1/100'
1/50 and l/25 marks denote the approximate frac-
tions of a second during which light is allowed to
pass through the shutter. At 1/100 catch extremely
rapid action ; at l/50 take children at play or a man
running swiftly; at l/25 pictures of cattle grazing
or a man walking slowly.
         Time Exposures
  At T the shutter remains open after the first
pressure until a second pressure closes it.  At B
ihe shutter stays open until the pressure is released.
These two factors are used when light conditions
are so poor that an exposure longer than 1/25 sec-
ond is necessary. The subject must be stationary as
the slightest movement  lvill cause a blur. The
Camera should be placed on a rigid base. A sup-
port is provided for both vertical and horizontal
pictu res.
  Satisfactory supports are not always available so
a metal tripod is really indispensable. Sockets for
attaching the Camera to the tripod head are found
upon the side and bed of the Folding Scout. All
interior pictures must be made by time €xposure
so the following tables have been compiled for the
the amateur's cbnvenience. Use the 16 diaphragm
stop.
Vhite Valls and More than One Vindow
  Bright sunlight otttsicle                 .....4   seconds
  Ilazy sun                                                           . .. .. .10
  Cloudy bright                                       . ..  . . .. .20
  Cloudy dull  .                         .........40       "
View original page 10Page 12 · Read text
www.butkus.us
lVith thc Folding Scout Catttcra

 As a basis to rvork from, set the stop at 16 for
pictures of objects in direct sunlight if taken in the
middle of the day. Use the U. S. 8 stop for
objects in direct sunlight earlier in the morning or
later in the afternoon. When the Iight seems bright
l-50 is satisfactory, but otherwise use l-25.
 Do not adhere too closel-v to these directions;
they are only general suggestions for use in making
the first exposures. The user's experience will be
the best guide.
  3. Press in upon the thumb pieces and push the
front stand back along the base runner as far as it
rvill go. Wind the push cord release over the finder
and dorvn the other side. Press down the side arms
and the bed will close easilr'.
            PART III
         Removing the Film
  I-After making the six or more exposures, turn
the rvinding ke;' until all  the paper is rvrapped
around the exposed film.


         Scncca Dc'"-cloping and Printing Outfit
View original page 12Page 13 · Read text
Successful Picture Makittg

   Il-Remove the back as before and take out the exposed roll.
   III-Use the gummed sticker in the now emDtv
 spool to keep the exposed roll tightly rolled.
  IV-Do not twist the film on the spool in order to tighten it;  it is likely to rub the emulsio" unJ
 sequently to spoil your pictures.                 "on_
                             camera in readiness - V-Replace the back upon the for use upon the next occasion.
  VI-In  case _vou are developing your own pic-
 tures, the film is ready for the daik-room. If vou at,e having your piclulss developed and prini.a,
 ask your dealer to show how you^may secure more
 pleasure from the time. sp.ent in photogrupt i. ;;;k by doing )-our own finis[ing.
            PART IV
         Developing the Fim
  These directions for developing are not to be re-
gqr-dqd as absolute, but only is [eneral hints from
which the amateur should ieviaTe at the fir.t mo-
ment he obtains more pleasing results. R.m.mb..
that the value of any rule in. p-hotography is gaugJ
_Uy t-ttq excellence or mediocrity of t-he result ;..;;;Jby following              that                      you                  rule.                                 find                                     anoth.,                                                     ol                                *uy                                    -If                                                    'newgetting      a better               or                 even the                      iame                                       result,                                         use the
yay. at once;. you are widening your acquaintance
rn prcture maklng.
  .  I-Pqp!y- the contents of the M. e. tube (bothchamicals) into eight ounces of water and plate ina tray at your left.
  II-In  the center place a tray of clear, cool rvaterfor rinsing.
  III-AI   the. right set the tray of acid hypo solu- .,lon,  f or making which complete direciibns areglven upon the box.
  IV-Exclude all ravs of rvhite light from the
room and let the ruby light be at leasione and one_
half feet from the developing tray.
View original page 13Page 14 · Read text
www.butkus.us
;      With the Folding Scout Canrera                                                      II
;                    Developing
       I-Unroll the film and detach the entire strip
      from the protecting black paper.
       II-With one end of the strip in each hand, pass
                                                      one                                               aboutt    minuteit continuouslythe blankthroughspacesthebetweendeveloper.the picturesIn                                                          will
      bgSin to show. By two minutes the images will
  l    show somewhat clearly.       Ill-Continue the development for five or ten
     minutes until the contrast between the light and
      dark parts of the negative has become very distinct
      or the image begins to show on the back of the film.
        If some of the negatives, as you hold them between
       y-our €ye and the ruby light, are darker than others,
     they have been exposed for a longer time, but thii
      difference will be easily taken care of in the print-
     ing.  It is only necessary to watch the degr ee of
       contrast.
                       Rinsing
       I-After  developing sufficiently, rinse three or
      four times in the middle tray of water before you.
          II-If  ,desired, the exposures may be cut apart     and fixed separately.
                         Fixing
       I-Pass the negatives face down through the solu-          -      tion two or three times before completeiy submerg-
      ing them in the hypo solution.
          II-If   the_ negatives were not cut apart, fold the
      strip several times without allowing it to crack at
      the ends. Press these down so that the solution will     reach all parts of the film. Trvo or three minutes
      after the last trace of milkiness has disappeared, it
      is safe to admit white light to the room-. Allow
      the negatives to remain in the hypo solution for ten
 I    minutes longer.
      III-Remove the negatives to running water and
     allow them to remain there for an hour. In case
     running water is not available, change the water
      five times the first ten minutes, movfug the films
View original page 14Page 15 · Read text
t2                             Successful Picture Mahing

 occasionallSr, and then allow them to soak for an
 hour. If desired, the water may be changed four or
 five times during a half hour of washing. It  is
 essential that the negatives be thoroughly washed.
  I\r-Suspend the wet negatives in such a way that
 neither side will come in contact with anything
while drying. The Seneca Film Clip will be found
to be very convenient for this purpose as well as
for handling the films while developing.
          Defe&s in Negatives
Veiled Whites or Fog
    Film handled too close to ruby light.
    Exposed to rays of white light.
Muddy Effe&s

                                                                                                                                                                  '    Exhausted developer.
    Forcing under-exposed negatives in develop-
         ment.
   Too warm a developing solution.
Irregular Light Spots
    Uneven development due to failure to keep all
         parts of the negative evenly moistened dur-
        ing development.
   Uneven immersion in the developing solution.
    Over-exposure.
    Air bells upon the film during development.
Milky Spots on Negatives
    Failure to keep negatives entirely covered by
         fixing bath or insufficient time for fixing.
                  Dontts                                                                          I
  Don't start until the chemicals are thoroughly dis-
solved.                                                                                                      It  Don't use a tray for developing  if  it has previ-
ously been used for hypo solution or final washing.
  Don't use chemicals after their strength is gone.
A hypo solution is exhausted when air bells settle
View original page 15Page 16 · Read text
www.butkus.us

 IVith, the Folding Scou,t Camera                            r3

 around the edge of the tray and remain there.
When the developing solution loses its strength, it
turns brown.
  Don't allorv one ray of rvhite light to enter the
room.
  Don't hold the strip too close to the ruby lamp;
it may cause fog.
  Don't let a trace of hypo reach the developer; a
drop may spoil the whole solution. Wipe \:our
hands upon a clean towel each time after taking
them from the hypo solution.
  Don't remove the negatives from the hypo until
they are thoroughly fixed. Too long is better than
too short.
  Don't blame the materials; read the directions
over again or ask your dealer.


Th,c -lint\ler Erposure Scale. A handy companion for
            !our Seneca Folding Scou,t
View original page 16Page 17 · Read text
t4                               Successfu,l P'icture Making
             PART \/
         Making the Prints
  I-Mix  the contents of the M. Q. tube (both chem-
icals) thoroughly with four ounces of water at
about 70o Fahr. and place in the tray at the left.                                                                                                    III
                                                                                                                                                                             I  II-In  the center have a tray of clear cool water
for rinsing the prints after developing.                                                          i  Ill-Dissolve thoroughly the acid hypo according
to the directions upon the box and set the tray to
the right.
  IV-Darken the room to semi-darkness.  It is un-
necessary to have the room completely dark, since
Seneca Paper can be handled safely ten feet from
an ordinary gas jet.
      .           Developing
  I-Place the smooth side of the negative against
the glass of the printing frame, allowing the dull or
picture side of the film to face up.
  II-Take one sheet of the developing paper from
its light-proof wrapping and lay it concave side
down upon the negative. This allows the dull sur-
face of the negative to come into contact with the
concave side of the paper
  For a negatiwe of normal contrast use Mediurn
Seneca to obtain best results. I,Vhen the negati,ue is
'w^eak or thin, use Hard Seneca. If the dark places
(the high ligltts of the negatizte) are ct)ery dense and
tlte contrast between the light and dark portions
oery tnarked, double tlte amount of xoater and use
Soft Seneca. The time of exposttre and de,ztelop-
ment will be somewhat lengthened. It  is oery im-
portant that paper with the correct degree of con-
trast be used ,utith each class of negative. A soft
or weak paper,  f or instance, with a contrasty nega-
ti,ue will produ.ce tlte same resttlt as a contrasty
fapertuith a qreak negatioe. Tlte Medittm Seneca
meets the awerage requirements of an arnateur mlre
elosely than any other degree of contrast.
View original page 17Page 18 · Read text
www.butkus.us
      With the Folding Scotr,t Camera                             r5
       III-Clamp the back of the printjng frame into       place and expose to artificial light for several sec-
        onds.
       With an ordinary gas light and a negatioe. ol
      aeerage density expoie Seneca Pape.r abou.t eigltt
  I      ,rrorir-counting ine hundred, two hmdred, etc'
  I       IV-After exposure to the bright light, hide the
  I      exposed paper until the room has been darkened
      enough to permit its being handled sSf.ely again'I{     RemJve the paper from the frame and immerse it
                                                                    so       in the developer with a quick sidewise motion
       that the solution reaches all parts of the paper at
       anproximatelv the same time. The room may now
       U.'tigntea again to enable the operator to follow
       the diveloping more closelY.
       V-Leave the paper in the developer until the
        picture has come up-to the right shades of black and
       *hit.. The pictuie will begin to appear in about
       six seconds.
                                                       appea.r           If  the shadows are lig,ht or foggy -and
        slowly, the paper has not been -exposed long enough'
             If , oi'the othir hand, the shadows are-oery intense
      ind come up quickly, the exposure has been too
      Lonq. Bef orb making any exlrosure' cut a sheet of
      pa[er int'o strips and rnake tri.al exposures. Y.ou
           iill  toon fnd what exposure giyqs the best results'
                                    considerable -amortnt.of       Not only'witl-but    this sore o       iarer,       it  '*-ill enable you to obtain pleasing
         reiults more quicklY.
                        Rinsing
        I-At  this point take the print from the developer       quickly and iinse it in the middle tray.
                          Fixingt
         I-subrrrerge the print in the hypo solution and
       allow it to rJmain for fifteen minutes. See that the
        prints do not become matted, since in that case the
      hypo solution will not fix them evenly.
       II-Wash the prints in running water for an
                                  they                              that                  care again       hour, taking                               d9 l9t become                  -running                                                 change                                           available,                                      is not                        water                         If       matted.
View original page 18Page 19 · Read text
r6                             Successful Picture Making

the water ten or twelve times during a half hour.
Be sure that the prints are thoroughly washed.
  III-PIace the prints face down on either stretched
cheesecloth or a blotter. The time necessar,r' for
drying may be shortened by first laying them upon
a piece of clean glass and pressing out the surplus
water. Then dry them upon cheesecloth or blotters
as before.
            Defe&s in Prints
Foggy Whites
    Paper handled in too strong a light.
   Paper too old.
Muddy Effe&s
    Forcing development of under-exposed prints.
    Exhausted developer.
Irregular Light Spots
   Uneven development due to  f ailure to keep
        print fully submerged during development
        or to immerse print evenly.
    Over-exposure to light.
Stains
    Over-development.
    Forced development.
    Chemically dirty dishes or hands.
    Failure to fix a  sufficient length of time.
Round White Spots in Clusters
   Air bells upon the print  after being immersed
       in developer. Rub the print lightly with
        the finger to scatter them.
Oval Dark Spots in Clusters
         bells upon the print after being immersed
         in the fixing bath face downward. Im-
       merse them face upward and move about
        to displace the bubbles.
View original page 19Page 20 · Read text
www.butkus.us
      With thc Folding Scout Camera                           r7

        Don't start until the chemicals are thoroughly  dis-
       solved.
       Don't use a tray for developing if  it has been
     used for pyro developer, hypo solution or final
      washing.
       Don't use chemicals after their strength is gone.
   A liypo solution is exhausted when air bells settle
     around the edge of the tray and remain there.
    When the developing solution loses its strength,  it
      tulns blown.
       Don't have the lights too bright while the print
       is in the developer;  it may cause fog.
       Don't fix the prints too long; it has a tendency
      to turn them brown.
        Don't let a trace of hypo reach the developer; one
     drop may spoil the whole solution. Have a clean
      torvel handy after taking the hands from the fixing
       bath.
        Don't blame the materials if your first results are
     not as good as you expected; read the directions
     over again or ask your dealer.


             Seneca Film Clips savc  -t,our hands andI                    heep filtn front   slil,firtg  i


 I
View original page 20Page 21 · Read text
Su.ccessful Picture Making

          Greater Possibilities
  Good pictures depend mainly on two things,-
 accurate focusing and correct exposure.
  An accurate focus is easily obtained. Pacing off
the distance between the Camera and the subject of
the picture is a good method. Even with the f :4.5
Anastigmat Lens at its widest opening, good results
may be had by estimating the distance in this way.
However, the more care you take in measuring-dis-
tances, the sharper and clearer your pictures will be.
  Correct exposure is a more complicated afiair
than focusing. The intensity of sun light varies
rvith the season of the year and the hour of the day.
Dark objects require Ionger exposure than Iight
ones. Marine pictures take less time than ordinary
scenes because of the light reflected from the water.
These and other factors must be considered before
deciding just what exposure to give in order to
fully exposc the film and have every detail register.
  Many amateurs merely guess at the correct e.$-
posure. Usually they guess wrong, and their pic-
tures are failures.
  GooC pictr:res can be reii.-d on if you use a Sim-
plex Exposure Scale. This handy little companion
for your Camera shows at a glance the correct
exposure for any subject or condition. No matter
what the month, day or hour, the Simplex Exposure
Scale gives the correct exposure to use with any
diaphragm stop.
   It is accurate, inexpensive and small enough to
carry in your vest pocket. Solidly made of alum-       I
inum, it will last a life time.                                                                      I
  Get a Simplex Exposure Scale and get good pic-
tures. It will save its cost in one month by prevent-
ing spoiled film.
View original page 21Page 22 · Read text
www.butkus.us
With the Folding Scout Camero

            Flashlight Pi&ures
   Flashlight pictures are as easy to take as snap-
shots out-of-doors. The only apparatus required is
your Seneca Folding Scout, a Seneca Metal Tripod,
an Actino Flashlight Holder and a box of Actino
Flashlight Cartridges. To get the best results,
select the Actino Cartridge suited for the room the
picture is going to be taken in,-the No. 12 Cart-
ridge fully illuminates a twelve foot room, the No.
18, an eighteen foot room and the No. 30 a thirty
foot room.
  Arrange your group or subject against a con-
trasting background,  if possible. A light colored
wall acts as a reflector and helps illuminate the
subject more evenly. Pictures taken at night in a
room illuminated by gas or electricity are very
effective as the additional light helps soften the
shadows and gives a much better result than lvhen
the Flashlight is used alone.
   S.et- your Camera up on a iripod at a great
etiough distance to include all the group, focus the
Camera carefully pacing off the distance, set the
indicator on the shutter for a time exposure and
open the diaphragm at its widest aperture.
 Now place the Cartridge.in the.,Actino golder
threading the fuse through the hole in the back
and removing the cover from the Cartridge. After
lighting the fuse, hold the Actino Hol'der high in
the right hand, and stand behind the Camera. Just
before the Flashlight ignites, open the shutter and
leave it open until the flash is over. Then open
the window in order to expel any smoke that may
result from the flash and may interfere with suc-
ceeding pictures.
  By this simple method, photographs obtained can
not be distinguished from those taken in daylight.
With the Actino Apparatus, the flash comes so
quickly and is completed in so short a time that ex-
pressions on the faces of the group have no time to
change.
View original page 22From the M. Butkus archive. Original publisher and archive notices are retained.
Check the model and edition against your equipment.
PDF verified 2026-10-10.