Film cameras
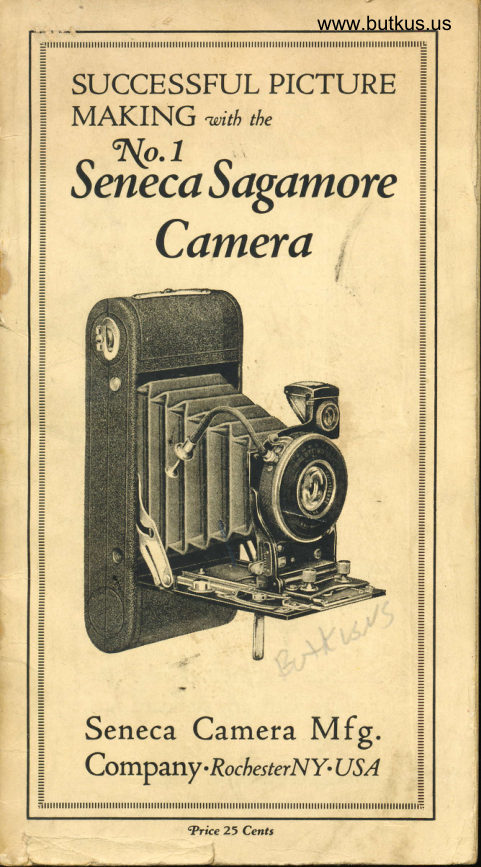
Seneca Sagamore Camera No. 1 User manual
User manual for Seneca Sagamore Camera No. 1. 28 pages in English. Read the original PDF, download or print a copy without registration.
28 pagesEnglish4.8 MB PDF
Loading your manual…Open PDF directly
Document details
- Brand
- Seneca
- Model / document
- Seneca Sagamore Camera No. 1
- Document type
- User manual
- Language
- English
- Pages
- 28
- File size
- 4.8 MB
- Category
- Film cameras
- Document date
- Not specified in catalog
Search available document text
Find a term, then jump to its page in the original PDF. Image-only pages may not be searchable; check the PDF for exact wording and diagrams.
Page 1 · Read text
www.butkus.us


    Camera                                     f


==   )eneca Camera                          Cr r.vtM  rfo-Fi.                       -C+rtrl,!==at==?r=   UomPany-RochesterNY.USA   ==

-llulilillltllnlnluttil         ttiltilrilililtlltnnl     l lntlnnnnl  riltililuil ilililttttttiltttttttttttltttrE====
View original page 1Page 4 · Read text
www.butkus.us
        Contents
    PART  f :  Loading the Camera
  =    PART II:   fuIaking the €xPosure  ==  =     PART III z  fumotting the Film                                                                 =  =     PART IV :  Developing the Film
                                                                 =
                                                                 =
I  = nAnf V:   tuIaking the ?ints      =     !
     PART VI z  $reater fPossibilities =

        EtttttttttttttIttttrtnrrrrnrrrnrrrulrrrlrrnrrunrrrrrurrrrnrrtttttttttttttttttttttt;
  =                                                        ==  ==                                                      =               lBefore Loading
     6pnnOnE attempting to take pictures =                        SeneeaSeneca Sagamore,Sagamore, readread thisthis    D-lL) withwith.youryour
                                                                 =                                                                 =  E                                                                 =   =  book. Familiarize yourself with the lens  =      !   and shutter. Find out what the numbers
                                                                 =      I='=mean. You must do this to take pictures
                                                                 ==  ==           Although the camera may be loaded in
   =i    direct sunshine, it is better to do this in    =
      !   subdued light. One ray of sunshine will    =
       i    spoil the film, so eare must be used.        =
  ==  Aguin we say it,-read the directions       i                                                          =          carefully and investigate the use of every  =   =   pu., of the c&mera before loading. Finally  =       i         see that the shutter is closed before load-  =     !
                                                                 =     i   ''9.  ==                                                     =          itttttttttttt,ttttrtttunr==          u n u r lr r nrrrlr nrrrnunnrn r rruuuuurrlttt,tt,t,,t,,tt,tttttF
View original page 4Page 5 · Read text
S ucce s s ful P ic ture M ahing

            WARNING
   While the Camera is loaded, do not expose the lens
 to strong light until the bellows is extended.
              PART I
         Loading the Camera
   1. Hold the Camera in your left hand. Insert the
right thumb nail under the nickeled spring at the top             l
of the Camera. Lift up on it, at the same time     T
slipping the pin from the aperture in the spring. The               .t
back will now lift off easily. See figure I.                                  I
                                      T


                              Fis. I
  2. Pull up the lower film chamber, remove the      fspool and place in the film chamber at the winding
key end. Make sure that the slotted side of the
spool is on the winding key side of the chamber.
  3. Insert the film cartridge in the empty film
chamber. Be sure that the number is on the right
side. See figure II.
View original page 5Page 7 · Read text
Succe s sful Pic ture M ak in g


                            Fig. IV
   6. Replace the back, sliding the nickeled spring
over the pin. It is now securely locked.
  7. Turn the winding key until a hand appears in
the ruby window. See figure V. A few more turns
will bring No. I into the center of the window. The


                               Fie. V
film is now in place for making the first picture.
Before winding the film draw out the front of the
camera. This prevents the film rubbing against the
back of the lens and causing abrasion marks.
           WARNING
  While the Camera is loaded, do not expose the lens
to strong light until the bellows is extended.
View original page 7Page 8 · Read text
www.butkus.us
        With the Sagamore Camera
                  PART II
               fuIaking the €xposure
         1. Press the nickeled button which allows the
      Camera bed to spring forward. See figure VI.  Pull
     down the bed until it automatically locks in position.


1t


                                       Fig. VI
       _ 2. Press firmly upon the two thumb pieces and
     draw the front"standard forward along the base
       runners until it catches. See figure VII.


                                    Fig. VII
View original page 8Page 9 · Read text
Successful Picture Making


                             Fig. VIII
  3. Press down and then forward upon the small
lever to the desired focus;  i. e. to the number on the
scale which corresponds to the number of feet the
object'whose picture is desired is distant. See figure
VIII.


                            Fig. IX
  4. To take vertical pictures hold the Camera level
at the waist line. See figure IX.  Turn the front of
the finder so that the rectangle in it shows length-
wise. Now look down into the finder from directlv
above and you will see exactly what objects will ap-
pear in the picture.
  5. To take a horizontal picture hold the Camera
horizontally at the waist line. See figure X.  Turn
View original page 9Page 10 · Read text
www.butkus.us
        With the Sagamore Camera


      the whole finder to the left and turn the front of the
+     finder until the rectangle  in^ it is horizontal.
         The finder used on the Sagamore Camera eliminates the use of a
        Ievel. To use it correctly, the eye must be directly above the finder
      and the rcctangle in it must square up with the markings on the
       finder top. When this is done and the picture can be seen clearly in
        the finder, the Camera is level. It is impossible to see the picture  il
       the Camera  is held at an angle.


                                    Fig. XI
       6. Before taking an exposure, study the use and
      operation of every part of the shutter. Be sure that
            First-The upper indicator points to the proper
                   time factor.
          Second-The lower indicator  is set at the proper
                     diaphragm stop.
           Third-An  unexposed section of film is turned
                      into position.
       Three shutters, the A'utic, the Optimo and the
      Ilex Acme are used on the Sagamore models. The
     Autic and Optimo shutters are automatic and re-
View original page 10Page 11 · Read text
S ucce s sful P ic tur e M ak in g
 quire no setting. The Ilex, a somewhat speedier
 shqtter., requires setting before every picture.
   Besides the usual time and bulb exposures, the
Autic Shutter gives fractional exposures of l, %,l15,
 7125 and 1i100 second. The Optimo gives the usual
time and bulb exposures and fractional exposures of
 l, th, ll5, 1125, Il50, llt00 and 11200 second. The
Illx Acme gives time, bulb and fractional exposuresof l, rl,Il5, 1125,1150, LllO0 and 1/300 second.

             Snap Shots
  Exposures at the fractional speeds can be made
rvhen the Camera is held in thshand. The 1/100.
1/50 and ll25 marks denote the approximate frac-
tions of a second during which light is allowed to pass
through the shutter. At ll20} catch extremely
rapid action; at IlSO take children at play or a man
running swiftly; at ll25 pictures of cattle grazing or
a man walking slowly.
           Time €xposures
  At T the shutter remains open after the first
pressure until a second pressure closes it. At B the
shutter stays open until the pressure is released.
These two factors and the 1, /2, and 1/5 exposures
are used when light conditions are so poor that an
exposure longer than ll25 second is necessary. The
subject must be stationary as the slightest movement
will cause a blur. The Camera should be placed on a
rigid base. A support is provided for both vertical
and horizontal pictures. See figure XI and XII.
  Satisfactory supports are not always available so
a metal tripod is really indispensable. Sockets for
View original page 11Page 13 · Read text
10                                       Successful Picture Makng
  8. If the lens is an anastigmat, the markings be-
                                                        7 .5, 11, 16,neath it will be / 6.3, 8. 11, 16,22, 32 or f22, 32. Set the shutter at T, open it and rvatch the
relative size of the diaphragm stops while the lower
indieator is moved. When the indicator is at 8, the
diameter of that opening is very close to 1-8 of the
distance from the diaphragm to the film; at 16, ap-
proximately 1-16 of the distance from the diaphragm
to the film, etc. This is the basic principle of the /
System. Since the diameter of / 8 is twice that of /
16 and the area of a circle varies as the square of the
diameter, four times as much light will pass through                                    :fthe / 8 opening in a given interval of time as rvill pass
through the / 16 opening. On that account, the lens                           as fast                     times                                  as when                                         workingrvorking          at f 8 is four                                                                       is     *4                    the                                       11 opening                     diameter                                     of the/at f 16. However,such that the area and accordingly the speed are one-
half that of the / 8 opening or twice that of the / 16
openlng.
  With the greater speed possible by the use of the
anastigmat lens at its greatest aperture, the lens loses
proportionately  in its ability to image clearly objects
both near and far from it.  This inabilitv of lenses
working at high speed to have great "depth of focus"
is not a new discovery nor a variable quantity, but is
the result of a mathematical ratio which is as rigid   t'twoas      times two make four". If the user rvishes to
take a snapshot under unfavorable light conditions
and consequently to use the lens at agreat speed, he
must be very accurate in estimating the distance to
                    gained                           is                                   a           Speed                                           lossthe                                              in                            only at                                        depth    object.                                                      of   .4                                              is                                        a                                        set                                               smaller       Ilowever,                   the                    diaphragm                             iffocus.                                          at
stop so that the lens works at a slower speed, the
depth of focus immediately increases. Extreme
accuracy in estimating the distance to the object is
not so necessary.                                         +t
    If the lens is not an anastigmat, itis markecl accord-
ing to the scale 4, 8, 16, 32 and 64. This Uniform
S)'stem (U. S.) was designed to show more clearly
the relation between the speeds of the lens at each of
the various stops, which ratio is shown by the numer-
ical value. For instance, tT. S. 8 is only twice as fast
as Li. S. 16.
View original page 13Page 14 · Read text
www.butkus.us
With the Sagamore Camera                                   11
  Anastiemat Lenses are marked according to the
/ Svstem] other lenses by the U. S. System. Ttt"
tabie shows the relation between the most commonly
used stops of both systems:
    U. S.     48163264            T      811162232
  Keep this relation clearlvin mind in order that the
indicators may be inteliigehtly set for each exposure.
  As a basis to work from, set the stop at 16 for
pictures of objects in direct sunlight if taken in the
i.tiAate of the day. Use the U. S. 8 or / 11 stop for
obiects in direct- sunlieht earlier in the morning or
lat"er in the afternoon. When the light seems bright
1-50 is satisfactory, but otherwise -use 1-25. The an-astismat lens mav'be used with the largest opening
for s"napshot worli under unfavorable conditions, bJrt
the leni which is not an anastigmat cannot get the
oictures under such conditions except by time ex-
bosut*. Do not adhere too closely to these direc-tions; they are only general suggestions for use in
making t6e first eiposures. The user's experience
will be the best guide.


                              Fig. XIII
View original page 14Page 15 · Read text
t2                                        Succe s sful P ic ture M ah ing
   9. A special rising and falling front allows the
amateur to increase or decrease the amount of fore-
ground in pttures taken with the Sagamore. On the.
lower right hand side of the shutteiwill be found a
small nickeled bar operating vertically. Grasp the
end of this bar firmly, pinchit to release the locking
device and raise it. The entire front is lifted bv it.
See Fig. XIII.
  When the bar is raised to the limit, the amount of
foreground in the picture is diminished. When the
bar is lowered, the foreground is increased.
  10. Before closing the camera, make sure that the
bar is lowered. Otherwise the finder will touch the
camera body and prevent closing. The focusing
lever should be pushed back and locked at the 100mark.                                                   ;
  11. Press in upon the thumb pieces and push the
front stand back along the base runner as Jar as itwill go. Wind the push cord release over the finder
and down the other side. Press down the side arms
and the bed will close easily.
             PART III
          fr:moving the Film
  I-After making the six or more exposures, turn
the winding key until all the paper is wrapped around
the exposed film.


                                               {


              Seneca lDeoeloping and ?rintins Outfit
View original page 15Page 17 · Read text
t4                                          Successful Pkture Making

                  lDeveloping
'  I-Unroll the film and detach the entire strip from
 the protecting black paper.
  II-With one end of the strip in each hand, pass it
 continuously through the dev-eloper. In abbirt one
minute the blank spaces between the pictures will
 begin t-o show. ,By two minutes the images rvill show
somewhat clearly.
  Ill-Continue the development for five or ten
minutes until the contrast between the light and dark
parts of the negative has become very distinet or the
image begins to show on the back bf the film.  If
some of the negatives, as you hold them between
 y,our eye and the ruby light, are darker than others,
 t-he-y have be-e! exposedJor a longer time, but thii
difference will be easily taken eare of in the printing.
 It is only necessary to watch the degree of contrasT.

  I-After developin-ffi:lf,tly,  rinse three or four
times in the middle tray of water before you.
   II--If desired, the exposures may be eut apart and ^fixed separately.
                    Fixing
  I-Pass the negatives face down through the solu-
tion two or three times before completely iubmerging
them in the hypo solution.
   II-If  the negatives were not cut apart, fold the
strip several times without allowing  it to erack at thtr
ends. Press these down so that-the solution will
reach all parts of the film. Two or three minutes                                                                                  i,Itafter the last trace of milkiness has disappeared,                                            ^           it issafe to admit white lieht to the room.  Alloui the  +negatives to remain in the hypo solution for ten min-
utes longer.
                                                                         I  III-Remove the negatives to running water and
                                                                                                                                                                                                                                                                                         Iallow them to remain there for an hou"r. In case
                                                                                                                                                                                                                                                                                                                                                 Irtrnning wa_ter is not available, change the water five                                                      I
times the first ten minutes, moving ttre films occa-                                                    l
View original page 17Page 18 · Read text
www.butkus.us
         With the Sagamore Cameta                                15
         sionally, and then allow them to soak for an hour. If
         desired, the water may be changed four or five times
        during a half hour of washing. It is essential that the
        negatives be thoroughly washed.
        IV-Suspend the wet negatives in sueh a rvay that
        neither side will come in co-ntact with anything while
       drving. The Seneca Film Clip will be found to be
        very convenient for this purpose as well as for hand-
         ling the films while developing.

                                                     e srI                    1D efe tts in I\(egatiy
        GAeiled Whites or Fog4
   Ia        Film handled too close to ruby light.
          Exposed to rays of white light.
        $uluddy €fe[ts
          Exhausted developer.
           Forcing under-exposed negatives in development.
         Too warm a developing solution.
        Irregular Light Spots
          Ilneven development due to failure to keep all
               parts of the negative evenly moistened during
              development.
           IJneven immersion in the developing solution.
           Over-exposure.
           Air bells upon the film during development.
       &Iilky Spots on \egatives
           Failure to keep negatives entirely eovered by fix-
               ing bath or insufficient time for fixing.Ij
*                      Don'ts
         Don't start until the chemicals are thoroughly dis-
        solved.
         Don't use a tray for developing if it has previously
       been used for hypo solution or final washing.
         Don't use chemicals after their strength is gone. A
     hypo solution is exhausted when air bells settle
View original page 18Page 21 · Read text
With the Sagamote Camera                               t7

             PART V
           fuIaking the ?ints
  I-Mix the contents of the M. Q. tube (both chem-
icals) thoroughly with four ounces of water at about
70' Fahr. and place in the tray at the left.
  II-In  the center have a tray of clear cool water
for rinsing the prints after developing.
  Ill-Dissolve thoroughly the acid hypo according
to the directions upon the box and set the tray to the
right.
  IV-Darken the room to semi-darkness.  It is un-
necessary to have the room completely dark, since
Seneca Paper can be handled safely ten feet from an
ordinary gas jet.

                  fDeveloping
  f-Place the smooth side of the negative against
the glass of the printing frame, allowing the dull or
picture side of the film to face up.
  II-Take one sheet of the developing paper from
its light-proof wrapping and lay it concave side down
upon the negative. This allows the dull surface of
the negative to come into contact with the concave
side of the paper.
  For a negatiae of normal contrast use Medium Seneca
to obtain best results. When the negatiue  'i,s weak or
thin, use Hard Seneca. If the dark places (the high
lights of the negati,ue) are uerA dense and the contrast
between the light and dark port'ions aerA marked,
double the amount of water and use Soft Seneca. The
time of erposure and deuelopment will be somewhat
lengthened. It is aery important that paper with the
correct degree of contrastbe used with each class of neg&-
tiue. A soft or weak paper, for i,nstance, with o, con-trasty negatiue will produce the same result as a con-
trastE paper with a weak negatiue. The M edium Seneca
meets the auerage requirements of an amateur n'Lore
closelE than any other degree of contrast.
View original page 21Page 22 · Read text
www.butkus.us
 18                                             S ucce s s ful P ic ture M ak ing
  .III-Clamp the back of the printing frame into plaee and expose to artificial light for several seconds.
     'll'i,th an ordinary gas li,ght and a negatiue                                           -eight of aaerage densi,tg efrpos9 Seneca Paper about      ieconds?
 counting one hundred, two hundred, etc.-
  IV-After exposu_re to the bright light, hide the
 exposed paper until the room has been'darkened
 enough to permit its being handled safelv asain.
 Remove the paper from theJrame and immerse"it in
 the developer with a quick sidewise motion so that
 the solution reaches allparts of the paper at approx-
 imately the same time. The room may nbiv rc
 lighted again to enable the operator to follbw the de-
 veloping more closely.
  V-Leave the paper in the developer until the
picture has come up to the rieht shades of black and
white.- The picture will begin to appear in about six
seeonds.
 _ If the shadows are light or foggy and appear slowly,
the paper has_not_been erposed Ioig enoufi. If , on tfi,e
other hand, the shadows are aerA intensd and bome up
qui,ckly, the erposure has been too long. Before making
anA-efrposure, cut_a sheet of paper into strips and make
 tri,al enposur_es. Y_ou wi,ll soon 7nd what eiposure giues
the best results. Not onlu wilt-this saue a ionsid,eiable
arnotLnt of paper, but jt_ will enable you to obtain pleas-
iltg results more quickly.

                                                                                                   ,:               poi.,i          this                             from                                     thedeveloper               i;#t:;rtntquicklyI:it and             rinse                     in the middle                          it                                      tray.
                     Fixing
 _.I-Submerge the print in the hypo solution and                  '1allorv it to remain for fifteen minudes. See that the        I{prints do not become matted, since in that case the
                                                                                                                                                                                             Ihl'po solution will not fix them evenly.                                                                                                                                                                                            ...                                                                                                                                                                                             I
  -II-Wush the prints in running water for an hour,                           'lltaking care again that they do not become matted.
If running water is not available, change the water
ten or twelve times during a half hour. Be sure that                   j
the prints are thoroughlfwashed.
View original page 22Page 23 · Read text
With the Sagamore Camera                                 19

  III-Place the prints face down on either stretched
cheesecloth or a blotter. The time necessary for dry-
ing may be shortened by first laying them upon a
piece of clean glass and pressing out the surplus
ivater. Then drv them upon cheesecloth or blotters
as before.
              cDefe&s in ?rints
Foggy Whites
   Paper handled in too strong a light.
    P:tper too old.
tuIuddy €feek
   Forcing development of under-exposed  prints.
   Exhausted develoPer.
Irregular Light SPots
   Uneven development due to failure to keep print
       fully submerged during development or to
      immerse print evenll'.
    Over-exposure to light.

Stains
    0ver-develoPment'
   Forced development.  ....,,id
    Chernically dirty dishes or'liands.
    Failure to fix a sufficient length of time.
\ound White SPots in Clusters
    Air bells upon the print after being immersed in
       developer. Rub the print lightly with the
        finger to scatter them.
 Oval lDark SPors in Clustqs
    Air bells upon the print after being immersed in
       the fixing bath face downward. Immerse them
       face upward and move about to displace the
       bubbles.
View original page 23Page 25 · Read text
With the Sagamore Camera                                2L

                     ?ossibilities          $reater
  Good pictures depend mainly on two things,-ae-
curate focusing and correct exposure.
  An accurate focus is easily obtained. Paeing off
the distance between the Camera and the subject of
the picture is a good method. Even with the f :4.5
Anaitigmat Lens at its widest opening, good results
may be had by estimating the distance in this way'
However, the more care you take in measuring dis-
tances, the sharper and clearer your pictures will be.
  Correct exposure is a more complicated affair than
focusing. The intensitv of sun light varies with the
season of tft" year and the hour of the day. Dark
objects require longer exposure than light ones'
Marine pictures take less time than ordinary scenes
because bt tft" [ght reflected from the water. These
and other factors must be considered before deciding
just what exposure to give in order to fully expose
the film and have every detail register.
  Many amateurs merely guess at the eorreet ex-
posure. Usually they guess wrong' and their pictures
are failures.
  Good pictures ean be relied on if you use a Simplex
Exposure Scale. This handy little companion for
your Camera shows at a glance the correct exposure
iot u.ry subject or condition. No matter what the
month, day-corrector hour, the Simplex Exposure Sc-alegives the        exposure to use with any dia-
phragm stop.
    It is accurate, inexpensive and small enough to
 carry in your vest pocket. Solidly made of alum-
 inum, it will last a life time.
  Get a Simplex Exposure Scale and get good pic-
 tures. It will save its cost in one month by prevent-
 ing spoiled film.
View original page 25Page 26 · Read text
.T
                            www.butkus.usu
                                               Suece ssful Picture iWaking                I'l

            Flashlight ?ictures                                                  I
  _ Flashlight pictures are as easy to take as snap-
 shots out-of-doors. The only apparatus requiredls
 your Seneca Sagamore, a Seneca Metal Tripod, an
 Actino Flashlight Holder and a box of Actino Flash-
 light Cartridges. To get the best results, select the
Actino Cartridge suited for the room the picture is
gging to be taken in,-the No. 12 Cartridge fully
                                           an                         iNrIilluminates a twelve foot room, the No. 18.'foot         foot room and the No.'30 a thirty                                                                 I
;rShteen
  Arrange your group or subject against a contrast-                 I
ing background,  if possible. A light colored wall                          l
acts as a reflector and helps illuminate the subject                        l
more evenly. Pictures taken at night in a room                  \
illuminated by gas or electricity are very effective as
the additional light helps soften the shadows and
gives a mgch better result than when the Flashlight
is used alone.
 _ Set your Camera up on a Tripod at a great enough             II
distance to include all the group, focus the Cameia
carefully pacing off the distance, set the indicator on              ,l
the shutter for a time exposure and open the dia-
phragm at its widest aperture.                                                                    {
  Now place the Cartridge in the Actino Holder            I
threading the fuse through the hole in the back and
removing the cover from the Cartridge. After light-
ing the fuse, hold the Actino Holder high in the right
hand, take the push-cord release in the left hand and
stand two or three feet behind the Camera. Just
before the Flashlight ignites, open the shutter and
leave it open until the flash is over. Then open the
window in order to expel any smoke that may result
from the flash and may interfere with succeeding
pictures.
  By this simple.method, photographs obtained can
M! be distinguished from those taken in daylight.With the Actino Apparatus, the flash comes so
quickly and is completed in so short a time that ex-
pressions on the faces of the group have no tirne to
change.


                                                                             I
                                                                                                                                                                                                                                                   I                                                                                                                                    --7.)
View original page 26Page 27 · Read text
With the Sagamore Camera                               2'

         Developing and Printing your own pictures is just
        as much fun as taking them,-and you don't have to
       wait to see how they come out.
         All that you need is a Seneca Developing and
       Printing Outfit and the instructions given in this
      book. With a little practice you can produce exeel-
        lent pictures at a much lower cost than having them
      done outside.
      The lDeveloping and lPrinting Outft
                      Contains:
           2 4x5 Japanned Trays
               I 4 oz. Measuring Glass
               1 3 5Ax6 Printing Frame
               1 Candle Lamp
            2 M Q Developing Powders
               1 pke. rA lb. Acid Fixing Powder
             pke. (1 dozen) Seneca Post Cards
             pkg. (f2 sheets) SrZxSrA Seneca Paper
             Seneca Exposure Meter
           Amateur Photographer's Manual.

                o4mateur eAids
        for taking the Picture:
       Seneca All-In-One Clamp.                              . .$1.50
       Seneca Tripods (Steel)
         No. 300 (3 section).  .  .                     3.50
         No. 400 (4 seetion)    .                 ...4.75
         No. 500 (5 section)   .                         5.50
       Simplex Exposure Scale                            .50
      Autosnap (the perfect timing device)            1.25
       Portrait Attachment.  .  .                                                       FF,ID
       Actino Flashlight Holder                           .50
       Actino Flashlight Cartridges per box of six
         No. 12 fully illuminates a 12 ft. room.   .       .45
         No. 18 fully illuminates a 18 ft. room.    .       .60
         No. 30 fully illuminates a 30 ft. room.   .       .80


   I
I.t-
View original page 27Page 28 · Read text
www.butkus.us
          .dmateur ofiids
 for making the Picture.
Seneea D.evelgRing and Printing Outfit.       8.00
lreneca r rrm ulrps, per pr.  . .                      .35
Seneea MQ Dev:eloper, per box of six tubes. . .  .tb
Seneca Acid Fixing Powder, 1 lb. box. .          .2b
Seneca Intensifierfper tube
Qeneca Printing Frame, 3fux\                    .40
Deneca Japanned Trays, SrZxSrh               .Zs
$eneea Paper (3%x5%) per pkg. of lZ sheets. .  .2OSeneca Postcards, per doz                        .25


         Seneca Cameras
         Bring Home the
               ?ittures


              Look for this Sign!
View original page 28From the M. Butkus archive. Original publisher and archive notices are retained.
Check the model and edition against your equipment.
PDF verified 2026-10-10.