Light meters
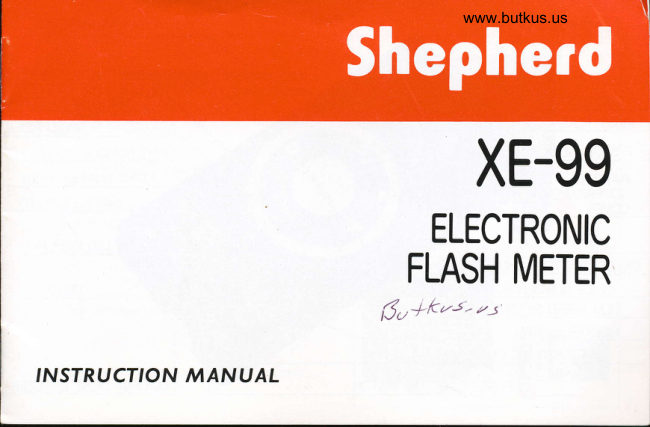
Shepherd XE-99 Electronic Flash Meter User manual
User manual for Shepherd XE-99 Electronic Flash Meter. 13 pages in English. Read the original PDF, download or print a copy without registration.
13 pagesEnglish4.3 MB PDF
Loading your manual…Open PDF directly
Document details
- Brand
- Shepherd
- Model / document
- Shepherd XE-99 Electronic Flash Meter
- Document type
- User manual
- Language
- English
- Pages
- 13
- File size
- 4.3 MB
- Category
- Light meters
- Document date
- Not specified in catalog
Search available document text
Find a term, then jump to its page in the original PDF. Image-only pages may not be searchable; check the PDF for exact wording and diagrams.
Page 4 · Read text
BATTERY INSTALLATION                                   www.butkus.us

(1) Remove the Bettery Compartment Cover
   by pressing on grooved area in the
    direction of the arrow.

(2) Install a fresh 9 Volt alkaline battery such
     AS:

   MALLORY MN16O4, DURACELL. MN16O4,
   EVEREADY 522 or MATSUSHITA 6AM6.
   Be certain to match battery polarity (+
                       symbols in the Batte-   and -) and polarity    ry Compartment. Reversal of battery po-
     larity will result in descturction and pos-
    sible damage to the meter.

(3) Replace the Battery Compartment Cover.
View original page 4Page 5 · Read text
(4) The battery should be tested after it is
     installed and periodically in use. Push
    the oN/oFF Battery Check switch to
   "ON" position. Yellow LED on the far
    right of the LED Display will light for one
    second.  lf the light comes on but dims
    noticeable or does not come on at all,
   check that all contacts are clean or
    replace battery.

NOTE:
When testing the battery, the other
LED's may light from the ltght entering
lnto the Sensor. Ihis is normal.

INSTALLING THE NECK STRAP
Pass the small loop end of the neck strap
through the Neckstrap Lug.
Then, pass the large loop end of the neck
strap through the small loop and pull snu8.    ruM
View original page 5Page 7 · Read text
EXPOSURE READING
Any number of flash units may be measured                                                     \
simultaneously if all units are synchronized.
                                                                                                          J
INCIDENT LIGHT MEASURING
Depress the forward edge of the Rocker
Switch marked "RESET" to clear the meter
and makes it ready to take a fresh reading.

                             www.butkus.us
(1) Set the Diffuser control Switch to the
    incident position .l     .
(2) Place the meter directly in front of the
    subject to be lighted.
   The sensor should point towards the
    camera lens.
    Operate the electronic flash by using
    the open flash button on the unit.
   Make sure that the Sensor is not shad-   owed and no essential light to the Sen-  ffi-r=ry
    sor is obstructed.
View original page 7Page 8 · Read text
www.butkus.us
\II
 $    (3) Read the highest number indicated by
         the illuminated LED. Transfer the number
,l        to the Light Number Scale by matchinS
         the LiSht Number Index.
        The correct exposure setting will be in-
          dicated in f/stops by the F/Stop Index.


     NOTE:
    The LED Display will continue to illumi-
     nate for 30 seconds   and then turn                             -      itsef off to save battery and hold the
     rneter ready for taking o new reading.       If o new reading is regui red before the
    IED Display extinguishes, simply depress
     the forward wing of the Rocker Switch
     marked "RESET" to clear the LED Dis-
       PloY.
View original page 8Page 9 · Read text
(4) lf the Half stop LED liSht is illuminated
    along with the LED Display, set the Co-
    mputer Dial in 1/2 of increment.


IMPORTANT:
Most erectronic flash units give a "reody"
indicotion ot less than full charge.To obtain moximum accuracy of readin-
gs, the rneter exPosure reoding should
alwoys be token ofter the flosh unit has
completely recycled.

(5) lf the LED Display does not illuminate at
      all, the flash light intensity is too weak.
    Flash must be closer to the subject.
        lf all the LED Display including the Yellow
   LED on the right are illuminated, the
    flash light intensity is too strong. Flash
   must be further from the subject.
View original page 9Page 10 · Read text
www.butkus.us


REFLECTED LIGHT MEASURING
(1) Set the Diffuser Control Switch to the
                                                                           .    Reflected position F
(2) Place the meter as close to the subject
    as possible. The sensor should point to-
   wards the subject. Make sure that the
    subject is now shadowed by the meter.
(3) Follow steps 3 through 5 on preceeding
    pages under Incident Light Measurment.

When operating in the "cordless" mode under
strong illumination, the meter may be prevent-
ed from sensing the flash light.
View original page 10Page 12 · Read text
USE OF REMOTE PC OUTLET                             www.butkus.us
 By obtaining a Remote Cord (available sep-     (2) To operate the electronic flash unit,
 arately from the unit), you can take Remote        depress the rear edge of the Rocker
 Meter readings.                                     Switch. This will fire the flash unit and
 (1) PluS one end of the Remote Cord into         simultaneously take a reading.
     the synchronization cord (PC Cord) of    NOTE:
     the electronic flash unit. Plug the other    The Remote Cord should not be longer    end into the Remote PC Outlet of the    thon  | 5 feet/ 5 rneters, or the flosh may
      Meter.                                not oPerdte.
FLASH PLUS AMBIENT LIGHT READING

The Flash Computer Circuitry is designed to     the meter must be adjusted. For example, if
read both electronic flash light and ambient     1/60 of a second is used, close down the
light. This is extremely useful when the back-    camera lens by one stop from the original
ground of the subject is very bright, or the      setting indicated by the meter.
subject is in the shadows and electronic                                                  For other shutter speeds, refer the chart below:flash is used to brighten the subject.
                                                                               F/Stop-                                                                           Change.                                SpeedThe meter will indicate the f-stop number         Shutter                                                                     (Lens                                                                             Aperture)with a shutter soeed of 1/125 of a second               1 /30 sec.              -2regardless of the flash duration of the flash                                                                                1 /60 sec.                    -1unit used.                                                                               1 /125 sec.         no changeWhen a shutter speed other than 1/125 is                1 /250 sec.used on the camera, the f-stop indicated by                1 /500 sec.            +1+2        ro
View original page 12Page 13 · Read text
F'
USE AS A SLAVE UNIT

The meter can be used as a highly sensitive
slave unit for operating additional electronic
flash unit without sychronization  cord.
(1) Plug the synchronization cord (PC Cord)
    of the additional electronic flash unit into
    the Remote PC Outlet.
(2) Make sure that the Meter point toward
    the main flash.

SPECIFICATIONS
Sensor: Color Balanced Silicon Phototransistor.
Angle of Measurement: 60'(Reflected  light readin$.
Measurement Range:   f /1.4 to t/22 with ASA/ISO 100.
EV Range: B to 16.
ASA/ISO Film Speed Range: 6 to 3,200.
Guide Number Range: 1.7 to 160 in meters. 6 to 528 in feet.
Aperture Scale: t/1.0 to f/90.
Power Source: One 9 volt Alkaline battery (Not included).
Accessories: Neck Strap, Carrying Case.
All Specifications  Subject to Change Without Notice.
                                                                                                              Printed in Japan
View original page 13Related documents and language editions
From the M. Butkus archive. Original publisher and archive notices are retained.
Check the model and edition against your equipment.
PDF verified 2026-10-10.