Film cameras
Sibyl N and G Cameras User manual
User manual for Sibyl N and G Cameras. 5 pages in English. Read the original PDF, download or print a copy without registration.
5 pagesEnglish0.8 MB PDF
Loading your manual…Open PDF directly
Document details
- Brand
- Sibyl
- Model / document
- Sibyl N and G Cameras
- Document type
- User manual
- Language
- English
- Pages
- 5
- File size
- 0.8 MB
- Category
- Film cameras
- Document date
- Not specified in catalog
Search available document text
Find a term, then jump to its page in the original PDF. Image-only pages may not be searchable; check the PDF for exact wording and diagrams.
Page 2 · Read text
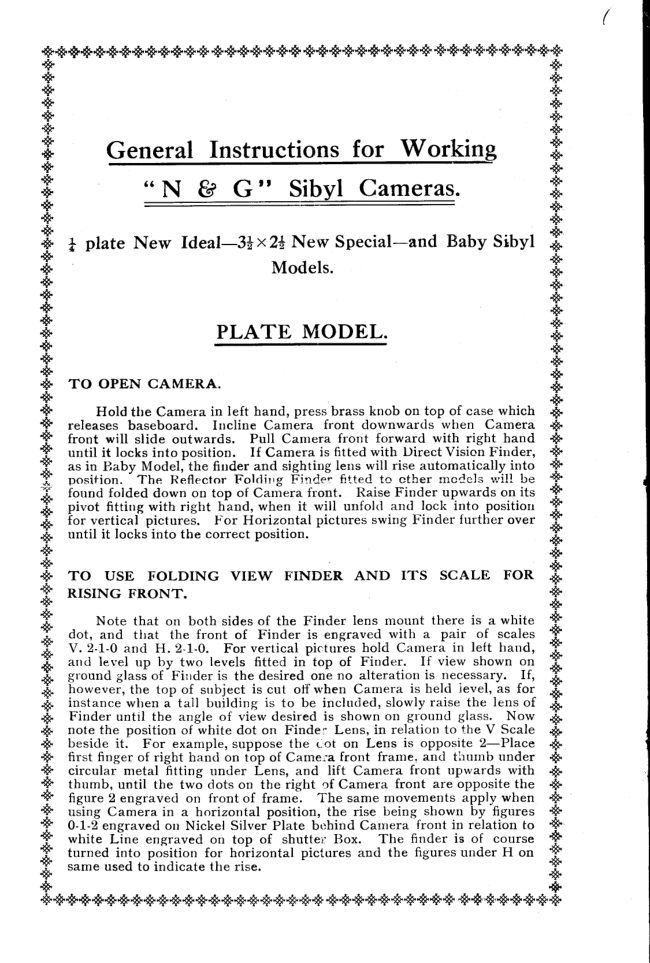
s*****ss*****  *****s*  *********,*  ***.*s*,***s* *
* *
**s**.s* *
$    General Instructions for Working   S*
++,            a6 r\TN Aer     r-tG",,  Sibyl                                               c:L-.|      (-n^nn^oCameras.        ***1r                                                                                  {F*s
$    t  phte New  Ideal-3|x2t New Special-and Baby Sibyl  *
++                                                                      rModels.r        I    r                                         ,i;*+                                                               ',1'+                                                                              -i'+                                                                              -i'
S+                        TrYPLATEa'rrrr  MODEL.*,.'\T\rtr                              +,*.t-*l"+                                                             .{h+                                                                                      -it*  To OPEN CAMERA.                                       +
* . * F
+       Hold tlre Camera in left hand, press brass knob on top-whenof case which    -lt
+   releases baseboard.  Incline Camera front downwarcls     Camera  -b
?   front will slide outwards.  Pull Carnera front forward with right hand   *
?    until it locks into position.   If Camera is fitted with Direct Vision Finder,   *
g   as in Ilaby- Modelithe fiuder and sighting lens will rise autornaticallyinto  +
T   posifion. The Reflector Foldirrg Finder fitted to cther rncdcls '*i!l be    f
H   found folded down on top of Carnera front.  Raise Finder upwards on its  T
ff   pivot  fitting with right h'and, when  it  will  urrfolcl and lock into  position    f
     for.vertical pictures. For Horizontal pictures swing Finder further overS                                                            S-it   until  it locks into.rrLu theLue  wurrvwlcorrect position.Pvrrrrv'.
**                                                                                                                             s.*.
s  TO USE FOLDTNG VrEW FINDER AND ITS SCALE FOR  -i-
*.iF  RISING  FRoNT.                                                            *                                                                                                                     *
*        Note  that on both sides of the Finder  lens mount  there  is a white   +
T    dot, and   tlrat  the  front  of  Finder   is engravecl with  a  pair   of  scales    t
g    V. Z-f -O and  H. 2-1-0.  For vertical  pictuils  hold Camera  in  le{t }raud,  X
H    atrci level up  iry two  levels  fitted  in'top   of  Finder.     If view shown on  X
&   ground glass of  Firrder is the desired one no  alteration  is necessary.    If,  S
.*.  however, the top of  srrbject is cut  offu,'hen Camera  is held  level, as for  &
{t   instance when a  tall  building   is to be includecl, slowly raise the lens of   S.
*lt   Finder  until  the angle  of view desired  is shown on ground  glass.  Now   *At
*    note the position  of white dot on Finder  Lens,  in relation  to the V Scale    *
*    beside  it.   For  example, suppose the  i'ot on Lens  is opposite 2-Place      *
+     first finger of right hand on top of Cameia  front  frame. ancl tirurnb under    *
$.   circular  metal  fitting  under  Lens, and   lift Camera  front  upwards  with  S
+   thumb,  until  the tw6 clots on the right  of Camera  front  arebpposite  the   4t
t    figure 2 engraved  on  front of frame.  The same movements  apply when  S
f    uJing Camera  in a horizontal  position,  the  rise being shown by  figures  +
f    0-1-2 ensraved  orr Nickel  Silver Plate bchind  Carrrera front  in relation  to  S
f    white LTne engraved on top  of  shuttei: Box.   The  finder  is of  course    *
?   turned  into  poiition   for  hoiizontal  pictures and  the  figures under H on     f
f   same used to indicate  the rise.                                                                  ** *
***s*************s******    ******,*,**.*'s*,*.s****
View original page 2Page 3 · Read text
*.*rq*****$
                                                                                                ,*   To cl-osE FINDER.H                                                     +
 { h                                                                                          r .                                     r , r                          , F
 I'       Gently depress gr.ound glass v;ith tip of first fi.nger-thgq  {oljl angle-  & x.S  piece bookw:se on hinge, and  svring over on pivot  to  fold down on  *3
     Front Frarne.  This mgvement automatically returns Finder Lens backS                                                          &
 .*,  to its normal position at 0.                                                                  *,
 *        Note.-Itis  nrost important to return the Finder Lens to the normal    -it
 -ir  position on each occasion after it has been used, for obvious reasons.         *it
                                                                                  *
                                                                                                          '                                                  *
   TO WORK SHUTTER.                                                         *s
        {Jnderneaththe lens is a German Silver Plate, engraved O and X,  +
Y   alsoalso aa capstancapstan  fittingtrtting  rvithrvith lever,lever, whichwhtch cancan bebe turnedturned  toto  left.orlett  or  rlgnt.ri-ght. S3
Y   The  shutier  is set by turning  this  lever to either O or X as inclicated  to
                                                                               lens.                                                                   The                                                   seen                                                             through                                                          blarle,                                  on shutter    be necessary                  by                        Sign"engrarr",l                                                                                 $"S f                                                                                                                           -                                                                                                                                                                        !tr'                                                                                                            oi-nsign                                                                               ^^i-+-points                                                               to+^                                               FittingEir+i--                                                                             +haconlathe same                   *heri        :;.*.--shutter                    r:-^1*'---*^-.is set                      Lev?rr  ^-,^- on^-   ,'-^-^+^-Capstan                                                                                                                                                                r\O  .ffH*
S   or X engraved on Silver Plate on 'iheShutter F'ront, and can be unset at any  A;    time by reversing this position.     speedsof shutter are engraved on  &
H   plate ai right of eamera front,and these.are adjusted by rnovingindicator S
S   to the speed required. On the left-hand side of Camera front is a small  .S.
.&  pin in slot by the side of which the letters I.II.T. are eng-raved_.When   -h
4.  the shutter is being used for Instantaneous exposures,frorn  I second  *
-ir  downwards, this pin should be set at  I.  The shutter is released by  ap
-nt pressureonsmall black Push Button, set in circular cup on left of Camera   *
's.  front.  In the Baby Sibyl Camera the release Push is set to the left side    I
+   of shutter box.  Tb give a Ball exposure--flurn^              lever to set shutter, set   *
4.  speed at + seconci,-and  I.B.T.  Pin  opposite B.  The  shutter  will   $.
*   rimain  opJt  .,  long as pressure is kepi on release. To give a Time   *
*    *"fi.ute'-'=5.t   ShrfltJr rnd-c', e1 ,eC *t   j secon.land-r-R'l-  Fin-olrnQsite  *
f    T.' One decided pressureonrelease opeirrshutter, and a secondpiessure H
E   closes it.   Ball and  firne Exposures are best given with an Antinous H
Y   Release,as the Push Button must be pressedri,git h,omeand the Antinous  g
H  Release Fitting avoids movement of Carnera, Specialcarentttst be ts,,hen I
H   to seethat pini"s setexactlyofpositeI.B.ovT.,asotheraise tlamagewitt bc  g
    c,ause(to tlie relettsingn rrio,rirk.  A slight click shoas uhen pi,n i'{i'n'correc,S                                                          S
*   Postno,t)                                                                                    *
* ' *.*.                                                                               *
.*  FOCUSSTNG.                                                                              *
s*
.$      The  focussing scale  is engraved  on  front  of  baseboard, and  the    *
I   Camera  is focussed by setting white  line on focussing lever opposite the    *.
*    distance requirecl.                                                                                   *
* *
* *
   THE  DEPTH  OF  FIELD  SCALE  (NOT  FITTED  TO  BABY   +*
*  MODELS).                                            s
**
.*       This scale is engraved on an arc at the extremity of Focussing lever,  +
*   and is used in conjunction with the Distance Focussing scale. _Tl.t" S
*   figures engraved represent lens apertures,and the combined use of the  S
*.   trio scaleslliocussing arrd Depth ,if fl"ta;  is of the greatest assistance in  +
*   determinirrg--  -i;;       the stop'necessaiyto get objects in diffJrent planes-in-focus. +
+             ;"?r"pr";    ii tn" rnain'obleit in the photograph is'8 yards distant   *
*   from tn" C^-L.",  ttr" centre ti,rJon Focus.i,rg t"u"ii.  set'opposite this    f
g   distance on the Focnssingscale. Now refer to depth of field scale and.it  X
     will be seen that f8 eniraved each side of Focussing line is opposit"
S                                                                      $
{-i'*******s***ss****i F                    s*****  ****s***s***#*** . . *

                      www.orphancameras.com
View original page 3Page 4 · Read text
-

     *s**s***********     *******s****#*#s     ****  ****    +'                                           *
              f   6 yards and 12 yards, indicating that r:ljects between those two distances  *
           tr   aie in,focus when using that-.top..  ()r  if stop.{22 is used, objects from  &
     H  4 yards up  to infirrity would be in  focus. Always set centre line on   {t
            ff   FJcussing lever oppoiit"  <iistances for sharp focub of principal objects,  S
             fi  and by referring io depth of  field scale it  will be seen, what stop  it is   {F
      &   n"""...ty   to usJ to bring into focus other objects at different planes in   *
           -i;  front of, or behind, principal object as required.                       +
          -i'                                      S       -i'                                      s
    .*,.+-F  THE  IRIS DIAPHRAGM  OR LENS APERTURE,.                S      A     A scale will be found engraved inlrnediately above ihe l-ens, and the   .$
     &    Iris is set by moving pin along circular slot to f number required.                     **
         -i;S*To ct.osE cAMERA.                              S
       * *
             rii         First  close up folding  trinder.   Hold  Camera  with  back  downwards,      *
          ,*;  depress  spring cit"tr  let into Focussing plate irnmediately  below  shutter   +
             .tl'  box, when'the"front  will slide back to cioied  position inside Camera body.      f
           -f   Close up baseboard, and lock- - - - - by- J presslrreE       on !'wo top corners.                         *'
                  i s .                                                                                                                                                               t
      rtr*
      S" To  usE DARK sLIDES, FILM PACK ADAPTER,  etc., WITH   g          r*'                                                                                B'
         -t  CAMERA.                                                                         *
           f      The Film PackAdapter,ChangingBox and GraflexRoli Holderused S
     H   with  3j  x  2| and  nt'plate  Sibyls  is  of a deeper  register  than  the Dark     *
     H   Slides.  Therefore when  rrsiug either of the.e  it  is necessary to make an    -it
      S   adiLrstment in register of Camera.  To do this,  first lower baseboard and    *
      A     r'.'iIhrr'-t  :rt-!r'.'.'i::gtrcnt   tc  sliCe  lo:'r:'i.t'r  sci Focu:;sing  l::ve:'  io  IrrftnitS:    .*"
           fr.  Towards  the bacl< of  the baseboard  to the  centre, and  projecting  from    *
           -l;   underneath  the bronzed base, will be seen a German-Silve-r-.Spring.   Pull   $.
       +    this spring  away gently from  bron zed  base, and  still  holding  it_in  this    *
            -it   positibn,'Silu"r    bring f6cissiig   lever over towards two yards, and,releas-e German     *
       +          Spring." On  pus"hing Focussing  lever  bick   to  infinity    it  will  be      f
          *    noticed that-b.onred  base has moved                                                      b;rck exposing the  letters B. and F.      f                                               -lhe                                                                                in tlre                                                                          correct  register                                                                           is                                                now                                           Carnera                       on                           baseboard.            P. engraved-              f                                                                          S                                                   Box,                                                                   Roll                                                                   Holder.                                                                 or                        Pack                                Adapter, Charrging              for'"^               using'iilfi"  Fihn              f
              f                    N. and G. Ilouble  llook'Forrn  Metal Dark  Slirles are used   g
       g    with  the Camera,_a-Filrn""*            _Pack Adapt:r  can  be supplied  of the same  S
      T    register""'-i-n"liii[as thesep""r.slides,Aclapterand no adjttstmentforisBabynecessary.sibti camerais of the       *      T  same register as Dark Slides, and                                             ""t;ii;dno change is necessary.          Sr$.
      T      To change back register of Carnera for use with Dark Slides these S
      T   movernentr ir"  reuersed. First  set Focussing lever to two yards, pull     t
     H  German Silver Spring away frorn bronzed base, and still holciing it in this    -i;
       ,e  position push-This trocussinglever back to infinity and releaseGerman Silver    rii
            ;    spring.       brings the baseboard irack to Dark  Slide register, the   *
       .#   leiterJ D.S. showing irnrnediatelyin front of Focussingbase.                4.
        -ir                                                                        *
         * . * F
      +   To  usE  TELECENTRIC   oR  DALLoN   LENS  wtTH   3+ x  2h   *
                                                                                                                                     *'      +   and * PLATED J SIBYLL D L U
              *                                                                                                            +
            tit      Remove the Front  anci Back cells of normal lens fitted to Camera.         *
              Screw  horne the  Telecerttric or Dallon  Lens into shutter, until  the    *
           aluminium  foot  fitted to Lens, cornes hr;;    -r Top of capsta"n fitting under     *
           Lens.                                                                                                       *
                                                                                                                                                           *.*
        *****##******s***      ***ss**##**    #s******s'*
View original page 4Page 5 · Read text
4S                                                             -'-
 * #***SS##   S*S***   * S'**q'*.******.**S*s      *S*S***
 * *
  f       The Focussin! scales for Teleu^entricLens are engraved on German    f
 ?    Silver Runners at The side of baseboard-and .the Caniera is focussedby
 g   moving Focussing lever, but ignoring scale for normal lens.               $r*.
  ;       The Camera F'ront is put into the Film Pack Adapter  register when   fr.
  -i;   u-singTelecentric or Dallon Lens i,'om- Infinity to about six.yards, and is   -it
 .4- changed into the Dark Slide register when used for nearer objects.             *it
 # 1 *
 * * , .
  *i'  TO USE DALLON  LENS \VITH  BABY  SIBYL.                              *
 *                                                        '.ells
  *       Remove  the Front  and  Back         of normal   lens. fitted  to Came"a.    *
  *       Screwhome  the front part  of l'allon  Lens intoshutter  front, and  the   +
  *    small   cell  into  back  of  shutter.   The  Focussiitg  scale  for  Dallon   is   $.
  *    engraved-      on baseboard, in front  of movittg-istailboard.                                     {.
  *       The  angle  of view  of  Dallon  Lens    marked  on  finder   fitted   to    *
 +*s camera.                                                                           * s* *s..g  T T           RcfltqFrr.M MoDELS.         g
 * *
  f       The general in structiorrsgiven for Plate Models apply as well for the    f
       R:ll.              Models as regarcls"Folcing Finder, Shutter,bocussing, Depth  5 S             Tit*      of F-ield Scale, etc. $                                                           S
 * . *
 *  To oPEN cAMERA.                                   + * * , '
 g       Hold            Camera in left hand with handle at top, and baseboard to the    f             -Prd.i f     feoirt.             , cc.,r:e;rLgtFbutt,,,, *rfirr   i#t**n4:*;g*-*6-4ap?r.q-g+-€Glt*-g-          --
               top-which   releases baseboard-the   instructions fbr  Plat" $     li",   {ro.T                                                                        $: -l'  Models then apply.                                                        -F
 *r t *t r , *
    TO  INSER'I   SPOOL  INTO  CAMERA*{      plate and 3}  x  2} Models. S                                                                   S
                  back of Camera by p::essing.on two concealed buttons  let. in $    ^.^  l"Tove,                                                                  $ *    the,centreof   both  sides of Camera.   Pull  out  the two  bronzed  spring   ,+
 ,4.  buttons  at handle  end of Camera.  Drop spool  into chamber and  press    .*.
 -lr   buttons honre again, which hold spool  in- position.   Ilreal< seal  off ipool   S
 *    and gently  pull on black paper wound round spool until there is suffic-ient   *
 $.   to thread  in widest side of  slot  in ernpty reel  in  position at winder  end.   $"
 *    Carefully wind a few turns, making sure that the paper is properly wound    *
 t     into reel, and  is running  freely over the rollers and between  the centres  +
 ?    of metal guides.  Now replace bach of Canrera, taking care that the right   +
 T   end is towards the handle, and  lock into position  by pressing on back at     f
 E   the centre.  Open red window  irr bzrck of eamera,      slowlyiurn  winder      f
 g     until index fing-er shows through window followed  "rdshortly  by tte  figure 1.     f
 3   The  first   frl':r is now  in position   fo: exposure.   After    fii'st exposuie  has
     been            winder  until 2 appe arsiand  so on.                                              ff
H        _rnade,turn          has beenmade turn winder until the spool  o,
$   fr""J|;#;::;iX.j:xpfsure' r r r  L u v     r v u r .                                   S
 *T f *                                                                                                                                                                                                      *
* - *
***          NE\,[/][IAN & GUARDIA,  Ltd.,           ** ' *
*   17 8t t8, RATHBONE  pLACE, OXFORD STREET,  LONDON,  !1/.1  S
* *
**s*******s**********,*                        ***** ***** *******'**, *

Women's Printing Society, Limited, www.orphancameras.comtsrick Street, Piccadilly, W. 1.
View original page 5From the M. Butkus archive. Original publisher and archive notices are retained.
Check the model and edition against your equipment.
PDF verified 2026-10-10.