Film cameras
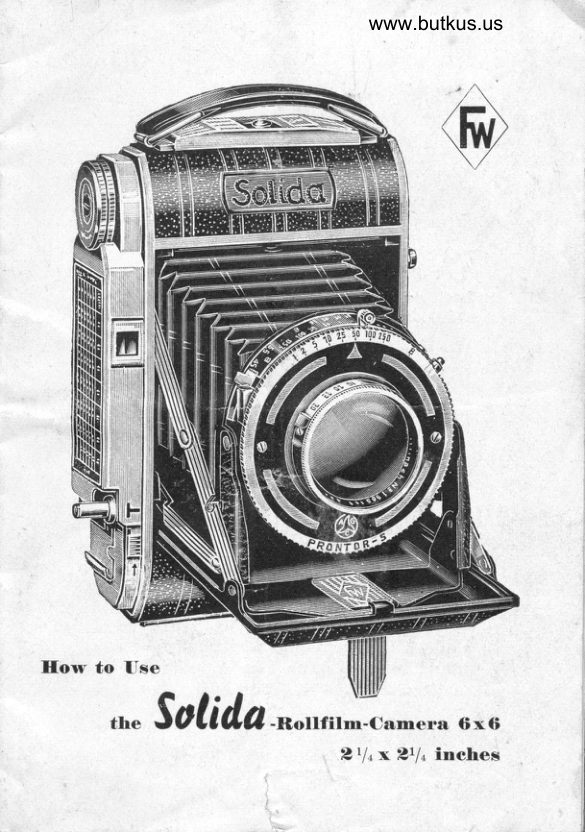
Soldia rollfilm 2 1/4 x 2 1/4 User manual
User manual for Soldia rollfilm 2 1/4 x 2 1/4. 17 pages in English. Read the original PDF, download or print a copy without registration.
17 pagesEnglish3.3 MB PDF
Loading your manual…Open PDF directly
Document details
- Brand
- Soldia
- Model / document
- Soldia rollfilm 2 1/4 x 2 1/4
- Document type
- User manual
- Language
- English
- Pages
- 17
- File size
- 3.3 MB
- Category
- Film cameras
- Document date
- Not specified in catalog
Search available document text
Find a term, then jump to its page in the original PDF. Image-only pages may not be searchable; check the PDF for exact wording and diagrams.
Page 2 · Read text
/U e thank you for the confidence you have
 bestowed on our products by acquiring the
 "Solidat' camera.
 For well-nigh 40 years we have been manu-
 facturing cameras, and our experience in
 camera construction gained over suctr a long
 period will not disappoint you.
 Furthermore, your dealer will be glad to assist
 you with his advisory service so that you will
 achieve beautiful pictures.
 Before you begin operating your camera,
 kindly read carefully the instructions while
 practising the several manipulations at leasure.
 This will save you many a disappointment and
 annoyance.
 Under no circumstances attempt to correct
 trouble yourself or by force. Almost invariably
 matters will thus be aggravated.


                                                                   i
                                                  l
View original page 2Page 3 · Read text
www.butkus.us

Londing the Ca,mera,
 The "Solida" is constructed for roll films B II or No. 120.
 Never use any other films.
Opening of Back of Camera:
Open the back (32) by pushing the button (30) in the
 direction of the arrow and fold the back (32) downwards
in its hinge.
                                                    3f
Inserting Film:
PuIl out the film winding
knob (28) and swing up-
ward the film spool car-
rier (321 that has the
shape of a half cylinder.
Place an empty spool in
the spool carrier (37),
hereby inserting the pin
on the left of the spool
caruier into the round
aperture of the spool.
The slotted side of the
spool must face the film
winding knob (28). Swing
out the half cylinder of
the lower film dramber
(34) and place a new film
in  it  in  suctr a way
that the pointed end of             Picture 2
View original page 3Page 5 · Read text
the protective paper (35) points to the upper spool. The
black side of the protective paper must face the lens.
Break the adhesive strip of the film, pull out somewhat
the beginning of the protective paper and swing the
spool carrier back into the spool chamber.
Bring up the pointed end of the protective paper (35)
into the wider slot (36) of the upper empty spool so that
it protrudes from the narrower slot. Fold the upper
spool carrier (3?) with the empty spool bacJr into the
spool chamber; for this purpose it is necessary to pull
out the film winding knob (28). Turn this film winding
knob (28) in the direction of the arrow until its catctt
clutctres the slot of the empty spool, hereby enabling
the film winding knob to spring back into its former
position.
Wind 2-3 layers of the protective paper onto the empty
spool (36), and mind that the film paper is running ab-
solutely straight without crumpling at the edges of
the spool. Now, fold up the back (32) with the lock (29)
catdring.
Wind the film farther until dots become visible in the
film window (33) and now wind cautiously until the
number 1 is appearing. Then the film is ready for the
first exposure. After taking a picture, it is advisable to
move the film at once to the next number.

Removing the Exposed Film:
After the last exposure turn the film winding knob (28)
until no more of the protective paper is visible through

4
View original page 5
Page 6 · Read text
www.butkus.us

 the film window. Then open the back (32), wind the film
 tight upon the spool and close it with the attached
 adhesive strip. Pull out the film winding knob (28),
 swing the spool carrier with the full spool upward and
 take thJfilm out-

Changing the Empty Spool:
Take the empty spool out of the lower film chamber and
insert it into the upper film chamber as described
above.
Proteetive Lid fbr Panchrorna,tic Filrns
The sensitiveness of the pan-
ckrromatic films is so great
that the intrusion of light for
hours or days through the red
film window might possibly
make the film hazy. Therefore
the camera is equipped with 38
a device to cover the film  33
window. This cover ought to
be kept shut all the time and


                                                                                                                                                       signed                                                                                                                                             by Mike                                                                                                                                                                   Butkusshould be opened merely in                                                               DigitallyDN: cn=Mike                                                                                                                                                                      Butkus,                                                                                                                                                        o=Butkus                                                                                                                                                            camera manuals,
                                                                                                                                                  ou=butkus.org, email=mike@butkus.org, c=USorder to control the numbers Mike Butkus Date: 2023.03.09 20:45:05 -05'00'
while moving the film  by
pushing upward the small button (38) on the back of
the camera.
View original page 6Page 7 · Read text
Opening of Calrnera
                         After pressing the button (31)
                     the base-board (21) will  fly
                          open. Pull down the base-board
                                 (21) until both struts (25) click
                          audibly into the notdr, or else
                          the base-board will not be fast
                  and the Iens is not in the
www.butkus.us               correct distance from the film.
                       This may cause unsharp pic-
                                 tures.

                  The Lenses
                           Focussing the lens:
   Turn the lens mount so that the stop hand (1) points to
 @ ; thus the camera is focussed for "infinity", that is
   for distances beyond 50 feet. For objects of a lesser
   distance the adjustment is effected by setting the mount
    of the front lens on the desired number of feet.
   Judge, or better measure, the distance between the
   object and the camera, and make the actual number
   of feet tally with the stop hand (1) on the lens. If the
    ascertained distance, for instance 7 feet, is not indicated
   on the mount, then set the front lens in suctr a way that
   the hand (1) rests between 6 and 8 feet; or, if possible,
   drange the distance of the object to some suetr distance
   as indicated on the front lens (6 resp. B feet).

    6
View original page 7Page 8 · Read text
www.butkus.us


         3
         2
            7


                            Picture 5
After the exposure, and before closing the camera,
always put the front lens back to go otherwise the
protruding Iens cannot be Lroused in the case. The strong
pressure of the closed base-board on the lens would
cause the bending of the lens carrier and unsharp pic-
tures would be the result.
View original page 8Page 9 · Read text
Ta,ble of Depth of Focus
In setting a definite distance, say 4 feet not only
exactly this point is sharp, but also a certain range
before and behind the 4 feet mark. This is the so-called
depthoffocus'Thesmallerthediaphragmopening,
the greater the depth of focus. On the finder case of the                    I
"Solida" there is a small table (26), indicating the                j
appropriate depth of focus for the various distances and    {
diaphragm apertures.

Shutters
Generally, the following shutters are being used in the
"Solida" cameras:
Vario        Speeds: B    Ll25    1/50    1/100 second,                           -      -       -             with flash synchronization
Pronto      Speeds: B-L125-1.150                                -11100 -Li200                second.
             with built-in self-timer and flash syn-
                chronization
Prontor-S  Speeds: B   1    Llz    ll5    llJO                           -    -      -      -       -
                Ll25 -  1/50 -  1/100 -  1/250 second,             with built-in seif-timer and flash syn-
                chronization
Compur-RapidSpeeds: B   1    ll2    1r5    1/10                           -    -      -      -       -
               Ll25 -  Ll50 -   1/100 -  U200 -   71400                second,
             with built-in self-timer.
I
View original page 9Page 10 · Read text
www.butkus.us

Setting of shutter speed.s:
The setting of the shutter speedS is effected by turning
the rimmed adjustment ring (B) until the indicator (5)
shows the desired speed.
For "8" (:  indicating time exposures :)  the shutter
stays open as long as the release is being pressed. ,,B"
is used for any exposure greater than those marked on
the shutter.


                                                                                                                                ,Cocking the Shutter:
Before any exposure the shutter must be cocked by
turning the tension-lever (6) to the right.
Blockage of Shutter:
All shutters have a blocking deviee against double ex-
posure; that is, the release will work only if the shutter
is cocked.

Setting of DiaphraErn
As a rule, the shutter boasts the following diaphragm
apertures (4):
f: 32   22    16    11   B    5.6    4      -           -                 -        f-: 2.9-the largest-   -2.9.opening             smallest,      is thef : 32
If the diaphragm is wide open at the moment of ex-
posure, there is more light falling on the film, there-
fore little time only may be used for exposing. With a
small opening, however, correspondingly less light
can penetrate, therefore we need more time for the
exposure.
View original page 10Page 11 · Read text
But, the greater the diaphragm aperture the less is the
 ,depth of focus, whereas the smaller diaphragms achieve
 .greater depths of focus. 'The     adjusting of the diaphragm is effected by moving
 the diaphragm indicator (B) onto the desired diaphragm
 values (4).
Self-Timer (I)ela,yed-Aetion Device)
The built-in self-timer (10) permits you to take your
own portrait without outside help, even when taking
group pictures the photographer may join the group.


                               www.butkus.us

10
View original page 11Page 12 · Read text
www.butkus.us

    Mode of Use: After setting the speed (2) and coching the
      shutter (6) the lever (10) on the lower side of the shutter
      is turned to the left until it stops. The release of the
      shutter is effected in the customary manner when the
e      delayed-action device will begin to work, releasing the
      shutter after about 10 seconds. The self-timer can be
1    used for any momentary speed from 7   t1250 seconds,                                               -     but never for "B".
    Mode of Use with Compur-Rapid: This shutter has the
      setting lever for the self-timer on the upper side close
      to the tension-Iever (6). The tension-Iever (6) is pulled
      right up to the stop, then the tiny button found there is
     pushed bach and the tension-lever (6) is farther cocked
      the full stretch freed in that manner.


       I

,}

 t


                                                                    11
View original page 12Page 13 · Read text
Flash Synchronizing
 The flash synchronizer
 respect. the connecting
 nipple (7) is on the right
 upper part of the shutter.
 In order to use them it
 is essential to insert ihe
cable of the flashlight
 device into the connect-
ing nipple (7) and to
screw the flash bulb into
the tripod sodret of the
camera, or to push it
into the holder (22) (see
picture). When the shut-
ter is released the syn-
drronized flash bulb is
automatically ignited.


                                                                      7Body Belea,se                           Picture
The release of the shutter is effected by easily and
evenly pressing upon the body release (24).
T-Equipment on the Camera
As the shutters equipped with a release blockage no
longer boast the double time T, we have furnished our
camera with this deviee. When using it, simply move
the small plate (23) in the direction of the arrow.

t2
View original page 13Page 14 · Read text
www.butkus.us
 l*
 l,'   If the time adjustment ring of the shutter is set on "B"
                                                  and l"il;  and the shutter is released, the latter will open up
   I    stay open as long as the plate (23) is not moved back
  I    into its old position opposite to the direction of the
 l    arrow.
                                 case oi very long ex-:    This device is made use of in     I    posure times, suctr as exposures at night, indoor ex-
     posures with insufficient light, flash pictures etc.
    Ifolder for Supplernentary Dquiprnent
    On the left hand side behind the body release (24) there
     is a hoider for suppiementary equipment (22), sudr as
     a flash bulb, range finder etc. These parts have standard
     guide plates to be pushed into the holder.

    I'ieu--Finder
   The camera is supplied with the well-tried optical
     telescop finder (27). When using this finder, bring the
     small aperture in its rear close to your eye. The view
     through the front Iens gives the picture area.


    ;

                                                                   13
View original page 14Page 15 · Read text
Picture 8
Taking Pietures
In order to actrieve perfect pictures  it is essential to
hold your camera right. Picture 8 shows the correct way
how to hold your camera while taking pictures.
Hold camera fast with both hands, bring finder close to
l4
View original page 15
Page 16 · Read text
www.butkus.us

 eye, and focus your object into the center of the picture
 area. Then press the body-release (24) slowly and gently
 right through. For pictures of longer exposure than 1/25
 second always use your tripod or something else for a
steady support.

Closing of Ca,rneras
Before closing your camera,
always turn the front lens
(9) back to @   If at all
possible, avoid shutter (6)
and self-tirner (10) being
cocked.
Pressure of both thumbs on
the two struts (25) folds up
the base-board (21) and the
Iens front retreats auto-
matically into the camera.

Adviees on lfetter Pictures
Always keep the lens clean, wiping it with the lens-
cloth only. Never use ordinary cloths. for they might
scratdr the lens.
Do not try to take pictures at distances under 3 feet, as
they will be unsharp.
For speeds longer than 1/25 second always use your
tripod or some other means of steady support. The
camera boasts sockets.

                                                              15
View original page 16Page 17 · Read text
under normal light conditions the most favourabre
 camera-setting is f :11 and 1/50 second. For fast moving
 objects take 1r100 second. For very fast movements as
 in sports etc. 1/200 resp. 1i250 or 1/400 sec. hereby of
 course the wider diaphragm 4 or 2.g.                          I
 On dull days open the diaphragm to f  : g or f  : b.6.
 On very bright days with sunshine on water or snow,
 reduce the diaphragm to f  : 22 or f:32.
 Of very good aid are the optical exposure meters as
 supplied by your dealer.
 If stress is laid on particularly exact exposures, or if
you must operate under difficult conditions regarding
 light and surroundings, the employment of an electrical
exposure meter is deemed advisable.


Dtuck: Julius Steeger  I Co. Bayfouth
View original page 17
From the M. Butkus archive. Original publisher and archive notices are retained.
Check the model and edition against your equipment.
PDF verified 2026-10-10.