Film cameras
Soligor Spot Sensor II User manual
User manual for Soligor Spot Sensor II. 13 pages in English. Read the original PDF, download or print a copy without registration.
13 pagesEnglish3.3 MB PDF
Loading your manual…Open PDF directly
Document details
- Brand
- Soligor
- Model / document
- Soligor Spot Sensor II
- Document type
- User manual
- Language
- English
- Pages
- 13
- File size
- 3.3 MB
- Category
- Film cameras
- Document date
- Not specified in catalog
Search available document text
Find a term, then jump to its page in the original PDF. Image-only pages may not be searchable; check the PDF for exact wording and diagrams.
Page 1 · Read text
www.butkus.us
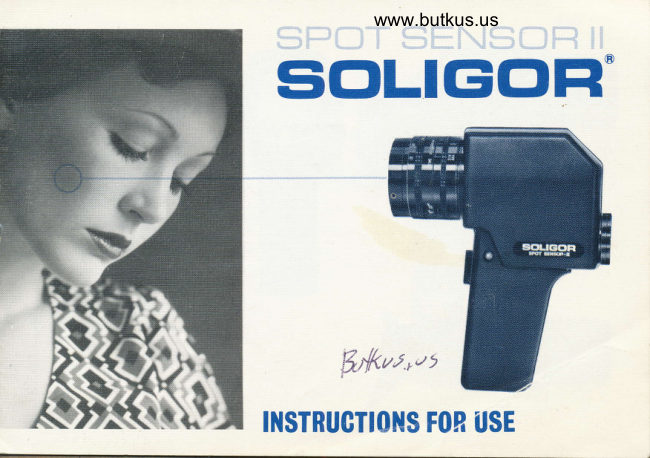
 siol.lGioFl'ii


                   o't9       ffius

I]{STRUGTIO}IS FOP USE
View original page 1Page 4 · Read text
www.butkus.us
  1  EV scale
 2  Shutterspeed scale
 3  Cine speed scale
 4  Lens aperture (f scale)
 5 ASA and DIN scale
 6  Battery compartment
 7  Socket for wriststrap
 8  Filmspeed mark
 9 EV computer mark
10  Eyepiece, w/d iopter adjustment
11  Operating switch (trigger)
12  Sensing spot, 1 degree.
13  Zero adiustment screw
14  lndicator needle
15  EV scale 2-18 (ASA 100)
16' .LED battery checker
17  Zero mark
View original page 4
Page 5 · Read text
What is the Soligor Spot Sensor II Meter?
The Soligor Spot Sensor II is a professional exposure meter which measures an ex-
tremely narrow, 1o, angte of incidence. Conventional exposure meters read an area
approximately equal to the area covered by the camera's normal lens. This results in an
 "average" reading. The result can be a poorly exposed photograph due to the exposure
meter erroneously reading an unimportant area such as a very bright object or dark back-
ground. The Soligor Spot Sensor II Meter enables the photographer to measure the
most important areas in the photograph to which he will key his exposure.
The Soligor Spot Sensor I[ Meter utilizes an ultra sensitive SPD (Silicon Photo Diode)
so that extremely low light exposure measurements may be made.
As an example of a situation requiring the use of a spot meter, let us assume that you
intend to photograph a person in bright sunlight on a beach or standing against a snowy
background. A standard me.ter would read the bright sands or snow and give you an
inaccurate reading causing an under-exposure of your prime subject. With the Soligor
Spot Sensor II Meter, however, you can read only the face of the person you are
photographing and achieve a perfect exposure. In addition, if the subject is made up of
very bright and dark areas you can read each individually and then average your exposure
to achieve the best results.
View original page 5
Page 6 · Read text
www.butkus.us
How does the Soligor Spot Sensor II work?
When the meter is pointed towards the subject, a beam of light enters the meter through
the lens, and is reflected on to a mirror. In the center of the mirror is a small part which
is half-coated, through which part of the light passes to activate the extrernely seniitive
Silicon Photo Diode (SPD). This SPD activates the needle, visible in the viewfinder. The
remaining light is reflected to the built-in penta-prism and is thus visible through the
eyepiece. To determine the exact "spot" in the center of the field of view, a small circular
mark is visible which should be poin{ed towards the sub.iect.
View original page 6Page 7 · Read text
How to operate the Soligor Spot Sensor II Meter.
 1. How to insert the battery
   Take off the cover of the battery case in the base of the
   grip (handle) and insert the battery. Make sure the battery
   is loaded correctly according to the polarity (*) (-)
    indication.
2. Battery checker and battery
   Battery checking can be done by the LED red light (t 0) on the top left side of the
  body grip (handle). lf the LED lights when pressing the switch button, the battery in
   use is in good condition.
  This spot meter utilizes one standardg volt 006P(Eveready 522 or Mallory MN1604
   type battery). lf the switch button (11) is not pressed, the battery is completely
   disconnected from the circuit.
      lf , after you have used the meter for a longtime, the lightemittingdiode (LED) does
   not light up, replace the battery.                                             '
3. Put the appropriate film speed (ASA or DIN) on the meter by turning the ASA/DIN
   scale (5) to the required position.
View original page 7Page 8 · Read text
www.butkus.us
4. Hold the meter body grip, pointing with your fore-finger to the switch button. View
   through the eyepiece, and accurately place the subject you are photographing in the
    light sensing circle in the center part of the viewfinder. Then, push the switch buttgn
   and read the number at the position where the needle stays still.
  Now, transfer the number you have read on the EV scale in the viewfinder to the EV
   ring on the lens barrel (l).The correct combinations of shutter speeds and lens
   openings will now be indicated on the scales of the lens barrel. You can select a
   suitable combination according to your photographic needs.

5. More effective light measuring can be obtained if it is done from the camera position.
  On the eyepiece of this meter, there is an eyesight diopter adjustment dqvice. By
   turning it, accurate focus can be obtained.


6. In cases where filters are to be used on the camera lens, the exposure reading should
  be made by holding the filter in front of the meter lens. This gives you the correct
   exposure, including any filter factors, automatically.


                                                   6
                                                                                 :'                         ---               .., .,,.-..,.'..,,.,. .,,-'.* -+'-;4ry.m;j*iE*##iii4{:::-r:::-i  .-:-+;.,.,-*,
View original page 8Page 9 · Read text
Zero adjustment
 lf the needle (14) does not return to the zero mark when the meter is not in use, adjust-
ment can be made by slowly turning the zero ad.iustment screw (13) to the right or left
 until the needle comes to a stop in the center of the zero mark


                                                                                                                                                                                                                                                                                        I Careand Storage                                                                                         {The Soligor Spot Sensor II exposure meter is precision engineered to give the very'
best results for many years. The all plastic body requires no special care, however, never
drop or bump the meter unnecessarily. lt should be treated as the fine optical and
electronic instrument  it is. Avoid storing the meter in places with extremes in temperature
or humidity. The lens should be kept clean and free of finger prints. lt is advisable to
remove the battery from the meter if you are not going to use it for some time.
View original page 9Page 10 · Read text
www.butkus.us

 The Soligor Spot Sensor II utilizes an ultra sensitive SPD (Silicon Photo Diode) and with
 its unique transistor electronic circuit, operation in extremely low light is much more
 accurate than with meters with Cds cells. The measurement range is very wide; from EV2-
 18 (ASA 100) in a single range. Simply by pushing the switch button, a steady measure-
 ment can be made; the meter is very simple in use. An LED (Light Emitting Diode)  is
 located on the side of the meter body and is so designed to light up for battery checking,
 when the switch is pressed.
The circuit voltage is 7.5 volt and the power source is a standard 9-volt 006P (Eveready
522 or Mallory MN1604) type battery. As it is controlled by a built-in constant voltage
device, the battery life is quite long. Depending on frequency of use, it can be used for
about one year to 18 months.
View original page 10
Page 11 · Read text
Specifications
 Angle of incidence:             1"
Angle of view, horizontal:     15"
Angle of view, vertical:       11"
 Viewfinder:                  Diopter adjustment system Pentaprism and condenser
 EV-range:                2-18 (ASA 100) in one range
ASA-range:                6-12,800 (DlN 9-42)
                                            min.Shutter speeds:              114000 - 30
Cine speeds:              8-18-32-64-128 fps
                                         F :128 Lens opening:                F:1 -
 Batteries:              1 pc 9 volt Dry battery Type 006P (Eveready 522 or
                            Mallory MN1604).
Measuring method:            Direct reading system                                -l00Lens:                mm f2.8, Fully coated.
Accessories
Soligor offers a complete range of accessoiies for your Soligor Spot Sensor I[.
Rubber lens hood: Soligor 43 mm Rubber Lens Hood
                                                             &Filters: Choose from a wide range of Soligor 43 mm filters fot black
        white and color films. Additional Soligor filters are also available for
        fluorescent light and polarizing.
View original page 11Page 13 · Read text
OTHER FAMOUS SOLIGOR PRODUCTS INCLUDE

   SOLIGOR INTERCHANGEABLE LENSES
   SOLIGOR ELECTRONIC FLASH EOUIPMENT
   SOLIGOR TELECONVERTERS
   SOLIGOR ENLARGING LENSES
   SOLIGOR BELLOWS
   SOLIGOR FILTERS
   SOLIGOR CASES & GADGET BAGS
   SOLIGOR EXPOSURE METERS


                   SOLIGOR CORPORATION OF JAPAN, C.P,O. BOX 2079,TOKYO 10O.91, JAPAN
                   AiC PHOTo INc.,  ,I 68 GLEN coVE RoAD, cARLE PLACE, NY11514, U.s.A.
                    AIC FOTOTECHNIK GMBH, 7 STUTTGART 81, POSTFACH 8101 26 W. GERMANY

                                                                     PRINTED IN JAPAN
View original page 13From the M. Butkus archive. Original publisher and archive notices are retained.
Check the model and edition against your equipment.
PDF verified 2026-10-10.