Film cameras
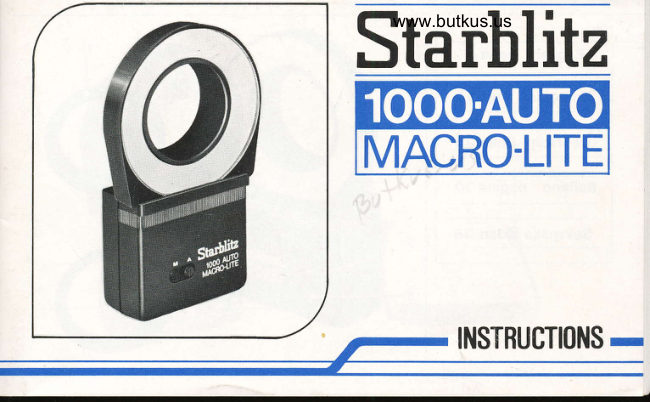
Starblitz 1000-Auto Macro-lite instructions User manual
User manual for Starblitz 1000-Auto Macro-lite instructions. 49 pages in English. Read the original PDF, download or print a copy without registration.
49 pagesEnglish2.4 MB PDF
Loading your manual…Open PDF directly
Document details
- Brand
- Starblitz
- Model / document
- Starblitz 1000-Auto Macro-lite instructions
- Document type
- User manual
- Language
- English
- Pages
- 49
- File size
- 2.4 MB
- Category
- Film cameras
- Document date
- Not specified in catalog
Search available document text
Find a term, then jump to its page in the original PDF. Image-only pages may not be searchable; check the PDF for exact wording and diagrams.
Page 5 · Read text
English page 4

 Frangais page 12

 Deutsch Selte 22

Italiano pagina 30
                            o
 Sevenska sidan 38


                                         *
View original page 5Page 7 · Read text
English

DESCRIPTION
 1. RING Flash Window       7. Test Button/Ready Light
 2. Auto Sensor Eye           8. Power "ON" Switch
 3. Auto/Manual Switch        9. P.C. cord Socket
 4. Battery Compartment Lid    10. P.C. Connecting Cord
 5. Series Vll Screw Ring (Male) 11. Adaptor Ring 49mm & 52mm
 6. Flash Guide Table

STARBLITZ 1000-Auto MACRO-LITE
o This MACRO-LITE  is automatic flash unit designed particularly for close-up photography
 and easy to use.
o In order to gain the maximum benefit from your MACRO-LITE please read the following
  instruction carefully.
o Please remember that the electronic flashguns work at high voltages, protect from damp
  conditions and do not dismantle-except by a qualified station.
View original page 7
Page 8 · Read text
BATTERY INSTALLATION                       www.butkus.us
1. Slide the battery compartment lid in the direction of the allow for about 2mm until resistance is felt.
  The lid is hinged and can now be opened outward.
2. Insert two "AA" size alkaline batteries into the compartment, taking care that the positive and
   negative terminals are correctly aligned as indicated.
3. We recommend alkaline batteries for use in this flashgun because of their longer life, and endurance
  to a wider temperature  range.
4. Clean the battery and compartment contacts at regular intervals. Remove the batteries  if the flashgun
   in not likely to be used for a long period.
HOW TO INSTALL THE MACRO-LITE TO CAMERA
1. Screw in one of the series Vll thread ring generally available at any camera store onto your camera
   lens, and then install the Lens Flash on  it.
2. The series Vll 49mm and 52mm thread rings are included in this unit.
3. Connect the synchrocord one end (male-plug) to the back of this unit (female-plug) and other end to
  your camera "X" contact, and then set your camera shutter speed to "X" setting or 1/60 sec. (Please
   refer your camera instruction booklet).
View original page 8
Page 9 · Read text
OPERATION
 1. Set your camera ASA speed in accordance with your film in use.
2. Push the "ON" switch button. Green indicator lamp will light up indicating "power on". When fully
   charged, the red ready light lamp will blink indicating the unit is ready for operation.
3. Test the unit by depressing the test button located on the back of the uni.t.
4. After operation, the unit will automatically recycle and when fully charged, the red ready lamp will
  again blink indicating the unit is now ready for further operation.
5. After fully charged and unit is left for longer period without use, the green light will automatically
  turn off, however, as long as the red ready lamp blinking, the unit is always ready to use.

AUTOMATIC USE
1. Set the "A" (auto)/"M" (manual) switch to "A" position.
2. lt you are using ASA100 film speed, set your camera aperture to F5.6. In this case, automatic
  operation range is 30-95 cm (1-3.1 feet).
3. lf you are using other'than ASA1 00 film speed, please refer F setting guide table printed on the back
   of the unit for proper setting.
MANUAL USE                              f/fus't/5
1. Set the "A" (auto)/"M" (manual) switch to "M" position..
2. When in manual use, set the F setting in accordance with the F exposure guide table printed on the
  back of the unit (Focal length 50mm only).
View original page 9
Page 10 · Read text
3. When you wish to determine accurate distance or you with www.butkus.usto use macro lens, please refer and  determine the F setting from the guide tables in this booklet.

PRECAUTIONS
1. Should the unit fail to operate for any reason other than depleted batteries please refer to qualified
  service personnel. A high voltage capacitor in incorporated in the unit.
2. Remove the bdtteries  if the unit is not in use for any period exceeding say 2 or 3 weeks.
3. Keep the unit dry and store in a moisture-free environment.
4. When photographing outdoors or in a large room or hall where are no effective reflecting surface
  nearby, it is necessary to set the camera lens at a winder aperture than that indicated in the exposure
  table (1 or 2 f stops).
5. Readylight.  lf the ready-light remains on after the unit has been switched off, no harm results from
   leaving the charge to gradually disperse or to discharge by pressing the open  f lash button. However,
  to preserve battery life, it is preferable not to discharge the unit.
6. Close-up photography. With extension tubes or bellows, the extra exposure for close working is best
  determined by reference to the factors provided with the extension tubes or the approximate scale of
  reproduction with bellows.
  The exposure factor:(1+scale)2. Thus, at a scale of 1:1, for example, the exposure factor is 4X and
  the lens aperture should be opened two stops.
View original page 10
Page 11 · Read text
SPECIFICATIONS
                          (ASA 100 in meter)i     Guide number:    5I      Recycling time:       10sec. with alkaline batteries
      Number of flashes:  120 with alkaline batteriesiI     Angle of coverage: 80o
      Auto setting:         F5.6 (ASA 100 in meter)
      Auto effective range: 30-95cm (1-3.1feet)
      Automatic power off:  Green lamp turns off when orafterfully charged
      Ready lamp:        Red ready lamp blinks when fully charged
       Applicable lens:     The focal length more than 50mm
       Flash rotation:      360" rotation possible
      Power source:     Two AA size alkaline batteries    Dimensions:      150 X 90 'x 36mm
       Weight:              2009 without batteries
   o Because we continually strive to improve our products, we may change specifications
      without prior notice
View original page 11Page 15 · Read text
Frangais

NOMENCLATURE
 1. Reflecteur du flash annulaire
 2. Cellule au Silicium
 3. Connecteur MANUEL/AUTOMATIQUE
 4. Couvercle du logement des Piles
 5. Pas de vis male pour adaptation bagues serie Vll
 6. Tableau nombre-guide
 7. Bouton d'open flash/lampe temoin de charge
 B. Commutateur de mise en marche                                                    P'//*A-vt 9. Jack pour cordon de synchronisation
10. Cordon de synchronisation
11. Adaptateurs s6rie Vll diamdtre 49 et 52mm fournis d'origine.
View original page 15
Page 16 · Read text
STARBLITZ MACROLITE 1OOO AUTO              www.butkus.us
o Le flash MACROLITE STARBLITZ a 6t6 tout specialement 6tudi6 pour une utilisation trds
  facile dans le cadre de la macro-photo.
o Pour obtenir les meilleurs r6sultats oossibles avec votre MACROLITE nous vous
  recommandons de lire attentivement les instructions suivantes.
oSe rappeler que les flashes 6lectroniques fonctionnent sous hauts voltages.  ll convient de
  les mettre d I'abri de I'humidit6 et de ne pas les d6monter en dehors des ateliers qualifi6s.
MISE EN PLACE DES PILES
1. Faire glisser le couvercle du logement des piles dans la direction indiqu6e par la fldche d'environ
  2mm, jusqu'ir ce qu'une resistance se fasse. sentir et relever le couvercle.
2. Mettre en place 2 piles alcalines du type UCAR E 91 ou equivalent, dans le logement, en veillant d
   respecter les polarit6s comme indique par les repdres.
3. Les piles alcalines sont recommand6es pour ce type de flash, en raison de leur dur6e de vie plus
  lonque et.dg.leur...meilleur fonctionnement sous des temperatures trds vari6es.
4. Netioyer"lB*Sontacts du flash et ceux des piles d intervalles reguliers. Retirer les piles du flash si
   celui-ci ne doit pas etre utilise pendant un certain temps.
View original page 16
Page 17 · Read text
MISE EN PLACE DU MACROLITE SUR L'APPAREIL
    1. Visser un adaptateur s6rie Vll (disponible dans la quasi totalite des points de vente photo) sur le
      filetage de I'objectif, puis mettre en place le flash.
   2. Des adaptateurs serie Vll de diamdtre 49 et 52mm sont fournis d'origine avec le flash.
   3. Relier I'extremit6 mAle du cordon de synchronisation au jack femelle situe d l'arriere du flash, et
      l'autre extremit6 du cordon A la prise flash marquee 'X' de I'appareil photo, puis regler la vitesse
     d'obturation de I'appareil sur le symbole'X'ou le 1/606me de seconde (se r6f6rer au mode d'emploi
    de I'appareil).

  PRISE DE VUE
   1. Afficher sur I'appareil photo la sensibilit6 du film utilise.
  2. Appuyer sur le bouton de mise en marche (ON). La lampe verte t6moin de charge s'allume. Lorsque
      le condensateur est compldtement charge, la lampe rouge temoin se met A clignoter, indiquant que le
     flash est pret pour la prise de vue.
  3. V6rifier le fonctionnement en appuyant sur le bouton test situe d I'arridre de I'appareil.
  4. Aprds ce declenchement,  le flash se mettra en charge automatiquement  et lorsqu'il sera en charge, la
    lampe rouge t6moin de charge se remettra d clignoter pour signaler que le flash est a nouveau pret i     6tre utilis6.
  5. Lorsque le flash est charg6 et qu'il est rest6 pendant un certain temps sans utilisation, la lampe verte
     s'6teint automatiquement;  cependant, aussi longtemps que la lampe rouge t6moin de charge clignote,
     le flash est prOt a 6tre utilis6.

14
View original page 17Page 18 · Read text
UTILISATION EN MODE AUTOMATIQUE           www.butkus.us
1. Afficher la position "A" sur le commutateur Manuel/A situe sur I'avant du flash.
2. Si vous utlilisez un film de sensibilite 100 ASA, regler le diaphragme sur la position f 5.6. Dans ce
   cas, le flash fonctionne automatiquement  pour des distances appareil-sujet  allant de 30 it 95cm.
3. En cas d'utilisation d'un film de sensibilite differente de 100 ASA, se r6f6rer au tableau guide des
  diaphragmes, figurant d l'arridre de l'appareil, pour connaitre le diaphragme correspondant.
UTILISATION EN MODE MANUEL
'1. Positionner  le commutateur frontal (AUTO/MANUEL)  sur la position "M".
2. Dans le cadre d'une utilisation manuelle, r6gler le diaphragme selon les indications du tableau-guide
   situe d I'arridre du flash (ces indications sont donnees pour une focale utilisee de 50mm).
3. Pour d6terminer la distance exacte A retenir pour la prise de vue ou en cas d'utilisation d'un objectif
  macro, se reporter aux tableaux indicatifs figurant dans ce manuel.
View original page 18
Page 20 · Read text
www.butkus.usCARACTERISTIQUES
Nombre guide:          5 pour 100 ASA en mdtres
Temps de recyclage:       10 secondes avec utilisation de piles alcalines
Nombre d'eclairs:          120 avec utilisation de piles alcalines
Angle d'eclairement:         800
Fonctionnement en
  automatique:             avec diaphragme 5.6 pour film de 100 ASA
Distance pour fonctionnement
  en automatique:         de 30 6 95cm
Dispositif d'arret              la lampe verte t6moin de mise sous tension
  automatique temporis6:       s'6teint automatiquement lorsque le flash est
                             charge
Lampe t6moin de charge:    la lampe rouge temoin de charge clignote
                              lorsque le flash est pret a I'emploi
Objectifs utilisables:         distance focale minimum 50 mm
Positionnement du flash:     rotation possible de 360o

                                                                                                                17
View original page 20Page 21 · Read text
Alimentation:        2 piles alcalines de type UCAR E 91 ou equiva-
                                     lent
Dimensions:         150 X 90 x 36mm
Poids:               200 grammes sans les piles
o Du fait que nous nous efforgons de toujours am6liorer nos produits, certaines caract6-
  ristiques peuvent 6tre modifi6es sans preavis.
View original page 21Page 25 · Read text
Deutsch

BESCHREIBUNG DER TEILE
 1. Ringblitzrohre
 2. MeBauge (Sensor)
 3. Automatic-/Manuell-Umschalter
 4. Batteriefachdeckel
 5. AnschluBgewinde f. Serie Vll-Ring
 6. Entfernungstabelle
 7. Bereitschaftsanzeige/Handauslosung
 8. Schalter Aus/Ein
 9. Synchrokontakt fur Kabel
10. Verbindungskabel
11. Serie Vll-Ringe 49 + 52mm
View original page 25
Page 26 · Read text
www.butkus.us DIE ANWENDUNG DES STARBLITZ IOOO.AUTO MACRO.LITE
 Das Starblitz MACRO-LITE ist ein c.omputergesteuertes  Ringblitzgerdt ftir den Makro- bereich. Es ist leicht zu bedienen, klein dnd v5n qerinqem Ce-wicnt]
Zur Erzielun-g bester Aufnahmeergebnisse  lesen S'ie oiite oie nachstehenden Gebrauchs- hinweise aufmerksam durch.
 Bitte beachten Sie, daB Elektronenblitzgerdte mit sehr hohen Spannungen arbeiten.
 Schuitzen Sie das Gerdt vor Beschddigurigen und ribertassen $ie ii-epaiii,iren in jeoem Falle einer qualifizierten Werkstatt.
EINSETZEN DER BATTERIEN
1. Schieben Sie den Batteriefachdeckel  in Pfeilrichtung und klappen Sie ihn auf.
2. Setzen sie zwei Batterien des Typs "AA" ein, wobei sie bitte auf richtige polaritdt achten wollen. lm
   Batteriefach linden Sie die entsprechenden  Hinweise.
3' Bitte verwenden Sie nach Moglichkeit Alkali-Mangan-Zellen,  die eine grciBere Temperaturbestdndigkeit
  und hcihere Auslaufsicherheit bieten.
4' Bei ldngerem Nichtgebrauch des Gerdtes entnehmen Sie bitte die Batterien. Die Batteriekontakte
   sollten sie in regelmdBigen Abstdnden prrlfen und gegenenenfalls  reinigen.


                                                                                               23
View original page 26Page 27 · Read text
ANSETZEN DES GERATES AN DIE KAMERA
  1.Zum Adaptieren des MACRO-LITE an die Kamera benotigen Sie einen Serie Vll-Ring mit dem
     Filtergewinde des Objektives. Schrauben Sie den Ring an das Blitzgerdt (5) und dann die
     Gesamtkombination  auf das Kameraobjektiv.
   2. Serie Vll-Ringe mit 49 und 52mm Filtergewinde werden zum MACRO-LITE serienmdBig mitgeliefert.
   3. Das beigefLigte Blitzkabel dient zur Synchronisation mit der Kamera. Verbinden Sie das Blitzgerdt
    durch Einstecken des Kabels in Buchse 9 und in den Kamera-Yynchrokontakt.  Bitte stellen Sie an der
    Kamera die richtige Belichtungszeit (normalerweise bezeichnet mit "X" bzw. rot gekennzeichnete
     Ziet) ein. lm Zweifelsfalle sehen Sie bitte in der Gebrauchsanweisung der Kamera nach.
  DIE AUFNAHME
   1. Prtifen Sie, ob die Filmempfindlichkeitseinstellung an der Kamera mit der Empfindlichkeit des
    verwendeten Filmmaterials  r.ibereinstimmt
   2. Drtiken Sie zum Einschalten des Gerates auf den Knopf "PUSH ON". Ein grrines Licht zeigt an, daB
    das Ger:dt arbeitet, sobald das Gerdt blitzbereit ist, blinkt ein rotes Licht im Fenster "READY".
   3. Sie kcjnnen das Gerdt auf Funktion prr,ifen, indem Sie nun auf das als Prr,ifknopf ausgebildete Fenster
    "READY" drucken.
   4. Nach Auslosen durch den Testknopf bzw. durch die Kamera ladt das Gerdt automatisch nach. Das
     rote Blinkliicht zeigt wiederum die Blitzbereitschft fLir die ndchste Aufnahme  an.
   5. Wird das Gerdt in voll aufgeladenem Zustand lengere Zeit nicht ausgeldrst, schaltet sich der StromfluB
    automatisch ab. Das rote Licht blinkt noch einige Zeit nach und erlischt dann. Das Gerdt ist
     abgeschaltet.
24
View original page 27Page 28 · Read text
ilr  Drticken Sie bei erloschenem grr.inen Licht und bei noch blinkenderwww.butkus.usBereitschaftsanzeige auf den
  Testknopf, schaltet sich das Gerdt automatisch wieder ein.


AUTOMATISCHE COMPUTERSTEUERU NG
'1 . Das eingebaute MeBauge (Sensor) des Gerdtes steuert die Lichtabgabe vollautomatisch im Bereich
  von 30 bis 95cm. Sie stellen lediglich den Schieber 3 auf "A" und lesen auf der Tabelle an der
   Gerdterr.ickseite die Arbeitsblende  ab, die frir die verwendete Filmempfindlichkeit in der roten Spalte
  angegeben  ist.
2. Die gebrAuchlichste Filmemepfindlichkeit  100 ASA/21 DIN ergibt z.B. die Blende 5,6. Bei Verwendung
  des Diafilms EKTACHROME 200 kommen Sie zur Blende 8.
  Diese Angaben gelten frir Objektiv mit 50-60mm Brennweite.
MANUELLE EINSTELLUNG
  Stellen Sie de Schieber 3 auf "M".
  Lesen Sie anhand der Tabelle auf der Gerdterr.ickseite ab, welche Blende zur jeweiligen Auf-
  nahmeentfernung am Objektiv lhrer Kamera einzustellen  ist.
  Andert sich der Aufnahmeabstand,  ist auch die Blende entsprechend zu korrigieren.                                          lil
3. Die Tabelle  gilt fur Normalbrennweiten von 50-60mm Brennweite. FUr andere Objektivbrennweiten
  benutzen Sie bitte die Einstelltabellen der vorliegenden Gebrauchsanweisung.
                                                                                                                                                                                                                                                                                                         lfft

                                                                                              25
View original page 28Page 29 · Read text
BESCHREIBUNG
  Leitzahl:               5 Q1 DIN/1OO ASA)
  Blitzfolge:                   ca. 10 Sekunden
 Anzahl der Blitze:          100 pro Batteriesatz Alkali/Mangan
  Ausleuchtwinkel:              800
  Automatikblende:            5,6 (21 DIN/100 ASA)
  Automatikbereich:          95-30cm
 Autom. Abschaltung:        Grrine Lampe frir Arbeitsbereitschaft erlischt
  Bereitschaftsanzeige:       Durch rote Blinklampe bei vollstdndiger Auf-
                             ladung
 Verwendbare Brennweiten:  50 mm und ldnger
  Energiequelle:          2 Batterien AA (Alkali-Mangan)
 Abmessugen:         150x90x36mm
  Gewicht:                 2209 ohne Batt.

 o Technische Anderungen vorbehalten.

26
View original page 29Page 33 · Read text
Italiano

IDENTIFICAZIONE DELLE PARTI
 1. Schermo flash
 2. Cellula fotosensibile
 3. lnterruttore Automatico/Manuale
 4. Vano batterie
 5. Anello a vite
 6. Scala sensibilita e diaframmi
 7. Test e Spia pronto flash
 8. Pulsante ON (acceso)
 9. attacco sincro
10. Cavetto sincro
11. Raccordo per fotocamere
View original page 33
Page 34 · Read text
STARBLITZ 1000-Auto MACRO-LITE                www.butkus.us
 . Questo flash Anulare-Automatico d particolarmente indicato per Macro-Fotogorafie.
 . Leggere attentamente le istruzioni per un corretto uso.
 o Usare con molta attenzione e non manomettere  il circuito elettrico.

INSERIMENTO BATTERIE
 1. Far scorrere e alzare il coperchio batterie.
 2. Inserire due batterie da 1,5 Volt del tipo Alkalino seguendo lo schema all'interno del vano stesso.
 3. Si raccomanda di usare batterie del tipo Alkalino per la loro maggiore  affidabilitir.
 4. Pulire  il vano batterie a intervalli di tempo regolari. Togliere le batterie se il flash non verrd adoperato
  per lunghi periodi.

FISSAGGIO FLASH ANULARE
1. Avvitare I'anello adattatore sulla ghiera porta filtri dell'obiettivo e awitare su quest'ultimo  il flash
   anutare.
2. Sono inclusi due anelli adattatori d49mm e d52mm.
3. Collegare  il cavetto sincro al flash e I'altra estremitd al contatto "X" della fotocamera.
  Selezionare  il tempo di posa corrispondente alla "X" (vedi libretto istruzioni fotocamera).
View original page 34
From the M. Butkus archive. Original publisher and archive notices are retained.
Check the model and edition against your equipment.
PDF verified 2026-10-10.