Film cameras
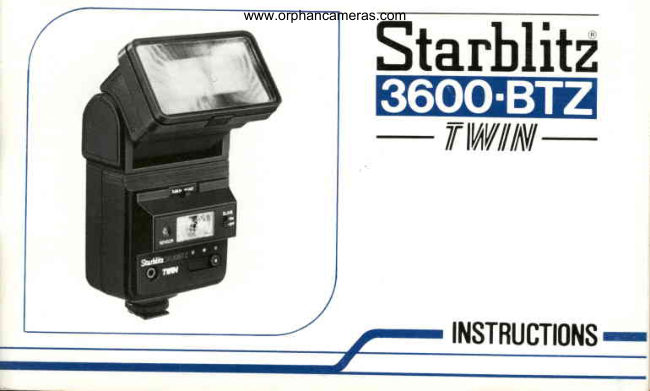
Starblitz 3600 BTZ Twin instructions User manual
User manual for Starblitz 3600 BTZ Twin instructions. 18 pages in German, Spanish, English. Read the original PDF, download or print a copy without registration.
18 pagesGerman, Spanish, English0.7 MB PDF
Loading your manual…Open PDF directly
Document details
- Brand
- Starblitz
- Model / document
- Starblitz 3600 BTZ Twin instructions
- Document type
- User manual
- Language
- German, Spanish, English
- Pages
- 18
- File size
- 0.7 MB
- Category
- Film cameras
- Document date
- Not specified in catalog
Search available document text
Find a term, then jump to its page in the original PDF. Image-only pages may not be searchable; check the PDF for exact wording and diagrams.
Page 8 · Read text
www.orphancameras.com
English

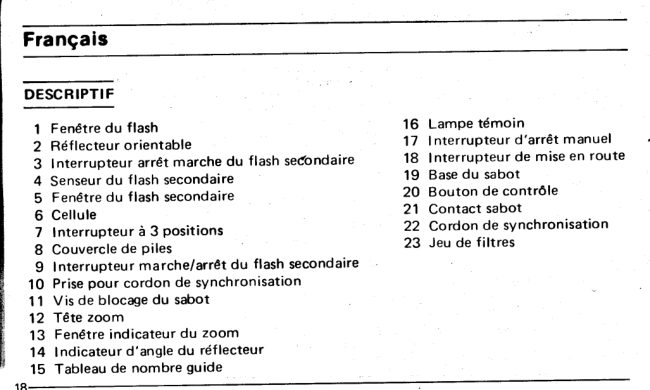
     PARTS DESCRTPTION

         1 Flash window                     16 Ready lamp
         2 Adjustable bounce head           17 Manual off switch
        3  Auxiliary flash oN/oFF  switch     1g power on switch
        4 Slave sensor                      19 Flash shoe base
        5  Auxiliary flash window           2O Test button
        6 Auto sensor eye                  21  Hot shoe contact
        7 .3 position switch                 22  p.C. connecting cord
        8  Battery lid                       23  Filter kit
        9 Slave ON/OFF switch
      10 P.C. cord socket               'l        1 Shoe lock screw
      12 Zoom head
       13 Zoom  indicator wir.rdow
      14 Flash bounce angle indicator
      15 Flash giulOedial scate
View original page 8Page 9 · Read text
www.orphancameras.com
SPECIFICATIONS

Guide Number:        1) Main Flash only (at Wide I position)
                      30 in meter ASA 1OO50 in feet ASA 25
                      36 in meter ASA 100 (1/2 stop increase)at normal position
                      42 in meter ASA 100 (1 stop increase)at telephoto position
                          2l Dual Flashes(Main + Aux.)
                           a) Main Flash
                         26 in meter ASA 100 43 in feet ASA 25 at wide I position
                           b) Aux. Flash
                           7 in meter ASA 100 12 in feet ASA 25
CoverageDistance     1) At Wide Position
(Main Flashonly)        F =2.8 setting      1.3 - 10.7 meters,4 - 35 feet (ASA10O)
Two auto positions:      F = 5.6 setting       1    -   5.3 meters,3 - 17 feet (ASA100)
                        2) At Normal Position
                      F = 2.8 setting       1.5 -  12.5 meters, 5 - 41 f eet (ASAI OO)
          '                                         '3 -  6'2meters'4 - 20feet(ASA100)
                    a, ffii#:ilsporitionl
                      F = 2.8 setting      1.8 - 15  meters,6 - 49 feet (ASA1O0)
                      F = 5.6 setting       1.5 -   7.5 meters, 5 - 25 feet (ASA100)
Colour Temperature:  Daylight (5700" Kelvin)
Angle of Coverage:   Main Flash  Wide I position Horizontal 60"'Vertical 45"
                             (35mm lens and up)
                                                         .    Normal position Horizontal 46" Vertical 34"
                            (Somm lensand up)
View original page 9Page 10 · Read text
www.orphancameras.com


                     Telephoto position Horizontal 31" Vertical 23"
                   (85mm lensand up)
                   Wide adopter (Wide il)
                          Horizontal 70" Vertical g!3" (2gmm lens and up)
                     Aux. flash Horizontal 55o Vertical 40"
 Flash Duration:       1/1000 sec. at manual setting
                      l/1000  -  1/30000 sec. at auto setting
Recyclingtime:       10 sec.at manual setting by Alkaline Battery
                       0.5 - 1O sec.at auto setting by Alkaline Battery
Power Source:        4 x 1.5V AA size Alkaline bafteries
Number of flashes:   120 flashesat manual by Alkaline battery
                 12O - 2OOOflashesat auto by Alkaline Battery
Special featu res:       1) Rapid recycling for motor drive camera
                       2)  Built in Slave
Weight:           36O9 without batteries
Dimension:          1 4 0 m m x 8 0 m m x 8 9 m m
View original page 10Page 11 · Read text
www.orphancameras.com
BATTERY INSTALLATION                contacts at  regular intervals. Remove the                                                   batteries if the unit is likely to be out of use
Ensure that  the "ON-OFF"  switch  is  in         for a long period.
"OFF"  position. Slide the battery compart-                          ATTACHMENTTO CAMERAment lid in the direction of the arrow until
the  lid becomes detached  (fig. 1 ). Insert           / SHUTTERSPEEDSETTING
four penlight (AA size) batteriestaking care      The flashunit has a "Hot  Shoe" Base pro-
that the positive and negative terminals are        vided. Insert the mounting foot  into the
corectly  aligned as indicated  in the com-       accessory shoe on the camera and tighten
partment (fig. 1)                              Lock Nut. A P.C. cord is supplied and this
Al kaline batteries are recommended because       should be used for other cameras to elec-                                                                                                                  'X'of  their  longer  life and endurance to  a         trically connect the   f lashunit to  the
wider temperature range. Moreover, their        contact socket of the camera.                                                                             'X'strength  is  far  superior to  that  of  con-         The     contact socket should always be
ventional  zinc-carbon batteries and  this       used. Any  shutter  speed can be set on
powerful flashunit understandably requires      cameras having interlens shutters although
considerableenergy.                               the  speed of  1l'l25th  second  is recom-
   The  thyristor  circuitry  is power-saving      mended.
and does allow quite a numberbf flashesto           Focal-plane shutter cameras will have an                                                     'X'shutter                                                    speed setting (usually 1/6oth orbe made from a single charge with micro-
scopic intervals between f lashes.                  1l125th second) and this should be set for
   N.B. Clean the battery and compartment       photographing in poor light conditions.
View original page 11
Page 13 · Read text
www.orphancameras.com   unit.  lf the test button is activated, the          Read  the adjacent  white     f igure on the
   unit  will  automatically turn  on and          in n e r  d isc  to  deter m ine  the cam er a  lens
   recharge again and will turn  off again        a p e rtu re se ttin g  ( E.G. F 5.6 for a distance of
   after approximately 40 seconds.                sa y  1 5 ft).  P le ase note  the'r eadings on  the
                                                       o u te r  d isc  a re the m axim um  distances al
                                                   which  photographs  taken  at the adjacent  F
FLASH OPERATION- ManualUse          sto p   re a d in g   will  be  cor r ectly  exposed.
                                             En su re th a t  p h otogr aphs  ar e not taken out
Set the knob on front  of  unit  t6 central         of   the   effective   range  as  they   will  be
position. The two white dots set adjacent        u nderexposed.
one another (Fig. 2) serve as an indicator
that flash is on manual setting.
   Set the rotating diaphragm disc on the    FLASH OPERATION- ComputerUse
back of the unit in such a position that the
speed of the film being used appear adjacent     The built-in photosensitivecell measuresthe
the yellow diamond mark - normal {E.G. ASA       light emanating from the subject and the
1 0 0 i n F i s . 3 l                                computor  automatically  determines  the
   Estimate  (or  measure  f or  greater ac-        cor'rect quantity of light required. There are
curacyl the camera to. subject distance and       two  settings for  computor use -   (a) for
then locate the nearest greater reading in        relatively close range where green framed
feet or meters on the top semicircle of the        circular window  is adjacent the white dot
diaphragm disc.                                      (Fig. 4) and (b) for greater distance where
View original page 13Page 14 · Read text
www.orphancameras.comthe red framed photocell is visible adjacent                                                        to  25ft corresponds to F2 setting. Should
the white mark (Fig. 5).                           the film speed (e.9. ASA 64) be such the
   With  the  diaphragm disc set at  the      green arrow    f alls between two  F  stop
appropriatefilm speed e.g. 100 ASA in Fig.      readingschoose the nearestyellow f igure to
5, one can choose either F'2.8 setting as       the right of the arrow (e.9.F5.6).
indicated by the green f igure or F 5.6 as
indicated by  the  red   f igure.
12It is the maximum distance specifieci in    PHOTOGRAPHIC E FFECTS BY
the green.Therefore for distancesof 1 2ft  or    DIRECT AND BOUNCE FLASH
less the green setting (a) should be selected
and the ca'meralens should be set at F2,B        a) Using direct   f lash, pictures have hard
stop.                                       shadows and brightly  lit subjects even
                                                            th rough correctly exposed.
For distancesin excess of  l2ftbut  lessthan        b) Using bounce flash, you can minimize
25ft the red setting (b) should be selected         hard shadows.
and the camera lens should be set at F5.6        c) Using twin  flash strobes, you  will get
stop.                                                  brighter shadows and still get the brilli-
   As can be seen in Fig. 7 when 25 ASA         ance of direct f lash.
Film is being used the green setting (a) for        d) When  using the  twin  flash (Main &
distances up  to  12ft corresponds to  F5.6           Slave), slide the f lash 1-2 switch for the
setting, while red setting (b) for distancesup          slave flash to "flash 2" position on  the
View original page 14Page 17 · Read text
www.orphancameras.com
                            DETACHEDOPERATION

  lighting, extra light for group photos, side            It  is possible to use the flashunit detached
  lighting for portraits, ETC. More than one       from  the camera for  flashlight reflection
   unit may be used at  the same time  for       from  vertical objects such as a wall. The
  large group photos, special effects or drama-        flashunit should be attached to the camera
   tically lighted portraits. You will be limited       by connecting the P.C. cord to the camera
                                                   'X'socket.                                                    The same apertures as those  only by your imagination when using the
   Starblizt 36OBTZ-TWIN    auto    sensor       specified for vertical bounce apply.
  electronic flash slaveunit.                                                lf possible for wall reflection the flash
                                                       unit should be attached to the camera and
                                                  the combination held so that the camera
                                           base is verticalto the ground.
                ^^                        detachedWarning:fromlf thethecamera,flashunitit shouldis beingalwaysused
                                            be held in such a way that  it  is at right
                                              angles(90") to the camera.lf  it is employed
                                                     whilst  in the sarne horizontal or vertical
                                               plane as the x cameraor at an obscureangle
                                                                                        it may be that the direct or reflectedlight
                                             does  not  provide  suff icient coverage to

1 6
View original page 17Related documents and language editions
From the M. Butkus archive. Original publisher and archive notices are retained.
Check the model and edition against your equipment.
PDF verified 2026-10-10.