Flashes & lighting
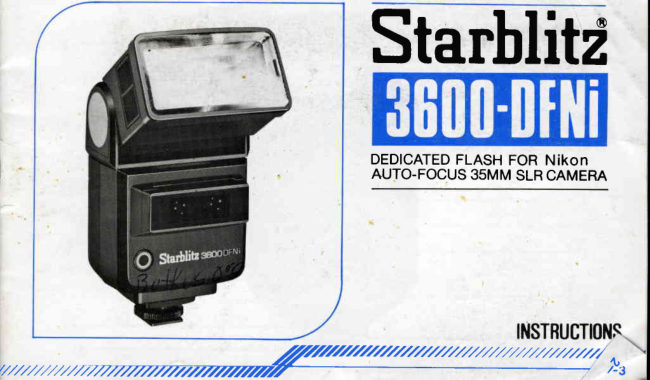
Starblitz 3600-DFNi Nikon AF flash unit User manual
User manual for Starblitz 3600-DFNi Nikon AF flash unit. 39 pages in English. Read the original PDF, download or print a copy without registration.
39 pagesEnglish1.6 MB PDF
Loading your manual…Open PDF directly
Document details
- Brand
- Nikon
- Model / document
- Starblitz 3600-DFNi Nikon AF flash unit
- Document type
- User manual
- Language
- English
- Pages
- 39
- File size
- 1.6 MB
- Category
- Flashes & lighting
- Document date
- Not specified in catalog
Search available document text
Find a term, then jump to its page in the original PDF. Image-only pages may not be searchable; check the PDF for exact wording and diagrams.
Page 6 · Read text
English

     PARTS DESCRIPTION
          1. Flash Window                                         20. LED for switch ON
          2. AdjustableSwivel Base                               21. Synchro Socket
          3. AF llluminator                                        22. Test Button
          4. Hot-shoe Contact
          5. Locking Wheel
          6. Zooming Flash Head
          7. Zooming Position Indicator
          8. Bounce Angle Indicator
          9. AdjustableBounce Head
        10. Maximum Coverage Distance Scale
        11. ApertureScale
        12. Knob for Film Speed and Aperture Change
        13. Film Speed Window
        14. Under Warning Lamp (Red LED)
        15. Ready Lamp (Green)
        16. Battery Chamber
        17. Mode/Power Level Selector
        18. Main Switch         '19.          Buzzer Switch
View original page 6Page 7 · Read text
Specifications
GuideNumber:            36 in meters/ 119 in feet (Full). 9 in meters/30 in feet (-4)
(rso100)                     (at Zoominghead positionof 'N') For furtherdetail, refer Table A
Angle of Coverage:        See Table A
Auto CoverageRange:      See Table B
ColourTemperature:         Daylight(5700"K)
FlashDuration:            1/1000- 1/50000sec. (Auto)
                         1/1000(Manual)
Charging Time:            O.2- 8 seconds(in Auto)
                          8 seconds(in Manual)
ChargingInhibitTime:       2 seconds
PowerSource:               4x'1 .5V AA-size (LR-6)Alkalinebatteries
Numberof Flashes:          Approx. 160 - 2000 flashes(in Auto)
                          Approx.160 flashes(in Manual)                                           -SpecialFeatures:              AuxiliaryAF illuminator
                          (Can be covered 1 - 10 meterswith 50mm lens)                                                   .                               Auto-offand One-touchON mechanism                                           -                                Flat-trackingcircuit                                     *                           Under-exposurewarningby buzzer (with ON/OFFswitch)
Dimensions:            132x79x88mm
Weight:                 3409 (withoutbattery)
OptionalAccessory:        Wide Adapter   Colour Filterset

                             www.orphancameras.com
View original page 7Page 8 · Read text
The Starblitz3600 DFN| is designedto couple with the Nikon F-501 Auto-focusSLR camera and is also used
 with the Nikon SLR cameras with TTL-auto flash function, such as Nikon FA, FE2, FG and F-301 models.
 The built-inAF illuminatorworks when the light conditionis nol enough for the camera's AF mechanism,allow-
 ing to shoot flash picture even in low light conditions.
 Please read this manual as well as camera's manual to use the flash unit extensively.

PREPARATION

1. Battery Loading
          loading batteries,be sure to turn off the main switch (18). !) Q9t9re
2) Slide and open the battery chamber cover (16) and insert tour AR size batteries.(Fig. 1)
3) When insertingbatteries,be sure the positive and negativeterminalsof batteriesaieioriectty aligned as
   indicatedin the battery chamber. (Fig. 2)
NOTE: Clean the battery chamber contacts at regular interval and remove batteriesif the un1 is likely to be
       out of use for a long period.
      Always change battery in four-pieceset.
       Ni-Cad battery may be used with the flash unit.
2. Attaching and Removing Ftash Unit
1) Before attachingor removingthe flash unit on or from the camera,be sure to turn off the main switch (1g).
2) To attach: slide the shoe into accessoryshoe of camera and tighten the locking wheel (5). 1fig. iy3) To remove: loosen the lockingwheel, grasp base of flash unit ind slide out.
View original page 8Page 10 · Read text
2. Mode/Manual Power Level Selector
Automaticflash control of this flash unit is made by TTL only, and by sliding the selector knob (17) to ,TTL',
the TTL auto flash function will work.
In manualmode, the output                     power can be controlledin two steps, full and one sixteenthof full power. By sliding                      'Full'thethe selectorknob                  to             full power can be fired, while only 1/16 of full power can be fired by sliiing tn6                     '-4'.selectorknob to       In later case, the guide numberof the flash unit will be 9 (lSO 100, in m'eters).'
This power control is useful when using motor-drivenflash photography.

3. TTL-Auto Coverage Range
The operating range changes with the aperture in use and zooming head position. Please refer to the following
table.
View original page 10
Page 14 · Read text
2) Maximum Distances
 Film speed (lSO)    25       SO       1OO       2Oo       400       1000
 Ratio               0.5        O.7         1           1.4          2         3 . 1 7
 For example:  lf the maxiry11 operating distance is 5.3 meters (12.s ft.) with ISO 100 fitm, it wifl be 10.6
meters (35 ft.) when using ISO 400 film.

4. Guide Scale
The guide scale shows the combinationsof the maximum\operatingdistance(10) and lens aperture(11) at thefilm   speed            in            the             window                         (13),                        based on                                     the                                  zooming                                                 head'positio-nof W1 and tne poweireiel selectorswitch                   'Full'position        (17)                 (Guide             of                     number                                     of 30                                              in                                        meters).
This combinationwill help you when selectingthe lens aperturewith A- and M-mode operations.With p-mode
operation,the maximum distance will be one just above the lens aperture of f/5.6
Also the maximum operating distance will change with zooming head position as follows:
         Zooming head position       Maximumoperatingdistance
           w2                 by 2O% shorterthan indicated
                N                  by 2O% longerthan indicated
                   T                  by 40% longerthan indicated
Example:  At the head positionof 'N' the maximumoperatingdistanceat f/4 is 9m (30ft.) (at tSO 100), white
           the scale indicates7.5 meters (25 ft.)
View original page 14Page 15 · Read text
5. Three Modes Flash Operation
The followingthree modes of operationcan be made with this flash unit, TTl-Program auto flash, TTL auto
flash and manual.

1) TTL-Programauto flash mode: (With Nikon F-301 and F-501)
   In this mode, the flash operation will couple to the Program function of the camera. The aperture will
   automaticallybe set with the film speed in use, and the flash unit controlsthe output power suitablefor the
   set aperture.
    ln this mode, the control of the depth-of-fieldcannot be made as is possible with ordinal TTL auto flash
  mode, but this is the most simple way for the Nikon F-301 and F-501 models.
   Please refer to the operationinstructionfor details and also refer to the instructionmanual of camera, as
   there may be some restrictionon the combinationof lenses.

2) TTL-auto flash mode:
   In this mode, lens aperture can freely be selected within the range, and the flash unit controlsthe output
   power suitablefor the selected.aperture.
  As the lens aperture can freely be selected,the depth-of-fieldcan be controlled- for maximum depth-of-
    field, select the minimum aperture in the TTL-auto range and for minimum depth-of-field,select the
  maximum aperture.

3) Manualflash mode:
    In this mode, lens aperture should be determinedby the distancefrom flash to the subject.This flash unR                                               '1l1   has two steps power control of full and   6 of full power.

                            www.orphancameras.com
View original page 15Page 16 · Read text
6. AF llluminator for Auto-focusing
 Wien shootingwith the Nikon F-501 autolocus SLR camera at low-contrastsubject in low light condition,the
 AF illuminator(3) on the flash unit works by pressing the shutter release button in halfway.
 Pleasenote, the AF illuminatorcan work only with the camera'sAF mode of 's'.
 The lamp in the illuminatorprojectslight on the subjectto activatecamera's autofocusmechanism.The effec-
 tive rangeof the illuminatorwith 50mm F1.8lens is about 1 to 1Ometers(3.3 to 33 feet).The effectiverange
 will be decreasedwhen using longer local length and slower lenses than above.
 7. Warning Signal (Under exposure)
 When the flash unit fired its maximum light and the exposureis not enough for the.lightingcondition,the warn-
 ing signal(14) on the flash unit blinks.Also when switchingon the buzzerswitch(19),th-ebuzzeron the flash
 unit also sounds.

 8. Test Bufton
 The test button (22) is providedon the hot shoe base and open flash can be made by pushingthe button.This
 button does not couple to the TTL auto mechanismand it is not possibleto check'correctexposure by pre-
 flashing ol the flash unit.

 9. Flat-tracking circuit
 This flash unit incorporatesthe circuit accuratelycorrespondto the signal from the camera. When taking flash
 picture in short flash-to-subjectdistance with larger aperture,the picture tends to be over-exposed.wiin tnis
 flat-trackingcircuit, correct exposure can be obtained even at f/2.g.

fz,rNKuLi t .  Drt
View original page 16
Page 17 · Read text
10. Auto-off and One touch On
   After about three minutesof last operationor power on, the yellow LED (20) just below the main switch turns
   off, indicatingthe power source is turn off for bafteryenergy saving.This circuitwill not operatewhile pressing
  shutterreleasebutton.When pressingthe shutterreleasebuttonagain or switchthe main switch OFF and ON,
  the power source is again in ON position.


                              www.orphancameras.com
t                                                                                                                                                                                                                                                                                                                                                                                                                                      , a "
View original page 17Page 18 · Read text
OPERATING INSTRUCTION
1. TTL-Program auto flash operation (with Nikon F-301 and F-501 cameras)
1) Set camera in either one of 'P' (Program)modes.
2) Set lens aperture to its minimum aperture.
3) Set mode/powerlevel selector switch on the flash unit to ,TTL'.
4) Slide main switchto 'ON', the yellowLED (20)just belowthe main switchlightson indicatingthe ftashunit
    is on position.
5) After       a few            seconds,                    ready                        lamp                                  (15) on the                                               flash                                                       unit                                                            lights on and the ready light in the viewfinderlights                                  '125'lights   on. Also           shutter               speed                    mark                                of                                    on                                                      in the                                                   viewfinder.
6) Afbr making sure the subject is within the TTL-auto range, press shutter release button in halfway. The
   operatingshutter speed will be illuminatedin the viewfinder.
7) Releasethe shutter by pressing the shutter release button all the way.
8)  lf the output power was not sufficient,the ready light in the viewfinderblinks and under warning LED (14)'
   bfinks.Also buzzer on the flash unit will sound when the buzzer is on and the red LED (14) Otint<s.
View original page 18Page 19 · Read text
2. TTL auto flash Operation (With Nikon FA, FG, FE2, F-301 and F-501 cameras)                     'A'1) Set camera to    (Aperturepriority)mode or select any shutter speed slower than X-synchof the camera
   in use.
2) Select the lens aperture as you like, by consultingTTL-auto coverage range, and set the lens aperture
   accordingly.
3) Follow 3) to 7) in case of TTl-program auto flash operation.Also 8) of above works.

3. Manual Flash Operation
1) Set shutter speed slower than X-synchrospeedand also set lens aperture by consultingflash-to-subject
   distance.
   Please rememberthe followingformula in determiningthe lens aperture:

   Guide Number:Flash-to-subjectdistancexLens aperture

2) Set mode/powerlevel selectorswitchof the flash unit to either'Full' or'-4'position.  lt is recommended             '-4'              positionwhen shooting with continueousmotor-drivenphotography.   to set
3) Follow4) to 5) and 7). By pressingthe shutter button in halfway,the operatingshutter speed will be illumi-
   nated in the viewfinder.
  The under exposure warning will not be operative in this manual mode.


                            www.orphancameras.com
View original page 19Page 20 · Read text
SPECIAL TECHNIQUES

BOUNCE PHOTOGRAPHY
The head of flash unit bouncesup to g0', and also swivelsto 180' to the left and 90" to the right. (Fig. 6).
Automaticbouncing flash photographycan be made with rrL-auto flash operation.
In bounce photography,following matter should be taken into consideration:
1) The flash-to-subjectdistance should be those of the flash-to-reflectingsurface plus reflectingsurface-to-
   subject.But dependingon the kind of reflectingsurface,considerableloss of the light shouldbe taken into
   consideration.
   Better to open the lens aperture to the maximum in automaticbounce shooting.
2) When using colour film, better to choose the white reflectingsurface only, otherwisethe picturewill be col-
   oured.
3) Take care the bouncing angle, so that the direct flash light will not fill into the picture area.

DAYLIGHT FILL-IN FLASH
When taking picturewith bright background,the main subjecttends to be under-exposed.In this case the bet-
ter resultcan be obtainedby using this fill-inflash technique.
Please note that the exposurewith flash units is depends only on the lens aperture,while the exposure with
ambient light is depends on the combinationof lens aperture and shutter speed.
View original page 20
Page 21 · Read text
Manual Daylight Flash

1) Set the shutter speed slower than X-synch speed of camera.
2) Measure the exposure of backgroundwith camera's exposure meter.
3i Setect the lens aperture correspondingto the shutter speed set and sei it accordinglyon the lens.
4) Take the flash-to-subjectdistance appropriateto the lens aperture set as above.                                                                                                                       '-4'      lf the flash{o-subjectdistanceappropriateto the set apertureis too long, set the flash unit in     position.
   With the above proceedures,the exposure ratio betweenthe backgroundand the subject will be 1:1. But
    in ordinaldaylightfill-inflash, the better result many be obtainedby decreasingthe light from the flash unit.
   In this case, the followingthree ways of controllingthe lights from the flash unit are possible.                                                                                                  1I
1) To close down the lens apertureby one to two steps and selectshutterspeed slower in one to two steps.
2) Or take longer flash-to-subjectdistance than one mentioned4) above.                                     '-4'3) Or set the power level at      position.

Daylight Flash with TTL-Auto
In this case, the light from the flash unit can be automaticallycontrolledwith the set lens aperture.
The operationsare as same as ordinal TTL-auto flash, but when the backgroundis too bright, it may not be
possibleto control the balance of exposure. In this case, manual daylightflash is recomended.


                             www.orphancameras.com
View original page 21Page 22 · Read text
SLOW SHUTTER.SPEED  SYNCHRONICATION

   This is to increasethe exposureon the background,while maintainingthe properexposureon the subject.
      It may be advisableto use this techniquewhen shooting portrait in dark room.
   The operationsare as same as daylightfill-inflash and the followingshould also be taken into consideration:

    1) When the ambient light is not sufficientfor hand-heldshooting, use tripod to secure the camera.
    2) Better result may be obtained by controllingthe backgroundexposure a little under.
  SYNCHRONIZATIONWITH MORTER.DRIVEN

   This flash unit was designed to synchronizewith camera with built-in motor-drivenmechanism as well as
            with                motor-driven   cameras                           accessory.                                The                                              range                                          coupling                                                                          is                                                          4                                                            frames                                                       about                                                                       per second.I                                                                                            '-4't                                                                          position    In this case,                better                       to use a                                         Alkaline                              fresh set of                                                 battery                                                         set                                                 and                                                      use                                                                                        of power level. Also better
    to have longer recyclingtime before shooting.
View original page 22Page 23 · Read text
Frangais

DESCRIPTIF
 1 . REFLECTEURDU FLASH                        14. LAMPE TEMOIN DE SOUS-EXPOSITION
 2. TETE ORIENTABLEHORIZONTALEMENT        (ROUGE)
 3. GENERATEURINFRAROUGE                   15. LAMPETEMOINDE CHARGE(VERTE)
   POUR AUTOFOCUS                           16. LOGEMENTDES PILES
 4. SABOT A CONTACTS                          17. SELECTEURDE NIVEAUDE PUISSANCE/
 5. MOLETTEDE FIXATION                  MODE
 6. REFLECTEURDE FLASH A ANGLE              18. INTERRUPTEURGENERAL(ON/OFF)
   VARTABLE(TETE ZOOM)                        19. COMMUTATEURDE L'INDICATEUR
 7. INDICATEURD'ANGLEDE COUVERTURE       SONORE
   DE FLASH                                    20. TEMOINDE MISE SOUS TENSION
 8. INDICATEURD'ANGLE D'INCLINAISON          21. PRISEPOUR CORDONSYNCHRO
 9. TETE ORIENTABLEVERTICALEMENT           22. BOUTONTEST
10. ECHELLEINDIQUANTLA PORTEE
   MAXIMUM
11. ECHELLEDES DIAPHRAGMES
12. CURSEURD'AFFICHAGEDE LA
   RAPIDITEDU FILM ET DES DIAPHRAGMES
13. FENETRED'AFFICHAGEDE LA
   RAPIDITEDU FILM          www.orphancameras.com
View original page 23
Page 24 · Read text
CARACTERISTIQUES
NOMBREGUIDE:                en position'Full'- 36 en mdtres
(pour100 ISO)                   en position'-4'  - I en mdtres
                                          (chiffresdonn6s pour la t6te zoom en positionnormale)
                                Pour plus d'information,se r6f6rerau tableauA.
ETENDUEPORTEEEN
AUTOMATIQUE:                    Voir tableau B
ANGLEDE COUVERTURE:          Voir tableauA
TEMPERATUREDE COULEUR:     Lumidredu jour (5700"K)
DUREEDE L'ECLAIR:             1/1000sec. -115000sec. (Auto)
                                1/1000sec. (manuel)
TEMPSDE RECYCLAGE:           0.2-8 sec.(Auto)
                                 8 sec (manuel)
SOURCED'ALIMENTATION:        par piles 1.5V- LR 6 ALA CALINE(TypeUCAR E91)
NOMBRED'ECLAIRS:              environ 160 - 2000 6clairs(Auto)
                                  environ160 6clairs(manuel)
CARACTERISTIQUESSPECIALES:      - G6n6rateurinfra-rougepour autofocus                                                                  .                                          Dispositifd'arr6t automatiqueavec remiseen marcne
                                     par poussorr
                                                                  .                                          Circuitd r6sponselin6raire                                                       -                               T6moin de port6e sonore (avec interrupteuer)
DIMENSIONS:               132x79x88mm
POIDS:                        360 gr (sanspiles)
ACCESSOIRESEN OPTION:         Adaptateurgran angle,jeux de filtrescolores.
View original page 24Page 25 · Read text
Le flash STARBLITZ3600 DFN| est congu pour s'adaptersur I'appareilR6flexautofocusNIKON F-501; ll peut
aussi s'adapter sur les autres R6flex NIKON dot6s'de la fonctionTTL au flash, tels que les NIKON FA, FE2,
FG et F-301.

PREPARATION
1. Mise en place des piles
 1) s'assurerque le commutateurprincipalest sur la positionan6t (18).
Zi taue coulisseret ouvrir le couvercledu logement des piles (16) et mettre en place 4 piles de type LR 6'
   Fig. 1.
3) s'issurer du respect des polarit6sen vous conformantau diagrammeinclus dans le logementdes piles.
   Fig.2.
Remirques: Nettoyer les contacts du logementdes piles d intervallesr6gulierset retirer les piles si le flash
doit ne pas 6tre utilis6 pour une longue dur6e.
Proc6dertoujoursau changementde toutes les piles en m6me temps. Les accus nickel/cadmiumpeuvent6tre
 utilis6sdans ce flash.

 2. Mise en place du flash
 1) avant de mettre en place le flash su I'appareil,mettre I'interrupteurprincipalsur la positionARRET (OFF)
   (18).
 2) pour la mise en place: glisser le sabot dans la griffe porte-accessoirede I'appareil et sener la molette de
    fixation (5). Fig. 3.
 3) pour enlever le flash: desserrer la molette de fixation, saisir le flash par sa base et le faire glisser hors de
    la griffe porte-accessoire.      www.orphancameras.com
View original page 25Page 26 · Read text
CARACTERISTIQUESSPECIFIQUESET FONCTIONNEMENT
1. T6te Zoom
La t6te zoom (6) permet la s6lectionde 4 angles d'6clairementen faisant glisser la tdte de flash. Fig. 4.
Le nombre guide varie an fonction de la position de la t6te de flash (voir tableau ci-dessous).
            (TABLEAU A) NOMBRE GUIDE ET ANGLE DE COUVERTURE
                      POUR 1OOISO EN METRES

                                  NOMBREGUIDE
       POSITIONDE LA TETE DE ZOOM                                                 PleinePuissance     - 4      angle de couverture
 w2(28\        Compatibleavec 28mm             25         6,25      Vertical       53'
                e t +                                                       Horizontal    70"
 w1 (35)        Compatibleavec 35mm            30          7,5      Vertical     45
                e t +                                                       Horizontal    60'
 N (50)         Compatibleavec 50mm             36                    I         Vertical       34"
                e t +                                                       Horizontal   46o
  r (85)         Compatibleavec 85mm            42         1 0 , 5     Vertical      23"
                e t +                                                        Horizontal   31'
 W2+          en positionW2                                                 Vertical      69"
  adaptateur    compatibleavec obj.                 1 5        3,75     Horizontal    87"
 grandangle   20mm et +
View original page 26Page 27 · Read text
ll n'est pas n6cessairede choisir une positionde t6te de zoom 6gale d la longueurfocale de I'objectifutilis6,
   et un angle de couverturesup6rieurd celui de I'objectifpeut donner de meilleursresultats.

   2. S6lecteur de Mode et de Puissance
  Le contrOlede ce flash en fonctionnementautomatiquen'est assur6 qu'en TTL. En glissant le s6lecteur(17)
   sur la positionTTL, on obtiendrale fonctionnementautomatique.
  En Mode Manuel,la puissancepeut ritre r6gl6esur deux positions"pleinepuissance"et (1/16Emede puis-
  sance".En glissantle s6lecteursur la positionFull,on obtient"la pleinepuissance",tandisque 1/16E.eseule-
  ment de la puissancetotale est 6mis lorsque le selecteur est sur la position -4; Dans ce dernier cas, le
  nombreguide du flash devient9 (pour 100 ISO en mdtre).
  Ce r6glage de puissanceest trds utile lorsque I'on utilise un mat6riel motoris6 eu flash.
   3. Etendue de port6e en fonctionnement automatique TTL
   L'6tendue de port6e change en fonction de I'ouverturedu diaphragmechoisi et de la positiondu r6glecteur     ,
  zoom.
  Se r6f6rer au tableau ci-joint.


                               www.orphancameras.com2 6
View original page 27Page 30 · Read text
REMARQUE:La distance minimum d'utilisationd6pend de la parallaxeentre l'objdctifet le flash; Les meil-
             leurs r6sultatsseront obtenus aux environs de 0,7 mdtres.
Lesport6esde fonctionnementen automatiquechangent en fonctionde la rapidit6du film de la fagon
suivante.

  1) distance minimum de fonctionnement:

                    rapidit6
               de tilm     25         50        100       200        400       1000
   diaphragme

     P-mode       0.7m       0.7m       0.7m      0.7m      0.7m      0.7m

   1 . 4          0.7m       1 m     1.4m      2m       2.8m      4m
   2              o.7        o.7         1         1 . 4          2        2.8
   2.8            0.7        0.7        o.7          1         1 . 4         2
   4              o.7        0.7        0.7         o.7                            'l        1 . 4
   5.6            o.7        o.7        0.7         0.7         o.7         1

 En utilisantun diaphragemplus ferm6 que F 5,6, la distance minimum sera de 0,70m.
View original page 30Page 31 · Read text
2) Pour les distancesmaximumde fonctionnement:multiplierles indicationsdu tableau pr6c6dentpar les fac-
   teurs suivants:

rapidit6du film: (lSO)         25         50        100      2OO      400       1000
facteur:                     0,5        0,7                   1 , 4         2         3 , 1 7

par exemple: si la distancemaximumde fonctionnementest de 5,3m avec un film de 100 lSO, elle deviendra
           10,60mlors de I'utilisationd'un film de 400 lSO.

4. Echelle guide
L'6chelleguide indique les combinaisonsentre la distancemaximumde fonctionnement(10) et I'ouverturede
I'objectif(11) en fonction de la rapiditede film affich6edans la fen6tre (13) sur la base d'une positionde l6te
zoom en W1 et d'un s6lecteurde puissance(17) sur la positionFull (nombreguide 30 en m).
Cette combinatisonaiderad choisir I'ouverturede'l'objectifen cas de fonctionnementAutomatiqueet Manuel.
En fonctionnementan mode Programme la distance maximum sera celle mentionn6eau-dessus du diap-
hragme F5,6.
De m6me, la distance maximum de fonctionnementchangerarenfonctiondu positionnementde la t6te zoom
de la fagon suivante:

Positionde la t6te zoom           distancede fonctionnementmaximum
PositionW2                   2Oo/oplus courte que la distanceindiqu6e
PositionN                20% plus longueque la distanceindiqu6e
PositionT                 40% plus longue que la distanceindiqu6e                             www.orphancameras.com
View original page 31From the M. Butkus archive. Original publisher and archive notices are retained.
Check the model and edition against your equipment.
PDF verified 2026-10-10.