Film cameras
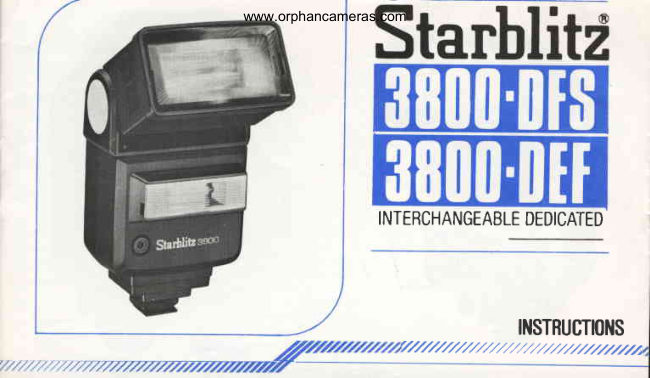
Starblitz 3800-DFS / 3800-DEF User manual
User manual for Starblitz 3800-DFS / 3800-DEF. 29 pages. Read the original PDF, download or print a copy without registration.
29 pagesOriginal document1.4 MB PDF
Loading your manual…Open PDF directly
Document details
- Brand
- Starblitz
- Model / document
- Starblitz 3800-DFS / 3800-DEF
- Document type
- User manual
- Language
- Check the original document
- Pages
- 29
- File size
- 1.4 MB
- Category
- Film cameras
- Document date
- Not specified in catalog
Search available document text
Find a term, then jump to its page in the original PDF. Image-only pages may not be searchable; check the PDF for exact wording and diagrams.
Page 7 · Read text
PARTS DESCRIPTION      www.orphancameras.com

 1. Main FlashWindow                       21'.Main/PowerRatioSelectorSwitch (3800DEF)
 2. AdjustableSwivelBase                      22. Switch ON Indicator(OrangeLED) (3800DFS)
 3. Slot for ReflectorPanel                  221Switch ON Indicator/PushButtonlor Switch
 4. AuxiliaryFlashWindow                   oN (3800DEF)
 5. Auto Sensor Eye                            23. Shoe Module ReleaseButton
 6. Zooming Head                             24. Shoe Module (optional- selectfor your 7. Windowfor Zooming Position                camera)                                 l
 8. BounceAngle Indicator                     25. Shoe LockingWheel
 9. AdjustableBounce Head                    26. Test Button (onlyfor Standardshoe-module)
10. Over ExposureWarningLED (Red)           27. SynchroCord Socket(only for Standard
11. ApertureWindow                          shoe-module)
12. DistanceScale                             28. BatteryChamberCover
13. Under ExposureWarningLED (Red)          29. Auto LED Light
14. PresetableAperturein Auto Mode Indicator   30. ReflectorPanel
15. LED Alley (Green)for FlashMeter
16. GuideScaleKnob
17. FilmSoeedWindow
18. Mode SelectorSwitch(AutoapertureSet Switch)
19. Twin FlashSwitch
20. Test Button/ReadyLamP
21. Main Switch (3800DFS)      :
View original page 7
Page 8 · Read text
SPECIFICATIONS          www.orphancameras.com
 GuideNumber               1) Main flash only - See TableA
 (rso/ASA 100)               2) Twin Flash(at Zooming head positionW1)
                                  a) Main flash 29 in meters/96in feet
                                  b) Auxiliaryflash 9 in meter/3Oin feet
 Auto CoverageRange       See Table B
 Angle of Coverage            1) Main Flashonly - See TableA
                              2)  AuxiliaryFlash V 40., H 60o
 ColourTemperature         Daylight(5,700"K)
 Flash Duration             1/1000sec. at manualsetting
                          1/1000- 1/50000sec. at auto setting
  3800DEF (Manual)       1/1000sec.at'FULL'
                          1/3000sec. at'-2'
                        1/13000sec.at'-4'
ChargingTime             11 sec.at manualsettingby Alkalinebattery and o.2 - 11 sec.at auto setting
ChargingInhibit Time        1.5- 2 seconds
Power Source              4 x 1.5VAA-size(LR-6)Atkatinebattery
                          Ni-Cad rechargeablebattery may be used.
Number of Flshes          Approx. 100 flashesat manualsettingby Alkalinebattery
                          Approx. 100 - 2,000flashesat auto settingby Alkalinebattery.
Dimensionsr'Weight       136 x 79 x 88 mm with Standardshoe 3800 DEF -370 gr.
 (w/std. shoe but w/o battery)                               DFS - 360 gr'
AccessoryIncluded          Reftectorpanerfor Soft rwin pno,ogr"pfilo
Optional Accessory        SD-Systemdedicationshoes,/Standardshoe with synchrocord.
                       Wide adaptor(equivalentto 20mm),/  Colour FilterKit.
View original page 8Page 10 · Read text
2.  Built-inFlashMeter                             www.orphancameras.com
   Both model havea built-in tlash meter which can be used in manualand auto oDerations
   The buill-in flash meter circuit measuresthe amount of li ght when the flash unit fires and displaysthe
   amount ot light fired with LED alley @  in apertureof 0.5 steps.Therefore,the circuit not only servesas
   aulo check function in ordinal units but also displayshow much light has over/underexposed,and the
   correct lensaperturesetting can ben obtained.
   Also in manualflash operation,you can see the correct aperturesetting with the test tiring.
   The followings are some examples of how the circuit works.
    Note: Auto apenure  set switch position. (at ISO/ASA 100 )  is as per sketch
o Auto mode, f5.6 preset aperture                  oAuto mode, f5.6 preset aperture
 Green LEDs light on up to 5.6, and this means the    Green LEDs light ojr up to 5.6 +1/2, and this means
  correct exposure is obtained                        over-exposure by  '/z aperture. This  is within the
                                                               latitutde  of                                                                                film                                                                and  correct                                                                              exposure  At the same time, green 'AUTO' LED lights on.                                                                            may be                                                               'AUTO'                                                            green                                                       obtained.                                                            LED lights                                                                                            on.
View original page 10Page 11 · Read text
aPerture                                                   oAuto                                                       mode,                 prese                                             t aPertureo                f5.6                                                                     15.6 Preset  Auto mode,                                                     'UNDER'                             www.orphancameras.com'AUTO'                                                                                   lights                                                                       on and this menas auto                                   LED                                            Red LED                            to 4 and green                light                on up      LEDs Green
 does not light on.                            mode shooting is not Possible.
  This means the  preset aperture of  f5.6  is not    Take shorter flash-to-subject distance or open the
 enough to cover the flash-to-subject distance         aperture to t2 in manual mode. Testing once may
  Either set the aperture att4 or take shorter flash-to-    be recommended.
  subject distance


           o Manual mode
         Green LEDs light on up to 4, and this means an
           aperture setting of  t4  will give you the correct
           exposure.
View original page 11Page 13 · Read text
Flat-tracking Circuil             www.orphancameras.com
This new circuit enables to use the flash unit in rather short distance at automatic flash operation. By
now, the minimum auto  f lash-to-sublect distance at f2.8 has been around 1.5 meters or 5 feet, and at the
shorter distance than this, the pictures tend to be over-exposed. This unit enables to have correct
exposure up to at about 0.7 meters or 2 teet in auto mode. The minimum distance, however, is restricted
because ol the parallax between angle of coverage of lens and that of the  f lash unit.
This f lat-tracking circuit operates in TTL-auto  f lash mode, as the circuit accurately responds to the signal
(TTL measuring signal), and correct exposure can be obtained. However, the operation of the circuit
depends f ully on the camera's signal, and  if the camera's signal is that of over exposure, the picture will
become over-exposeo.       please refer to your camera's instruction manual and follow  its instruction.
Solt Twin
The auxiliary flash head in the f ront also bounces up to 90 degrees and the unit provides slot for ref lector
panel (supplied with the unit as a standard accessory) for the auxiliary flash head. The effects of the
ordinal twin  llash (where the auxiliary flash head lixed  to  fire straight forward only)  in bounce
photography, are in taking portraits:
 1) To fill in the shadows under the nose and eyes.
 2) To eliminate colourings of the bounced light.
 3) To provide a catch light in the eyes'
 By using a reflector panel with tilting auxiliary flash, the light from the auxiliary flash becomes softer and
 this makes the picture more natural' Fig. 1
 Also the main and auxiliary  f lashes are interconnected  in one circuit and the combined  light is measured
 simultaneously by the unii sensor in case of automatic flash operation. Therefore, the correct exposure
 can be obtained even at close distance.
View original page 13
Page 14 · Read text
5.  E.S.T.(Energy Saving Test) Circutt                                                     - 3800 DEF model                            www.orphancameras.com   TheStarblitz3800DEFflashunit incorporatesthis circuit.In ordinalflashunits,when makingtestfiring,
    in manualmode or auto mode in long flash-to-subjectdistance,f ull power is fired and it takes long unt-il
    fully recharged,and some time lose the shutterchance.
   This-circuitpreventsthis situation.Whentest fired,onlyl/a of f ull power is fired and the computor  in
   the flash unit converts it to f ull for flash meter. Therefore,'this circuit enables to shoi-tenthe
   time of recycling and loss of proper shutter chance can be avoided.
6. VariablePower - 3800 DEF model
  The Starblitz3800DEF                   modelhas variablepowerratiocontrolmechanism.The mainswitch                     'OFF','FULL','-2'  hasfour positionsof                 and'-4'.
  Whensettingthe switchto'FULL' position,full powerwill be fired in manualmode and auto
  mode in long flash-to-subjectdistance.
  Whensetting.theswitchlo'-2' position,onlyl/t of f ull poweris fired.This means,in manual                                                                                                                                        'f  mode,               if the              flash-tq                                             is                               5.7m                                                  (1gft.),the correct                                                       aperture                                                                                    is f5.6                                                                                     in                                                                 ULL;UV                 ^syQ1e_c!distance                                                                                               '-2'  using              f ilm             of           speedISO/4SA                          100,and                                   the                                  zooming'head                                                     position                                                                              position,                                                                  bt Wt, but                                                                                  in
  the correct apertureis f2.8, opening the apertuie by- two steps.Also in auto mbde, the  maximumauto coveragedistancewill be 2.gm (9ft.).
  When settingthe switch                               lo'-4', only_%oof_full powerwill be fired.This meansit is necessary   to    open the.            aperturein four steps(f8 to f2, for example)and the maximumauto coverage  distance              is 1/a.
View original page 14Page 15 · Read text
www.orphancameras.com PREPARATIONS
  1. Attachlng the Interchangeablemodule
    To attachthe module,slide the modulealong the shoe guide of the flash unit. Fig. 2  . Be sure to check if
     the moduleis correctly attached.
    To detachthe module, pull the modulewhile liftingshoe-modulereleasebutton @ fig. S
  2.  Baltery Loadlng
     This flash unit is powered by four AA-size 1.5V batteries.When loading the battery, be sure to switch off
     the ON/OFFswitch@ and @'. Slideand open the batterychambercorer @ and insertfour batteriesFig.
     4 , taking care the positiveand negativeterminalsof batteriesare correctlyaligned as indicated in the'     batterychamber Fig. 5
N.B.  Cleanthe batteryand chambercontactsat regularintervals.Removethe battery,if the unit is likely to
      be out of use for a long period. When the unit is new or after it has not been used for a time, the
       capacitorwill take longerto charge.                                                                                                                \
      Always change battery in four-pieceset. Ni-Cad rechargeablebattery may be used with this flash
        unit.
  3.  Tesl Flash
    The test button @ is locatedat the bottom centreof back panelservingthe readylamp as well. Push the
     buttonfor test firing and for using built-inflash meter.p;g. 6
     For flash meter,pleasereferto'Built-in FlashMeter'article.
   o Some camerahas the mechanismwhich synchronizethe shutteronly afier the film counter comes to
     the first frame.
      . Flash-stopmechanism- Daylightshooting without flash operationis possiblewithout detachingthe
     flash unit from the camera.Simplyturn otf the-mainswitch (@ and @').
View original page 15Page 16 · Read text
4.   Attachlng             the                  unlt                       to camera                            www.orphancameras.com                          'hot-shoe'   This        flash              unit              employs                                  contact                                       system.Just slide the shoe into the accessoryshoe on the
   camera         and tighten the locking wheel @  Fig. 7. When attachingthe unit to the camera not having    'hot-shoe'             contact, use standard module with attachedsvnchro cord.
5.  Shutler rpeed eettlng
 1) Leaf-typelens shutter camera
   The flash unit will synchronizeat any shutter speed but in ordinal case, the shutter speed of 1/125sec.
  may be recommended.
 2) Focal-planeshutter camera
   The focal-planeshutter cameras have 'X'synchro shutter speed appropriatefor each camera.Set the
   shutterspeed in accordancewith the instructionmanual of the camera.
 3) Dedicatedcamera
   Select the camera'smode appropriateto dedicatedflash, and refer to your camerasmanual for proper
  mode setting.
  When the capacitoris fully charged,the shutter speed is automaticallyset at the proper shutterspeedfor
   the camera in use.
  Some camera has the feature of slow shutter speed synchronizationand in the event the shutter is set                   'X'   slower than                synchro Speed,the flash operation is made at the set shutter speed slower than 'X'
   synchro speed. Pleaseconsult with your camera'smanual as well as the tiableon the last page of this
   manual.
View original page 16
Page 17 · Read text
6. Zooming                     www.orphancameras.com
   The zooming head allows the selection of four preset lighting angles by just pulling out the main  f lash
   head. The guide number changes in relation to this head position. Fig. I
      It is not neceSsaryto select the zooming head position equal to the camera lens'focal length. The better
    results may be obtained by using the wider coverage angle of flash head than that of the lens. For
   example, suppose using the 50mm lens, W1 or W2 head position will be quite all right, when considering
    the parallax between flash and lens coverage angle. When taking picture at long llash-to-sub;ect
    distance, however, the maximum auto coverage distance will be suitable with the zooming head position
   equal to the focal length of the camera lens.
   Guide Number and Angle of Coverage Table (TABLE A)               (For Maln Flash onlY)

                  ZoomingHead Position      GuideNumber            Angle of Coverage
                                                         -2                                                                                    Vertical    53"
    w2 (28)   Compatiblew/28mm lens and longer   27/89   13.5/45  7/23     Horizontal  70"
                                                                                        Vertical     45"
    w1 (35)   Compatiblew/35mm lens and longer  32/105  16/53     8/26     Horizontal  600
                                                                                    Vertical    U"
    N (50)   Compatible w/50mm lens and longer 38/125  19/63    9.5/31   Horizontal  46"
                                                                                        Vertical     23"
        r  (85)   Compatiblew/85mm lens and longer   44/145  22/73  11/36    Horizontal  31"
                                                                                          69"                                                                                        Vertical                             (at W2       + Wide   W2                                Position)                                                16/53   8/26     4/13                                                                                       87"                                                                              Horizontal                                    lens and longer                    w/20mm               Compatible     AdaPtor
View original page 17Page 18 · Read text
guideThere       is a              scaleon                      the back                                  of the                                      flash                                                unit. The combination                                                                    of distance                                                            and aperture                                                                                                   in the window                            www.orphancameras.comis based                           position       on          the zooming                  head                                      of                       W1 compatible                                                 with 35mm lens,                                                        whichequals                                                                                    to the guide                                                                     number
of 32 (lSO/ASA100 in meters)or 105 (tSO/ASA100 in feet).Fig. 9
As the guide number changesin relationto the zooming head positionas above,and care should be taken
when shiftingthe zooming headfrom W1 position.

OPERATINGINSTRUCTION
Slidethe switch@and@'to ON position('FULL','-2' or '-4' positionas desiredin caseof 3800DEF model).
and the red LED@ and @' lightson indicatingthe flashunit is ON. Aftera few seconds,readylamp@ ligniiup for READYindication.Fig. 10
After about 90 seconds of last operation or power on, the red LED @ and @' goes out, as the unit
incorporatedAuto-Shut-Offcircuit for energysaving.During the time while the readylamp is on, the flash is
in operativecondition.But when not fire for long time, say more than ten minutes,it may be betterto make
this red LED lighton. This can be madeby switchingthe mainswitchto OFF and then to ON. In caseof the
3800DEF model,just push the cover of red LED.
Afterflash operation,the unit automaticallyrecyclesand red LED lights up again.
Whenf ully discharged,the unit stopschargingfor about two secondsand afterthis inhibittime,the flash unit
startsto recharge.

Also sometime the red LED remains lighting on after switching the main switch to OFF position for a few
seconds. This is because the main condenser  in the flash unit should always be partially charged to have
longer life. So charging sould be made during this time.
                                                                                                                                    i                                                                                                                 r.*.1
View original page 18Page 19 · Read text
1.  Manual Operatlon              www.orphancameras.com
    1) Set the film speed by slidingthe guide scaleknob @, so that the film speedusingshouldbe shown in
      the window@.  Fig.9
    2) Set the mode selectorswitch@to'M. TTL'position.Fig.11                                                 'Aux.                                                  Auto/M' position (Refer to the instruction with    3) Set the mode selector switch ol module to
      module).Fig.12
    4) Estimatethe camera-to-flashdistance(betterto measure)and read the lensaperturein the window @
        just below the nearestdistance.Set the apertureof camera lens.
   Be sure that the guide scaleis for the zooming head positionof W1,and when you set the zoominghead
    other positionthan W1, the maximum coveragedistancewill change as follows:

    Zooming Head Position  Maximum Coverage Distance
      W2(28mm)      by 20o/oshorter than indicated    Erample: At the zooming head position                                                                             'N',                                                                the maximum coveragedistance at        N  (50mm)       by 2Oo/olonger than indicated                                                 F4 is about9m (ISO/ASA10O),while the
         T  (85mm)       By 4Oo/olonger than indicated    panel indicates7.5m.

 2.  Automatlc Operatlon (Uslng lhe computor In the llash unlt)
    1) Set the film speed by sliding the guide scale knob @, so that the f ilm speed using should be shown in
       the         window                           rig. S             @.                                                                    'A' positions Fig. 13 When f ullf charged,your          mode                   selector          the    2) Set                          switch @ to either one of  f ive
       preset aperturewill be illuminatedwith red LED. lf the apertureis not suitablefor flash-to-subject
       distance,set the switch to other'A' position.Set the apertureof the cameraaccordingly.
View original page 19Page 21 · Read text
.1  The above distances are the one withwww.orphancameras.comMain Flash only, and when taking photo with twin-flash, the
   maximum distance will be shorter by about'l 00/o'
.2  Besure to note that just after the ready lamp is on, the maximum distance may be shorter and you have
    better to wait for a while to have good results'
.3  The maximum auto coverage distance will change by shifting the zooming head as follows:
               Head Position          MaximumAuto         Distance
                m
                m
              m                                     switch@; positionot'-2'  or'-4', the maximumcoverage  r                              with                                 the                                main                    model,.4           3800             DEF    fn case of                                    1/a                                                                                                                                                                                                                                                                                                                                                                                                                                                                                                                                                                                                                                                           '  ll                                        respectively'                             will                            bel/z                           and              the table          on    distance
     .Exampte Main switch al'-2'position,  Film speed ISO/ASA 100 with the-zooming head
                 position W1, the mdximum auto coverage distance is 4m (13ft) for the lens      c
                aperture of f4.
  3. TTL Auto Flash OPeration
  1) Setthe film speedby stidingthe guidescaleknob@, so that the film speedusingshouldbe shown in the
   window@.Fig.9                                           'M'TTL' position'Fig' 15  2) Set the m;de selectorof the flash unit @to                                         'TTL' position.Fig' 16  3) Set the mode selectorof the module to
  4) Set the lens apertureas you like by consultingthe maximum coveragedistance.The correct exposure
    can be obtainedat any f-stop, providedthe flash-to-subjectdistance is shorter than the maximum
    coveragedistancetable.
  5) Set the camera in TTL mode. For the detail camera operation,pleaserefer to the camera'sinstruction
    manual.
View original page 21Page 23 · Read text
NOTET . When shootingat the flash-to-subjectwww.orphancameras.comdistanceshorter than 1 meter or 3.3 feet, use W2 zooming
        head position.
               . The minimum distanceon the table depends on the camera'smechanism,and the table is just
         only for referencepurpose.
               . Coveragerange changes in accordancewith the film speeds and the following compensation
         should be made to have better result:


                                          The minimum distance,however,will not be
                                                   shorter than 0.5 meter or 1.6 feet, becauseof the
                                                      parallax between the angle of coverage of lens and
                                                       that of flash unit.

Hlntr for TTL Auto-fhsh and Non-TTL Aulo-flash Operatlon
    In case of TTL auto-flashoperation,the exposure is calculatedwith the reflectivelight lrom the film
   surfaceby camera'scomputor and it depends on the films used on the camera.Particularly,the over-
   exposuremay be resultedwhen using reversalfilms and it is better to have some compensationafter
    testing.In this case,operatethe flash in Non-TTL auto-flashoperationby using the computor in the flash
    unit.
   Also at close flash-to-subjectdistance,TTL auto-flash operation tends to be over-exposed.
   When shooting at longer distancewith the lens of medium telephoto,TTL auto-flashoperationmay be
   advantageous.
View original page 23Page 24 · Read text
4. Operallon wlth motor drlven camerewww.orphancameras.com
       This-f lash unit is designedto be synchronizedwith motor drivencamera.By followingthe stepsas under,
       the flash unit will synchronizewith camera up to four to five framesper seconct.
       1) Setthemodeselectorswitchoftheflashunitat'A'(tz.}forlSo/ASA100orf5.6fortso/ASA40ofitm
       2) Set the cameralens aperturein accordancewith the above.
       3) Use 4 FRESHALKALTNEBATTERTES.
       4) Keep the flash-to-subjectdistance around 2 meters or 6.5 feet.
        5) In caseof 3800DEF model,it is possibleto use the flash unit with motor-drivencameraby settingthe
        main switchto'-4'position. In this case,the guide numberof the unit is 8 (zoominghead position
       W1 and ISO/ASA100film speed).
    5. Bounce/SwlvelPhotography Fig. 17
     The main flash head bouncesand swivels.The bounce flash operationin auto mode is same as normal
      automaticoperation.Test by pushingthe test button for betterresutt.
       In case of manual bounce flash operation,the total flash-to-subjectdistance (f lash-to-reflectivesurface*
       reflectivesurface-to-subject)should be calculatedand appropiiatelens apertureshould be setected.*
   Nole: when using color f ilms, betterto bounce the light otf white surfaceonly, since the reflectivelight will          take on the colour of reflectiveisurface.


                                                                                                                                                                                                                                                                                                                                                                                                                                                                                                                                                                      il
                                         *lit
View original page 24Page 25 · Read text
6. Twln Flash                  www.orphancameras.com
                                              'TWIN' position.Pleaserefer to 'Soft Twin' articleof   When using twin flash, slide twin-flashswitch @ to
    this manual.Fig.18
7.  Off-camera Flash Photography
      It is possibleto use the flash unit away from camera by means of attachingthe standardmodule and
   suppliedsynchrocord. When employedin this way, alwaysensurethat the total flash-to-subjectdistance
   should be taken into account, or under-exposurewill result. Also ensure that the flash unit is held   'SQUARE'               to the camera,i.e.do not allow the flash to face away from a reflectingsurface.
8.  Daylight Synchronization  with Auto Mode
   The daylightfill-inf lashoperationwith auto mode is possibleif the ambientlightingconditionis within
   the range of auto preset aperture.That is, if the exposure meter of the camera indicatesthe proper
   exposureis 1/125sec.with f 11, set the auto presetapertureat f 11. In th is casethe sensorof the f lash unit
   should be faceddirectlyto the subject.


                                          J
View original page 25Page 26 · Read text
PRECAUTIONS             www.orphancameras.com
1 . Shouldthe unit fail to operatefor any reasonother than weak batteries,pleaserefer to qualifiedservice
   personnel.A high voltagecapacitoris incorporatedin the unit.
2. Removethe batteriesif the unit is not in use for any period exceedingsay two or three weeks.
3. Keepthe unit dry and store in a moisture-freeenvironment.
4. When photographingoutdoorsor in a large room or hall with no etfectivereflectingsurfacesnearby,it is
   necessaryto set the cameralens at a wider aperturethan that indicated(1 or 2 stops).
  When using this flash unit, please make sure that the rectangularflash reflector correspondsto the
   rectangularpictureformat,otherwiseyou will not obtain an evenly illuminatedpicture.
   Close-upphotography.With extensiontubes or bellows,the extra exposure for close working is best
   determinedby referenceto the factors provided with the extensiontubes or the approximatescale of
   reproductionwith bellows.
  The exposurefactor: ('1+ scale)2.Thus,at a scaleof 1 :1, for example,the exposurefactoris 4x and the
   lensapertureshould be openedtwo stops.
   In this case,off cameraphotographyusingthe synchrocord is recommended.Also use the flashunit in  Manualmode.
View original page 26From the M. Butkus archive. Original publisher and archive notices are retained.
Check the model and edition against your equipment.
PDF verified 2026-10-10.