Flashes & lighting
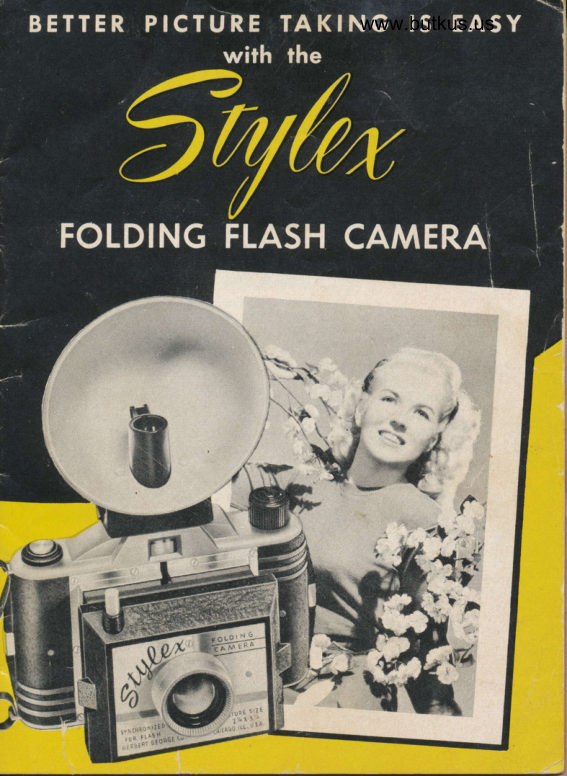
Stylex folding flash camera User manual
User manual for Stylex folding flash camera. 17 pages in English. Read the original PDF, download or print a copy without registration.
17 pagesEnglish4.9 MB PDF
Loading your manual…Open PDF directly
Document details
- Brand
- Stylex
- Model / document
- Stylex folding flash camera
- Document type
- User manual
- Language
- English
- Pages
- 17
- File size
- 4.9 MB
- Category
- Flashes & lighting
- Document date
- Not specified in catalog
Search available document text
Find a term, then jump to its page in the original PDF. Image-only pages may not be searchable; check the PDF for exact wording and diagrams.
Page 2 · Read text
PHOTOGRAPHY


                               www.butkus.us
            Phologrophy is o very educolonol, enlerloining ond losting hobby
        {or men, women, boys ond girls. lf's so much fun to toke picfures os
        lhere ore mony fhings ond evenls fo phologroph ond, of course, lhere
           is so rnuch solisfoclion in showing ofl good piclures of your pels, home,
          relolives, porlies, trips, elc.
          And it's so much lun toking indoor flosh pictures which ore jusl os
        3osy to loke qs outdoor picfures.
             Photogrophy  is  f un the whole year oround-indoors ond oufdoors-
      doy or night-ond there ore so many subjects from which lo choose,
        such os:

                a Your dog or cql in one of their Gule poses.
                a Mother fixing dinner or relqxing in the eosy choir reoding o
             good book.
                 O Dod rrying to fix o leoky foucef.
                a  Sister doing her homework.
                o  Brother working on o puzzle.
                a  Friends iust wolking in the door.
                a And outdoors, lhere ore londscopes, picnics, vocolions, sporli,
                friends ond so mony things fo snop.

         Good pictures ore prized possessions thol olwoys bring bock fond
           recollections.


              I
\r
View original page 2Page 3 · Read text
www.butkus.us
FEATURE' oF YouR NEw                   fiyfr*
        FOTDING FTASH CAMERA


     Your Stylex Folding flosh comero hos been designed to enoble you
to toke good pictures with o minimum effort, under most conditions, of
ony time. You con toke good pictures outdoors under normol conditions,
with the correct selection of film. Toking indoor flosh'pictures  is iust os
eosy os outdoor snopshots when fhe simple inslructions in this booklet
ore followed. Under good conditions, you cqn qlso toke beoutiful color
snopshots with your Stylex comero.
    Toke your Stylex folding flosh comero wherever you go os you will
ofwoys find something of inferest fo photogroph. foke good core of
your comero ond it will toke good core of you!

 6
 2                                 I
 5                                 5
                                    T I

                            Mike Butkus                                  Digitally                                                                                                                                                                                                   DN:email=mike@butkus.org,Date:cn=Mike2022.02.27signedButkus,by15:16:38Mikeo=ButkusButkusc=US-05'00'camera manuals, ou=butkus.org, 3                                 I
 l.  Winding knob fbr odvoncing  f ilm
2. Shutter releose (shufler will nol operote unless bellows is fully extended)
3. Tripod sockef
4. Corrying strop which should olso be used lo sleody cqmero when snop-
   ping pictures
5. Bock clips-both must be moved to remove bcrck
6. Flosh gun sockels to hold pins l6coted in bottom of flosh sun
7. Hold these two ploslic extensions to open ond close bellows
8. Toking lens
9. View finder lens
View original page 3Page 5 · Read text
HOW TO tOAD  YOUR CAMERA
     Ploce your comero before you ond identify fhe vorious ports of the
comero. Use the illustrofion on Poge 3 qs o guide. Then prociice operot-
ing the comero o few times iust to be sure you hove the ideo.
    Your Stylex comeio moy be looded or unlooded in doylight buf you
should do this only in fhe shode, never in direct sunlight or under bright
house lights. Now you con follow these eosy steps-step by step.
CAUTION! IMPORTANT! B"for" loodins comero with film or
otfoching flosh unit, operote shutter lever severol times to see thot it  is
working properly. This permits smoother operotion, eliminoting possibil-
iiy of dust on shutter working ports or premoture floshing of flosh bulbs.
l.  Open the bock by lifting both the right ond left bock clip with
    your thumb noil os illustroted in figure 2. Ploce your hond under
the bock to prevent  it from folling. Then ploce it down gently close
fo you.
                          2.   Insert o roll of either Ansco or Eostmon     *                     620 film in the chomber ot the opposite
                      end of fhe comero from the winding knob
                          (See Figure  I ). Be sure thot you ploce the
                                roll of film in the chomber so thot the
                         pointed end of the film pqper will come
                         from fhe rop of fhe roll. lt is IMPORTANT
                         thot you moke sure thot the two bross
                               rivets locoted in the chqmber engoge fhe
                            holes locoted in either end of the spool of
                     620 film. This is occomplished by plocing
                      one end of the spool in one of the rivefs,
                     ond using your finger to relieve iension of
                           spring of opposite end then pushing spool
                             into other bros rivet.
      FIG. 2
View original page 5Page 6 · Read text
www.butkus.us
 3.  Remove the sticker which seols
     fhe roll of film ond corry the
 pointed end of the film poper ocross
 fhe comero ond fitting ii on the film
 trock locoled ot the top of the focol
 box. Threod the pointed end of
 poper into slot of empty spool now
 being held by the winding knob. Be
 sure lhol poper is centered on the
 empty spool to insure even winding.
 Give the winding knob two full turns
 (the knob will only turn one woy)-
 enough fo bind poper ond ossure
 firm grip of spool (See figure 3).              FIG. 3

4.   Ploce ihe bock of the comero bock on the body mok/ng sure thot
     the red window is locoted ot the opposite end of the winding knob.
Then slide BorH bock cfips into position which insures positive lock-of
the bock.

   DO NOT OPEN BACK OF CAMERA AGAIN UNTIT 8 EXPOSURES
HAVE BEEN TAKEN AND FIIM HAS BEEN COMPTETELY WOUND
THROUGH.

5.  Turn ihe film winding knob ond wotch the red window on the bock
    of the comero until the number r oppeors. A pointed hond ond 4
dots in succession will show up iust before the first number oppeors.


                   o         a    o
View original page 6Page 8 · Read text
www.butkus.us
        2.  Next grosp the comerq firmly in your left hond ond put your right
          hond through the vinylite corrying strop to furiher steody ihe
        comero. Next hold the cqmero comfortobly fo your left eye viewing ihe
         obiect you wish to photogroph through the viewing lenses. When you
       ore sure lhe obiect is centered ond you hove everything in view you
        wish photogrophed, corefully steody your comero ond snop the shutfer
       by pushing the shutter bufton down quickly ond firmly wirh your fore-
         finger. Remove your finger immediotely when the lever is down ond let
            it iump up by itself. BE VERY CAREFUL THAT YOU DO NOI JAR OR
       JERK THE CAMERA,AS A EI.URRED OR SMEARFD PICTURE MAY RESIJLT

       3.  wind the film immediofely ofter you ioke fhe first picture. Turn
               until number 2 oppeors in the red window ond repeot lhe some
         instruciions until 8 pictures hove been snopped ond then continue lo
       turn ihe winding knob until ihe pope', is completely wound on the
        ioke-up spool ond connoi be seen ihrough the red window.
                                      :1ffiiift;:             dn     ii#J                                               "ryl,ffir    &,                                                         'U;
            REMovTNG THE FtrM  FF','r
     &'i
            Affer you ore sure the film is complerery wound on the toke-up
       spool remove the bock ogoin following your previous instructions. The
       exposed roll con now be removed ond its end fostened with ihe glued
       poper found on the end of the spool. Before replocing the bock, move
       lhe remoining'empty spool to the top of the comero ogoin to be reody
        for onother new roll of film. you will note the winding knob will pull
       out slightly enobling the spool to procticolly drop into proce.
                                                                                                                                                   -{Ftil6                      A                                                                                  7
t-
View original page 8Page 11 · Read text
HERE's THE WAY TO OPERATE YOUR STYLEX
           FTASH ATTACHMENT


   t. How to ossemble <lnd ol-
     toch FTASH ATTACHMENT!
       (o) To inseri botteries  lift off metol
      cover from the plostic housing os
        illusfroted  in  Figure 5.   Insert 2       penlite (ony good stondord moke)                 FIGffi.5
        botteries with the tops in opposite
       directions os illusfroted in Figure 6.
            lf  properly ploced, the top of the
       bottery should be  fitted  info  fhe
      holed poriion of the bross conlocl
       locoted ot one side of the plostic
       housing ond ihe bottom of the other
        botiery fitted into the roised portion                           6
       thof looks like o minus mork. You                                                                                        '-rii:,;
      con be sure of positive insertion by                                                                   .d.*i
       determining lhot the botteries hove
      been ploced exoctly os those on lhe
       metol cover. Figure 7 demonstrotes
     how metol cover is eosily snopped
       bock 4'nto proper ploce by pressing
         lightly with righl fhumb.                            F1G. 7
       CAUTION! Be sure thot the section stomped "reflector" is ploced on
        the plostic housing with the <rrrow pointing to the reflector.

l0
View original page 11Page 12 · Read text
www.butkus.us
IMPORTANT POINTS TO REMEMBER!

A-lnsert tlosh bulbs in flosh unit before replocing flosh
     unit bock on comero. lt is not odvisqble to insert
     bulbs when flosh ottochment is ottoched to comero.
 B       only Press Flosh # 5 or Sylvonio #25 flosh bulbs.  -Use
 C-Flosh giun is inst<llled by pushing flosh gun pins into
     receptocles locoted on top of comerq.
 D        bulb is inserted by slipping into socket qnd  -Flosh
     pushing down gently till you heor it click into ploce.
 E   to eiect "hot" bulbs, pull lever on side of   f losh   -
     housing sfroight bock-this releqses bulb--turn upside
    down to drop bulb.
                                               f losh pictures use o quick  f irm pressure F - Wh"n toking
    on shutter lever ond complete exposure in one con-
     finuous motion. Pressing shutter lever oll the wqy
    down, let go ond qllow shutter lever to return itself.
    Do not press shutter lever slowly qs this moy permit
              f losh bulb to go off premoturely cousing loss of
     exposure.

CAUTION! Be sure lo remove botleries from the flqsh
housing whenever the cqmero is not in use.                                            #.
                                                                                                                          ll
View original page 12Page 13 · Read text
REMEMBER THESE RUTES FOR BETTER PHOTOGRAPHY

                  '+s4tn*.tt184.                                                              ;iifllh*,"    '#
                                                         pictures os fhe slighfest         l.  Hold the comerq steody when snopping
          movemenf or jor will couse blurring.
        2.  Hold the comero level.
        3.  Don't try to gel too much into one picture ond be sure you see
           your subiect in thq view finder before snopping the shutter.
           Rernernber, loo, you will octuolly get o rrifle more on your
            picture thon you octuolly see in the view finder.
       4.  lood ond unlood film in the shode or dimmed room only.
       5. Wind  f ilm immediotely oft-er toking eoch picture-doylighr  or
             flqsh indoors
       6.  Hove eoch roll of exposed film developed os soon ofter it  is
           exposed os possible
       7. DO NOI EVER try to cleon the lenses with your fingers. Use only
        o soft dry clolh or lens brush.
       8. When toking pictures hove lhe sun behind you. Do' nol loke
             pictures iocing the sun.
       9.  Enlorgements up to 8 x l0 con be mode from oll shorp negotives.
          Your photo finisher con olso furnish enlorged prinls.
      lO.  Be sure to use o new flosh bulb for every flosh picture.
         I l.  Your Stylex folding flosh comero hos been focused fo toke shorp
             pictures from 5 feet fo infinity.
     CAUTION! Do nol ever loke flosh piclures clo3er rhon l0 feet from
     your subiect without using o refleclor shield.h
   t2
View original page 13Page 15 · Read text
"{E
   THE PICTURE STORY

                                         " -4eia{{*e"                                                    .d}ii.iF
        Most omoteur photogrophy lokes ploce ouidoors during the doylight
   hours.                       \
     A superobundonce of light does nof meon thqt the snopshot illumin-
    otion problems ore solved. The woy the light is distributed over the
    subiect, the ongle from which it strikes, ond the qmount of reflected
     light from the clouds ond other obiects ore olso foclors which influence
    the quolity of the finol prini.
       Very intense direct light with little or no ref lection will often
   produce o horsh ongulor effect. Softer lighting will give fhe most
    sotisfoctory results. Slight overcosts ond reflections from woter, light
    colored clothing, houses qnd wolls ore helpful in softening the lighting
     effeci. Hozy overcosf doys with no sun (use only foster film) moy give
   o flot look to mony subiecfs.
        While there isn't much thot con be done oboui soft lighting, you
   con diffuse lighting by plocing your subiect neor o light colored woll or
    house to toke odvontoge of reflected light. Persons being photogrophed
    need not squint into the sun os octuolly better pictures con be token  if
    the light comes from tlre side of your subiect'
        Londscopes ore o fovorite subiect os they offer endless voriefy.
    Action picfures con be o lot of fun but this fokes o lof of proctice in
    trying to figure the speed of your subiect, the direcfion of the subiect
    motion in relotion to comero ond the disfonce of the sublect to the
    comero. Action c<ln be stopped ot iust the righl ongle ot iust the
     right time.
       There ore unlimited vorielies of subiects fhol con be pholo-
   grophed during the doy. Toke your cqmero wiih you olwoys to toke
   odvontoge of  oll the picture toking opportunities thot occur. A
     fire, on occident, on unusuol incidenf, o fomous Person, ond of course
    your home, /oUr friends, your vocotion, your picnic-There is no end
*   to things ond persons to photogroph.
l4
                                                                                           j
View original page 15From the M. Butkus archive. Original publisher and archive notices are retained.
Check the model and edition against your equipment.
PDF verified 2026-10-10.