Film cameras
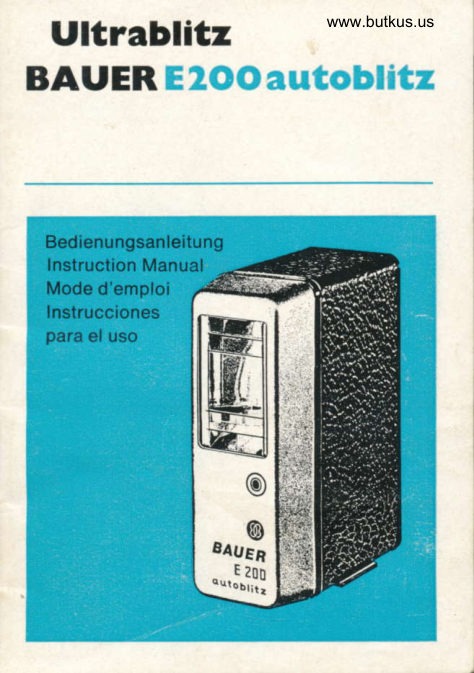
Ultrablitz Bauer E200 Autoblitz User manual
User manual for Ultrablitz Bauer E200 Autoblitz. 28 pages in German, Spanish. Read the original PDF, download or print a copy without registration.
28 pagesGerman, Spanish1.7 MB PDF
Loading your manual…Open PDF directly
Document details
- Brand
- Ultrablitz
- Model / document
- Ultrablitz Bauer E200 Autoblitz
- Document type
- User manual
- Language
- German, Spanish
- Pages
- 28
- File size
- 1.7 MB
- Category
- Film cameras
- Document date
- Not specified in catalog
Search available document text
Find a term, then jump to its page in the original PDF. Image-only pages may not be searchable; check the PDF for exact wording and diagrams.
Page 1 · Read text
www.butkus.us Ultrablitz
BAUER


  Bed ien ungsan leitu ng
   Instruction Manual
  Mode d'emploi
  Instrucciones
  para er uso
View original page 1
Page 3 · Read text
www.butkus.us

 INHALT
  2 Technische Daten
  2  In Betrieb nehmen
  3  Einstellen der Kamera
  4 Arbeiten mit der autom.atischen Lichtregelung  4 BAUER E 200 als Servoblitz
     Akkuladen 5                   vom Netz     Pflegehinweise-  Blitzen 6                   Hl                      - Formieren


 CONTENTS
  7  Technical data
  7  Instructions for use
    8I  Camera!qi qg_th9settinqsauto.'matic   I  i g ht control 10    BAUER           E 200                 as servoJlash
  't0  Accumulator                 charging                                on AC                             -   f lashing 11     Furrner           matntenance                            hints                  2l                                  - formino

 CONTENU
 12  Caract6ristiques tech n iques
 12  Mise en serVice
 13  Reglage de I'appareil photographique
 14  trxprotratton avec le 169lage automatique de la lumidre 15  BAUER E 200 comme s6rv5-f lash
 15    Recharge             des accus
             pour to  uonsetts                      I'entretien                           - fonctionnement_ formation dusurcondensateursecteur  Fl

INDICE
18  Datos t6cnicos
1B  lnstrucciones para la puesta en funcionamiento
19  Alusle oe ta camara
2021   Ir.qQgtgt_"onBAUER E 200 comola regulaci6n"servo-blitz'autometica de exposici6n
21    Carga         de la bateria - funcionamiento con corriente   de         la red23  Entretenimiento - Carga del condensador    El
View original page 3Page 4 · Read text
2

TECHNISCHE DATEN
Leitzahl                    20 frir 18 DIN-Film
Blitzfolge                     Batt. ca. 10 Sek.
                           Netz ca. 12 Sek.
Blitzdauer                          r/sso bis r/roooo Sek.
Blitzzahl je Ladung          ca. 40
Leuchtwinkel               Weitwinkel
Farbtemperatur             56000 K (entspricht mittl. Tageslicht)
Batterie                   3,6-V-NC Akku, wiederauf ladbar
Netzspannungen             110, 125, 1ffi,220,240 V, 40-60 Hz
MaBo                          3,9 x 10,4 x 7,5 cm
Gewicht                   325 g, Ladestecker 230 g
Zubehor                   Ladestecker, Synch ronkabel
Sonderzubehor              Stecker  frir Rollei und Leica M

IN BETRIEB NEHMEN                                                                                                                                                                                                                                i
Vor der ersten Inbetriebnahme oder nacfi ldngerer Benutzungs-
pause wird empfohlen, die Blitzkondensatoren zu formleren.
Hinweise siehe Seite 5.
Automatlk-Schalter
Mit Hilfe des Automatik-Schalters  (4) kann BAUER E 200 als
Blitzgerdt mit automatischer Lichtregelung, als Geriit mit manu-
eller Blendenwahl oder als Servo-Blitz geschaltet werden.
Der Schalter hat drei Schaltunqen:
A  Automatische  Lichtregelung
O Manueller Betrieb
S  Servoblitz-Betriel:
Alle diese Funktionen erf0llt das Gerdt bei Batterie- und Netz-
betrieb.

AnsdrlleBen an die Kamera
Bei Kameras mit Kontaktschuh ist das Gerdt mit dem Einschie-
ben automatisch synchron isiert.
Bei Kameras mit herkommlichem Synchronnippel wird der Syn-
chron-AnschluB (6) iiber das mitgelieferte Synchronkabel  mit
dem X-Kontakt verbunden.
lm Servo-Betrieb wird der Blitz durch das Licht eines mit der
Kamera verbundenen Blitzgerdtes ausgelost.
View original page 4Page 6 · Read text
www.butkus.us

  Einschalten
  Gerdt vor dem Einschalten in den Schuh schieben, da sonst  unnotigerweise ein Blitz ausgelost wird.
  Der Betriebsschalter (3) hat drei Schaltstellungen:
 B  Batteriebetrieb  EIN
  tf AUS am Netz: LADEN p AUS am Netz: BLITZEN (Formieren)
 Bei Batteriebetrieb  zeigt ein reiser pfeifton das Arbeiten des
 Gerdtes an. Nach Aufteichten der Signanirpe iSt iJioii oJrJ  blitzbereit. In Betriebspausen abschilten.
 Beim Laden leuchtet die Signallampe  nic.lrt auf.


 EINSTELLEN OER KAMERA
 Die .Belichtungszeit kann bei Zentralverschlrissen  beliebio oe- wantt werden, zu empfehlen ist etwa r/r:s Sek. Bei Schlii'zv"er_
 sch.lrissen  ist etwa '/so Sek. einzustellen, jedoch sinO Oie Hin_ weise der Hersteller zu beachten.
 Die Blende wird bei manuellem, herkommlichem Betrieb ent_
 sprechend Leitzahl und Aufnahmeentfernung verdnderi.
 Bel Aulomatik-Betrieb  entflillt diese Arbeit.
 Leitzahl und             Arbeitsweise                          der                              automatisclren                                                   Licfitreqeluno.-oie Bekanntlich           kann                   bei                  Verwendung                            von aritzgeilten                                                                      -r;;ii;;ilEntroe Belichtung            nicht                mit                            Versc-htuOgesChdi;di;i;ii                  der
 werden, .da d ie ei gentl iche Bel ichtun-gszeit, nirfriiCn' d i;-B   t iii: oauer, Kurzer ist als die kr.lrzeste VerschluBzeit. Bei herkomm_ lj9.l9l-qli,.serdten oder beim BAUER e zoo mit aosei-hiiieier
AuromarrK wird ctie Blende mit Hilfe der Leitzahl errechnet bzw.
am Blendenrechner gegenriber der Entfernung aUgeleJJ;.-Sl;ergibt sich aus der F5rriel:
               Blende = Leitzahl  : Entfernung
Die Leitzahl dndert sich mit der Filmempfindlichkeit
Filmempfindlichkeit (DtN)   12 15 18 21 24 27  gOLellzanl              10 14 20 2g 40 56  g0
                  zeigt.                   die Einsteilung                                                    ftir 18_DtN_Fitm,                                                                      z. B.!i9_lOlitpung                    (Leitzaht                       20:S= 4).-GrrineF!_e.nde 4 bei 5 m                                          Zahlen geiien-f[iASA und feet.
View original page 6Page 7 · Read text
4

Bei manueller Betriebsart  ist also fUr jede Aufnahmeentfernunq
eine andere Blende an der Kamera einzustellen. wobei duBer6
Aufnahmeverhdltnisse  (heller oder dunkler Raum. starkes
Nebenlicht usw.) noch individuell berticksichtigt werden sollten.
Diese Arbeit wird dem Fotografen von der automatischen Licht-
regelung abgenommen. In Schalterstellung  ,,A" wird mit Hilfe
des ,,MeB-Auges" - auf der Frontseite untelhalb des Reflektors- das vom Objekt reflektierte Licht gemessen. also das Lichtdes eigenen Blitzes sowie vorhandenes Nebenlicht, selbst das
Licht   f remder Blitzgerdte, die zur gleichen Zeit ausgelost
werden. Bei Erreichen der richtigen Filmbelichtung wiid der
Blitz geloscht. Die Lichtmenge wird also nicht durch-Verdndern
der Blende, sondern selbsttdtig durch Verkr-irzen der Blitzdauerdosiert. Die Blende wird nur einmal eingestellt und bleibt dann     I
unverdndert.
Arbeiten mit der automatischen Liclrtregel un g
Da die automatische Lichtregelung auf einen festen Lichtwert
geeicht ist, hdngt die einzustellende Blende von der Filmemp-
findlichkeit ab. Sie wird am Blendenrechner gegen0ber der
roten Marke (5 m) abgelesen und betrdgt z. B. fiir-18-DlN-Fitm
t=4.
    automatischeDie                  Lichtregelung                                                     5                                     zwischen                                  arbeitet                        m und
0,5   m.     Die                      betrdgt                          zwischen                                                                 r/sso Sek.                                              bei der           9litzdauer       t/roooo                                                       groBten-und         Sek.                           kr.lrzesten                bei der                              Aufnahmeentfernung.
Die Automatik  ist fremdblitzsicher. Erst wenn der eigene Blitz
gezrindet ist, arbeitet die Automatik.
Bei groBeren Aufnahmeentfernungen als 5 m spricht die Auto-
matik nicht mehr an. Hier ist man auf die manuelle Blenden-
wahl _entsprechend den Werten des Blendenrechners angewie-
sen. Die Automatik kann hierbei eingeschaltet bleiben.
Bei indirektem Blitzen muB dieAutomatik abgeschaltet werden,
da hierbei das vom Reflexschirm oder von d6r Decke und nichi
das vom Objekt reflektierte Licht gemessen werden wrirde.
BAUER E 2OO ALS SERVOBLTTZ
Als Servoblitz werden Blitzgerdte bezeichnet, die drahtlos von
einem anderen mit der Kamera verbundenen Blitzgerdt gleich-
zeitig gezrindet werden. Sie erlauben Studio-Betrleb mit zwei
oder mehreren Gerdten. In beliebig verstellbarer Anordnung
ohne Behinderung durch Kabel.
View original page 7Page 8 · Read text
www.butkus.us5
 BAUER E 200 wird in Schalterstellung ,,S" auf Servo-Betrieb
 umgeschaltet. Jetzt rjbernimmt das ,,M-eB-Auqe,, die Auslosuno
 des Blitzes. Die Empfindlichkeit des ,,MeB-Ariges,, braucht nich-t
 wie bei herkommlichen Fotozellen eingestellt zu werden, da es
 mit einer raumlichtkompensierenden lmpulsauslosung versehen
 ist. Schwankungen der Raumhelligkeii losen den-Servoblitz
 nicht aus, er reagiert nur auf den sehr kurzen Lichtimpuls eines
 B.litzgerdtes. Das ,,MeB-Auge" ist empfindlich genu!, daB es
 nicht auf den ausl6senden Blitz ausgerichtet w6rden' muB, es
 reagiert schon auf das reflektierte Licht. Bei extremen Bedin-
 gungen wird ein Probeblitz empfohlen.
 lm Servoblitz-Betrieb  ist die volle Leitzahl wirksam. Die einzu-
 stellende Blende hdngt von Leitzahl, Anzahl und Anordnunq
 der verwendeteri Blitzgerdte ab und muB individuell  ermitteit
 werden. Hierzu gehort ein wenig Erfahrung.
AKKULADEN _ BLTTZEN VOM NETZ
Spannungswdhler des Ladesteckers mit spitzem Gegenstand
auf die <irtliche Netzspannung einstellen. kabelsteck5r in die
AnschluBbuchse  (1) des Gerdtes stecken.
Nur an Wecfiselstrom anschlieBen!
Das Laden erfolgt bei der mittleren Schalterstelluno  ,,)l-" des Gerates und wird durch Ziehen des Steckers beendel.
Nach dem Blitzen sollte der Akku sofort wieder nachgeladen
werden, damit seine volle Leistunqsfahiqkeit erhalten- bleibt
und das Gerdt stets betriebsbereit  ist.
Eine Ladung (14 Stunden) ergibt ca. 40 Blitze.
also: Fiir je 10 Blitze ca. 4 Stunden nacfrladen.
Auch bei Nichtbenutzung mrissen die Akkus hin und wieder
nachgeladen werden, da sich jede Batterie langsam selbst ent-
lddt. Man erkennt das an der ldngeren Blitzfolg-ezeit.
Bei Erreichen einer Blitzfolgezeit von 30 Sek. ist auf jeden Fall
14 Std. zu laden. Gelegentliches Uberladen (bis 24 Stcf.) schadet
NC-Akkus nicht.
Bei unbekanntem Ladezustand, also auch vor der ersten Inbe-
triebnahme oder nach ldngerer Betriebspause,  ist es durchaus
zuldssig, den Akku 12 Std.-lang zu laden.
Es reicht ab.er auch, di.e ktirzeste Blitzfolgezeit festzustellen,
die das Gerdt nach l4s.ttindiger Ladezeit unid guter Formierungj
(siehe ndchstes Kapitel) des BlitzkondensatorE aufweist. Dies6
Blitzfolgezeit kann dann immer als MaBstab  frir die Volladuno
des Akkus herangezogen werden.
View original page 8
Page 9 · Read text
6,

 Sollten die Akkus einmal durch versehentlich zu lanoes Laqern
 oder weil vergessen wurde, das Gerdt nach Gebra-uch auizu-
 schalten, tiefentladen sein, kann mit einer soqenannten ..Lano-
 zeitladung" von 24. Std. die Leistungsfdhigkeit wiedeiherg6-
 stellt werden. In diesem Falle ist voi dem-Einschalten  unbe-
 dingt auf gute Formierung des Blitzkondensators zu achten.
 Soll_te eine ,,Langzeitladung" keinen Erfolg haben, so muB dasGerdt in eine unserer Kundendienstw-erkstiitten  gegeben
 werden.
Das Blltzen vom Netz kann bei SchalterstellUDg ,,r,, nach Auf- leuchten der Signallampe (3) erfolgen. Abgesch-aliet wird eben-
 falls durch Ziehen des Steckers

WEITERE PFLEGEHINWEISE  - FORMIEREN
Die beste Pflege fiir ein Elektronenblitzgerat ist hdufiqer Be-
trieb. Besonders der Blitzkondensator blaucht zur vofen Er-
haltung seiner Funktionstrichtigkeit den elektrischen Strom.
Deshalb schlieBen Sie bitte lhr Gerdt vor der ersten Inbetrieb-
nahme oder wenn Sie es mehrere Wochen nicht benutzt haben.
ca.20 Min. in Schalterstellung ,,-"  mit dem Ladestecker  ari
das Lichtnetz an und blitzen Sie dabei ein paarmal ab. Dadurch
wird der Blitzkondensator wirksam formiert. und die volle
Leistungsfdhigkett des Gerdtes bleibt erhalten.

SERVICE UND GARANTIE
Sollte lhr Gerdt Sie zu irgendeiner Zeit nicht zufriedenstellen.
wenden Sie sich bitte an lhren FachhSndler oder an unsere
niichste Vertretung in lhrem Lande. Unsere weltweite Kunden-
dienst-Organisation  bietet lhnen in der ganzen Welt fachliche
Beratung und erstklassigen Kundendienst. In Deutschland
konnen Sie sich auch direkt an unser ndchstes Verkaufsbriro
wenden. Die Anschriften finden Sie auf Seite 24.
Wir gewdhren lhnen ein halbes Jahr Garantie gemdB den Be-
dingungen des Garantiescheines, sofern diesei vom Hdndler
beim Verkauf des Gerdtes ordnungsgemdB ausgeftillt wurde.
View original page 9
Page 10 · Read text
www.butkus.us7

 TECHNICAL DATA
 Guide number              66 for 50 ASA film
 Light output               2000 BOPS
 Recovery time, approx.      Batt. 10 sec
               AC  12 sec
 Flash duration                     ]/eso-l/ro,ooo S€C
 No. of flashes per charge   Approx. 40
 Radiation ano[e          Wide angle
 Colour temoe-rature        5600 K (corresp. to medium davliqht)                                                                     - Battery                    NC accumulator.                                         rechargeableAC    voltaoes                  110,                                    125, 160, 220, 240                                                V, 40_60 Hz Dimensidns                    3.9 x 10.4 x 7.5 cm                                                                                                            ,:
                            (11/zx4llex3ins)
 Weight                     325 g, (12 ozs)
                           charging plug 230 g (8 ozs)
 Accessories               unargtng plug, sync cord
 Extra equipment            Plugs for Rollei and Leica M
 INSTRUCTIONS FOR USE
 Before switching on for the first lime, it ls recommended to
lorm the ftash dapacnors. beia-iieii"inltiiriiionJiCd'  i;ge-t:
Automatic control switch
With the aid of the automatic control switch (4), the BAUER
E 200 can be used as a. ftashtignt witn auiomatic'iighi  c;;i;j,a flashlight with manuar rens srop setting or a servd iia;hii-ghi:
The switch has three positions:
A  Automatic liqht controlO  Manual operation
S  Servo fla5h operation
The unit fulfils all these functions on both battery and ACoperation.
Camera connections
In the case of cameras with contact shoe, the flashlight isautomatically synchronized when slid into pLace.
With    cameras              having                      a.conventional                                                                                                                     i     the sync cord                                 sync'  - nipple,(6) is     connected                 to ihe                  X-contact.
On.s.ervo          operation,                   the                         flash                                  is triggered-- by the light of aflashlight         connected                    with                          the                          camera.""-
View original page 10Page 11 · Read text
8

Switching on
Before switching on, slide the flashlight into the camera shoe,
as otherwise an unnecessary  f lash will be released.
The operating switch (3) has three positions:
B  Battery operation ON
)l- OFF  on mains: CHARGE* OFF  on mains: FLASCH (forming)
On battery operation, a quiet, high-pitched note will be heard,
denoting that the flashlight is in operalion. When the readiness
indicator lamp (3) lights up, the flashlight is ready for use.
In between series of shots,  it should be switched off.
The indicator lamp will not light up during charging.

CAMERA SETTINGS
For between-lens shutters, any desired shutter speed may be
used. Recommended shutter speed is about r/rzssec. In the
case of focal plane shutters, the camera manufacturer's in-
structions should be consulted. Most focal plane shutters are
correctly synchronized at about t/so sec.
The lens stop is set according to the guide number and range
when the flashlight is used manually in the conventional
manner.
All such calculations are eliminated when the automatic con-
trol system is used.

Guide number and mode of operation of automatic light control
It is well known that when a flashlight is used, the correct
exposure can not be controlled by means of the shutter speed,
as the actual exposure time, in other words the flash duration,
is shorter than the fastest shutter movement. With conven-
tional flashlights or with the BAUER E 200 with the automatic
light control switched  off, the lens stop number is calculated
with the aid of the guide number or read off against the range
on the stop computer, being the quotient of the formula:
                              guide number     '            Lens stop -                               range
View original page 11Page 12 · Read text
www.butkus.us

 The guide number varies according to the film speed.
 ASA film soeed    12 25 50   100  200  400    800 Guide number    33 46 66    92  132  184    264
 The illustration shows the setting for SO ASA film (18 DIN), e.g.
 lens stop_4 at 16 ft. (guide no. 66:16 = 4). The g'reen figuret
 refer to ASA numbers and feet.
 On manual operation, therefore, the lens stop number must be
 set on the camera in accordance with the range of each shot,
 and individual consideration must also be given to incidentai
 factors, such as brightness of the room, p=roximity of bright light, eic.
 The automatic light control relieves the photographer of all
 calculating.and adjusting problems. With'the switbn in posi- tion 'j4", the light reflected by the subject is measured with
 the aid of the "light gauge" underneath the reflector at the
 front; the measurement covers the light of the flashlight  itself
and                         present,    any          incidental                       light                                   including                                                                     of                                               thdlight                                   -Uponeven other       flashes              released                                         time.                         ihe same                                                 reaching                                                                 tne                       at
 proper exposure for the film in use, the flash is extinouished.
The volume of light is thus metered not by varying t-he lens
 stop.number, but automatically by curtailing'the flash duration.
The lens aperture is set once only and then remains unaltered.
Using the automatic light control
Since the autornatic light control is calibrated on a fixed light
 scale,. the required aperture is dependent upon the film speed.
The stop number is indicated opposite the'red mark (16 it) on
the stop computer dial, e.g. f 4, 50 ASA.
The flash duration ranges from r/aso sec at the longest range to t/,ro,ooo     s€c at the shorlest range. The effective iange oi tfre
automatic light control lies between 2 and 16 ft.
The automatic light control is proof against external flashes,
as it functions only when the unit's own flash is ignited.
The automatic light control does not respond at ranges inexcess of 16 ft. ln such cases, recourse must be had to the
manual stop setting in accordance with the figures shown by
the stop computer. The automatic light control can, howevei,
be left switched on.
The automatic light control must be switched off for bounce
lighting effects, as in this case light reflected by the reflector
screen or ceiling and not by the subject would be measured.
View original page 12
Page 13 · Read text
10

BAUER E2O() AS SERVO FLASH
The term servo flash is applied to flash equipment ignited
simultaneously without the use of connecting wires by another
flashlight connected to the camera.  lt permits studio operation
with two or more units in any desired arrangement, without the
nuisance of trailing cables.
The BAUER E 200 is set to servo operation by placing theswitch in position "S". The "light gauge" now takes over the
function of releasing the flash. The sensitivity of the "light
gauge" need not be adjusted as in the case with conventional
 photoelectric  cells, as it functions on the principle of impulse
activation with compensation for ambient light. Ambient light
fluctuations do.not release the servo flash, as it reacts only to
the very short light impulse of a flashlight. The "light gauge"
 is sufficiently sensitive not to require training on the actuating
flash - the reflected light is enough to make it react. A trialflash is recommended where conditions appear to be extreme.
The lens stop setting depends upon the light output, number
and disposition of the flashlight used, and must be established
empirically. A little experience is necessary to obtain best
 resu lts.
ACCUMULATOR CI-IARGING - FLASHING ON AC POWER
Set voltage selector of charging plug to local power voltage
with a sharp object. Insert cord plug in connecting socket (1)
of the unit.
                                                        1
Connect only to AC!
Charging is c.arried out with the switch set to the central posi-
tion (ff  ), and is terminated by withdrawing the plug.
After the flashlight has been used, the accumulator should be
topped up again immediately, to enable  it to retain its full
power and keep the flashlight always ready for use.
1 charge (14 hours) provides approx. 40 flashes.                                          '{
Therefore, recfrarge approx. 4 hours for every 10 flashes.
Even when the flashlight is not used, the batteries should be
charged from time to- time, for eveiy batterie iJ suUleCt to
gradual self-discharge. This can be perceived by the inireased
length of the recovery time.
Should the recovery time be 30 seconds or more, the battery
should be charged for 14 hours in any case. An occasiondl
View original page 13Page 14 · Read text
www.butkus.us11

 longer charge (up to 24 hours) will not damage nickel cadmium accumulators.
When the          condition is unknown, e.g. before the unit rs used tor"fgrsil'tgthe first time or after a lengthy p-eriod of non_use, it is quite in order to give the accumu'iat6ra tZ-frour cnaise.
 It is sufficient, however, to establish the shortest recovery time
 achieved by the unit after a 14-hour charqe and oood foimino
{see next section) of the flash capacitorl This r-ecoverv tim6 ,can then be            used to gauge the charging condition of tire ac_,cumulator             in future.
:Should the accumulators be exhausted by lengthy periods of        or forgetting                     to switch                               the ftashlighi                                                     oit'attei-use, i9lqnesg Inetr p-ower           can be restored                        by means                                      of a so_called,,soak
 charge" of 24 hours. In such caies, it is specially important lo
 pay. attention.to.good  forming of the flash capacitor Sefore the unit is switched on. lf a "soak charge" h'as no effect, the
 flashlight should be handed in to one 6f our customer seiviceworkshoos.
The flashlight can be used on the mains with the operatinoswitch in position "n"  alter the indicator lamp (3) liilhts uol
Switching off is likewise automatic upon withdrawihg  tn"e mainsplug.
FURTHER MAINTENANCE HINTS - FORMINGThe best maintenance of ail for an erectronic frashriqht  is
frequent-use-  In_ particular, the flash capacitor neeOi eieciriJcurrent for the full retention of its function. Therefore,  oetiire
switching on for the first time or after a few weeks ot rion_uie,
connec,t your flashlight to the mains via the charoinq oluo foiabout 20 minutes with .the operating switch in piosition Y,_"and release a few flashes ai the sime time. TAis effectivelv
forms the  f lash capacitor and keeps the  f lashlighi ai iutt- pei'_formance level-
SERVICE AND GUARANTEE
Sfroul$, ygy. qt.any. time be dissatisfied by the performance ofyour lashlight, please consult your dealer or our nearest1,S,9n9y in your country. Ou.r,worldwide service organizationgtrers you expert advice and first-class service in all parts ofthe world.
f^o-1r-tt_qsf,!iOht  is coverejJ by-.a 1/z year guarantee as per theIerms      ot the            cuarantee                                 provided                          Certificate                                               that                                                     this i3- proo_- --erly filled          out            by the dealer                                           ftashtight                      when thb                                                     id iola.
View original page 14Page 15 · Read text
12

 CARACTERISTIOUES TECHNIOUES
 Nombre-guide                20 pour un film de 18 DIN
 Fr6quence des 6clairs        environ '10 secondes sur batterie,
                              environ 12 secondes sur secteur
 Dur6e de l'6clair                   r/asoe d r/ao.ooo€ Seconde
 Nombre d'6clairs par charge  environ 40
 Angle d'6clairement         grand ang le
 Temp6rature de couleur       5.6000 K (Lumidre du jour moyenne)
 Batterie                    accu au CN, rechargeable
 Tensions secteur                     1 10, 125, 160, 220, 240 V,
                             40 a 60 o6riodes                      1
 Dimensions                      3,9 x 10,4 x 7,5 cm                           1
 Poids                       325 g, fiche de recharge 230 g
 Accessoires                   Fiche de recharge, cAble de                  "{
                               synch ron   i sati on
 Accessoires sp6ciaux         Fiches pour ROLLEI et LEICA M
MISE EN SERVICE
Avant la premidre mise en servlce ou apras une longue
p6riode de non-utilisation former les condensateurs de flash.
Voir aussi remarques page 16.
Commutaleur de 169lage automatlque
A I'aide du commutateur de 169lage automatique (a) le BAUER
E 200 peut €tre coupl6 en flash d r6glage automatique de la
lumidre, en appareil d 169lage manuel du diaphragme ou en
servo-f lash (service d'appo  int).
Le commutateur a trois positions:
A = R6glage automatique de la lumidre
O = Reglage manuel
S - Couplage en servo-flash                                                                                    ll
Toutes ces fonctions sont assur6es par I'appareil aussi bien
en service sur batterie qu'en service sur secteur.
Raccordement a I'appareil photographique
Lorsqu'on utilise un appareil photographique d sabot de con-
tact, la synchronisation est 6tablie automatiquement.
Dans les appareils photographiques d prise de synchronisation
habituelle,  il faut brancher la douille de synchronisation (6)
au contact X de l'.appareil d l'aide du cdble de synchronisation
loLrrnr en accessotre.
View original page 15Page 16 · Read text
www.butkus.us13

  En. service d.'appoint, le flash est d6clench6 par l'6clair d,un  autre ftash pitote raccord6 d I'appareil photogiaphique.
 Mise en marcfie de I'appareil
 Mettre I'appareil en marche aprds I'avoir plac6 dans le sabot,
 sinon on d6clenche inutilement un 6clair.'Le commutateur de service (3) a trois positions:
 B  = Service sur batterie MARCHE
 t+ = ARRET; sur secteur: CHARGE p  = ARRET; sur secteur: FLASH (formation)
 En service sur batterie, le fonctionnement de l,appareil est
 signal6 par un faible sifftement. Dds que la ijmpei?moln l5i           l'appareil                   peut                           fournir                         un 6ilair. oeco'nneciei i;ap1 !^q]]V,r",parett pendant                 les pauses                        de                                service.
 Quand on charge I'appareil, la lampe-t6moin ne s'allume pas.
 REGLAGE DE L'APPAREIL PHOTOGRAPHIQUE
 Sur les appareils .d obturateur central, le temps de pose est sans.      importance;                          recommand'6                    le                 temps                                       dd lf,"e                                         est                                                                   5e-J,:ni6.-slionG Sur.     les         appareils              d obturateur                       A rideau,                                         Lhoisir                                                                        'lrre environ,        mais respecter                         les indications                                 Ou                                                 tabricant.
 Le.diaphragme est choisi,. en service manuel, selon le nombre guide et la distance de l'objet.
 Cetle op6ration est supprim66 service automatique.
Nombre-guide et lonctionnement du 169lage automailque de la lumiire.
 Lorsqu'on utilise un flash, I'exposition ne peut pa 6tre 16o166.comme       on                 exacteme.nt              sait,                          par                                     la vitesse'de                                                   I'bbturateuri                                                                     cii le temps          d'exposition                         r6el,                              ciest-d-dire                                           lidur€e-Oe-i'ecfiii.                                                                 6iiprus     coun.                 plus                     grande         que ta                                             pour                                vitesse                                          d'obturation.flasnes habituets ou Ie BAUER E200 avec le systdme d'auto_les
matisme d6connecte, le diaphragme est calcu'le a iaiOe-bunomore-gutde, a savoir qu'il est relev6 sur le calculateur du
diaphragme en face de la distance correspondante.   ll r6suliede la formule:
      diaphragme = nombre-guide  : distance de I'objet
Le nombre-guide varie suivant la sensibilit6 du  f ilm.
Sensibilit6 en DIN        12  15  18 21 24 27 30Nombre-guide         10 M  20 28 40 56 80
View original page 16Page 17 · Read text
14

La figure montre le r6glage pour un film 18 DIN: par exemple
le diaphragme obtenu pour une distance de 5 m est de 4
(nombre-guide 20:5:4). Les chiffres verts correspondent aux
valeurs en ASA et pieds.
En service manuel il faut donc varier sur l'appareil photo-
graphique toujours le diaphragme pour chaque distance de
I'objet, en tenant compte en plus des conditions particulidres
ambiantes (lieu clair ou sombre, 6clairage accessoire puis-
santetc...).
Le 169lage automatique de I'exposition d6charge le photo-                                      positiongraphe                        En           toutes                                     du com-               ces op6rations.      de                                       "A"                                                          par           (4)                                          mesur6e                         r6ll6chie par                                          sujet estmutateur                                        le             la lumidre
                                                       du                                            au-dessous                                          frontale                 dispos6                         sur la partie  I'eil d6tecteLir""                                 propre                                                           la lumidre                          la lumidre                                de l'6clair,            c'est-d-direr6flecteur,
parasite et m6me la lumidre 6mise par d'autres flashes d6-
clench6s en m€me temps. Quand I'exposition juste du film est
atteinte, l'6clair s'6teint. La quantit6 de la lumidre n'est donc
pas 16916 par un changement manuel du diaphragme, mais
automatiquement par une rdduction de la dur6e de l'6clair.
Une fois achev6 le 169lage du diaphragme,   il reste invariable
par la suite.
Exploitation avec le 169lage automalique de la luml6re
Le r6glage automatique de la lumidre 6tant pr6r6gl6 d une
quantit6 fixe de la lumidre, le choix du diaphragme d6pend de
la sensibilit6 du film. Celui-ci est relev6 sur le calculateur du
diaphragme en tace du repdre rouge (5 m), il est de f = 4 par
exemple pour un  f ilm 18 DlN.
Le 169lage automatique fonctionne pour des distances allant
de 5 m d 0,5 m. La dur6e de l'6clair varie entre r/esoe €t l/ro.oooe
seconde pour la plus grande et la plus petite distance de prise
de vue.
Le systOme automatique n'est pas influenc6 par flashes 6tran-
gers. Seul si son propre 6clair est declench6, le systdme
automatique entre en fonction.
Pour des distances de prise de vue plus grandes que 5 m, le
systdme automatique ne r6pond plus. Dans ce cas il faut se
16porter au choix manuel du diaphragme en fonction des
valeurs indiqu6es par le calculateur du diaphragme. Pendant
ce mode d'op6ration le systdme automatique peut rester en
 marcne,
View original page 17Page 18 · Read text
www.butkus.us15

   En cas d'6clairs indirects (bounce-flash)  il faut couoer le
    systdme automatique, car celui-ci mesurer'ait lumidre r6it6cnie    par le r6flecteur ou le plafond et non celle r6fl6chie par le
      su iel.
LI  BAUER E 200 COMME SERVO-FLASH (SERV|CE D'AppOtNT)
    I   Sous le nom de servo-flash on d6signe des flashes qui sont    d6clenches.sans  l.il par un autre fla!h raccord6 a t'dppireii    photographique.  lls permettent un service de studio il'rofes_    sionnel avec deux ou plusieurs appareils a toute dispbsition
    voulue sans 6tre gen6 par des cdbles.
    En position "S'; du commutateuJ (a) le BAUER E 200 est coupl6    en service.d'appginJ. Alors " I'eil d6tecteur> prend d sa chaige     le declenchement de l'6clair. L'ceil d6tecteui se distingue d6s
      cellu.le.s. photo-6lectriques.  traditionnelles par le fait"que ia    sensibilit6 n'.est pas d ajuster parce qu'il est 6quip6 d'un   mecanisme d6clencheur d impulsion avec comperisdtion de
    l'6clairage.ambiant. Les variations de l'6clairagti Ou iocat ne
    d6clenchent. pas le servo-flash, car celui-ci ie  r6agit qu'd
    I'impulsion lumineuse trds courte d'un 6clair. L,eil OEtecieui     est suffisamment sensible pour qu'il ne soit pas n6cessairement
     orie.nte sur.le.flash pilote d6clehcheur mais' il r6agit d6jd d la
    lumiere r6fl6chie de cet 6clair. Dans des conditiois exirOmes       il est cependant recommand6 de proc6der  ir un essai.
   Le choix du diaphragme d6pend de la puissance lumineuse,
   du nombre et de la disposition des flashes utilis6s; le dia-
    phragm.g devra.donc etre 6tabli par calcul dans chaque cas
     particulier. Ceci n6cessite une ceriaine exp6rience..
   RECHARGE DES ACCUS                                -   FONCTIONNEMENT                SUR                      SECTEUR
    Regler le s6lecteur de tension de la fiche de recharge sur la
    tension secteur locale d I'aide d'un objet pointu. Arincher  ii    fiche du cdble d ta douiile de raccordement  (t) Oe-itppiieil
   Ne brancher I'appareil que sur courant alternatif!
    L_e recharge a lieu en position centrale *)f  , du commutateur
     (3) de I'appareil et est termin6e en retirant la fiche.
       ll est recommand6 de recharger I'accu aussit6t aprds l,utilisa_    tion,                         p^our             l'appareil      de                                      -qu'il- conserve sa pleinei cip"cite-et    qu'rl          soit             toujours prdt                       d fonctionner.
View original page 18Page 19 · Read text
16

Une recharge (14 heures) donne environ 40 6clairs, donc -
pour 10 6clairs recharger pendant 4 heules environ.
MOme lorsqu'on ne se sert pas de I'appareil,  il faut recharger
les accus de temps en temps parce que toute batterie se
d6charge lentement. On reconnait cette d6charge aux inter-
valles plus longs entre les 6clairs.
Lorsoue les intervalles entre les 6clairs sont de 30 secondes
envir6n,  il faui recharger I'accu absolument pendant 14 heures.
Une surcharge accidentelle (jusqu'd 24 heures) n'est pas
nuisible aux accus NC.
Si l'6tat de charge n'est pas connu, donc aussi avant la
premidre mise en service et aprds un temps prolong6 de non-
utilisation,  il est permis de recharger I'accu pendant 12 heures.
ll suffit cependant aussi de d6terminer les intervalles les plus
courts entre les 6clairs que fournit l'appareil aprds une recharge
de 14 heures et aprds une bonne formation du condensateur
de flash (voir aussi article suivant). Cette fr6quence de 6clairs
peut donc toujours servir de mesure pour la pleine charge de
l'accu.
Si un jour les accus 6taient compldtement d6charg6s par
m69arde parce qu'ils ont 6t6 stock6s trop longtemps ou parce
qu'on a oubli6 de d6connecter  I'appareil aprds utilisation, on
peut retablir leur capacit€ par une recharge de 24 heures, dite
                                                            d"de longue dur6e". Dans ce cas il faut veiller absolumentune oarfaite formation du condensateur de llash. Si une telle
recharge de longue dur6e ne donne pas de r6sultat,  il faut
remettre l'appareil i un de nos ateliers du service aprds-vente
pour r6paration.
En service sur secteur et avec le commutateur en position
<<ry', oo peut fournir de 6clairs dds que la lampe-temoin  (3)
s'allume. On coupe 6galement I'appareil en retirant la fiche
secteur.
CONSEILS POUR L'ENTRETIEN -FORMATION DU CONDENSATEUR
La meilleure fagon d'entretenir un flash 6lectroniq'ue est une
utilisation fr6quente. Surtout le condensateur de flash n6ces-
site le courant 6lectrique pour conserver sa pleine capacit6
de fonctionnement.  C'est pourquoi nous vous recommandons
avant la premidre mise en service et si vous ne vous 6tes oas
servi de votre appareil pendant plusieurs semaines, de le
View original page 19Page 20 · Read text
www.butkus.ustl

!1an9he1 sur secteur, d I'aide de la fiche de recharge, pendant20   minules                       (le            environ                     commutateur                                       6tant                                 en                                                            positiilri'condensateur'dei-";   et    produire            quelquesde                         6clairs.                     De ce                                              le                                              fait,
flash sera efficacement form6 et l'appareil acquiert d nouveausa pleine capacit6.

SERVICE APRES.VENTE ET GARANTIE
Si, pour une raison ou pour une autre, votre appareil ne vous
qpportait pas entiere satisfaction, adressez-voli d votre ven-deur habituel ou d notre_ repr6sentant le plus proche. Notre
reseau de service vous offre dans le monde'entier ses conselliqualifi6s et un.service aprds-vente de premier ordre.
Nous vous accordons une garantie de 6 mois conform6ment
aux conditions 6nonc6es pal le bon de garantie, si cetui_ci a
6t6 .rempli correctement par le vendeur iu mom6nt de I'achaide l'appareil.
View original page 20
Page 21 · Read text
t8

DATOS TECNICOS
 Nimero de guia           20 para pelicula 18 DIN
Tiempo de recuperaci6h   Con bateria apr. 10 s.,
                        con red apr. 12 s.
 Duraci6n del disparo          r/eso hasta  l/ro.ooo s,
N[mero de disparos
 por carga                  40 aproximadamente
Angulo de iluminaci6n     Gran angular
Temperatura del color      5.6000 K (corresponde a la media
                       de la luz natural)
Bateria                  Acumulador de niquel-cadmio,
                           recargable
Tensiones de red            110, 12s, 160,220,240v.,40-60 Hz.
Dimensiones                  3,9 x 10,4 x 7,5 cm.
Peso                      325 9., enchufe de recargar 230 g.
Accesorios                Enchufe de recargar y cable de
                              sincron izaci6n
Accesorios especiales   Enchufes para Rollei y Leica M
INSTRUCCIONES PARA LA PUESTA EN FUNCIONAMIENTO
Antes de poner el "flash" por primera vez en funcionamiento,
o despu6s-de haber estado-fuera de servicio por alg{n ti.e-mpo'
reconiendamos formar debidamente el condensador. V€anse
las indicaciones en la pdgina 23.
Conmutador  del funcionamiento autom6tico
Con la ayuda del conmutador del funcionamiento autom6tico
(4), se puede emplear el aparato "BAUER E 200" como "flash"
con regulaci6n de exposici6n autom6tica, como aparqto con
selecci6n manual del diafragma o como "servo-blitz" (flash
adicional).
El conmutador en cuesti6n tiene 3 posiciones:
A  Regulaci6n de exposici6n automdtica
O Regulacion manual
S Conexi6n "servo-blitz"
Todas estas funciones presta el aparato con bateria y con
servicio alimentado por la red.
Conexi6n a ta cdmara fotogrilica
Trat6ndose de c6meras con pie de contacto, el aparato se
sincroniza autom6ticamente al introducir el mismo. Cuando se
View original page 21Page 22 · Read text
www.butkus.us 19

 trata en cambio de cdmaras con una boquilla de sincronizaci6n
 normal, se_ conecta la conexi6n de sin'cronizaclOn foi con li contacto X por medio del cable de sincronizaci6h'que  se suministra.
 Al    trabajar           con                   el servicio                                                             el flash mediante                              -  servo, se dispara ta    tuz cle un             aparato                       flash incorporado                                en la cdmara.

 Conexl6n
 Se debe introducir el aparato en el pie, antes de conectarlo.
 ya que contrariamente se disparia innecesariamente et ttasn.
 El conmutador de servicio tiene tres posiciones, a saber:
B  Funcionamiento mediante la bateria: CONECTADO ff  DESCONECTADO;conectado a ta red: CeACnn-- 4  DESCONECTADO; conectado a la red: DISpARA
     (cargar el condensador).
 Trabajando el flash con la bateria, el correcto funcionamiento
 plgqy-ce_yl tisero sitbido. La ituniinacidn de la lui piio{JiCi, senara que et- aparato estd dispuesto para entrar en serviii<i.    recomtendaue                 clesconectar el aparato cuando no est6 en
  f uncionam             iento.
 Durante  la carga, la luz piloto no se enciende.

AJUSTE DE LA CAMARA
Trat6ndose         de obturadores                                     podr6                             se                                                                       libre_                                                   elegir                              .centrales,                                                                                             t/,r,              de exposici6n,                            aunque                                               se'                                        recomieniamente .e.l tiempo                                                                                         i.rara     ooruradores               de                         cortinilla el tiempo                                  de exposicion                                                     serd                                                       de rAo    s.,         rto obstante,                recomendamos                                                instrucciones                                seiuiiias                                                               delfabricante de la c6mara a este respect-o.
C_uando se trata del normal funcionamiento  manual. se reoulael diafragma de acuerdo con el n0mero-guia v iejnijnbo- eicuente la distancia existente.
Si el funcionamiento es automdtico, no hace falta esta regu-laci6n.
Nrimero-guia.y modo de trabajar de la regutaci6n autom6ficade la exposici6n.
Como se .sabe, no se puede regular la exposici6n correcta
con la velocidad del obturador, al usar un'flash, ia-que ln
View original page 22From the M. Butkus archive. Original publisher and archive notices are retained.
Check the model and edition against your equipment.
PDF verified 2026-10-10.