Film cameras
Ultrablitz Matador 500 User manual
User manual for Ultrablitz Matador 500. 29 pages in English. Read the original PDF, download or print a copy without registration.
29 pagesEnglish4.8 MB PDF
Loading your manual…Open PDF directly
Document details
- Brand
- Ultrablitz
- Model / document
- Ultrablitz Matador 500
- Document type
- User manual
- Language
- English
- Pages
- 29
- File size
- 4.8 MB
- Category
- Film cameras
- Document date
- Not specified in catalog
Search available document text
Find a term, then jump to its page in the original PDF. Image-only pages may not be searchable; check the PDF for exact wording and diagrams.
Page 1 · Read text
www.butkus.us
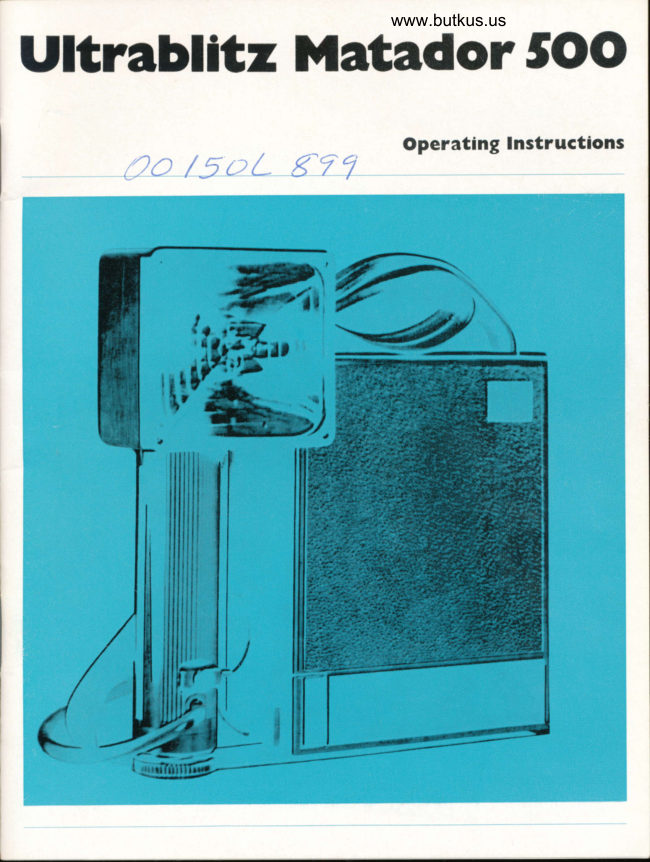
Ultrablltz MatadorSOO

                                     Operating lnstructlons
               8-?7    0c /5oL
View original page 1Page 4 · Read text
www.butkus.us

 KEY TO ILLUSTRATION    CONTENTS          PAGE

   1  Second lamp unit                 Standard and optional accessories     2
  2  A.C. unit and charger               Technical data                      4
  J  Generator unit                    Operation - summary                5
  4   Battery tray                    Camera connection                  o
  5  Main lamp unit                    Main switch - modes of operation      7
  6  Angle of illumination selector      Guide number and film speed          7
  7  Bounce light swivel               Guide numbers table                   8
  8  Readiness indicator lamp          Lens stop computer and power switch  I
  9  Lens stop computer               Angle of illumination                   10
 10  Power selector switch               Flash duration and shutter speed      12
 11  Hand release button              Changing batteries                    13
 12   Photoelectric cell On-Off switch     A.C. operation                         13
 13  Second lamp On-Off switch          Battery charging                       13
 14  Voltage selector                   Lead-acid batteries                    13
 15  A.C. connection                     N/C-batteries                          14
 16  Locking catch                      Special notes on battery types         14
17  A.C. unit terminal socket           Replacing batteries                    15
18   Safety catch                       Forming                               15
                                                                                 1619  Main lamp plug                   Automatic control - recovery times
20  Second lamp plug                      lnd irect lighting (bounce effects)      17
21  Main switch                      Working with two lamp units           18
22  Sync cord of lamp bracket          Studio equipment                     18
23  Swivel bearing                   Matador 500 as servo-flash            19
24  CDS photoelectric  cell              Flash photography by daylight        20
25   Interlock key                       Carrying and shoulder strap
26  Sync cord of camera bracket       adjustment                            21
27  Knurled screw r/r"                 Service and guarantee                  21
28  Knurled screw 3/e"
29  Camera bracket
30   Interlock key
31  Lamp bracket
32  Sync cord safety screw
View original page 4Page 6 · Read text
www.butkus.us

 KEY TO ILLUSTRATION    CONTENTS          PAGE
 1 Second lamp unit                 Standard and optional accessories     2
 2  A.C. unit and charger               Technical data                      4
 3  Generator unit                     Operation                                                   - summary                5
 4  Battery tray                    Camera connection                  o
 5 Main lamp unit                    Main switch                                                     - modes of operation      7
 6 Angle of illumination selector      Guide number and film speed          7
 7 Bounce light swivel               Guide numbers table                   8
 8  Readiness indicator lamp          Lens stop computer and power switch   I
 9  Lens stop computer               Angle of illumination                   10
10 Power selector switch               Flash duration and shutter speed      12
11 Hand release button              Changing balteries                    13
12 Photoelectric cell On-Off switch     A.C. operation                         13
13 Second lamp On-Off switch          Battery charging                       13
14 Voltage selector                   Lead-acid batteries                    13
15 A.C. connection                     N/C-batteries                        14
16 Locking catch                      Special notes on battery types         14
17 A.C. unit terminal socket           Replacing batteries                    15
18 Safety catch                       Forming                               15
19 Main lamp plug                   Automatic control   recovery times   16                                                          -
20 Second lamp plug                    Indirect lighting (bounce effects)      17
21 Main switch                      Working with two lamp units           18
22 Sync cord of lamp bracket          Studio equipment                      18
23 Swivel bearing                   Matador 500 as servo-flash            19
24 CDS photoelectric  cell              Flash photography by daylight        20
25 Interlock key                       Carrying and shoulder strap
26 Sync cord of camera bracket       adjustment                               21
27 Knurled screwr/r"                 Service and guarantee                  21
28 Knurled screw 3/e"
29 Camera bracket
30 lnterlock key
31 Lamp bracket
32 Sync cord safety screw
View original page 6
Page 10 · Read text
www.butkus.us


                                                                                                                               Detai   I ed       OPERATION  -  summary                                                             description
                                                                                                  on page
            Detach camera bracket (29) from lamp bracket (31) by depressing the inter-      6
              locking key (30),

           Screw lamp bracket (31) firmly to lamp unit and connect sync cord (22). Secure      6
            cord with screw (32),

           Screw camera bracket (29) firmly to camera and connect sync cord                   6
               to X-contact (26),

            Connect lamp cord to upper main lamp terminal (19) of generator unit (3),            6

            Connect lamp with camera by locking camera bracket together,                     6
             Set film speed on lens stop computer  (9),                                                      I

             Select desired light power at power switch (10),                                      9

            Set radiation angle (6),                                                                 10

             Adjust camera lens stop,

           Check camera shutter speed,                                                           12

            Switch on at main switch (21),                                                   7

                           A.C. "on" (also forming capacitors)
            ^,                ft            A.C. and battery "off". With A.C. connected:"charge" only
       B            Battery "on"

             Readiness indicator lamp (8) shows when flash is ready for use.

.lI
il t      NOTE:
          Before using the flashlight for the first time, form flash capacitor
        and re - charge battery. Detailed instructions will be found on
         pages 13,14 and 15.
View original page 10Page 11 · Read text
CAMERA CONNECTION


UNIVERSAL BRACKET
The quick-action catch of the universal camera bracket automatically establishes
the sync connection with the lamp unit when the camera bracket is locked with
the lamp bracket.
The generator unit is provided with a similar catch, which holds the lamp unit for
transportation purposes. To release  it, the interlocking key (25) at the front of
the generator unit is simply depressed.
When using several cameras, each can be equipped with its own bracket,
available as optional accessories. Thus, any camera can be connected to the
flashlight "in a flash".
The set-up is extremely rigid, and the lamp unit will even take the weight of the
generator unit quite easily. The weight of a camera is thus no problem at all,
and the photographer  is afforded a very easy means of handling his equipment.
lf it is desired to position the lamp unit further away to the side of the camera,
the sync connections at the lamp unit and camera must also be detached. The
coiled sync cord 8694442571 is then used. When using a commercial sync cord,
this should not be more than 4m (12ft.) long, as otherwise  it cannot be guar-
anteed with certainty that the flash will be released.

LAMP UNIT
The sync cord (22) of the lamp bracket is secured by the sync cord safety screw
(32) against being accidentally pulled out.
The plug of the lamp cord (20) is secured in the terminal socket of the generator
unit by the safety catch (18). Withdrawal of the plug is therefore facilitated by
raising the safety catch.
The main and second lamp are equipped with swivel bearings (7) which permit
the ref lector heads to be swivelled upwards into bounce positions (see page 17).
There is an additional bearing (23) fixed to the main lamp for swivelling  it side-
ways in 30o notched steps. This bearing is also available as optional equipment
for the second lamp.

6
View original page 11
Page 12 · Read text
www.butkus.us

MAIN SWITCH  MODES OF OPERATION
The main switch (21) has three operating positions.
 ln the bottom position "B", the flashlight is switched to battery operation. A low
hum indicates that the unit is operating, and when the indicator lamp (8) lights
up, the flashlight is ready for use. Shortly after the readiness indicator lamp
 lights up, the hum will be interrupted at intervals, due to the action of the auto-
matic control circuit.
 In the center position " |l  ", battery operation is switched off. When connected
to the A.C. via the A.C. unit, as shown in the cover illustration, the battery is
charged. At the same time, the flash capacitors are formed. The charge is
terminated by withdrawing the A.C. plug from the power socket.
 ln the top position ",\.", the flashlight can be used on A.C. powei. Readiness for
use is indicated by the signal lamp (8). To switch off, the A.C. plug is likewise
withdrawn from the power socket, or the main switch returned to the center
charging position " )F ".
GUIDE NUMBER AND FILM SPEED
When using an electronic flashlight, the film is not exposed during the entire
so-called effective shutter time, but only for the short duration of the flash,
unless, of course, some other powerful light source, such as daylight, is allowed
to interfere.
For this reason, the exposure cannot be determined by the shutter speed, but
only by the lens stop setting. The guide number indicates what stop setting
should be selected.
                    Lens stop = Guide number  : Distance
As a measure of the light output of the flashlight, the guide number varies in
accordance with the film speed. The guide numbers of the MATADOR 500 for all
film speeds are given in the table overleaf. Since the guide number is affected
by various factors (area factor, optical equipment, etc.),  it can only be regarded
as an approximation, and is valid only for distances of over 2 metres (6 ft. 6 ins.).
IMPORTANT NOTE
As a result of the tremendous  light intensity of the flashlight, there is a risk of
momentary blindness if it is flashed directly into the eyes at close range. The
selected power output in ws can be used as a guide to the minimum distance
in inches. For example, at 50Ws, distance should be greater than 25 inches,
or, at 100 Ws, greater than 50 inches.
View original page 12Page 14 · Read text
www.butkus.us

LENS STOP COMPUTER AND POWER SWITCH
The lens stop computer (9) takes the mathematics out of the photographer's
work, showing the correct stop setting for every distance with normal radiation
angle. The lens stop computer  is coupled to the power switch (10), and the light
output selected is relayed to the lens stop computer, thus enabling the correct
stop setting to be immediately read off with normal angle of illumination. Naturally,
the film speed must first be set by rotating the disc until the appropriate figure
is opposite the arrow. (Red figures for ASA and  ft.).

             Example: 50 ASA, distance 16 ft.
         At 50 Ws: Guide number 88, distance 16 ft., lens stop: 5.6
             At 100 Ws: Guide number 125, distance 16 ft., lens stop = 8
             At 200 Ws: Guide number 176, distance 16 ft., lens stop : 11

To select the light output, the switch lever is depressed slightly and turned. The
lower lever for the full output of 200 Ws can be actuated only when the upper
lever is already at half output (100 Ws). Conversely, the upper lever can be set to
quarter output (50 Ws) only when the lower lever is turned to the right. Both
levers can be turned together in the required direction by depressing them
simultaneously. They must always be turned to the end position as shown in the
illustrations. Under no circumstances should the levers be allowed to remain in
an intermediate position since this would result in damage to the lamp.


         www.butkus.us
View original page 14Page 16 · Read text
www.butkus.us


With the reflector at the wide angle setting, a larger area is illuminated by the
same volume of light, therefore the guide number must be lower. The lens should
thus be set at one stop lower than that indicated by the lens stop computer.
 lf the wide angle setting is used very frequently or invariably, the lens stop can
be read off immediately  if the film speed is set at the lens stop computer to half
the ASA rating or 3 DIN (corresponding to one stop, see guide numbers table)
lower than it actually is.

            Example:
             50 ASA (18 DIN) full output: guide number 176, distance 16 ft.
              176: 16: stop 11 ; for wide angle setting, select one stop lower:
                                    .     Stop 8

However,  if the lens stop computer is already set to DtN 15 (25 ASA), the stop
setting can be read off directly:    Stop 8


  Picture size                     Focal              Aperture angle                                  length
  d = diagonal                                 f (mm)    Diagonal  I Horizontal I Verticat
               Wide angle      28         75.50        65.50        46.50
                                   35         63.50        54.50        3go
 24x36 mm   Normal         45        51.50        43.50        310
  d = 34.5 mm                     50        470          39.50        270
                  Tele            85        2go         240          160
                                  135         19.50        15.50        100
               Wide angle      50         90.50        620         620
  6x6 cm                     -Normal          80        560          410          410  d=85 mm
                  Tele           150        31.50        22.50        22.50
               Wide angle     100        73.50        620         49o
  9x12 cm                  Normal         150        530          43.50        33.50  d=150 mm
                  Tele           240       350         2go         210
View original page 16Page 17 · Read text
FLASH DURATION AND SHUTTER SPEED

 For between-lens shutters, a shutter speed ol l/rco or 1/ns sec. is selected. How-
 ever, faster shutter speeds may also be used in order to prevent blurring when
 photographing rapidly moving objects, etc. when the exposure time becomes
shorter than the duration of the flash, the total volume of light is no longer
 effectively utilised, as the shutter then closes before the flash is extinguished.
The lens stop correction for such cases is shown in the table under the illu-
 mination curve.
 In the case of focal plane shutters, the manufacturers' instructions should be
consulted. Complete exposure can be obtained only when the two roller blinds
have uncovered the entire film format. This is generally the case at r/so or r/eo sec.

Relative light volume

                         ILLUMINATION CURVES
                     MATADOR 5OO


Duration            rltm I     rllrr                                                                                                           t o,s
of flash                                                                                                                                                               t o,r
Shutter speed  r/rooo
Effective   A3olo        520/o                 80 o/o                  %                                                            1olight       open 2 st.   open 1 st.          open  t/z st.         200 Ws
                                              olo             olovolume             45                                          7'l                                                97 olo              100 ws    100 %           open                      open                                                 r/z st.                 1 st.and stop
                                                                              o/o                                                  o/ocorrection Volo     100%                100           open Vz st.                                     50 Ws   Lot


12


                                                                           J
View original page 17Page 18 · Read text
www.butkus.us

       BATTERY TRAY - CHANGING BATTERIES
          To withdraw battery tray, press lightly and pull forward the locking catch (16). t-
            The tray can then be lifted out by the catch.
           The batteries can easily be removed from the tray should they require attention.
          When removing the battery tray from the generator unit, care should be taken to
             ensure that the batteries are not inadvertently dropped.
          A.C. OPERATION
            Connect only to A.C. soc*et      ,
             Set voltage selector (14) of A.C. unit (2) to the local A.C. voltage with the aid
              of a pointed object. Withdraw battery tray (4) and insert A.C. unit. Insert plug
            of retractible connecting cord in A.C. unit terminal socket (17) of generator
                unit (3).
            Connect to A.C. outlet with A.C. cord (15).
             Set main switch (21) to "-.'.".
              After light-up of the indicator lamp (8) the unit is ready for flash operation. The
             automatic control circuit for A.C. operation ensures that the unit is immediately
             ready for use and guarantees constant light power. (See p. 16 also).
       BATTERY CHARGING
          The battery must be inserted in the generator unit for charging. Connect A.C.
                unit same as for A.C. operation. Set main switch to " )|- ".
             Set battery selector switch of the A.C. unit to the type of battery to be charged
              (lead B or N/C), using a pointed object.
            Discharged batteries should be immediately recharged.
          A full charge requires about 14 hours.
           Even when not in use the batteries must be charged occasionally since every
L             battery slowly discharges  itself.
          As a result of the special circuit of the MATADOR 500 the flash capacitors are
            formed during the process of charging.
            For charging the batteries outside the unit an extra battery tray with terminal
              socket for the A.C. unit cord is available.
    l       LEAD-ACID BATTERIES
             Lead-acid batteries must be charged in the verticii position. The charging state
                 is indicated by the three colored balls in the observation tube.


                                                                                               13
View original page 18Page 19 · Read text
Three balls at top             = fully charged
              Black ball at bottom         = 10% discharged
              Bfack and red ball at bottom =50% discharged
            Three balls at bottom        = 80% discharged
 Each observation tube is furthermore provided with two acid level marks. When
the battery is fully charged, the acid level should be between these two marks,
 but may fall below the lower mark during discharge.  lf it does not rise above the
 increase level, add only distilled water. Never add before charging, as the final
 level may wind up above the upper mark and lead to subsequent spillage in use.
N/C BATTERIES
The chemical composition of a N/C battery makes it impossible to provide
an optical indication of its charging condition with any degree of certainty. A
 useful guide is the charging period, which bears a certain relationship to the
number of flashes released.  lf the simple rule is adopted:
                           t hour's recharge for every 10 flashes,
constant readiness and a long service life will be ensured for the battery of the
MATADOR 5OO.
 lf the charging condition is unknown,  i. e. before the equipment is put into
operation for the first time and after the equipment has been out of use for some
time, it is permissible to charge the N/C batteries for 12 hours. Occasional over-
charging (up to 24 hours) will not damage N/C batteries.
 lf the battery should be inadvertently discharged to such an extent that the
recovery time exceeds 30 seconds or the flashlight even ceases to function at
all, the battery is exhausted. This does not mean that it is unfit for further
service, but it will need a charge of up to 24 hours. After it has been discharged
2 or 3 times through normal use of the flashlight and recharged for 14 hours
each time,  it will regain its full capacity.
 lf it is found impossible to charge the battery in the flishlight,  it must be con-
nected to a special charger at one of our service establishments.                                                                                                                                                                                        iI
SPECIAL NOTES ON BATTERY TYPES                                                                                                                                                                                                   II
Sonnenscfiein 2Bf3 "slandard", Order No. 8 697 g42OSs                                                                                                    i
ldeally suitable for the professional photographer. Long service life under heavy
conditions of use; particularly robust construction,  largely unaffected byfrequent
charging cycles.
"standard" batteries have a shelf life of up to three weeks after being charged;
unused batteries should be recharged as soon as the black balls sink. After
3 months at the latest they should be completely discharged and then recharged.

't4

                                                                                                                                                                                                                                                                                                                                                           ItI
View original page 19Page 20 · Read text
www.butkus.us


 After all the balls have risen, the battery should be charged for a further 3-4
 hours, upon which  it will reach its full capacity.

 Sonnenschein 2Bf3 "permanent",8 697 342053
 Needing only a negligible amount of maintenance, this battery is particularly
 suitable for intermittent use, e. g. as a reserve battery for amateur photographers.
 "permanent" batteries have a shelf life of up to 6 months when fully charged;
 unused batteries should be recharged as soon as the red balls sink.
 After all the balls have risen, they should be charged for a further 1-2 hours,
 whereupon they will reach their full capacity

 Nidcel-cadmium (N/C) battery,8 692 942 048
 This battery is of gastight design.  lt is thus not possible for the electrolyte to dry
 up and re-filling is unnecessary; this type of battery is therefore classed as
 maintenance-free. Their higher purchase price is outweighted by their longer
 service life, in addition to minimum service requirements.

REPLACING BATTERIES
When one of a pair of batteries becomes unfit for service as the result of normal
 deterioration, bolh batteries must be replaced in order for full capacity to be
obtained.
ADDITIONAL CARE - FORMING
The MATADOR 500 is a professional flashlight and is designed for intensive use.
Frequent operation also happens to be the best formula for the care of the
electrical components, particularly the flash capacitors. For the full maintenance
of their service fitness, they need electric current, and they attain their optimum
service life when subjected to plenty of use. lf left unused for lengthy periods,
they are liable to become prematurely weak.
A special circuit in the MATADOR 500 ensures that the flash capacitors are also
formed during the process of charging.  lf however batteries are charged outside
the unit, care must be taken to ensure that the unit in the switch position " t*  "
or ".r." is attached to the A.C. mains for 20 minutes before it is put into operation
for the first time or after it has been out of operation for a long time.
Please also follow the instructions on the charging of accumulators when the
flashlight  is not in use.


                                                                           15
View original page 20Page 22 · Read text
www.butkus.us


The recovery time is an approximate measure of the time between the release
of a flash and the lighting up of the readiness indicator lamp.
By reason of the special circuitry of the MATADOR 500, all flash capacitors are
always charged together. When the  f lashlight is used at low output, e. g. 50 Ws,
only the appropriate electrolytic capacitors is discharged.  lf the flashlight is re-
quired at full output immediately afterwards,  it is ready for use again within one
second, as only the 50 Ws capacitor needs to be charged.

!NDTRECT LtcHTtNG (BOUNCE EFFECTS)
The main and second lamp units are provided with reflectors which can be
easily swivelled upwards and have click-stop positions at Oo, 4So and 90o.
with the swivel bearing (23) the lamps can be swivelled sideways to bounce
positions or likewise upwards, when the camera is used crosswise.
A certain amount of light is absorbed when using bounce lighting, depending on
the height of the room and the reflectivity of the ceiling. The lens should there-
fore be opened approximately a further 3-4 stop numbers at the 45o setting of
the reflector and 4-5 numbers at the g0o setting. At full power, the correct lens
stop will be about 5.6-8 in medium-sized rooms, using S0 ASA film.
The big advantage of the bounce technique is that virtually shadowless lighting
is obtained.
The use of an indirect second lamp unit for brightening the scene conjunction
with a direct main lamp unit can also produce excellent results. ln such cases,
only the light of the main lamp unit is taken into account for the purpose of
ascertaining the lens stop setting.


                                                                                 17
View original page 22Page 23 · Read text
WORKING WITH TWO LAMP UNITS

The plug of the second lamp cord is inserted in the lower socket (20) of the
generator unit.
It is secured in the same way as the main lamp.
The second lamp unit (1) is likewise provided with a readinessindicatorlamp(8).
When two flashlights are connected to the same generator unit, the light power
is equally divided between both lamps, provided of course that the second lamp
is switched on at the switch (13). The light power is selected in the usual way at
the switch (10) of the main lamp unit.
The full guide number thus remains the same when both flashlights are trained
direct on the same motive. However, if the second lamp unit is used in such a
way that it has no effect on the computation of the lens stop, the lens should be
opened by one stop. All the variations in the use of the second lamp unit are
therefore encompassed by the limits of this stop number:
        Second lamp 300-600 to the side     : open 1/zslop additional
        Second lamp over 600 to the side   : open 1 stop additional
        Second lamp in bounce position  = open 1 stop additional
         Main lamp also about 40o to the side : open a further % stop additional


STUDIO EOUIPMENT

The tremendous light intensity of the MATADOR 500, its universal equipment
and its well-designed accessories enable it to be used in many combinations
for a wide variety of applications. Swivelling reflectors, second lamp with photo-
electric cell, judicious light grading by power selector switch or use of second
lamp connection permit a powerful and reasonably-priced set of studio lighting
equipment to be assembled with one or several MATADOR 500's. At the same
time, every flashlight can be used individually. When the equipment is operated
exclusively from the mains in the studio, the cost of accumulators can also be
saved.
View original page 23Page 24 · Read text
www.butkus.us


MATADOR 5OO
AS SERVO.FLASH WITH PHOTOELECTRIC CELL

The second lamp unit is equipped with a CDS photoelectric cell (241, which re-
sponds to external flashes. The photoelectric cell is brought into operation by
moving the upper switch (12) to the left to reveal the letters "LS" (light switch).

The sensitivity of the photoelectric needs not to be adjusted, since  it is provided
with a pulse release.  lt reacts independent of the intensity of the light in the
room, being controlled solely by the instantaneous light pulse of the flash. lt is
so sensitive that under certain circumstances  it reacts at short distances to the
rapid fluctuations in the light intensity of fluorescent lamps.
Since the second lamp and the photoelectric cell can be switched off individu-
ally, the second lamp unit can remain connected to the generator unit until re-
quired. This enables the following modes of operation to be used:


Second lamp and photoelectric cell "Olf".      Second lamp "On". Main and second lamp
Only main lamp in operation via x-contact of       in operation via x-contact of camera.
camera.


Photoelectric cell "On", second lamp            Photoelectric cell and second lamp "On"
"Off". Only main lamp is triggered via           Main and second lamp are triggered via
photoelectric cell.                                 photoelectric  cell.


                                                                                 19
View original page 24Page 25 · Read text
FLASH PHOTOGRAPHY BY DAYLIGHT

The flashlight is particularly popular for the effective lightening of shadows, for
obtaining "sunshine" effects on dull days and for the constitution of individual
shots such as that given in the example below.
It is well known that daylight is subject to wide variations in colour temperature
amounting to several thousands degrees Kelvin; the serious photographer can
compensate for such variations only with the aid of colour correction  filters.
Photographers with their own "private sun", however, are independent of such
vagaries when making open-air exposures; the constant, controlled color
temperature guarantees 100% uniform picture quality for any particular emulsion.

EXAMPLE:
Portrait in daylight against a bright background. Distance 8ft.At1/tpowar (50Ws)
the lens stop computer shows stop 11. For stop 11, the exposure meter shows
r/cosec. By altering the stop setting, the effect of the flash can be varied; by
altering the exposure time, the effect of the flash remains unaltered, but the ex-
posure is influenced by the daylight. Various effects can be obtained, depending
on how these settings ate combined.


                    Effect of setting
           on back-      | motive**)

            Unaltered     Low           Silhouette
             daylight        illumination    effect

      1/60   Unaltered     Normal        Sunshine             daylight        illumination    effect  ilI

      1/125  Unaltered     Good        Good for
             daylight        illumination    dullweather

      1/2s0  Darker       Good          Twilight
                             illumination    effect

         1 /500  Dark        Good          Night effect
                             illumination

  ') Not reached by flashlight
'*) llluminated by flashlight


20
View original page 25Page 26 · Read text
www.butkus.us


MATADOR 5OO
AS SERVO.FLASH WITH PHOTOELECTRIC CELL

The second lamp unit is equipped with a CDS photoelectric cell (24), which re-
sponds to external flashes. The photoelectric cell is brought into operation by
moving the upper switch (12) to the left to reveal the letters "LS" (light switch).

The sensitivity of the photoelectric needs not to be adjusted, since  it is provided
with a pulse release. lt reacts independent of the intensity of the light in the
room, being controlled solely by the instantaneous light pulse of the flash. lt is
so sensitive that under certain circumstances  it reacts at short distances to the
rapid fluctuations in the light intensity of fluorescent lamps.
Since the second lamp and the photoelectric cell can be switched off individu-
ally, the second lamp unit can remain connected to the generator unit until re-
quired. This enables the following modes of operation to be used:


Second lamp and photoelectric cell "Off".      Second lamp "On". Main and second lamp
Only main lamp in operation via x-contact of       in operation via x-contact of camera.
camera.


Photoelectric cell "On". second lamo            Photoelectric cell and second lamp "On"
"Off". Only main lamp is triggered via           Main and second lamp are triggered via
photoelectric cell.                                 photoelectric cell.


                                                                                 19
View original page 26Page 27 · Read text
FLASH PHOTOGRAPHY BY DAYLIGHT

 The flashlight is particularly popular for the effective lightening of shadows, for
 obtaining "sunshine" effects on dull days and for the constitution of individual
 shots such as that given in the example below.
 It is well known that daylight is subject to wide variations in colour temperature
amounting to several thousands degrees Kelvin; the serious photographer can
compensate for such variations only with the aid of colour correction  filters.
 Photographers with their own "private sun", however, are independent of such
vagaries when making open-air exposures; the constant, controlled color
temperature guarantees 100% uniform picture quality for any particular emulsion.

EXAMPLE:
 Portrait in daylight against a bright background. Distance 8ft.At1/apowar (50Ws)
the lens stop computer shows stop 11. For stop 11, the exposure meter shows
 r/eosec. By altering the stop setting, the effect of the flash can be varied; by
altering the exposure time, the effect of the flash remains unaltered, but the ex-
posure is influenced by the daylight. Various effects can be obtained, depending
on how these settings are combined.


                     Effect of setting
          on back-      | motive")

            Unaltered     Low           Silhouette
             daylight        illumination    effect

      1t60   Unallered     Normal        Sunshine
             daylight         illum ination    effect

      1/125  Unaltered     Good        Good for
             daylight        illumination    dullweather
      1l2fi  Darker       Good          Twilight
                             illumination    effect         fi:
         1 /500  Dark        Good          Night effect
                             illumination

  -) Not reached by flashlight
.') llluminated by flashlight


20
View original page 27Page 28 · Read text
www.butkus.us


CARRYING AND
SHOULDER STRAP
ADJUSTMENT

 For transportation purposes, the lamp
 unit is clipped into the retention
 device of the generator unit. To ad-
 just the shoulder strap, the batteries
must be removed. Upon lifting thc
 tongue of the strap buckle, the carry-
 ing length can be adjusted in the
 usual way.
The specialsurface of the strap lends
 is a good grip and makes any addi-
tional protection against slipping
superf luous.
SERVICE AND GUARANTEE
Your MATADOR 500 is designed and manufactured on ilre most up-to-date
principles for serious professional use. Rugged construction and parts that rest
securely in the hand lend the flashlight the solid and dependable "feel" that the
professional will readily recognize. Meticulous manufacture is followed by a
rigorous final inspection, both at the manufacturing and distribution level.
Please read carefully the terms of your guarantee. To validate your guarantee,
fill out your registration card now and mail it without delay. should your
MATADOR 500 fail to function properly at any time, send it to Allied lmpex corp.,
sole authorized importers for the United States, at the address nearest you.
Please pack it carefully, and include a brief description  of what is not operating
properly.
Your flash unit is guaranteed for six rnonths, as described in the guarantee
packed with the unit. lf the unit is returned for repairs under the guarantee,
please enclose the guarantee card; otherwise, repairs cannot be made without
charge.
For repairs within the guarantee, please enclose $ 2.7s to cover handling and
return postage.
For repairs not covered by guarantee, send no money; you will be sent an esti-
mate of the repair charge.


                                                                                        21
View original page 28Page 29 · Read text
Robert Bosch Elektronik
und Photokino GmbH1 Berlin 3il   BAUER
Forckenbeckstrasse  9-13
A member of the Boscfi organization           Flashguns


lmported and guaranteed in the United States exclusively by:
        ALLI ED IM PEX CORPORATION
               168 Glen Cove Road
                Carle Place, New York, 11514


SERVICE STATIONS

Interstate Photo Supply Corporation
'168 Glen Cove Road, Carle Place, New York

Interstate Photo Supply Western Corporation
1025 Airway St., Glendale, California,91201

Interstate Photo Supply Southwest Corporation
1328 Motor Circle, Dallas, Texas, 75207

lnterstate Photo Supply Midwest Corporation
6445 No. Hamlin Avenue, Chicago, lllinois, 60 645


Subiect to alteration                      Printed in Germany              vKD  - 8 699 941 066 (04s/3)
View original page 29From the M. Butkus archive. Original publisher and archive notices are retained.
Check the model and edition against your equipment.
PDF verified 2026-10-10.