Film cameras
Universal Junior Cameras User manual
User manual for Universal Junior Cameras. 19 pages in English. Read the original PDF, download or print a copy without registration.
19 pagesEnglish2.1 MB PDF
Loading your manual…Open PDF directly
Document details
- Brand
- Universal
- Model / document
- Universal Junior Cameras
- Document type
- User manual
- Language
- English
- Pages
- 19
- File size
- 2.1 MB
- Category
- Film cameras
- Document date
- Not specified in catalog
Search available document text
Find a term, then jump to its page in the original PDF. Image-only pages may not be searchable; check the PDF for exact wording and diagrams.
Page 1 · Read text
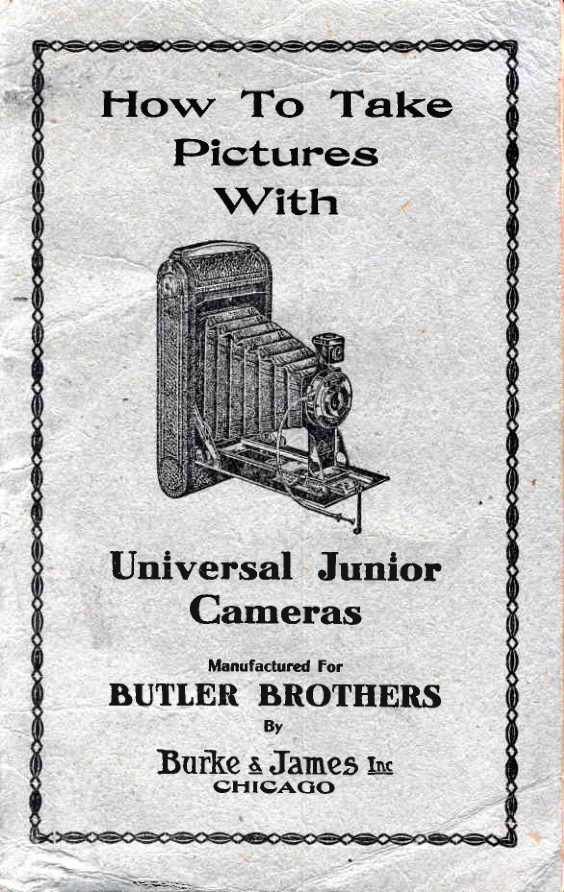
Hornz To   ifake
    Pieture.s
      with


Universal  Junior
    Cameras

             Manufacturcd For
BUTTER BROTIIERS
               By
        q   Burke        JameSros          gFtrcAco
View original page 1Page 3 · Read text
Instructionsfor 0peratingRexoJr. Cameras
  Do  not  attempt   to  loacl  or  take  any  pictures   with   the
Rexo  Junior    untit  you  have  become  thoroughly    familiar
with  every  part   of  the  instruinent.    Take  especial  care  to
learn  the  construction   of  the  shutter;  work    it  for  time,  bulb
and  instantaneous   exposures.  Read  carefully   the  following
instructions.   The  most  important   thing   to  be remembered
in  picture  taking   is  that  no  white   light   (including  gas,  elec'
tric  or lamp  light)  should be allowed  to  strike  the  film,  even
for  a fractional   part  of a second, until    it  has been developed
and fixed.    It  is therefore  best  that  the loading  and unloading
be done  in  a subdued  light,   for  after  the  seal on the  film  is
broken  there   is a  possibility   of  the  edges becoming  fogged
if  care  is not  taken  to  keep  the  black  paper drawn   tightly.
    Before  loading  the  camera  try  the  shutter   to  see that    it
is working   properly.   Remove   all  the  dust  from  the  lens  with
a  soft  cloth.
   Films Adapted to the Rexo Junior Cameras
  The  Rexo  Juniors  accommodate   all  standard  makes  of
roll  flms   of  eorresponding   sizes as shown  in  the   table:
                            -trxpo-
  Camera,           Size  sures Rexo    Eastman         Price
No. 1  Rexo  Jr. ZV+xBt/+   6   475 120 (No. 2  Brownie)  $ 0 . 2 0
No. 14 Rexo  Jr. Ztkx4Va    6   425  116 (No. 1A  X'. P. K.)        . 2 5
No. 1.A.Rexo  Jr. Zt/zx4L/+  12   426  116 (No. 1.A' X'. P. K.)    .50
No. 2C Rexo  Jr. 27/sx47/a  6   436 130 (No. 2C  F. P. K.)        . 3 5
No. 2C Rexo  Jr. 27/sx47/e  10   438  130 (No. 2C   ll, P. K.)    .60
No. 3  Rexo  Jr. TY+x4Ye   6   .{30 113 (No.3      tr'. P. r(.)        . 3 5
No. 3  Rexo  Jr. !r/+x4Va   t2   431 118 (No. 3   F. P. K.)    .?0
No. 3A Rexo  Jr. 7t/+x|Vz    6   445  122 (No. 3A  X'. P. K.)    .40
No. 3A Rexo  Jr.  Tt/+x|t/z   10   446  122 (No. 3A   tr'. P. K.)    .70
               To toad
   To prepare  for  loading,  back  of the camera must be removed.
This  is best  accomplished  by  holding  the  instrument    in  both
hands as illustrated   in figure  1.  Push  the knob  located under
the  strap  handle,  to  the  right,    i.  e., in  the  opposite  direction
from  the  winding  key"   This   will  release  the  cover  catch  so
that  the  cover can be  easily  removed.  An  empty  spool  will
be found. in  position  in  the  winding  key  chamber.
   Next,  break  the seal on '|,he film  cartriclge  ancl plaee the spool
in  the  empty  chamber  as shown  in  figure  2;  this  is accom-
plished  by  raising  the  lever which  in  turn  d.raws back  the  spool
centers, so that  the spool  will  drop  into  position.   Next,  touch
 the lever which  will  throw  the spool centers forward,  engaging
them  in  the encls of  the  film  spool.-     See that  the black  paper
leads  off lhe  lop  of  the  spool.  The  film  is now  in  positibn  to
eontin-ue, lo,ading;  the  retaining   spring  preventing  any  loosen-
ing_of  the black- paper.  Next,?raw   tie-black   pap-er across the
back  of  the eamera  ancl about two  incihes beyond  the  encl of
the samera.  Then  threacl the  encl of  the black  paper  into  ths
                                                - l -
           ;
View original page 3Page 4 · Read text
wide  slot  in  the e_-p!y  spool, as shown  in  figure  3.  Now  turn
 the rvincling_k.y  slorvly  untit  the paper  is sec"ured.,two  or three
 turns  should be sufficient.
     After  the  fihn  is secured replace the back cover by hooking
 it  into  the  end  of  the eamera  opposite  the  strap  handle,  ,uE
 figure  4, using  eare  that  the  hookecl encl of  th;  back  cover
 engages in  the ll-shaped  groove on the  lorver end of the ealn-
 era, however,  note  that  the back  eover  r,vill not  fully  engage
 until  the  lock  nnder  the  handle   is  pushecl to  the  rigfrt]  7t
 the same time  pressing on the back cover  until    it  .ngug.s   in
 the  lock.


                                                   n
                                                                                             d|i:,i't"


                                                                                                                                                                                                                                                                                                                                                                                                                                    .  .  :   '  :  :  |  i  .  :  :  :   '  |  :  :  :  .
                              FigrrreI
   With  the baek in plaee tunr  tire winding k.y  slowly until
the figure 1 appeal's opposite the ruby  rvindor,r,'ivhich signifies
that the fllm is in proper position for the first exposure. To
open the front  of the camera press the hidden button located
on the top of the cam('ra (see figure 5 ) pull dorvn bed until
tltt'side braees spring into position so that bed of camera is
held rigirlly.
    \\ihen fitted with  a Rapid Rectilinear Lens, the automatic
f ocusing lock should be set at  the desired distance before
drawing out the standard.  To set the   f ocusing lock, grasp
                                            - 2 -
                            www.orphancameras.com
View original page 4Page 5 · Read text
the knob r,vith the thumb and forefinger and pull out to release
the spring, the lcck can then be set for any distance by sliding
the spring until   it, engages in the slot opposite to the desrred
distance as engraved on the fccusing scale,


                                            f'tgure  2
   Next, draw out the lens standard  until   it engages in  t'he
focusing lock.  When  fitted  with  a Single Achromatic Menis-
cus Lens (except No. 3A  Rexo Junior), the camera is now
 reacly for p_hotographlng _all Sjects  at a distanee of e_rghtfegt
or more. Note that the 3A Rexo  Junior  (single achromatic
lens) is equipped with a focusing scale locking at  6, 8, 10, 15t


                               Figure 3
                                                  - 3 -
View original page 5Page 6 · Read text
20 and 100;  for  all distances greater than 20 feet, set the
    pointer on 100-foot mark.
     When  it  is desired t,o change the  f ocus, af ter the eamera
   has been set, reset the  f ocusing lock  f or the desired distance
   and mor'e the standard backu'ard or forward  until  the notch
    again engages in the spring on the focusing lock, as described
    above.
        fn order to insure sharp pictures, the distance of the object
    from  the camera shoulcl be carefully  estimated.   If   thi;   is
    found difficult  it  will be rvell to step off the distance. With
        pointer set at the proper distance the picture will then be    lhu
     in focus.


                                      l-igure 4.

       For  those desiring an instrument   for  automatieally  meas-
    uring  the distance from  the camera  to the object photographed
    \\ze recommend an Ideal  Telemeter,  price 50 cents  at, all photo-
    supply  dealers.
      To close the eamera release the focusing  lock,  at  the samc
    time  pushing  the standard  back  into  the body  of  the camera,.
   Be sure that  the standard  is pushed back as far  as  it  will  go
     in  order  to  eliminate  any  possibility   of  injuring   the  shutter
   when the bed plate  is closed.  To close bed plate press down-
   ward  on  the  bed  braces and  close  the  bed  until   the  catch
   engageS.
                                   4 -
                               www.orphancameras.comt
View original page 6Page 7 · Read text
The Shutter
  The No.   I A, 3 and 3A Rexo Juniors are fitted. with  a,D
 Jtrnior Autonratic Shutter  (flex  I'[cdel) workirag for  time,
 bulb,  I /25, 1750 and 7 /I00  of a seconcl. The No. 1 Junior
 Shutter u'orks for  time, bulb,  I /25,  I /50  of a second.  All
 shutters are operaterl by either the flexible wire releases or
 the finger ler-er.
   The pointer on the graduated scale at the bottom  of the
shutter indicates the aperture at which the lens is working,
the graduated scale at  the top  of the  shutter  indicates the
different methods of making exposures. When the pointer  is              ((T"set opposite     time exposures of any duration are obtained
by pressing the lever or release to open the shutter and press-
itg   it again to close it.  When the pointer is placed opposite


                                Figure 5.
(68"     bulb  exposures  are obtained  by  a single pressure  of  the
lever,  the  lens  remainitg   open so long  as  the  lever  is  held
down  and  closing  in stantly  upon  the  release  of  the  lever.
Bulb  exposllres are especially  valuable  for making  short  time
exposures.   \\lhen  the  pointer   is placed opposite  L / L00, L / 50
or    I / 25, an  instantaneous  exposure  of  this  duration   is  ob-
tained  by  giving  the  lever  or^ release a  single  pressure, the
                                                 - o -
View original page 7Page 8 · Read text
shqtter  ope_ning and closing  in the  fractional   part  of a second,
    as indicated.
        This  shutter  works  arrtomatically  and  is always  set,-Beforlready
     for making  either time, bulb or instaritaneous  exposures.
    attempting    to  take  pictures  one  should  become  thoroughly
     familiar   with   the  working   of  the  shutter,  noting   its  action
    under  the  various  conditions  described  above.
    rhe stop.o"airpffittl   ?#*l3tffwhich  regulatesthe
   amount  of  light  that  is allowed  ,to pass through  the-lens.  The
    rliaphragm^  is  t9  be  red.ucecl or  entargecl  iccording   to  the      4
    strength  of                           light.                  .the                         -Wh.g _making exposures uncler-ordinary             )
    conditions_the pointer shoulcl be,set on,,-1r,  (U.S.  8 or  f,  1li.
       If-.thelight_   is ve y strong  set pointer  on stop 2  (U.  S. 6,r            I    _
   F  16).  The  3, 4 and 5 stops are to be used foi  making  timo            .l
    exposures o;rly, where unusu-al clepth is required                                                      j
            If  the camera  is  fitted  with  a single  lens  set the  pointer
   on stop 1 for  all  ordinary  exposures.  See the  follolving  pages
     for  instructions   on  the  proper  stops  and  exposures  Ioi   f,he      4
    various  conditions  of  light.
        fnstantaneous or Snap Shot Exposures
        fn  making   instantaneous   or  snap  shot  exposures  never
    '  use a.di_aphiagm stop smaller than 16.  Usually  8 is preferable,
    especially_ fo_r short  range  pictures.   Snap  shots  are  usually
   made  lr.hile holding  the camera  in  the  hand,  the  light  should
    therefore  be bright  sunshine.  On bright  days snap shots can
   be made  at  any time  during  the  day-from   ihree  Lours  after
    sunrise  to  three  hours  before  sunset.   Earlier   or  later  than
    this  short  time  exposures  should be given.     It   is a good rule
   never to photograp.h  directly  toward  the sun, the besd position
   being  to_ have  the  light  shining  from  behind  the  operator  or
   over  either  shoulder  and  directly  on the  object  to-be  photo-
   graphed.     If  the  direct  rayg__oj the sun  strike  the  lens during
    the exposure                        p_icture will  be blurred.  Do not  try  to  phol                   -the
   tograph  moving  objects  at  a  shorter  distance  than  2b leet
    distant  from  the camera.    ft  is advisable  to endeavor  to catch    d
   them  at  arr angle  either  coming  toward.  or  going  from  the
   camera,  as good  results   will  not  be obtained    if  taken  when
   the  object  is  directly  opposite.   fn  photographing    tall  build-
    ings at close range   it  is necessary to seeure a posiltion as near   ?
   as  possible  opposite  the  center  of  the  building,   for    if  the                                        itJ
   camera  is tilted  upwards,  the lines  in the picture  will  be found                         t
    to converge because of  the  fact  that  the  top  of  the  building               l"
     is of a mueh  greater  distanee from  the camera than  the  bot-              tI
   tom.   This same rule applies when photographing  small  otrjects
   such         as                           in            a  dog;                               this                            case                                      the                                    camera                                                should                                                    be  lowered
    to  the                      of                       the                             object                                         to                                  be                                            taken,  thus                                                        avoiding            .eenter                                                            any          i
    distortion.  When  ready  to make the exposure observe the  fol-
   lowing  rules
                                                    - - 6 -
                               www.orphancameras.com\L
View original page 8Page 9 · Read text
First,  see that  the  pointer  on  the  shutter   is  set opposite
the  correct  opening  and  shutter  speed.
   Second, see that  the  focusing  pointer   is  set  opposite  the
proper distance  of the  object from  the camera.
    Third,  be sure  that  an unexposed  portion   of  the  film   is
turned  into  position.
   When  ready  for  making  the  exposure  hold  the eamera  in
both hands and as near  level  as possible  so that  the  picture
will  be  in  true  perspective.   Locate  the  object  in  the  finder
by looking  squarely  into   it, making  sure that   all  of the obje_ct
which you  desire to photograph   falls  within  the  limits   of  the
flnder.  When   all  is  in  readiness  release  the  shutter,  taking
care not  to  jerk  or move the camera  during  the  exposure.  A
pressure  of  the  lever  will  open  the  shutter   for  a  fractional
part  of a second, thereby  permitting   the  light  to pass through
the lens and. forming  an image on the  sensitive  surface  of the
film.   After  making  the exposure  turn  the winding  key  to  the
left,  watching   the  ruby  window   in  the  back  of  the  camera
until   the  next  number  appears.   This   is  a  very  important
point  and one should  early  acquire  the  habit  of  turning   the
winding  key  after  each exposure, thus  avoiding  the  possibility
of making  trvo exposures on the same surface  of  the  film.
              Time Exposures
   When  making   time  exposures    it   is  absolutely  necessary
that  the camera be placed. upon a tripod,  table  or firm  support
where  there  will  be no danger  of  its  being moved. during  the
exposure.   Center  the  object  properly   in  the  finder,  set  the
shutter  on  "T"    if  a long  exposure  is  to  be made I where  an
exposure  of a few seconds is to be made  it  will  be found more
convenient  to  set  the  pointer  on  "B."  When  the  pointer   is
set on  "T"  give  a  single  pressure  of  the  lever  to  open and
$'hen  sufficient  time  has  elapsed  an  additional   pressure  to
close, using  care not  to  jar  the  shutter   in  either  opening  or
closing.
    fn  making   time  exposures    it   is  necessary  to  use some
judgment   in  regard  to  the  length  of  time  the  lens  should
remain oDen.  This  is governed by  the amount  of  light  which
falls upon  thc  object  to be photographed  at  the  time  of  the
exposure.
               .  Time Exposures Out-of-doors
    In making time exposures out of doors the pointer should
be set on "B" and the shutter worked as quickly as possible.
  WITH SUNSIIINE  use stop 3, U. S. 32 or  !' 22, opening
ancl closing the shutter as quickly as possible.
  WITH  LIGHT  CI-/OUDSuse stop 3, U. S. 32 or E 22, giv-
ing from one-half to one seconclexposure.
  WITII HEAYY CLOUD'S use stop 3, U. S. 32 or E 22, and
give from two to five seeoncls.
                                             -

  -Jdgr         ,.$bjsi.-         ,,rr*
View original page 9Page 10 · Read text
The  foregoing   calculations   are  for  open  air  exposures.
   When  photographing   objects   in  shadows  or  on  porches,  no
   accurate  directions  can be given  as too much  depends upon
    the  density   of  the  shad.ows.  Proper  exposure  can  only  be
   learned  through  experience  or by  using  a  scientific  exposure
   meter  such as the  Watkins  Bee.
     CAUTION.   Never attempt   to make a time  exposure while
   holding  the camera  in the hand, as a blurred  picture  is sure to
    result.
                TIME  EXPOSURES  INDOORS
      fn__using  the  following   table  the pointer  shoultl be set upon               't
      I  (q. S.8  or F  11)..  In ease the 2  (U. S. or F  16) stop is    usecl, twice ,as much time must be given.   With>   3  (U.  S: g2       ,
    or F  22)  stop, four  times as much;  and with  the.4  (U.  S. 4
   or,F  8  lE  7.71) stop, one-half the time shown in the table.
         WHITE VTALLSAND ONE WINDOW
       Bright  sun  outside,  three  seconds.
      Eazy  sun, eight  seconds.
       Cloudy-bright,   flfteen  seconds.
       Cloudy-dull,   thirty   seconds.
     WHITE  WALLS  AND MORE THAN  ONE WINDOW
       Bright  sun outside,  two  seconds.
      Hazy  sun, five seconds.
       Cloudy-bright,   ten seconds.
       Cloudy-duil,  twenty  seconds.
      MEDIUM  COLORED WALLS  AND ONE WINDOW
       Bright  sun outside,  six seconds.
     Hazy  sun, fifteen  seconds.
       Cloudy-bright,   thirty  seconds.
       Cloudy-dull,  sixty seconds.
     IUEDIUM  COLORED WALLS  AND MORE THAN  ONE
                wrNDow                       a
       Bright  sun outside,  four  seconds.                                                                  I
     Hazy  sun, ten seconds.
       Cloudy-bright,  twenty  seconds.                                                                      I
       Cloudy-dqll,_                           I9.!I   sgcogLds.                                                                           I       DARK COLORED WALLS  AND ONE VTINDOW
       Bright  sun outside, twenty  seconds.
      Hazy  sun, forty  seconds.                        "eighty       Ctoriay-Uright,                            seconds.                                            t$
   _  - 9!g"dy:dull,   two  minutes,  forty  seconds.                                                 !
  DARK COLORED WALLS  AND MORE THAN  ONE WINDOW        1
       Bright  sun outside,  ten  seconds.                                                                r'
       ^43ty_sun,-twen-ty.seconds._                                                                          I       Cloudy-bright,   forty  second.s.
      Cloudy-dull,  one minute,  t.went5r.ssssnflg;
   _  The  foregoing  figures  are  for  rooms  whose  wind.ows  get
    light  direct_ from  the  sky  and  for  any  time  during  the  d-ay-
   from  three hours  after  sunrise  to three hours before  sunset.
                                                    - E -
                               www.orphancameras.com
\                                                ,,s6 i
View original page 10Page 11 · Read text
NOTE-It      is advisable  when  circumstances  permit   to  use
   stop 2, doubling  the time  of exposure given  in the above tables.
             Home Portraits
       In  order  to make  portraits   (large  busts  and heads)   it   is
  necessary to use a portrait   attachment.    For  this  purpose we
   strongly  recommend  the  Ideal  Portrait   Lens, which  will  enable
  you  to make  portraits   of  the same softness  that  marks  pro-
   fessional work.  The  Ideal  Portrait  Lens  is mounted  in a neat
  brass  cell  with  adjustable  springs  ancl  fits  over  the hood  of
  the lens like a cap.  Special directions  for  its use accompanies
  each lens.       Bemoving the Film
     No dark  room  is required  for  removing  the  film  from  the
  camera.   Ilowever,     it   is  best  to  perform   this  operation   in
  subdued  light,  observing  the  following   rules:
       First:   When  the  last  section  of the  film has been exposed
   turn  the  winding  key  until   all  of  the paper has been wound
  on the  spool  in  the key-winding  chamber.   This  can be told
  by  the ease with  which  the  spool  turns.
     Second;  Remove  the  back  of  the  camera  as directed  on
,  the preceding pages.
 \     Third:   Draw  the  loose end  of  the  black  paper  tightty
  around, the spool and fasten   it  with  the gummed  sticker  which
   wiII be found  in the empty  reel.
      Fourth:   To remove  the  cartridge  from  the  camera,  turn
  the camera  face up and  pull  out  the  winding  key  to  its   full
   extent,  then,  with  the  forefinger  of  the  other  hand,  pull  back
  the retaining  spring, located  in the center  of the  fllm  chamber,
  as far as  it  will  go, which  will  allow  the  film  cartridge  to drop
   into  the hand.
            Dark Room Development
      Films  may  be taken  to  the  nearest  Photo  Supply  Dealer
   for development.   Dealers handling  our products can be readily
  recognized by the appearance of our trade-mark  on their  store
  lvindows.   Ilowever,   in  order  to  secure the  greatest  pleasure
  and  profit  from  your  camera  we  advise  that   the  amateur  '  develop  his own  films,  for  the process  is both  interesting  and
  simple.  The  easiest and  least  expensive way  to  develop  roll
   films  is by  using  trays   in  a darkened  room  which   is  lighted
  only  with  the ruby  lamp, care being taken  that   all white  light
   is excluded.  The  follolving   articles  are reiommended   for  this
  purpose:
     An  Ingento  Ruby  Lamp  No.  6.
      3 Insulate  Trays  4x5, or 4x6  (postcard).
      L 8-oz. tumblei  graduate.
      1 fngento  Tablet  Crusher,  or  glass  stirring   rod.
      1 Amateur   Printing  Frame  and  plain  glass.
      1 package of Ingento  M. Q. Tablets  or Tubes.
      1 box of Ingento  Acid HYPo.
                                                   - 9    -

   d       ;,i;d,iir@&,[o,'
View original page 11Page 12 · Read text
select a room  or closet where  all  white   li[ht  can be easily
    excluded.  when  development   is done  at  nigit    trris  oners-n"c,
     difficulty.  whatever.   The  reason  that  a  d-arkened room   is
    req,uired is  that  the  film  is extremely  sensitive  to  white   lighi
                     spoiled   if  exposed  either  to  dayiight         f*ilp    X1*,*"o"ld,,be    hght   for  the  fractional   part  of  a second.  Having  provided"i
    the articles mentioned- above, secure a pair  of scissorS, i  pitcher
    of water  and. a  pail  for  waste.
       Set           ,             ,the ,ry.Uf .lamp -on a table  or  shelf and  light    it.  The
   subdued red  light  which   it  emits  wiil  not  injure  t--he sensitive
    film  unless held  too  close to   it.    rt  is there?ore  advisable  to
   ntagg  !|e  {amq  a.t  least  18  inches  away  f"om   tte-iray     in   which  the developing  is to be done;   fill one of the  travs  with           /
   w&ter, open the box  of  tablets  and take two  tablets  fiom  the
    large  bottle  and two  tablets  from  one of the  small  vials;    fill
   the graduate  to  the six-ounce mark  and drop  all  four  tablets
    into  the water,  immediately   crushing  them  with  a stirring   rod.


                 Developing the Film in a Strip-figure  6
    until  reduced  to  a  fine powder;  then   stir  the  solution   until
   the  tablets  are  thorouglily-seconddissolved.   pour  the  contents   of
   the- gradua,te                   _into the  'measuring\roy;   next  prepare  the  fixing   bath._by  di.q..q_olvingone            cup  (which   will  be found
  on  the  rnside  of  the  box)   level   full  of  the   fixins  com_
   pound.             in  eight                   ounces                                   of                                   water.                                                            stir                                                              until                                                          the   iLtntioo                                                                                                                                                t'*l    is  coryplete;                 then                               the                                   contents                                                     of                                                   the  graduate                                                                            into                      _p_our   the         .third   .tray.                         (Note-It      is  not  necessary"to'unaffectedmix  the             I   solutions    in   the  d_arkroom,  as  they   are              by
    ligfrt).     It  is advisable  to reserve one tiay   for  the  fixing  batL
   only.
     To develop  the  fflm  break  the  seal with  which  the  black
   paper  is  held  and  unroll   until   the  point  where  the  film   is
                                            -    l o -
                               www.orphancameras.com
b;       *,.--
View original page 12Page 13 · Read text
attachecl  to  the  black  paper,  then  detach  the  entire  strip  _of
  film from  the black paper and allow  the  fllm  to  roll up loosely.
  HoId  one end  of  th-e ioll  with  the  thumb  and  finger  of  the
   left  hand. and take  hold  of  the  free end with  the  right.   Pass
  the  film  through  the  tray  of clean cold water,  holding  one end'
  in each hand  as shown  in  the  cut.   Pass   it  in  this  mannet'
  through   the  water   several  times  so  that   there   will  be no
  bubbles  remaining  on  the  swface   of  the  film.  When    it   is
  thoroughly   wet  the  development  may  be commenced'.  Hold-
  ing  the  fiim  in  the same manner,  pass the  film  througl   th.g
  developi.ng  solution  as  described  for  wetting-    it,  keeping   -it
  constantly   in  motion.    In  about  one mimrte  dark- spots  will
  begin  to appear.  These are termed  high  lights,  ?-1q very  soon
  aftlr   theif  appearance an image  of the object  will  be discern'
  ible.  Complete development  in  the  strip  by  passing-the  film
  through  the  d.eveloping solution   until   all  the  detail  hag been
  brought  out  in  the  thinest  negatives.
         It  will  be noted  that  the negatives  are of  different  d'ensity.
  This, however,  is not  an objection  as this  can be overcome  in
  printing.   The  difference  in  density  does not  affect  the  differ'
  6nce in  contrast.   Keep  the  strip  which   is being developed  in
  constant  motion,  allowing   the  developer  to  act  from   five  to
  eight  minutes,  depending- upon  the  rapidity-  with  which  the
  negative  gathers  density.   The  progress  oj  development  may
  be*watched  by  holding  the  strip  up  to  the  lamp  from  time
  to  time.     It    ii  advisable,  however,  to make  the  examination
  as short as possible
      Note:   To avoid transparent  spots  after  having  passecl the
   film  through  the developef  the  first  time  face down,  reverse  it
  and pass^clrawingit  through  face up, holding  the  film down  in the- tray
  and                    it  lightly  thrbugh  the developer  under  the hand.
  This   will  break   atl  tne  air  bubbles.   Transparent   spots  are
  caused by  air bubbles adhering  to the  film  during  developmer-rt.
      Aftef   the  development  has been completed,  pass the  film
  a few  times  througli  the  clear  water,  then  transferring      it  to
  the  tray  containing  the  fixing  bath.  When   all  of the creamy
  surface-has disappeared from  the unsensitized  surface  of  the
   film  flxation   is pr^actically complete.     It  is, however,  advisable
   to  continue   to- pass  the  film  through   the _solution  two   or
  three  minutes   aiter  the  disappearance  of  the  c,rgqmy  color_.
       After  the  films  are thoroughiy   fixed they  should be washed
   in  cold running  water  from   foriy   to  sixty  minutes'      If  run-
          *ut"t    is n"ot convenient,  ten changes of lresh  Y"!,""  should
   "i"gtu  i.."a,  keeping  the  films  constantly-in   motion   all  the  while.
   ihu  thotongi-all #ashing   of the fi1ms is very  important.in   order
   to remove       tra""s-of   the Hypo  or  else stains   will  appear
   after-      drying  and  the  negatives   yil-l  be  ruined'
       Aftei  wEshing,  the  fiiirs  should be hung 9.P to.dry.  in such
   a manner  that  ifdoes  not touch  the surround.ing  objects.  The
                                                  -    l t  -
,tr'   .-&l                                                                                                      'ul
View original page 13Page 14 · Read text
place sele-eted for  drying  should be free from  dust.    rf  a mild
 current  of  air  is present  the process of dryinge  will  be cgreaily quickened.
    The  tempe-r_ature of  the  developing  solution  should  be as
 near as possible to  65 degrees-Fahrenheit.   The  fixing  bath
 and  water  used  for. wgsfring  should  be kept  cora, ice'being
 employed  in extremely  hot weather.
    The use of fhe rngento  Developing  Roller  will  greafly   facil-
  t_lit-: th:,developing  process.  This  d'evice consistE oi  u't,"urry
 glass  roller  which  revolves  on  two  brass  pins  mounted    iir
       heavy                nickel-plated                          b1a9s                                     frame.                                                                  It's                                        own                                                      weight                                                                                     is sufficient"*gu.             to  resist                      the  pull  of                                   the  film                                   when                                                                                            it                                                                     is beine                                                      drawn
 through  the_ solution.   when   this  roller  is used onlv  f,aH  the        {
 solution.  ordinarily   required  need be made  up, as itre   rotter
 over which  the  film  is drawn   is  within   z/rc   oi  a"n inch from
 the  bottom   of  the  tray,  thus  keeping  the  film  entirely   sub-


    e    Cutting thc Film for Separate Development-figure 7
merged  in  less than  one-half  inch  of  solution.     rt   is  for  use
in tray_s 4xE or larger and will accommodate anyllm   +%"a% -
or smaller and can be obtained  from  all photo  supply  dealers.
     Separate Development of Each Exposure
   The above directions  apply  to  the development  of the  film
in the gt-rip.   rt  is sometimes-advisable  to develop each-section
separately,  especially  where  there  has been a gieat  variation
in       exposures given.   rn  this  case the  folloi'ing   directione   lheepply:
    In  unrolling   th-e  film  preparatory    to  developing   in  this
El&nner, care must be taken  that  the end should not  re allowed
to  roll       -up _o_verthe paper.  The exposures should be cut  apart
wit-h  the  black  paplr  on  top  so ihat   the  divisions  between
eech ulm  ean be  readily  recognized  by  the  numbers  which
                           _   l 2 _
                             www.orphancameras.com
View original page 14Page 15 · Read text
appear on the edge of  thl  blac]  paper.  Do not  let  the  finge-rs
t6rich  the  face  ol  the  film.   The  face  is  the  dull  side.  The
proper manner  of  holcling  the  film  is  iliustratect  by  figure  9.
    After  the  film has been cut  into  sections as indicated  above,
place the  sections  in  the  tray  containing   the  clear  water,  to
iu*ove   air  bubbles,  covering  the  tray  with  a piece of brown
paper  or cardboard  to  exclude  the  light   of  the  Pqp.   Take
irn6 of the  sections from  the water  and. immerse   it  face down
in the  tray  containing  the developer;  rock  the  tray  gently  to
prevent  s[reaks  and  air  bubb]es.   In  about  one minute   the
hlm  will  begin  to  darken,  representing  lhe  high.-lights.  of  the
picture,  and  in about  two  minutes  the imag-e will  be discern-
intu.  The common  way   of  determining  when  the  film  has
been fully  developed is to look on the back to ascertain whether
the objecls  in the picture  have begun  to show through.  When
developing-thefilms  singly,  from   five  to  six  minutes   is  usuallY
requir6d,       time  vaiying   according  to  the  temperature   of
the  solution.
   When  development-clear    is  eomplete  transfer   the  film   to  the
tray  containing        water  and  rinse   it  two  or  three  trmes,
after  which    if  should  be placed  in  the  tray  containing   the
fixing. bath.   At  this  juncture  the  second section  of  the  film
shoul-d be  put  through   the  same  process, care  having  been
taken  that  none of  the Hypo  has adhered  to  the  fingers,  thus
allowing     it  to come  in  contact  with  the undeveloped  section
of the  film  or with  the develoPer.
    Three  or more  negatives  may  be developed  at  ole  time
by  placing  the  films  in  the  developer  face down  and  alter-
niting  each section so as to prevent  air bubbles  I however' we
recomlmend  that  the  beginner  develop  only  one section  at  a
time  until  the necessary experience has been gainecl. - As each
successive section  is developed and  fixed   it  should  be placed
in  the washing  water.   After  the  fllms  have been thoroughly
washed they  slould  be pinned up separately  to  dry, care being
taken   that:  their  surface   is  not  allowed  to come  in  contact
with  the  surrounding   objects.
  JMe recommencl fngento   or Bexo  M.  Q. Tqbeg  or- trngento
M. Q. Tablets  as the most  highly  satisfactory   tleveloper. for
 flms]   Complete  directions   for  making  up  these  solutions
are  printetl  bn  each tube.   For  those  wlro-desire   to  prepare
 their  own  developer we recolnmend  the  following   formula:
water        TIll: T:::i ::::l:Ti'  .. .    64 02.
 Metol  or Fredol.                                      45  gr.
 socriumsurphiclei;;h;A;;;;i   ::.:.....              .ra/z62.
 Sodium Carbonate (anhyclrous)                    .. .. . . . 1   oz.
 I l y c l r o c h i n o n . .                               . . . . . i                . . . . 9 0   g r .
 B i o m i c l e o Pf o t a s s i u m . .                                 . . . . . - - - I 2   g r .
                         _ 1 3 _

          .;;*",.;',.         .ja;,S"                                                                                A
View original page 15Page 16 · Read text
lllaking  Prints
     ifhere                    in  general  use, three  classes of  paper  used. for            -are
 making  pictures;  namely,  blue_print. or  ferro-piussiate  paper,
 printin_g-out  paper  such  as_Soli,or_JDisco, ete.r'ana  aeveiop'ing
 or  gaslight  paper,^ suclr a9 Rexo,  Velox,'  Argo,  etc.  The  first
 two  classes  are  for_ daylight   printing.   onlf,   while   the   last
 class may  be printed   eiftrei  in  hayligli't   o" "by  artificial   light           ;
                                   s,,"gurio"f                       i   openthep"i"tt*ti#;ilo"g;3."1,r""?nfl                               acedown                                                                                                                                           I upon        the  glass,  then  place^ u_pon this  a  she-et of  brue                                                                           print
 plpjr:-   Replace the  back  of  the  printing  frame  and. secure  it
 yr_!\ tne  springs.    rt  rvil  be noted  that The back  of the  print-
 rng-frame   is hinged so that  a pVrt  of the  print  may be uncov-
 ered        for                        during   piinting,   without   dislurbing    its           .           inppe_ction
 register_with   the negative.   fhe  loading  of the paper  into  the
 frame  should be done  in a subdued  rigrt,  that  is,^in  an  ordi-
 nary  room,  but  as  far  as  possible  fiom   the  -wlndow.  The
 unused- pa_pel should be returned  to  its package  for  protection
 from  the  light.
         Ioaded  printing   fl"p"   qhould be_placed glass  side up .   ,Th"
        strongest  possible  light,  direct  suntigtrt  being  preferred. iT lhu
 rt  is allowed  to  remain'until    the image frdm  the  n""gltive  has
been                   irnpressed on  the  sensitive  paper.  " This  can       -sufficiently
gnff  be determined                              utr occasional examinatioi    of the paper..                   Fy
 Print   until  the shad_ows become a  gray bronze  color,  or  until
     high  lights  are slightly  tinged  witb  blue.  when   ihi,   *rrg"-the
has been reached remove- the  print  from  the  printing   fram-e,
wash  thoroughly   in  running  water   for  15 minutes  or" in  sev-
eral  chalges  of  cold  water,  allowing   the  print   to  remain   in
eaeh bath  a few  minutes.    After  having  thorouehlv  washed
the  print  as at,ove                      1n{icat_ed, it  should  bj  hung       i6"  drying.The  rngento             _Blue Pr!1t  Paper  is  especially  iecommende"d"fr           a"s it  is                 especially  for  photographic   purposes.     _prepared
 ..   When  using a  printing-out   papei  such as D"isco, Solio,'prinietc.,
the  frame  should  be loaded as directed  above  for  blue
paper.  The  printing   should be allowed  to  continue   untii  the
tone  of  the  print   is somewhat  darker  than  is desirable  in  the
fnished  picture.   rngento                                     andrixing    solution   is highly                           Jgning
recommended  for  toning  this  class of  paper.   Mix  the  toiin!;
solution  as directed  on the pa_ckage and-pour     it  into  a  trayl
The  prints  should be immersed  in-this   soiution  face d.own so
as  to  insure  the  even action  of  the  solution  over  the whole                  -irsurface  of                     p-rint.   After  a moment  or  so, the  print  may                                                     I           _the
be reversed so that  the  toning  can be watched.   Repeat  this
process fro,m  time   to  time  during   toning.   The  prints   will
begin  to  change  color  immediately   upon  immersion   in  the
toning                  At,  first  they  are  of a reddish  brown,  changing        -path.
gradually   to reddish  yellow,  then  to brown  and then  to  puiple-.
                            _ 1 4 _
                             www.orphancameras.com
View original page 16Page 17 · Read text
Toning  should  be stopped when  the  desired  shade has been
       obtained.   At  this  point  the  prints  should  be transferred   to
      a salt  solution  made by  dissolving  one tablespoonful   of com-
     mon  table  salt  in  16 ounccs  of  water.   The  prints  should be
       allowed   to  remain   in  this  solution  about   5' minutes,   after
      which  they  should be washed  for  one hour  in  running  water
        or in twelve changes of water.  They are then ready  for  drying,
      books  and   for   this  purpose  we  recommend.  Ingenfo   Blottel
       Several   prints  can be toned  simultaneously.
              Developing on Gaslight Papers
          Developing  Papers,  such as  Rexo,  Velox,  Argo,   ete.,  are
       very  popular  with  amateurs  because of the  simplicity   in  their
       operation,  the excellent  results  obtained  and the added advan-
       thge  of  being  able  to  print  them  by   artificial    light.   These
       papers can  be handled  with   safety   eight  or  ten  feet  away
       from  an  ordinary   gaslight.   They  should  not,  however,  be
        allowetl   to  remain  uncovered   in  the  direct  rays  of  the  light
                                      To
              W
                                      EL

      even  at  this  distanee  for  any  considerable  time.   The  paper
         is loaded  into  an  ordinary   printing  frame   in  the same  rlan-
       ner  as above  described  for  printing-out   papers,  taking   care'
        that  the  emulsion  side  of  the  paper  is against  the  dul   side
r       of  the  fllm.   The  emulsion  side  of  the  paper  can be  deter-     'mined             by  tendency   of  the  paper  to  curl   in  that   direction,
       or by  biting  a corner  of  the paper, the emulsion  side tending
        to  stick  to the  teeth.   With  the back  of the frame  clamped  in
r      position,    it  is exposed by  holding    it  near  a gas  jet,  lamp  or'      incandescent  light.   The  length  of the exposure depends upon
       the  distanee aL which  the  frame   is  held. from  the  light,  and
       the  density   of  the  negative.   Exposure  can  also be made  in
      subdued  daylight;   however,  artificial   light   is  preferred,  as   it
      does not  vary   in  intensity   as  is the  case with  daylight  and
            it  is therefore  much  easier to judge  the length  of the exposure
       required.
         With  thi:  class of paper no rmage  is seen on the surface.
       until  the print has been placed in  the developer.
       The larger the negative, the greater the distance it should
     be held from the light, the usual rule being that  the proper
 l*    distance is equal to the diagonal of the negative. The time of
 F   exposure varies with  the distance the printing frame is held
                              -15-

             ,i&ih&xr.,l
View original page 17Page 18 · Read text
from   the   light.      If,  however,  daylight    is  used,   it   witl  be
  found  advantageous  to  cover  all  the windows  with   postoffice
   paper,,with  the exception  of an opening about one foot  square.
  Over  this  opening  two  or  three  sheets of  tissue  paper  should
  be pasted  to  diffuse  the  light,  then use a piece of black  cloth
   ol any  other  opaque medium  to  cover  this  opening when  the
   white  light   is not  desired  for  printing  purposes.   In  this  case
   the  frame  should  be held  from  one  to  two  feet  awav  from
   t_he opening  during  exposure.     It   is  impossible  to  give  exact
   directions  as to the length  of exposure on account ofthe   great
   difference  in  the  intensity   of  daylight   at  various  times,  the
   best method  being  to make  test  exposures  with  small  strips
   of the paper used.
      Place  three  trays  on  the  work  table  as indicated   in  the
  accompanying  diagram_.  Use enough  solution   to  thoroughly
  subme_rge_lhe prints,  the  temperature   of  the  developing  Jolu-
   tion  should be about  ?0 degrees Fahrenheit,  keeping  the  fix-
I        solution  as_ near  as  possible  to  the  tempefature    of  b0    ittg
  degre_es. In  making  up  these  solutions  always  follow  closely
   the directions accompanying the developer used. We recod-
   pe."d  the  fngellg    4.  _Q. Diveloping   Td,blets  or Rexo  M.  e.
  Tubes for use with  aJl cleveloping papers. Having  prepared thL
  developer  and  fixing  bath,  the  prints  should  be immersed  in
  the  dev-eloper, using  care  that  the  solution.flows   evenly  over
  the  surface, leaving no  air  bubbles.  The image should appear
   in     _from gight  to  ten  seconds.    It   will  rapidly   gather   aetait
  and  density.   When  the  desired. tone  has  be-en-obtained,    it
   gfou]<t be quickly  removed  from  the  developer and  placed  in
   the  tray  containing  water,  after  which   it  is transferrid    to the
   fixing   bath.    3'or  best  results,  we  recommend   the  use  of
  Rexo  Acid  Hypo.    Directions   for  making   the  bath  accom-
  p11y  gach pagkage.  The  prints   shoultl  be  kept   in  motion
  while   in  the  fixing  bath.   X'rom  eight  to  ten  minutes   is  re-
  quired  for_ thor_ough- fixation,   after  which  they  should  be  re-
  moved and washed  for an hour  in running  water  or  in twelve
  ehanges of  clear  water.    Prints  can be Eest  driecl  in  blotter
  books  and   for   this  purpose  we  recommend   our   blotter
  Books.  More  explicit  directions  for  printing   will  be found  in
  each package of paper.
      For  those who  desire  to  prepare   their  own  developer,  we
  recommend  the  following   formuli:  'Water,
           soft  or  clistillecl.                                 .....20   oz.
  Metol  or  Tleclol.                                       1b gr.
  B. &  J. Soclium  Sulphite   (Anhyclrous)     . ..               . . Tz  ot;r,lce
  $ I c l r o c h - i n o n                                        . . . . : .                 . . . . . 6 0  g r a i n s
  B. & J. Sotlium Carbonate (Anhyclrous)  ...         ...s/a"ottnee
  P o t a s s i u mB r o m j J e               . . . . : . . . . . : .                   . . . . , 1 t  g r a i n s
    Dissolve  the  e,Lemicals in  the  orcler namecl.  The  tem.
  perature  of tho solution  should be about 68 degrees Fahr.
                              _  t 6 _
                              www.orphancameras.com
View original page 18Page 19 · Read text
Load Your auameraWith
               [UiU
Non-Curl,ing-0rthoekromatio-Now'Hal'ation
  The extra speeilyou get in Rexo Film
reducqq.to a minimum  your underexpo-
sures, and therefore greatly increasesyour
percentage of good Pictures.
    rHE RECORDINGYEATANE
  Ample spaceis provided for writing on
each negative fultr data relating to every
picture.- This is done after the neSativ-e
is developed. Ordinary black ink is used'
This record can be included in the pic-
tu-re,gromited as one Prefers.
      TRY"THIS RAPID FILM
  Made in sizesto fit everypopular @mera
on the market. With Rexo Film you will
 get negatiVesof snapand brilliance which
 *itt  p*do""  clear, beautiful pictdres.

                    Manufacttrred  BY
        BuikecJaneglls'ffi','fu'
         240-268E. Ontario St.,' CHICAGO
 Eastern Branch  ZZSFittU Ave. NEW YORK' N. Y'
                  Makers of
    n4x}Cameras, Paper, Film and Photo-Supplies
View original page 19From the M. Butkus archive. Original publisher and archive notices are retained.
Check the model and edition against your equipment.
PDF verified 2026-10-10.