Film cameras
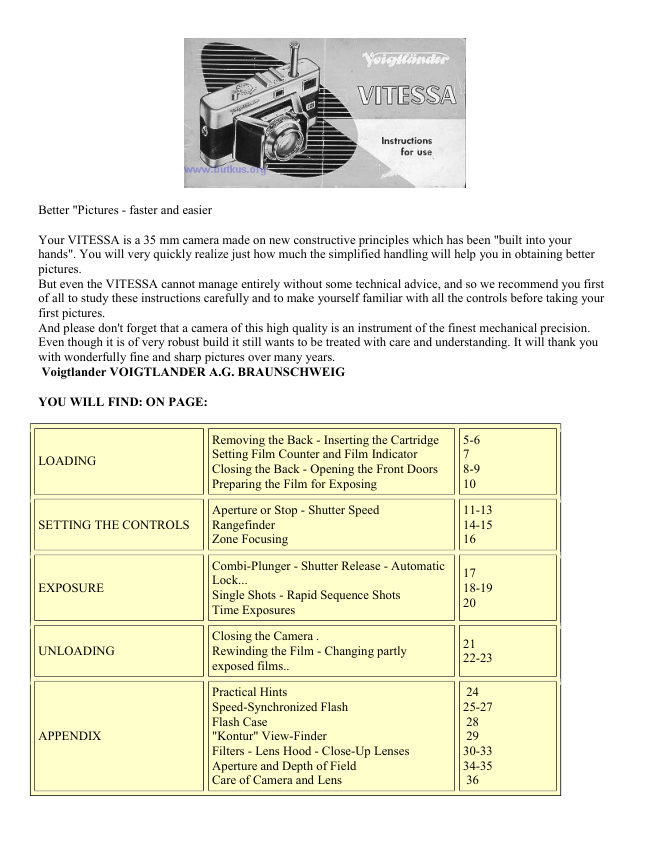
VITESSA User manual
User manual for VITESSA. 25 pages in English. Read the original PDF, download or print a copy without registration.
25 pagesEnglish3.4 MB PDF
Loading your manual…Open PDF directly
Document details
- Brand
- Voigtländer
- Model / document
- VITESSA
- Document type
- User manual
- Language
- English
- Pages
- 25
- File size
- 3.4 MB
- Category
- Film cameras
- Document date
- Not specified in catalog
Search available document text
Find a term, then jump to its page in the original PDF. Image-only pages may not be searchable; check the PDF for exact wording and diagrams.
Page 2 · Read text
Better "Pictures - faster and easier

Your VITESSA is a 35 mm camera made on new constructive principles which has been "built into your
hands". You will very quickly realize just how much the simplified handling will help you in obtaining better
pictures.
But even the VITESSA cannot manage entirely without some technical advice, and so we recommend you first
of all to study these instructions carefully and to make yourself familiar with all the controls before taking your
first pictures.
And please don't forget that a camera of this high quality is an instrument of the finest mechanical precision.
Even though it is of very robust build it still wants to be treated with care and understanding. It will thank you
with wonderfully fine and sharp pictures over many years.
 Voigtlander VOIGTLANDER A.G. BRAUNSCHWEIG

YOU WILL FIND: ON PAGE:


                          Removing the Back - Inserting the Cartridge    5-6
                                  Setting Film Counter and Film Indicator       7
LOADING
                               Closing the Back - Opening the Front Doors    8-9
                                Preparing the Film for Exposing              10

                               Aperture or Stop - Shutter Speed              11-13
SETTING THE CONTROLS    Rangefinder                                14-15
                           Zone Focusing                            16

                             Combi-Plunger - Shutter Release - Automatic
                                                                   17
                                  Lock...
EXPOSURE                                                            18-19
                                Single Shots - Rapid Sequence Shots
                                                                   20
                          Time Exposures

                               Closing the Camera .
                                                                   21
UNLOADING                Rewinding the Film - Changing partly
                                                                        22-23
                             exposed films..

                                   Practical Hints                            24
                              Speed-Synchronized Flash                   25-27
                                Flash Case                               28
APPENDIX                   "Kontur" View-Finder                      29
                                      Filters - Lens Hood - Close-Up Lenses         30-33
                               Aperture and Depth of Field                  34-35
                             Care of Camera and Lens                    36
View original page 2Page 3 · Read text
FRONT VIEW - Front doors open

A. Aperture Scale
B. Release Button
C. Focusing Scale with Depth of Field
Indicator
D. Accessory Shoe
E. Combi-Plunger
F. View- and Rangefinder Windows
G. Synchro-Lever for M/X Settings
H. Shutter Speed Ring for Setting
Shutter Speeds
I. Flash Socket for Connecting Flash
Guns
K. Film Counter and Film Indicator


BACK VIEW - Front Doors Open

L. View- and Rangefinder Eyepiece
M. Camera Back (Completely
Removable)
N. Focusing Wheel
O. Rewind Crank - when folded out
serves as camera support
P. Tripod Bush
Q. Rewind Button R Left Front Door
R. Aperture Setting Wheel T Right
Front Door
S. Latch for Locking Camera Back
T. Right Front Door
U. latch for Locking Camera Back
View original page 3
Page 5 · Read text
Hold the camera in your left hand, with the four fingers
lying against the lower edge of the front doors 10. Lift up
the latch and give it a quarter turn so that it points to "Off"
(2) , grip the latch and pull the camera back off the body
(3), using your left thumb which lies against the back to
help in pushing it off.


INSERTING THE CARTRIDGE


                            Turn the film transport shaft by the cogs until the slit
                                   in the take-up spool next to it faces upward (4).


Now push the tongue of the film as far as possible into the slit of the spool.

The upper edge of the film must touch the inside of the upper rim of the spool (5). Now pull the cartridge across
the transport shaft and the film aperture and insert it in the film chamber (6).
View original page 5Page 6 · Read text
SETTING FILM COUNTER AND FILM INDICATOR


                                               Finally, set the film indicator in
                                            the back (10). To avoid errors
                                                  later on, decide from the start on
                                            the colour marks you propose to
                                        use for the different films, and
                                 make a note of them.


Turn the milled edge of the film counter
disc in the direction of the arrow until
the. mark is opposite the index line on the
body (9).

Hold the camera with your left hand to
stop the cartridge from dropping out (7)
and turn it over (8).
View original page 6Page 8 · Read text
OPENING THE FRONT DOORS


                                                                Caution: It is advisable to
                                                                     use the left index finger for
                                                                      braking slightly the
                                                          movement of the combi-
                                                                      plunger as it slides out at the
                                                           same time. If the lens does
Hold the camera in both hands,                                          not come forward all the way,
point it slightly downwards, and                                          gently pull one of the front
press the release button (15). The                                      doors outwards.
two doors will spring open and
expose the shutter and lens. The
fully open camera appears as shown
in illustration.


PREPARING THE FILM FOR EXPOSING


                                    Press down the combi-plunger as far as it will go and allow it to
                                    spring up again. Press down the release button and keep it
                                  depressed is. Work the combi-plunger once more 19. Now take
                                 your finger off the release button and push down the combi-plunger
                                      for the third time.


The film is now ready for the first exposure and the film counter shows "0" From now on it will show the
number of exposures you have made.
View original page 8Page 9 · Read text
SETTING THE APERTURE


                        To set the aperture or stop turn the semi-circular wheel underneath the
                                  shutter housing ® and (. It is best to use your index finger.


All the stops on the scale which rotates during setting click into position opposite the tip of the A
mark ®, making accidental changes impossible. The scale and index mark are visible from above
(4).
View original page 9Page 10 · Read text
SETTING THE SHUTTER SPEED


                                 To set the shutter speed, turn the large, milled shutter
                                        speed ring Ts. All the settings are easily read off from
                                      above ©. Set the red dot on the shutter speed ring opposite
                                             the required shutter speed (ill. (7)= 1/2 sec).


The shutter has already been tensioned during loading (see p. 10).
View original page 10Page 11 · Read text
The figures on the shutter speed scale stand for
                                                        fractions of a second, except for the "1"/ which
                                          means one second. Intermediate speeds can be set
                                  EXCEPT between '/,o and 1/25 second, and
                                              between 1/250 and 1/500 second.


At the extreme left is the "B" setting for time exposures 80; at this setting the shutter remains open so long as
the release is kept pressed down. At the extreme right is the setting for 1/500 second (9) . This can only be set
before tensioning the shutter.

THE VIEW- AND RANGEFINDER


The precision finder of the VITESSA is a combined
viewfinder and rangefinder. Through the large eye-piece
                                           Make sure that your fingers are clear of
on the left (10) you see the bright picture area with the
                                                           the left-hand front window when using the
focusing diamond in the centre. The milled focusing
                                                                finder. Finger prints on this window can
wheel is at the right (11) .
                                                            also affect the focusing efficiency of the
The viewfinder is automatically compensated for
                                                           rangefinder.
parallax and shows the correct picture area at all
distances, including close-ups (3.3 to 7 feet).
View original page 11Page 12 · Read text
SETTING THE RANGEFINDER


                    Hold the camera in shooting position. Put your right
                   thumb on the milled wheel 12. Bring your eye right
                   up to the eye-piece of the finder so that you can see
                             all the four corners of the image. Make sure you are
                      looking straight through the centre. As long as the
                       rangefinder is incorrectly focused the focusing area
                   13 shows a double image of the subject .. Now turn
                        the focusing wheel until the double images in the
                       focusing diamond (ill. 1s for a horizontal and 16 for
                     an upright example) coincide and fuse into one
                      sharp image 17. The lens is now focused on exactly
                        the correct distance.

                      Note: With horizontal pictures watch the vertical
                          lines of the subject; for upright views focus on the
                        horizontal lines.


Setting the rangefinder automatically moves the focusing scale as well. Above the scale, in the centre is the
triangular index mark    (18) to which points exactly to the focused distance. The values of the distance
settings without figures are given on page 35.

For snapshots by "zone focusing" without using the rangefinder the distance scale carries two special marks.
When the distance is set at the  mark (10 feet) (19), everything between 8 and 15 feet will be sharp; when set
at the ( ) mark (30 feet) (20), the zone of sharp focus extends from 15 feet to 00 (infinity).
View original page 12Page 13 · Read text
Note:

Good light conditions are necessary for these settings and the aperture has to be set at the red dot between f/5.6
and f/8 (21).

See pp. 34 and 35 for a more detailed explanation of "Aperture and Depth of Field".

COMBI-PLUNGER . SHUTTER RELEASE . AUTOMATIC LOCK

A single finger pressure on the combi-plunger transports the film by one frame (automatically lifting the film
pressure plate), tensions the shutter, counts the exposures and releases the shutter lock.

Always press the combi-plunger down as far as it will go. If this is not done it will lock itself in the lower third
of its way and will only free itself after being pressed down completely once again.

Pressing the combi-plunger several times without making any exposures will do no harm. With the longer
speeds

(1/2and 1 second) always wait for the shutter mechanism to run down fully before working the plunger
again.

Always press the release button down in one gentle movement and never jerk it - you would only get blurred
pictures. The release button is threaded inside to take a cable release for time exposures (see p. 20).

The automatic shutter lock prevents double exposures as well as blank (unexposed) frames. The shutter is
tensioned only after a previous exposure; equally, the release button can be worked only after the combi-
plunger has been pressed down.
View original page 13
Page 15 · Read text
TIME EXPOSURES


When making exposures at speeds slower than 1/25 second, you should not use the camera held in the hand,
unless you happen to have exceptionally steady hands or when you can support your arms or lean against a solid
object.
Otherwise the camera must have a firm support. One way is to fold the rewind crank outwards and to stand the
camera on a level surface (7). Alternatively, mount it on a tripod (8). For time exposures a cable release with
locking device is useful; this screws into the thread inside the release button (9).


CLOSING THE CAMERA


The front cover of the shutter carries two red pressure marks (1). To close the front doors, hold the camera in
both hands, press with both thumbs simultaneously on the two marks (2) and push the shutter and lens into the
camera body. Then close the camera by folding down the two doors until they engage with an audible click (3)
and push home the combi-plunger. Finally press the release button down to its first pressure.
View original page 15
Page 16 · Read text
UNLOADING THE CAMERA


When the film counter indicates the number of the
last exposure (1) or the combi-plunger cannot be
fully depressed (2), the whole film has been exposed
and has to be rewound into the cartridge in this way:


Close the front doors, depress the rewind button on the
underside of the camera once quickly (no constant
pressure), and at the same time press home the combi-
plunger (3). Unfold the rewind crank (4) and turn it in
the direction of the arrow until the film counter dial
stops moving. Now pull the camera back off in the way
described previously and take out the cartridge.


CHANGING PARTLY EXPOSED FILMS

If you wish to exchange a partly exposed film for one of a different type
(e. g black-and-white for colour), first make a I note of the number of
exposures already made (1). Then rewind the film in the normal way but
stop winding immediately the film counter ceases to rotate (2). Now
open the camera back and remove the cartridge. When reloading the
partly exposed film, start off in the usual manner (3). Then half open (4)
the two front doors, press down the release button and keep it depressed
while pushing the combi-plunger down fully as often as necessary until
the film counter shows the number following the one you noted down
(5).
View original page 16
Page 17 · Read text
PRACTICAL HINTS

• If the beginning of the film is not properly anchored on the take-up spool, it may slip out and will not be
advanced on pressing the combi-plunger. To check: Unfold the rewind crank and let it hang down. Hold the
camera horizontally to see whether the crank turns when you work the plunger. If it does not move, the
beginning of the film has slipped out and must be fixed afresh to the take-up spool after opening the camera
back (see page 6).
• Deliberate double exposures (e. g. for trick shots) are quite easy, despite the automatic double exposure lock.
Proceed as follows: After the first exposure depress the rewind button, let go, and then fully push in the combi-
plunger. This tensions the shutter without advancing the film, and you can make a second exposure. Then work
the combi-plunger as already described.
If in doubt about the correct exposure, expose black-and-white film generously; a certain amount of
overexposure does not matter much. Underexposure, however, always gives poor results. With colour film,
exposure must be accurate; use an electric exposure meter at all times.

SPEED-SYNCHRONIZED FLASH SHOTS


The SYNCHRO-COMPUR makes possible flash
shots of moving subjects at any shutter speed,
including '/500 second. You can use the flash as
the sole light source or else combine it with
daylight or artificial light. With against-the-light
shots you obtain excellent illumination of the
shadow areas. All flash units on the market,
including electronic flash, can be used with the
shutter. Light-weight guns can simply be pushed
into the accessory shoe; larger ones are mounted
on a bracket which is screwed into the tripod
bush and kept at the left-hand side of the camera
(see. ill.).


The flash lead which connects the flash gun with the camera carries on one end a round plug which is inserted
into the sunk socket in the left-hand front door. The other end has the plug for the flash gun. This is often a
safety plug with one thin and one thick pin which can be connected only in the correct way.
View original page 17
Page 18 · Read text
THE SETTINGS ON THE SYNCHRO-COMPUR SHUTTER


 Synchronization, exposure time, and
aperture must be set according to the type
of flash in use to ensure that the peak
brightness of the flash coincides with the
instant when the shutter is fully open.
Flash bulbs and electronic flash tubes
vary in their firing delay times, and are
classified in the table on the right. The
synchronizing lever on the shutter must
be set to either X or M, according to the
type of flash in use (see ill.). Then set the
shutter speed according to the values
given under X and M and tension the
shutter in the usual way.


For setting the correct aperture look up the so-called "guide numbers", which will be found in the instructions
supplied with all types of flash. The correct aperture number will be found by dividing the respective guide-
number by the distance in feet between the camera with flash and the subject. (Aperture = Guide-Number /
Distance)

X-Setting
The contact closes at the moment when the shutter is fully open.


M-Setting
The contact closes a short time-corresponding to the firing delay of class M bulbs - before the shutter begins to
open.
View original page 18
Page 20 · Read text
FLASH CASE


The use of flash has become a matter of course for the up-to-date amateur
photographer, not only after dark, but also in daylight. A flash bulb can
give useful illumination to the often too black shadows of against-the-light
shots; it can give the subject an effect of sunlight on a dull day, enable you
to take hand-held snapshots with insufficient natural light, and so on.
To save you the inconvenience of carrying a flash gun separately,
Voigtlander have created for you a Flash Case which carries in the smallest
possible space both your camera and your flash gun. When you open the
case and have inserted the lamp and done the setting you are immediately
ready to use the flash gun because you can leave the flash lead connected
to the camera even with the case closed.
Please ask your dealer for the detailed prospectus.


THE "KONTUR" PUSH-ON VIEWFINDER


Quicker sighting of moving subjects and clearer presentation of pictorial scenes - those
are the invaluable advantages of the KONTUR viewfinder. The large eye-piece of /s inch
diameter gets rid of all the former viewfinder troubles, particularly for spectacle wearers.

Keep both eyes open while sighting the subject. The eye watching the subject directly will see it in
its natural size and brightness, while the eye looking into the finder sees the frame outlining the
picture area. You will see the two separate impressions as one single picture in your normal field of
view.
A dotted line indicates the parallax error with close-ups from 3.3 to 6.6 feet.


Caution: Never allow direct sunlight to
reach the eye-piece of the finder.
View original page 20
Page 21 · Read text
Push the KONTUR finder into the accessory shoe from the front of the camera and push it back as
far as it will go.


FILTERS - LENS HOOD

The high-efficiency lens of your camera will satisfy your
most exacting demands for superb definition, but you can
greatly enhance the mood of your pictures and obtain special
effects with the help of filters.
It is surprising how often you can attain pictorial effects with
these simple aids which are quite unobtainable without them,
and they should not be missing from any photographer's
equipment. Voigtlander Filters are made of massive,
spectroscopically tested, glasses and ground absolutely
parallel. Every filter is fitted in a bayonet mount and can
remain in position on the camera when this is closed.


The lens hood is indispensable for against-the-light shots and those taken with artificial light, for it
screens the lens from all stray light. It also serves to protect the lens from raindrops in bad weather
conditions.
The Leather Case for Accessories fits on the strap of the camera case and can take three filters and
the lens hood.
View original page 21
Page 22 · Read text
VOIGTLANDER FILTERS


Type and Exposure      Effect
Factor

Yellow Filter G 1   Slight correction, for outdoor shots with short
                    exposures, action and snapshots. Use when the sun
1.5-2x                   is low in the sky

Yellow Filter G2   Universal filter for landscapes and other outdoor
                  work:
2-3x
                     indispensable for snow

Green Filter Gr     Lightens green in landscapes.

3-4x               Counteracts the green deficiency of pan-red films.
                Recommended for artificial light portraits

Orange Filter Or  A powerful filter which absorbs a great deal of blue
                         light. Reduces the atmospheric haze of distant
4-6x                views.

                    Lightens yellow, red, and green

UV Filter           Absorbs ultra-violet rays at high altitudes and by
                    the sea.
1.5 x with colour
films only           Counteracts the undesirable blue cast with colour
                       film

Filter Type A - no  For using artificial light type colour film in daylight
exposure increase   or with daylight type artificial light (electronic
with reference to     flash).
daylight colour film
of the same make   Special instructions are enclosed with every filter.

CLOSE-UPS WITH SUPPLEMENTARY LENSES

Do not miss this highly interesting branch of photography which, unfortunately, so many amateurs neglect.
Large-scale pictures of flowers, butterflies, and other small animals, small "objects d'art" etc. may yield effects
of extraordinary beauty. With the help of Voigtldnder Focar Lenses you can, moreover, excellently copy pages
of a book, stamps, or small pictures. Care, however, is recommended in portraiture, as perspective may easily
appear distorted in this case.
View original page 22Page 23 · Read text
The effect of the Focar lenses is that they shorten the focal length: this permits the camera to be brought much
nearer the subject. Thus the subject is reproduced on a much bigger scale.
With the Voigtldnder Focar lenses you have three close-up ranges at your disposal, viz:
FOCAR 1 (1.25 Diopters) from 2' 71/2" to 1' 5 1/2"
FOCAR 2 (2.25 Diopters) from 1' 5' 1/2" to 1'
FOCARS 1 and 2 combined (3.5 Diopters).... from 11'/4" to 8'/4"
FOCUSING TABLE
Distance Plane of sharp focus when
using
scale on
Focars 1f-camera Focar I Focar 2
2
set to
00 2' 7'/2" 1' 5'/2" 11'/4'
2' 6
60' 1' 5" 11"
1/4"
0 2' 5 '/4" 1' 4 3/4" 11"
15' 2' 3" 1' 4" 10' /2"
^ 2' 1 '/2" 1'3,/d' 10'/ '
9' 2" 1/2" 1 3" 10'/a"
8" 1"11'/." 1'2'/a" 10"
7' 1111" 1'2'N' 10"
6' 1110" 1'2" 9'/u"
5' 1'8'/Q 11'/2' 9'/z
4'6" 1'8" 1'19'
4' 1' 7" 1' 1 " 9",
3'6"" 1'6" 1"/z' 8'/!'
3.3' 1' 5'/2" 1' 8'/e"
HOW TO USE THE FOCAR LENSES:
Approach the subject until it appears in the desired size in the viewfinder field. Then, according to the
subject distance, fix a FOCAR 1, FOCAR 2, or even 1 and 2 combined, on the lens mount.
Now measure accurately the distance between the front of the FOCAR lens and the centre of your
subject and look up this distance in the table on the left (second to fourth column). In the first column
you will find the figure to which the distance scale must be set.View original page 23Page 24 · Read text
When using FOCAR lenses you must stop down to at least f/11, particularly with three-dimensional
subjects.
No change in exposure time is required with FOCAR lenses but, of course, when filters are used the
usual exposure factor must be applied. Filters fit on the front of the FOCAR lens.
With close-ups the viewfinder
image does no longer correspond to
the area reproduced, but is shifted
upwards and to the left (parallax -
see ill. below). With the FOCAR 1
the difference is up to 1/8, with the
FOCAR 2 up to 1/4, and with the
FOCARS 1 and 2 combined up to
1/2, of the viewfinder area.
APERTURE AND DEPTH OF FIELD
The iris diaphragm regulates the amount of light which reaches the film, and thus controls the exposure as well
as the depth of field. Note that the aperture becomes smaller as the aperture number becomes larger, and vice-
versa. Going from one number to the next, the exposure time required is always doubled or halved respectively.
For example:
Aperture f/2 f/2.8 f/4 f/5.6 f/8 f/11 f/16
Exposure 1/5
1/500 1/250 1/100 1/50 1/25 1/10
(e. g.) second
The "depth of field" of a picture is that part of the photographed area which is still reproduced fully sharp in
front of, and behind, the actual focused distance.
Note: Large aperture = small depth of field; small aperture = great depth of field.
You can read off the extent of the depth of field from the focusing scale and the depth of field indicator. The
values of the unnumbered distance settings are shown in illustration (. After focusing the V mark points to the
exact subject distance. Two series of aperture numbers are arranged symmetrically on either side of the mark.
The depth of field then extends from the distance shown by the figure opposite the selected aperture
number on the left to the distance opposite the identical aperture number on the right.View original page 24Page 25 · Read text
• For Example, if you have focused on 14 feet, the depth of field scale shows that at f/2 everything will be sharp
from about 13 to 16 feet, at f/4 from about 12 to 20 feet, at f/5.6 from about 10 to 25 feet, at f/8 from about 9 to
30 feet, at f/11 from about 8 to 60 feet, and at f/16 from about 7 feet to 00 (infinity) T.

• To find the most suitable settings for aperture and distance for a given depth of field, set the limits of the sharp
zone required opposite two equal aperture numbers. For instance, for a depth from about 7 to 30 feet,
illustration ® shows that you have to stop down to f/11. The indicator then automatically shows the required
distance setting.

CARE OF CAMERA AND LENS
Successful work and long life of your camera depend largely on correct handling and careful treatment.
• Do, please, handle it carefully and gently, and never use force. If anything should not go smoothly, it is much
better to read again the relevant sections of this booklet.
• Before loading the camera, clean off any dust that may have collected inside, with a soft brush.
• At the seaside, or when there is a strong wind outdoors, carry the camera in its closed ever-ready case (beware
of sand); open case and camera only when making an exposure.
• You must avoid finger prints on the lens because they spoil definition. The windows of the view- and
rangefinder must also be kept clean, otherwise you will find it difficult to focus correctly.
• The lens is coated even on the outer surfaces (anti-reflection layer). It may be cleaned with a very soft brush,
or a piece of soft, clean, linen. Grease spots may be removed by gentle dabbing with a wad of cotton wool
moistened in medicinal alcohol or ether.


ACCESSORIES FOR THE VITESSA

Designation Art. Nr.

Yellow Filter G 1 (light) in Bayonet Mount
Yellow Filter G 2 (medium) do
Green Filter Gr do
Orange Filter Or do                                         125/21
Ultra-Violet Filter UV do                                    125/22
Conversion Filter Type A do                                 125/26
Close-Up Lens Focar 1 do                                   125/28
Close-Up Lens Focar 2 do                                   125/29
                                                          125/27
Lens Hood (Metal in Push-On Mount)                                                          125/23
Accessory Case                                                          125/24
                                                          125/20for Filters, Focar Lens and Lens Hood
                                                          90/094
Flash Case                                                 125/19
                                                          335/36
KONTUR Viewfinder                                                          90/104
                                                          90/083Camera Ever-Ready Case
                                                                                .............        90/122in Brown Hide with Carrying and Neck Strap

Leather Case for KONTUR Finder
Neck Chain, Brass, Chromium-Plated
View original page 25Related documents and language editions
From the M. Butkus archive. Original publisher and archive notices are retained.
Check the model and edition against your equipment.
PDF verified 2026-10-10.