Film cameras
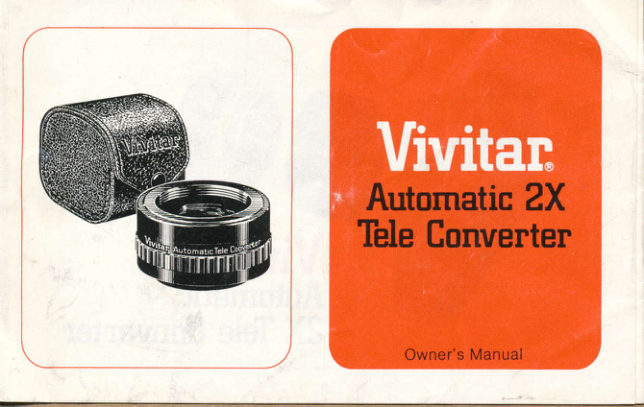
Vivitar 2x teleconverter User manual
User manual for Vivitar 2x teleconverter. 8 pages in English. Read the original PDF, download or print a copy without registration.
8 pagesEnglish1.4 MB PDF
Loading your manual…Open PDF directly
Document details
- Brand
- Vivitar
- Model / document
- Vivitar 2x teleconverter
- Document type
- User manual
- Language
- English
- Pages
- 8
- File size
- 1.4 MB
- Category
- Film cameras
- Document date
- Not specified in catalog
Search available document text
Find a term, then jump to its page in the original PDF. Image-only pages may not be searchable; check the PDF for exact wording and diagrams.
Page 3 · Read text
Your new Vivitar Automatic Tele Gonverter
doubles the effective focal length of your SLR
lens. lt offers you an economical and convenrent
way to achieve telephoto effects without the
burden of large, heavy, and sometimes costly
telephoto lenses.
The Tele Converter takes only seconds to attach
or remove. lt fits directly onto your camera body
and accepts all lenses designed for your camera.


SPECIFICATIONS AND FEATURES
r Length: Approximately one inch     r Fully automatic diaphragm
  (25 mm) when mounted on the         coupling
  camera                            r Fully automatic meter couplingr Weight: 4.5 ounces (128 gr)         r Doubles effective focal length ofr Ootical construction: 4 elements       prime lens
   in 4 groups     fully coated for       r Does not affect focusing range of  maximum light-  transmission           prime lens
View original page 3
Page 4 · Read text
www.butkus.us
135mm lens                    135mm lens with 2X Tele Converter
FOCAL LENGTH
Your Vivitar Automatic Tele Converter works with lenses of all focal lengths.
lf you now have a 50mm and 200mm lens, using your 2X Tele Converter
increases their effective focal lengths to '100mm and 400mm respectively.
With the Vivitar B5-205mm Automatic Zoom Lens, the 2X converter provides a
focal length range of 170-410mm. Tele Converters yield the best results when
                         www.butkus.us
View original page 4Page 5 · Read text
used with normal lenses and with medium length telephoto lenses. As with
        alltelephoto applications, use a tripod whenever possible to minimize the
       oroblem of camera movement.
      FOCUSING RANGE
        Since the Tele Converter does not alter the focusing range of your prime lens,
        the minimum focusing distance is not affected. For example, when used with a
         Vivitar 135mm Automatic Lens having afocusing range of 41/z feetto infinity,
,,       the converter and lens combination results in a 270mm lens which sli// focuses
                      infinity.F       ftom 41/z feet to                                                                                                                                                                                                                                                          DigitallyDN:org,Date:cn=Mikec=US2023.11.25signedButkus,by20:02:38Mikeo=ButkusButkus-05'00'camera manuals, ou=butkus.org, email=mike@butkus.                          Mike Butkus   l
       DEPTH.OF.FIELD
        Although the converter doesn't change the focusing range, it does affect
         depth-of-f ield (area of acceptable sharpness in  f ront of and behind the subject
          in focus). The depth of field will be comparable to that of a lens with the same
         focal length as your lens and converter combination. For example, your 2X
   .     Tele Convertercombined  with a 100nrm lens will give you the same
         depth-of  -f ield range as a 200mm telephoto lens. Because depth-of -field
       becomes more shallow as the focal length is increased, you should stop down
        the prime lens as much as lighting will allow.
View original page 5Page 6 · Read text
. .                          .{ul
      DIAPHRAGM OPERATION
        your Vivitar Tele Converter works with manual (preset) and automatic
\       diaphragm lenses. Full aperture viewing is maintained when the Tele Converter'           is used with automatic lenses.
      MOUNTING
       The Tele Converter is mounted on the camera in the same way that a prime
          lens is mounted. Once the converter is in place, mount the prime lens onto the
         Tele Converter just as you would mount the lens onto the camera itself.
       NOTE: FOR NTKON TELE CONVFRIERS
   .      1) First mount your prime lens onto the Tele Converter.
          Z) Then attach the lens/converter combination to the camera the same way
        you would mount the prime lens only.
         This method of attachment will assure proper meter coupling on Nikon
                                                                                                                                                                                                        f rom the         cameras. To remove the Tele Converter,  f irst remove the prime len's
         converter and then remove the converter from the camera body.
        NOTE: FOR CANON TELE CONYERIEFS
        To ensure proper meter coupling                                                 of the Tele Converter to your Canon camera,  I\                                www.butkus.us
View original page 6Page 7 · Read text
mount the converter as follows:
1) First mount the Tele Converter onto the camera the same way you would
mount your prime lens.
2) With the Tele Converter securely in place, mount the prime lens onto the
Tele Converter in the same way you would mount your lens to your camera.
To remove the Tele Converter,  first remove the lens/converter combination,
and then remove the Tele Converter from your prime lens.
EXPOSURE
When mounted behind your prime lens, the 2X Tele Converter reduces
incoming light by 2 f-stops.
FOR CAMERAS WITH THROUGH-THE.LENS METERS
On cameras equipped with built-in meters, your Tele Converter maintains
full automatic meter coupling between camera and lens. Since the meter
automatically readsthe amount of light coming through both the lens and
the Tele Converter, no exposure calculations are necessary.
FOR CAMERAS WITHOUT THROUGH-THE-LENS METERS
lf your camera does not have a through-the-lens light meter, calculate the
changes in exposure required with lhe Tele Converter in place as follows:
View original page 7
Page 8 · Read text
1) Determine the correct exposure of your subject with a hand-held meter
                                f ilm manufacturer's exposure chart).,        (or
      2) Set your camera shutter speed and lens f-stop for the exposure indicated
       by your meter or chart.
      3) Compensate  for the reduced incoming light using either one of the
        following methods:
,         a) Set the shutter so that  it stays open 4 times longer (2 shutter speed
              settings). For example,  if your light meter indicates an exposure of 11250
          second @ f1 6, keep your lens set at f1 6 and change the shutter speed
             to '1160 second.
    OR b) Locate the f-stop setting indicated by your light meter or chart on the
            Aperture Conversion Scale shown below, and set your lens to the
           corresponding f-stop directly below that number on the scale. For
           example,  if your light meter indicates an exposure of 1 1250 second @
             f16, keep the shutlerset at 1/250 second and open your lens to fB.
                    APERTURE CONVERSION SCALE
                                                                                              't1    to   ZZ  32  45   64          Indicated f-stoo        2   2.8   4   5.6   I
         Set your lens to this        1    1.4   2   2.8   4   5.6   B      1'l    to   22   32
                                www.butkus.us
View original page 8From the M. Butkus archive. Original publisher and archive notices are retained.
Check the model and edition against your equipment.
PDF verified 2026-10-10.