Lenses & filters
Vivitar TX Automatic lenses User manual
User manual for Vivitar TX Automatic lenses. 22 pages in German, French. Read the original PDF, download or print a copy without registration.
22 pagesGerman, French2.3 MB PDF
Loading your manual…Open PDF directly
Document details
- Brand
- Vivitar
- Model / document
- Vivitar TX Automatic lenses
- Document type
- User manual
- Language
- German, French
- Pages
- 22
- File size
- 2.3 MB
- Category
- Lenses & filters
- Document date
- Not specified in catalog
Search available document text
Find a term, then jump to its page in the original PDF. Image-only pages may not be searchable; check the PDF for exact wording and diagrams.
Page 1 · Read text
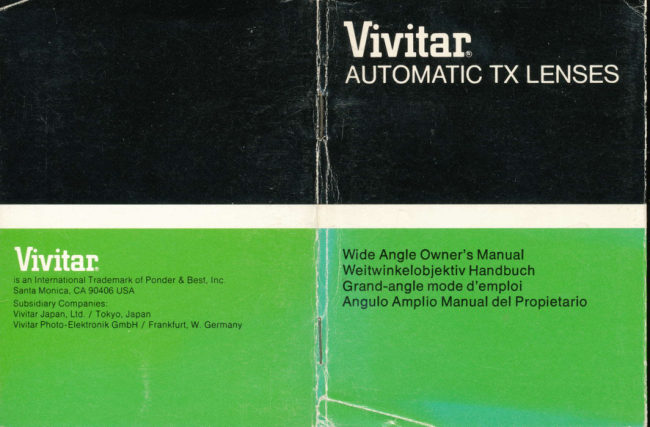
Wide Angle Owner's Manual
                                                  Weitwinkelobjektiv Handbuch
rs                 Trademark  an lnternational                                of Ponder & Besl, lnc.                 Grand-angle mode d'emploiSanta      Monica, CA                90406 USA
Subsidiary Companies:                                 Angulo Amplio Manual del Propietario
Vivitar Japan, Ltd. / Tokyo, Japan
Vivitar Photo-Eleklronik GmbH / Frankfurt, W. Germany
View original page 1Page 2 · Read text
Mounting your Lens
                                      Your lens is part of a complete system which
                                           allows you to use the lens on two or more
                                    cameras with differing lens mounts by simply
                                     changing the automatic adapter Complete
                                            instructions on mounting individual adapters are
                                       provided in the individual adapter package.
                              When mounting the lens/adapter combination
                                                to the camera,  it is a good idea to hold the rens
                                                                                                                       f irmly around the lens barrel for better balance
                                    and a more secure grip (See Photo "A")
                               Holding your Lens
                                        While using your lens,  it is best to support the
                                      camera/ tens combination with most of the weighl
                                           resting in the palm of your left hand as shown.
                                          This leaves the right hand  f ree to operate the
                                          controls of your camera and assures proper
                                       balance and stability. (See Photo "8")
                             Focusing
                                     Your new Vivitar TX Lens has been designed to
                                          provide you with the utmost in fast and easy
                                              focusin.g. To focus, simply turn the Focusrng
                                    Ring (, until the subject appears sharpest in theVivitar.                             camera's viewf inder. (See Photo "C")
                         www.butkus.us
View original page 2Page 5 · Read text
Distance Scales                                       Index Mark @ fnen, turn the Focusing Ring @
                                                                         until this distance reading is opposite the Inf raredYour lens has two Distance Scales @ engraveoon the Focusing Ring 1o show you the                       Index Mark and vour lens will be focused for
approximate distance from the subject in focus             average  inf rared photography. NOTE:Since
to the  f ilm plane. The white numbers indicate                 infrared radiation ts variable by nature, the
this distance in feet while those in qreen show                Infrared Index Mark should be used only as an
the distance in meters (See Photoi'D"1                    approximation for focusing (See Photo "F")
Distance Index Mark                          Aperture Control
The Distance Index Mark fil  is the reference              The Aperture Ring @ controls the amount of light
point for the correct focuslosition  of your lens.              allowed to reach the film by adjusting the size of
Reading the distance indicated on the Distance              the lens diaphragm opening. The higher the
Scale @) opposite this mark lets you approximate                                  f -stop number, the smaller the diaphragm
the distance   f rom the subject in focus to the  f ilm           opening and the smaller the amount of light
plane. You will  f ind the Distance lndex Mark to             allowed to reach the film.
be especially useful in flash photography where                Vivitar Automatic TX Lenses and TX Lens Mount
 it can be used to make sure your subject is                Adapters provide  full coupling to the automatic
within the effective   f lash range of your unit.               diaphragm operatron and through-the-lens
(See Photo "E")                                            metering system of your camera, even with
                                                    "open aperture" and automatic exposure
lnfrared Index Mark                                 cameras. The automatic diaphragm operation of
Your Vivitar Lens provides an lnfrared Index Mark           your TX Lens and Adapter combination allows
@which appears as a red line engraved to the            you to focus and compose the picture with the
right of the Distance Index Mark @ on the Depth          diaphragm at maximum aperture, or "wide
of Field Scale @) When using infrared film, focus           open," when the viewfinder image is brightest
normally on your subject and read the distance            and easiest to see. When shooting, the
on the Djstance Scale @ opposite the Distance           diaphragm will automatically "stop down" to the
View original page 5Page 6 · Read text
pre-selected aperture at the moment of exposure             your lens allows you a greater degree of creative
and re-open immediately  after exposure  is made.               control. Short focal length lenses with their deep
NOTE;Two Aperture Scales are engraved on the            zone of sharpness can be used very effectively
Aperture Ring @ of your TX Lens to assure                      for "pornt and shoot" photography and are
proper coupling between TX Lens Mount                      extremelv helpf ul when shooting fast action and
Adapters and the cameras they are designed to                   in situations where you are unable to focus
                                                                                                                                                                                                                                                f ind the great depth off it. Refer to the TX Lens Mount Adapter                              critically. You will also
instructions for the proper aperture scale to use                  field of wide angle lenses useful when shooting
with your TX Lens Adapter combination. (See                 landscapes, cramped interiors and architectural
Photo "G")                                                           exte rio rs.
Depth of Field                               Depth of Field Scales
Depth of field rs the area in acceptable sharpness            Your lens has a double set of numbers
in  f ront of and behind the subject in focus. This                representing    f -stops engraved on the Depth of
area is determined by the aperture you choose                  Field Scale @. Once you have focused on your
and the distance from the subject in focus to the               subject, everything within the distance range
film plane. As you move closer to your subject                indicated on the Distance Scales between the
or as you open your lens diaphragm (e.9.,  f rom              Aperture Marks you have selected will be in the
f 16 to f4) the depth of  f ield becomes shallower.              zone of acceptable focus. As shown in the
(See Photo "H") By stopping your lens down                     illustration, with this lens focused at 3'(0.9 m)
(e.9., from f4 to  f 16) or moving farther away                and the Aperture Ring set on f4, everything
f rom your subject, the depth of field or zone of              between 2'9't (0.84 m) and 3t3s,'ett(1 m) will be
acceptable sharpness increases. (See Photo "1")                in focus (See Photo "J")
Another factor affecting depth of  f ield is the focal         Depth of Field Previewlength of your lens. As a rule, the shorter the
                                                                                                                                                                                                                                                                    f ield in yourfocal length the greater the resulting depth of             You can actually see depth of
 f ield. Knowing the depth of field limitations of                camera's viewf inder by using lhe Depth of Field
                                     www.butkus.us
                                                                                                                                                                                                                                                I
View original page 6Page 7 · Read text
Preview control located either on your camera            RUB THE LENS ELEMENTS WITH YOUR
or on the TX Lens Mount Adapter. For cameras            FINGERS, CLOTHING, OR OTHER ABRASIVE
without depth of field control, Vivitar TX Lens            MATERIAL Attempting to clean your lens this
Mount Adapters have one of the following:                way can scratch the lens coating and damage the
A. Preview button    slide or press the button to              glass surface.stop the lens diaphragm-     down. When released,          D   Always store your lens in a cool, dry place.
the diaphragm  will return to automatic operation.                       It s- a good idea to store  rt with the silica gel
B. Auto/Manual switch    set the switch to the               packet supplied, especially during wet or humid"M" position to stop the- diaphragm down.                   weather. A lens case with a silica gel packet
Return the switch to the "A" oosition to reactivate             provides a handy means of storage and gives
automatic diaphragm operation.                              excellent protection for your lens.
Taking Care of Your Lens
A(filters,- Whenetc.)attachingto your lens,threadedalign theaccessoriesaccessqry
very carefully with the Accessory Thread @ to
prevent damage to the threads.

frontB -  andKeeprearyourlenslenscaosdust-fwhenree theby usinglens isbothnot
in use.

bi'i.ish,C -  Cleangood yourquaiitylenscamel-hairwith an airbrush,brush,oranti-staticuse a
lens tissue to gently brush away loose particles.
To remove fingerprints and smudges, use a very
small amount of lens cleaning fluid and gently
swab the lens surface with a lens tissue. NEVER
View original page 7
Page 8 · Read text
Bevor Sie. ..                                 Anbringen des Objektivs
 lhr neues Vivitar Automatic TX Obiektiv in                                                                           lhr Objektiv ist Teil eines vollstAndigen Systems, Gebrauclt nehmen, studreren Sie bitte dieses                                                       das es lhnen erlaubt, das Objektiv bei Aus-Handbuch and die Einlage sorgfdltig. FAhren                                                    wechselung des automatischen ZwischenstLlcks Sie diesen handlichen Leitladen mit srch und                                                     an zwei oder mehr Kameras mit verschiedenenschlagen Sie nach, wenn Fragen zum Gebrauch                                                             Objektivfassungen  zu verwenden. Dieoder zur Wartung lhres Obiektivs auf treten.                                                              vollstandigen Montageanweisungen     f ur die
Machen Sie sich mit lhrem Objektiv                  jeweiligen Zwischenstucke sind den
vertraut:                                             enstprechenden Zwischenstucken beigepackt.                                             Wenn Sje die Kombjnatron von Objektiv and
                                                       Zwischenstuck                                                                  an                                                                           der                                                                     Kamera anbringen,                                      f ur ZubehorteileQ Gewinde                                                             empfiehlt                                                                 es sich,                                                                       das                                                                                         Objektiv                                                                                                              fest am Ronr zu
@ ning zur Schdrfeeinstellung                             halten So ist ein besseres Gleichgewicht und
                                                              ein sicherer Griff gewahrleistet.
@ Entternungsskalen                                        (Siehe Abbildung "A")
@ Infrarot-Ablesemarke                             Festhalten des Objektivs
@ Entfernungs-Ablesemarke                        Wenn Sie lhr Objektiv verwenden,  ist es ratsam,
                                                         der Kombination von Kamera und Objektiv Halt
@ tletenscharfeskala                                    zu geben. Sie lassen das Hauptgewicht auf lhrer
@ BtenOen-Einstellmarke                                     linken Handfldche lasten, wie dargestellt. So                                                     haben Sie die rechte Hand frei, um lhre Kamera
                                                                                                                                                                                                                                 f ur richtiges Gleichgewicht und@ Blendenring                                          zu bedienen und
                                                                        Stabilitdt zu sorgen. (Slehe Abbildung "8")
@ Blendenskata                                              Scharfeinstellung
@ Sperring an der Objektivfassung                                                                          lhr neues Vivitar TX Objektiv bietet lhnen das
                                     www.butkus.us         q
View original page 8Page 9 · Read text
AuBerste in schneller und leichter Scharfein-                     BlitzlichtgerAtes  befindet. (Siehe Abbildung "E")
stellung. Drehen Sie einfach den Ring @ zur              Infrarot-Ablesemarke
Schdrfeneinstellung,  bis das Objekt im
Bildsucher der Kamera ganz scharf erscheint.                       lhr Vivitar Obiektiv lst mit einer lnfrarot-
(Siehe Abbildung "C")                                 Ablesemarke-@  ausgestattet; diese ist eine rote
                                                                           Linie, eingraviert rechts von der Entfernungs-
Entfernungsskalen                                   Ablesemarke @ auf rjer Tiefenscharfeskala @.
Auf dem Ring zur Schiirfeneinstellung an lhrem            Wenn Sie Infrarotfilm verwenden, stellen Sie                                                             einfach scharf auf ihr Objekt ein und lesen SieObjektiv srnd zwei Entfernungsskalen  ()
                                                               die Entfernung auf der Entfernungsskala @eingraviert. Sie zeigen lhnen die ungefahre
                                                     gegenuber der Entfernungs-Ablesemarke @Entfernung des Objekts im Brennpunkt von der
Filmebene an. Die weiBen Zahlen geben die                Dann drehen Sie den Ring @ zur Scharfenein-"b.
Entfernung in FuB an, die grunen in Metern.                      stellung, bis die abgelesene Entfernung
(Siehe Abbildung "D")                                  gegenuber der Infrarot-Ablesemarke ist. lhr
                                                              Objektiv ist nun auf einen Mittelwert fur
Entfernungs-Ablesemarke                                 Infrarotphotog raphie eingestellt. B ITT E
                                                             B E AC HT E N:   I nf rarote Strahlung weist naturl iche
Die Entfernungs-Ablesemarke @ ist der                   Schwankungen  auf; daher ist die Infrarot-Bezugspunkt fur die richtige Brennweitenein-                                                     Ablesemarke lediglich als ein Naherungswertstellung lhres Objektivs. Durch Ablesen der                                                                             fur Scharfeinstellung zu betrachten. (SieheEntfernung auf der Entfernungsskala @                                                         Abbildung "F")gegenuber dieser Marke stellen Sie die
annahernde Entfernung des Objektes im                 BlendenregulierungBrennpunkt von der Filmebene fest. Sie werden
feststellen, daB die Entfernungs-Ablesemarke                 Der Blendenring @ reguliert die Lichtmenge,
besonders nutzlich bei der Verwendung von                   der der Filrn ausgesetzt wird; er verandert die
Blitzlicht ist; Sie konnen daran feststellen, ob                GroBe der Blendenoff nung. Je groBer der
sich das Obiekt in der Reichweite lhres                       Blendenwert, desto gleiner die Blendenoff nung

                               10                                                                                       11
View original page 9Page 10 · Read text
and damit dle Lichtmenge, die den Film erreicht           Tiefenschdrfe
 Vivitar Automatic TX Objektive and Zwischen-                                                            Tiefenscharfe bezeichnet den Bereich einer
 stucke fur die TX Objektivfassungen  erlauben               annehmbaren Scharfe vor und hinter dem Objekt
 erne vollstandige Kopplung an die                          im Brennpunkt. Dieser Bereich hdngt von der
 automatische Blende und das Objektiv-                    gewahlten Blende und der Entfernung vomMeBsystem lhrer Kamera, selbst mit "offener                                                           Objeki zur Filmebene ab. Je ndher Sie am Objekt
Blende" und automatischer Belichtung. Die                    sind, oder je weiter Sje lhre Blende  off nen (2.8.
automatische Blende lhres TX Objektivs mit                 von  f 16 zu f4), desto   f lacher wird der
Zwischenstuck ermoglicht es lhnen, das Objekt               TiefenschArfebereich. (Siehe Abbildung "H")
bei groBter Blendenoff nung scharf einzustellen.              Je weiter Sie die Blende schlieBen (2.8. von f4
Somit ist das Bild im Sucher sehr heil and leicht             zu  f 16), oder je weiter Sie sich vom Objekt
zu sehen BeiAusl6sung wird die Blende                       entfernen, desto groBer wird der
automatisch zu dem vorher erngestellten Wert                 Tiefenscharfebereich. (Siehe Abbildung "1")
reduziert. Unmittelbar nach der Belichtung                                                              Ein anderer Faktor, der die Tiefenscharfeoffnet sich die Blende wieder voll. BITTE
BEACHTEN. Auf dem Blendenring @ thres TX                  beeinfFaustregel:luBt, istJediekleinerBrennweitedie Brennweite,lhres Objektivs.desto  AlsObjektivs sind zwei Blendenskalen eingraviert,                                                           grdBer die Tiefenschdrfe. Das Wissen um dieum die ordnungsgemdBe Kopplung des                                                         Tiefenscharfegrenzen lhres Objektivs gibt lhnenZwischenstucks  fur die TX Objektivfassung mit                                                                         g roBere Mogl ich keiten schopferischerder entsprechenden Kamera sicherzustellen.                                                                Gestaltung. Objektive von kurzer BrennweiteAnweisungen, welche Blendenskala Sie mit                                                     haben eine groBe Tiefenschdrfe; sie sind sehrlhrer TX Objektiv and Zwischenstuck                                                             wirkungsvoll im Bereich der SchnappschuB-Kombination verwenden, sind den Montaqean-                                                        Photographie und unabdingbar fur schnelleweisungen   f ur das TX Objektivfassung-                                                    Aufnahmen sowie in allen Lagen, wenn sie nichtZwischenstuck zu entnehmen.
(Siehe Abbildung "G")                                          scharf einstellen konnen. Sie werden die qroBe
                                                               Tiefenschdrfe von Weitwi n kelobiektiven
                                     www.butkus.us          t3
View original page 10Page 11 · Read text
besonders schdtzen bei Landschaftsaufnahmen                die Blende zu automatischem Betrieb zuruck
oder wenn Sie gedrangte Innenaufnahmen oder               B. Auto/Manual-Schalter     Stellen Sie den
architektonische Au Benauf nahmen machen.                   Schalter auf "M"-Stellung - wenn Sie die Blende
Tiefenschiirfeskalen                                     reduzieren wollen. Zur Wiederaufnahme des
                                                       automatischen Blendenbetriebs stellen Sie den
Die Tiefenscharfeskalen @ auf lhrem Objektiv                 Schalter wieder auf "A"
bestehen aus zwei eingravierten Satzen von
Blendenwerten Sie stellen scharf auf lhr Obiekt           Die Wartung lhres Objektivsein; der gesamte Entfernungsbereich  zwischen
den beiden Notierungen lhres gewahlten                 A   Wenn Sie Zubehorteile mit Schraubge-                                                                 -      (Filter usw ) an lhrem Oblektiv anbringen,Blendenwertes wird eine annehmbare                      wrnden
Tiefenscharfe aufwersen. Die Abbildung zeigt                  richten Sie das Teil sorgfdltig mit dem
ein Objektiv das auf 0 9 m (3') scharf eingestelll             Zubehorteilgewinde @ aus, um die
ist. Bei Blende f4 wird alles zwischen 0,84 m               Gewindegange  nicht zu beschadigen
(2' 9") und 1 m (3' 35/e") scharf sein. (Siehe              B    Halten Sie lhr Objektiv staubfrei; versehen
Abbildung "J")                                              Sie- beide Enden des Objektivs mit den
Tiefenschdrfekontrol le                               Schutzkappen, wenn Sie es nicht benutzen.                                        C-  Reinigen Sie lhre Linse mit einer
Bei Verwendung der Tiefenscharfekontrolle an                  Luftburste, einer anti-statischen Burste, einer
lhrer Kamera oder an dem Zwischenstuck frir die            guten Kamelhaarburste;  entfernen Sie lose
TX Objektivfassung k6nnen Sie tatsdchlich die                  Partikel mit einem weichen Linsentuch Um
Tiefenscharfe im Sucher lhrer Kamera sehen.               Fingerabdrucke und Fettflecke zu enlfernen,
Fu r Kameras oh ne Tiefenscharfekontrol  le haben             tupfen Sie die Oberf ldche der Linse mit einem
die Zwischenstucke  fur die TX Objektivfassung              weichen Linsentuch und ein wenig
eine der folgenden Einrichtungen:                             Reinigungsflussigkeit ab. REIBEN SIE DIE
A. Kontrollknopf    Auf Druck wird die Blende            ELEMENTE IHRES OBJEKTIVS NIEMALS MIT
reduziert. Wenn Sie-  den Knoof loslassen. kehrt            IHREN FINGERN N/IT KLEIDUNG ODER MIT

                                                                                                                                     t3
View original page 11Page 12 · Read text
ANDEREN MATERIALIEN, DIE NICHT                 Avant de commencer..,ABRIEBFEST SIND! Diese Prozedur kann die
Beschichtung der Linse zerkralzen und die                a utiliser votre nouvel obiectil Vivitar automatique
G lasoberflache beschddigen.                                   TX, nous vous sugg1rons d'accorder une
                                                                    attention particulidre a ce mode d'emploi.D   Lagern Sie lhr Objektiv stets an einem                                                       Conservez ce guide pratique et refdrez-vous-ykuhlen-   und trockenen Ort. Es empfiehlt sich, das                                                          lorsque vous aurez des doules sur I'utrlisationmitgelieferte Si  I icagel -Piickchen zusammen mit                                                    ou I'entretien de votre objectit.dem Objektiv zu lagern, besonders  in
niederschlagsreicher                    oder                          feuchter Witterung.             Familiarisez-vous avec votre obiectifEin Objektivetui mit einem                         Silicagel-Pdckchen
ist handlich            zur             Aufbewahrung                                                                              accessoires                          und hervorragend     Q ritetage pourzum    Schutz              fur lhr                    Obiektiv.
                     @ Aague de mise au point
                     @ fcnettes des distances
                    @ tndex infra-rouge
                    @ tnOex des distances
                     @ ecnette de profondeur de champ
                    @ Repere de r6f6rence des diaphragmes
                     @ Bague des diaphragmes
                    @ fcnette des diaphragmes
                    @ eague de verouillage de la monture d'objectif
                                     www.butkus.us         17
View original page 12Page 14 · Read text
lndex infra-rouge                                        adaptateursLes objectifs pourVivitarobjectifsTX automatiquesTX assurentet le
Votre objectif Vivitar possede un index inf ra-                couplage complet au fonctionnement
rouge @. Celui-ci apparait sous la forme d'un               automatique du diaphragme et au systeme de
trait rouge grav6 d la droite de I'index des                  mesure de la lumiera a travers I'objectif de votre
distancer @ sur I'echelle de profondeur de                 appareil m6me dans le cas d'aopareils dchamp (f  . Lors de I'utilisation de  f ilm                      "diaphragme ouvert" et d exposition automatique.
infra-rouge, effectuez une mise au point normale             Le fonctionnement automatique du diaphragme
sur le sujet, et lisez, sur l'6chelle des distances              assu16 par I'ensemble objectif/adaptateur TX
@, ta Oistance figurant en face de I'index des               vous permet de composer et de mettre au point
distances^@ Ensuite, tournez la bague de mise             avec le diaphragme a I'ouverture maximum, ou
au point (4 de telle sorte que la distance lue                "grand ouvert," alors que I'image dans le viseur
precedemment   f igure en face de I'index                        est la plus brillant et la plus ais6e A observer.
infra-rouge. Votre objectif sera alors mis au point             Lors de la prise de la photo, le diaphragme se
pour une photographie infra-rouge moyenne.                ferme automatiquement a la valeur pr6-
NOTE: Le rayonnement infra-rouge 6tant                    s6lectionnee pendant I'exposition et se rouvre
variable par nature, I'index inf ra-rouge ne sera              imm6diatement aprds celle-ci. NOfE: Deux
utilise que pour une mise au point approximative.             6chelles de diaphragmes sont grav6es sur la
(Voir Photo "F")                                       bague des diaphragmes                                    @ de votre objectif TX;
Commande des diaphragmes                           elles permettent d'assurer le couplage correct                                                                entre les adaptateurs pour objectifs TX et les
La bague des diaphragmes @ contrOle la                    appareils qu'ils sont destin6s d equiper.
quantit6 de lumiere qui atteint le film, par le                  R6f6rez-vous aux instructions accompagnant
169lage de la taille de I'ouverture du diaphragme.              I'adaptateur pour d6terminer l'6chelle des
A I'indice d'ouverture le plus eleve correspondent          diaphragmes appropri6e d votre groupe
I'ouverture de diaphragme la plus r6duite et la                   objectif /adaptateur TX. (Voir Photo "G")
quantit6 de lumidre la plus faible amen6e d
atteindre le film.
                                      www.butkus.us
View original page 14Page 15 · Read text
Profondeur de champ                              des objectifs grand-angle est 69alement  utile                                                      dans la photographie de paysages, d'interieurs I a nrnf nndarrr   rlo                 nhamn                          --                                        -'  'glllP   ectgJt   l:lq zvlznna19 dewu n^++^t;I lutluLg              ou d'archrtecture.
acceptable a l'avant et A I'arridre du sujet mis
quar r  vv,lnninl    f-otto  znno  oci  r'l6lormin6a    nar  lo               Echelles de profondeur de champ
diaphragme choisi et par la distance du sujet au              Votre objectif possdde une double s6rie de
plan du film Lorsque vous vous approchez du              nombres, repr6sentant les jndices graves sur
su jet ou que ouvrez le diaphragme de votre                     l'6chelle de profondeur de chamO                                                          @. Une foisoblectif (p ex de  f 16 a f4), la profondeur de                que la mise au point sur votre sujet est effectu6e,
champ se r6duit. (Voir Photo H")                                 tout ce qui se situe a une distance figurant sur
 Lv,I nrqnriervuv    \/nrq lcrmez lp dianhraomev,sv',l           (n eX. de                  I'echelle des distances entre les indices
f4 a  f 16) ou que vous vous 6loignez du sujet, la               d'ouvertures selectionnes sera dans une zone
profondeur de champ, ou zone de nettete                 de nettete acceptable. Comme indiqu6 dans
acceptable, augmente. (Voir Photo "l")                             l'illustration, lorsque cet objectif est mis au
La distance focale de votre objectif affecte                      point a 0,9 m (3') et que le diaphragme est
6galement la profondeur de champ. En regle                  regle a f4 tout ce qui se situe entre 0,84 m
generale, lorsque la distance focale diminue, la                   (2' 9") et 1 m (3t 35/att) sera zu point. (Voir
profondeur de champ augmente. La                        Photo "J")
connaissance des limitations de la profondeur           Contr6le de la profondeur de champde champ de votre objectif augmente votre
conl16le creatif en photographie. Les objectifs  it                             ll vous est possible de cont16ler visuellement la
courte distance    f ocale et la grande profondeur               profondeur de champ dans votre viseur, grAce ir
de champ qui les caracterise, peuvent 6tre                un bouton de contrOles de la profondeur de
utilises d'une maniere trds avantageuse en               champ situe soit sur votre appareil, soit sur
photographie  instantan6e, ou dans des situations            l'adaptateur pour objectifs TX. Pour les appareils.
oir  il est imnossible d'effectuer une mise au                  qui ne sont pas equip6s d'un cont16le de la
point critique. La profondeur de champ 6tendue             profondeur de champ, les adaptateurs pour
View original page 15
Page 16 · Read text
objectifs Vivitar TX offrent les possibilit6s               de nettoyage pour obieclif et essuyez legerement
 su ivantes:                                                              la surface de I'objectif A I'aide de papier optique.
 A. Bouton de contrlle-faites glisser ou              NE FROTTEZ JAMAIS CES SURFACES AVEC
 enfoncez le bouton pour fermer le diaphragme.           LES DOIGTS, UN VETEMENT OU D'AUTRES
 Une fois le bouton libere, le diaphragme se             MATERIAUX ABRAISIFS. Une tentative de
 retrouve en fonctionnement automatrque.                   nettoyage de I'objectrf de cette maniere risque
  u.R  ulntorrttntottrilct   t uptcur  auLw2111n/mantral/  l  l ldt Iudt     vlavwLnlonaz                            d'6raf ler le revetement de I'objectif et d'en
 I'interrupter en position 'M" - pour fermer le             endommaoer la surface.
 diaphragme. Replacez I'interrupteur en position         D   Rangez toujours votre objectif dans un                                                                -     frais et sec. ll est judicieux de le ranger "A  ' pour ramener le draphragme en                         endroit
 fonctionnement  automatique.                         accompagne du sachet de seccatif fourni,
                                                       specialement par temps humide. Un etui d
                                                                objectif contenant un sachet de s6ccatif, assureEntretien de I'obiectif                                                    un rangement pratique et off re a I'objectif une
 A    Lors de la mise en place d'accessoires                 protection excel lente. frletes-        (f iltres, etc . . .) sur votre objectif, 6vitez
 les d69ats au  f iletage en alignant soigneusement
 I'accessoire avec le filetage Q.
 B    Protegez votre objectif de la poussidre;
 utilisez-    des couvercles d'obiectifs avant et
 arriere lorsque l'objectif n est pas utilis6.
 C    Nettoyez I'objectif avec une poire, une
 h,^^^^UIUJJV-         dlltl_Jtdll\-lUVan+i nlarinr,^ n|lvu  trneurrw  hrossevrVJJU   enurr  nOilSyL   dg
 chameau de bonne cualit6; utilisez un papier
 optique pour evacuer les particules libres. Pour
 d6barrasser I'objectif de taches ou d'empreintes
 de doigts, utilisez une quantit6 minime de liquide
                            24                                      www.butkus.us
View original page 16Page 17 · Read text
Antes de que comience ...              Como Montar el Lente
a usar su nuevo lente automAtico TX Vivitar, por                uuQrr rgrrtulonlo ocuo  n:rtovur     r1o rrn qiqlom:  r'nmnlpf n Yvvnup le'v
lavor tome el tiempo necesario para estudiar              permite usar el lente en dos o m6s camaras con
cuidadosamente este Manual del Propietario y           monturas de lente diferentes simplemente
los agregados. Mantengalo a mano como una           cambiando el adaptador autom6tico
guia practica y consultelo siempre cuando tenga          Instrucciones ccmpletas para montar los
dudas sobre el uso y cuidado de su lente.                adaptadores individuales estan incluidas con
                                                              udud^^i^ crudptduvl^ra^|^,.r^,. nlAr colocar la combinacion
Familiaricese con Su Lente                       lente/adaptador en la c6mara conviene sostener
                                                                       el lente firmemente alrededor del tambor del
Q Rosca Accesoria                                          lente para tener mejor balance y una superf icie
                                            mas segura de asidero. (Vea foto "A")
@ nnitto de Enfaque
O  Escalas de Distancia                                  Mientras usa el lente, es melor soportar la
                                                                                                       parte                                                                                                              la mayor                                                                       con                                                                  camara/lente@ Indice Marcador Infrarrojo                         combinacion                                                                     pn la                                                                                         nalrna                                                                                                                                                          r-lp la manO                                                                                                uurdel neso|.JUJV   vvrvuldesr:ansandn
                                                                                                                             incJ ica Fsto deia la mano@ lnOice Marcador de Distancia                        izalierdarr vv,vl     como se
                                                  derecha libre para operar los controles de la
O  Escala de Profundidad de Campo                  camara y asegura el balance y la estabilidad
    MarcaOor de Referencia de Apertura                  correctos. (Vea foto "8")@
     nnillo de Apertura                    Como Ajustar el Foco@                                             Su nuevo lente Vivitar TX ha sido disetiado para
@ Escala de Apertura                                      darle los rjltimos adelantos en el 16pido y f6cil
                                                              ajuste del foco. Para enfocar, simplemenie gire
                                                                           que el sujeto@ nnitto de Seguro de la Montura del Lente                el Anillo de Enfoque @ hasta
                                                                                                27
View original page 17Page 18 · Read text
aparezca en forma clara en el visor de la                   grabada a la derecha del Indice Marcador de
 camara. (Vea foto "C")                                     Distancia Q) sobre la Escala de Profundidad de
                                             Campo qq) Cuando use  f ilm inf rarrojo, enfoque
Escalas de Distancia                               normalmente en el suieto y lea la distancia en la
Su lente tiene dos Escalas de Distancia @                 Escala de Distancia @ opuesta al lndice
grabadas sobre el anillo de enfoque para indicar           Marcador de Distancia @ Luego, gire el Anillo
                                                                                                             trsla loctrrra do 13 la distancia aproximada del suleto en foco al                    cle Fnfooue .  hasta nrp
plano del film. Los numeros blancos indrcan esta            distancia esta opuesta al Indice Marcador
distancra en pies mientras que aquellos en color                    Inf rarrolo y el lente estara enfocado para
verde dan la distancia en metros. (Vea foto "D")               fotograf ia infrarrola promedio. NOTA;Dado que
                                                                          la radiacion infrarroja es de naturaleza variable,
lndice Marcador de Distancia                           el Indice Marcador Inf rarrojo debe ser usado
                                                        solamente                                                    como                                                                   una                                                                          aproximacion para ajustar
                                                                               "F")                                                                 foco. (VeaEl Indice Marcador de Distancia @ es el punro                 el                                                                               fotode referencia para la posicion correcta de
enfoque de su lente. Leyendo la distlncia               Control de Apertura
indicada en la Escala de Distancia @ opuesta
a esta marca, le da una idea aproximada de Ia                   El Anillo de Apertura @ controla la cantidad de
distancia desde el sujeto en foco al plano del                  luz que llega al film, ajustando  el tamano de la
f ilm. Encontrard este lndice Marcador de                     abertura del draf ragma del lente. Cuanto mayor
Distancia especialmente ritil en fotograf ia con              es el numero  f, menor es la abertura del
equipo de  f lash, donde puede ser usado para               diafragma y menor la cantidad de luz que llega
verifjcar que el sujeto est6 dentro del alcance                    al film
efectivo del flash de su unidad. (Vea foto "E")              Los Lentes Automdticos Vivitar TX y Adaptadores
Indice Marcador lnfrarroio                          para montaje de Ios Lentes TX proveen                                                      acoplamiento total a la operacion automdtica del
Su lente Vivitar posee un Indice Marcador                        diaf ragma y a los sistemas de medicion
Infrarrojo @ el cual aparece como una linea roja            a-traves-del-lente de su camara, aun con
                            28                                                                     29                                     www.butkus.us
View original page 18Page 19 · Read text
cdmeras de "apertura abierta" y exposici6n                   del sujeto al plano del film. Cuando la cAmara se
automdtica La operacion automdtica  del                   aproxima al suieto o cuando se abre el
diaf ragma de la combrnacion de Adaptador y                     diaf ragma del lente (por etemplo de  f 16 a f4) la
Lente TX, permite enfocar y componer la                         prof undidad de campo se reduce. (Vea foto "H")
fotograf ia con el diafragma a mdxima apertura,            Cuando la c6mara se alela del sujeto o cuando
o "totalmente abierto," cuando la imagen del               se cierra el diafragma del lente (por ejemplo de
visor es mds brillante y fAcil de ver. Cuando se                t4 at16) la profundidad de campo, o drea con
dispare la cdmara, el diaf ragma se ajustar6                   definici6n de imagenes aceptable, aumenta.
automdticamente en el momento de la                      (Vea foto " 1")
exposici6n, a la apertura preseleccionada; y se              Otro factor que afecta a la profundidad de
abrird inmediatamente despu6s de hecha la              campo es la longitud focal del lente que se est6
exposicion. NOTA: Dos Escalas de Apertura                usando. Como regla, cuanto menor la longitud
estdn grabadas en el Anillo de Apertura @ O"                focal mayor la profundidad de campo que se
su Lente TX para asegurar el acoplamiento                    obtiene. Conocer las limitaciones de la
apropiado entre los Adaptadores para Montaje              profundidad de campo del lente le dard un mayor
de los Lentes TX y las c6maras para las cuales              grado de control creativo. Lentes con longitud
han sido diseiados. Ref i6rase a las                           focal corta tienen una zona con buena definici6n
instrucciones  del Adaptador para Montaje del             de imagenes amplia, y pueden ser usados en
Lente TX para la escala de apertura correcta                forma efectiva para fotografias del tipo "apuntar
a ser usada con su combinaci6n Adapator/Lente             y disparar" y son extremadamente  0tiles para
TX. (Vea foto "G")                                               fotografiar acci6n rApida y en situaciones donde
                                                    no se ouede enfocar con exactitud. Tambi6n
Profundidad de CamPo                               encontrara que la gran profundidad de campo
La profundidad de campo es el 6rea con                  de los lentes de dngulo amplio es muy [til
definicion de imagenes aceptable enfrente y               cuando se fotograf [a paisajes, interiores
detr6s del sujeto en foco. Este drea estd                     estrechos y exteriores arquilectonicos.
determinada por la apertura elegida y la distancia

                                                                                                                                                                                                                                                                   JI
View original page 19Page 20 · Read text
Escalas de Profundidad de CamPo                 automdtica.
                                                             B.   I nte rru pto.r Auto / M anual-coloque elSu lente trene dos grupos de numeros que                                                                                      para cerrar elrepresenlan los numeros   f , grabados sobre la                  interruptor en la posicion "M"                                                             diafragma. Vuelva la llave a la posici6n "A"                                Una vezEscala      de Profundidad                    de Campo                     @.                                                    cuando se desee volver a la operacion                                          anrrello                             tndn     el suieto           ha sir-lo pnfncar^lnnrreYuvvIUvjv(v
                                                          automdtica del diafraoma.situado dentro de la. distancia indicada en las
Escalas de Distancia, entre las marcas de
2nerl||r2oVUl    tulq   JUrUUUlvllqUdJ,qelpr-ninnad^-    gStdld^^+^.;   Cll^^ r^lA -^^aZUll'    d.e           Sobre el Cuidado de Su Lente
foco aceptable Como se muestra en Ia  f igura,           A   Cuando se coloque accesorios con rosca
con este lente enfocado a 0 9 m (3') y el Anillo                  (filtros-     etc.) a su lente, alinee los accesorios
de Apertura colocado en f4, todos los objetos             cuidadosamente con la Rosca para Accesorios
      los         0,84        m (2'9")entre                      y los 1 m (3' 35/ett) estardn               fr)\-/ a*                                                                                                                                                                                          f"'in cie evitar dano a la rosca.        (Veaen foco.                 J  ')            foto                                              B    Evite que las particulas de polvo lleguen al
                                                                      lente,-   usando las cubiertas anterior y posterior
Vista previa de Profundidad de Campo          cuando el lente no estd en uso.
Es posible ver la prof undidad de campo en el          C-  Limpie el lente con un cepillo de aire, un
visor de su camara si se usa el control Vista                        nonilln    aniiociitinn               r rn nonilln   dove   nolnPvrv   dovv
Previa de Profundidad de Campo ubicado en la             camello de buena calidad o use papel para
camara o en el Adaptador para Moniaje del                   lentes para remover en forma suave todas las
Lente TX Para camaras sin control de                              nariir^rrlas dp nnlvo Para sacar las imnrcsiOnes
profundidad de campo, los Adaptadores para                        rlo  lnc  rlorlnc    rr lrc  mennhte,ancnas, user reo unaI rne na.pequena
Montaje del Lente Vivitar TX tienen uno de los              cantidad de  f luf do para limpiar lentes y en forma
siguientes controles:                                    suava frote la superf icie del lente con un papel
A. Boton Vista Previa   mueva o empuje este              oara limoiar lentes. NUNCA FROTE LOS
boton para cerrar el diaf- ragma del lente Cuando        ELEMENTOS DEL LENTE CON SUS DEDOS.
se lo suelta el diaf ragma retornard a la operacion         TELAS O CUALQUIER OTRO MATERIAL

                            32                                     www.butkus.us
View original page 20Page 21 · Read text
ABRASIVO. Si intenta limpiar el lente de este
modo, puede raspar el revestimiento del lente y
danar la superf icie del vidrio.
D   Guarde el lente siempre en un lugar  f rio y
seco.-   Es una buena idea mantenerlo con el
paquete de silica gel que se suministra,
especialmente durante tiempo h0medo o
lluvioso Una caja para guardar lentes con un
paquete de silica gel es muy conveniente y da
excelente proteccion al lente.
View original page 21
From the M. Butkus archive. Original publisher and archive notices are retained.
Check the model and edition against your equipment.
PDF verified 2026-10-10.