Flashes & lighting
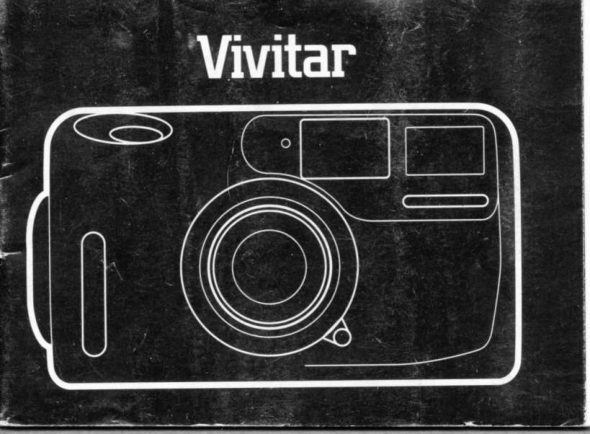
Vivitar Zoom Flash User manual
User manual for Vivitar Zoom Flash. 35 pages in German, French, Spanish. Read the original PDF, download or print a copy without registration.
35 pagesGerman, French, Spanish1.5 MB PDF
Loading your manual…Open PDF directly
Document details
- Brand
- Vivitar
- Model / document
- Vivitar Zoom Flash
- Document type
- User manual
- Language
- German, French, Spanish
- Pages
- 35
- File size
- 1.5 MB
- Category
- Flashes & lighting
- Document date
- Not specified in catalog
Search available document text
Find a term, then jump to its page in the original PDF. Image-only pages may not be searchable; check the PDF for exact wording and diagrams.
Page 4 · Read text
DESCRIPTION OF PARTS
 1. Shutter Release Button             16. Film Take-up Spool
 2. Frame Counter                    17. Rewind Switch
 3. Low Light Sensor                  18. Sprocket Wheel
 4. Zoom VieMinder                   19. Film Guide Posts
 5. Flash                            20. DX Contacts
 6. Lens Cover Glass                 21. Battery Door
 7. Zoom Lever
 8. Wrist Strap Attachment  Point
 9. Film Door Latch
10. Rewind Shaft
11. Flash Ready Light
12. Viewfinder Eyepiece
13. Shutter Release Lock
14. Film Door
15. Film DX Window


             www.butkus.us
View original page 4Page 5 · Read text
1
GENERAL INSTRUCTIONS
A. LOADING BATTERIES
Insert batteries following the polarity shown on the Battery Door. Use 2
AA size Alkaline batteries onlv.

B. LOADING FILM
Use ISO 'lOO/2'lo, ISO 200124o or ISO 4OO/27" color print film'
The DX Contacts in the film chamber can sense film speed coding on DX
film cassettes and will adlust the camera accordingly.
1. Unlock the camera by moving the Shutter Release Lock to the
   unlocked position, Slide up the Film Door Latch and open the Film
   Door.
2. Insert the film cartridge by first guiding the top onto the Rewind Shaft
   and then pressing the lower end into place.
3. With the film laying flat between the Film Guide Posts, pass the film
   leader over the Sprocket Wheel so that it lies on top of the Film Take-up


 2
View original page 5
Page 6 · Read text
Spool. Close the Film Door securely.
4. Press down and then release the Shutter Release Button to advance
   the film one frame..Continue  doing this until the number "1" appears  in
   the Frame Counter.
   NOTE: The frame counter will not operate unless film is in the
   camera and is loaded correctly.

C. TAKING PICTURES
ZOOM LENS
Compose your picture by looking through the viewfinder and moving the
Zoom Lever to obtain the desired magnification. As you move the Zoom
Lever, the scene viewed through the viewfinder will change to corres-
pond to the resultant picture image.
Pictures may be taken at any lens setting but should not be taken while
moving the Zoom Lever.


              www.butkus.us
View original page 6Page 7 · Read text
'l
OUTDOOR PICTURES
1. Move the Shutter Release Lock to the unlocked oosition.
2. Depress the Shutter Release Button halfway to turn on the camera
    circuits. lf the red Low Light LED in the Viewfinder illuminates, the
   ambient light level is too low and flash is required for correct expo-
   sure. The flash will automatically  activate. Wait for the Flash Ready
   Light to glow before taking the picture. The flash will fire when you
   take the picture, and will recharge automatically  to be ready for the
   next picture.
3. Compose the picture, hold the camera steady and press the Shutter
   Release Button gently to take the picture. BE CAREFUL NOT TO
  COVER THE LENS OR FLASH UNIT WITH YOUR FINGERS. When
   you release the Shutter Release Button, the film will advance
   automatically.
  DAYLIGHT DISTANCE RANGE: 1.8 m (6 ft.)to infinity.
View original page 7Page 8 · Read text
FLASH PICTURES
FLASH RANGE
lSO100/21o  1.8 m (6 ft)......2.8 m (9 ft.)
lSO200/24"  1.8 m (6 ft ). . . . ...  . .3.7 m (12 ft.)
lSO400/27"  1.8 m (6 ft ). . . .             . .4.5 m (15 ft.)
The flash will turn itself off after about a minute of non-use to conserve
the batteries. This will cause both the Low Light LED in the Viewfinder
and the Flash Ready Light to turn off. To reactivate the flash, depress the
Shutter Release Button slightly.
  NOTE: Maximum flash distance will vary with ditferent settings of the
       zoom lens. Best overall flash picture results may be obtained
            at the widest setting of the zoom lens.
D. UNLOADING FILM
At the end of the film roll, the film will stop advancing and the motor will
shut off. YOU MUST REWIND YOUR FILM BEFORE REMOVTNG tT


             www.butkus.us
View original page 8Page 9 · Read text
FROM THE CAMERA OR YOUR PICTURES WILL BE EXPOSED AND
RUINED.
1 Slide the Rewind Switch on the bottom of the camera in the direction
    of the arrow.
2. When the film is fully rewound, the motor will turn off automatically.
   This will usually take about 30 seconds for fresh batteries and 36
   exposure film.
3. Open the Film Door and remove the film cartridge.

E. CARING FOR YOUR CAMERA
                       Glass clean, Use a soft clean cloth to remove         the.Lens Cover   Keep-                      or dirt.         fingerprints   any
-  Protect the camera from dirt, rain, dampness or high heat.                         alcohol or abrasive cleaners to clean the camera                solvents,   Do not          use-               Cover Glass.          or          Lens   body
 WARNING: TO AVOID RISK OF ELECTRICAL SHOCK' DO NOT
          ATTEMPT TO TAKE THIS CAMERA APART.

6
View original page 9Page 10 · Read text
F. TROUBLESHOOTING
BLANK or DARK PICTURES may be caused by:
                                  ON.                   Flash                     Ready                                   Light                                                  is             before-  Shooting                                 your                                             fingers.                               with                      or flash            the lens   Covering-
-  Film not loaded correctly and not advancing through the camera.
UNSHARP PICTURES may be caused by:
-  Standing too close to your subject.                            steady,        holding               the camera-  Not                    Lever   Moving           the Zoom-                           while taking the picture.
BRIGHT OVER-EXPOSED PICTURES may be caused by:
-  Using flash too close to your subject.
-  Camera being aimed toward the sun.
FAILURE TO ADVANCE OR REWIND FILM may be caused by:
                                 batteries.          old              or non-alkaline-  Using    Inserting                       incorrectly              batteries-                                 without following the polarity marked on   the inside of the Batterv Door.


            www.butkus.us
View original page 10Page 12 · Read text
NOMENCLATURE
  1. D6clencheur                    16. Bobine r6ceptrice
 2. Compteur de poses             17. Interrupteur de rembobinage
 3. Senseur de faible lumiere        18. Roue dent6e d'entrainement
 4. Viseur zoom                    19. Ergots de guidage du film
 5. Flash                          20. Contacts DX
 6. Verre de protection de I'objectif   21. Couvercle du logement des piles
 7. Levier de zoom
 8. Fixation pour dragonne
 9. Curseur d'ouverture du dos
10. Axe de rembobinage
11. T6moin de charge du flash
12. Oculaire du viseur
13. Verrou du d6clencheur
14. Dos de I'appareil
15. Fen6tre de contrOle du film


8
View original page 12
Page 13 · Read text
MODE D'EMPLOI
A. MISE EN PLACE DES PILES
Ins6rez les piles suivant les polarit6s indiqu6es sur le couvercle du
logement des piles. Utilisez uniquement deux piles a/callnes de taille AA.

B. CHARGEMENT DU FILM
Utilisez les films pour 6preuves couleur de sensibilite ISO 100/21o, ISO
200/24" ou ISO 400/27".
Les contacts DX dans le logement du film d6tecteront  la sensibilit6 du
film sur les cartouches ayant un codage DX et r6gleront I'appareil photo
de faqon correspondante.
1. D6bloquez I'appareil photo en mettant le verrou du d6clencheur sur la
   position de d6verrouillage. Faites glisser le curseur d'ouverture du dos
   vers le haut et ouvrez le dos.
2. Introduisez la cartouche de film en guidant d'abord son extr6mit6
   sup6rieure sur I'axe de rembobinage et puis en pressant I'extr6mit6


             www.butkus.us
View original page 13Page 14 · Read text
inf6rieure dans le logement.
3. Assurez-vous que le film reste d plat entre les ergots de guidage et
   passez I'amorce du film par-dessus  la roue dent6e de fagon a ce
    qu'elle reste sur la bobine r6ceptrice. Fermez bien le dos de I'appareil.
4. Pressez et puis reldchez le declencheur pour faire avancer le film
   d'une vue. R6p6tez cecijusqu'a ce que le chiffre "1" apparaisse dans
    le compteur des poses.
  REMARQUE  : Le compteur des poses fonctionnera seulement
    lorsqu'il y a un film dans I'appareil qui a 6t6 correctement mis en
   place.

C. LA PRISE DES VUES
OBJECTIF ZOOM
Cadrez la vue en regardant d travers le viseur et en op6rant le levier de
zoom pour obtenir le grossissement d6si16. Pendant que vous d6placez
le levier de zoom, le scdne vu d travers le viseur changera pour
correspondre d l'image qui sera obtenue dans la photo r6sultante.


10
View original page 14Page 15 · Read text
Vous pouveztaire les photos d n'importe quelle position de I'objectif, mais
6vitez de d6clencher pendant que vous d6placez le levier de zoom.
PHOTOS EN DEHORS
1. Mettez le verrou du d6clencheur dans la position de d6blocage.
2. Pressez le d6clencheur jusqu'd mi-course pour mettre les circuits de
    I'appareil sous tension. Si la DEL rouge d'avertissement de faible
   lumiere a I'int6rieur du viseur s'allume, le niveau de lumiere ambiante
   est trop bas et le flash sera requis pour obtenir une exposition
   correcte. Le flash se mettra automatiquement en circuit. Attendez i ce
   que le t6moin de charge du flash s'allume avant de prendre la vue. Le
   flash 6mettra un 6clair lorsque vous d6clenchez  et se rechargera
   automatiquement pour 6tre pr6t pour la prochaine prise de vue.
3. Cadrez I'image, tenez l'appareil fermement et appuyez doucement sur
    le d6clencheur pour prendre la vue. ATTENTION DE NE pAS
  OBSTRUER NI L'OBJECTIF NI LE FLASH AVEC LES DOIGTS.
   Lorsque vous relAchez le d6clencheur, le film avancera
   automatiouement.


            www.butkus.us
View original page 15Page 16 · Read text
DTSTANCE D'UTTL|SATION EN LUMTERE DU JOUR: de 1,8 m (6 pi.)
   d I'infini.

PHOTOS AU FLASH
DISTANCES D'UTILISATION DU FLASH
lSO100/21o 1,8 m(6 pi.)......2,8 m(9 pi.)
lSO200/24o  'l,B m (6 pi ). . .       3,7 m (12 pi.)
lSO400/27"  1,8 m (6 pi ). ..             . . .4,5 m (15 pi.)
Le flash se mettra hors circuit aprds environ une minute de non-
utilisation pour prolonger la vie des piles, En cons6quence,  la DEL de
faible lumiere dans le viseur et le t6moin de charge du flash s'6teindront.
Pour r6activer le flash, appuyez l6gdrement sur le d6clencheur.
 REMARQUE : La distance maximale d'utilisation du flash changera
                selon la position de I'objectif zoom. Les meilleurs
                  r6sultats peuvent, en g6n6ral, 6tre obtenus en
                employant le plus grand angle de I'objectif zoom.


12
View original page 16Page 17 · Read text
D. DECHARGEMENT DU FILM
En fin de rouleau, le film cessera d'avancer et le moteur s'arr6tera. lL
FAUT REMBOBINER LE FILM AVANT DE LE RETIRER DE L'APPAREIL
SINON LES VUES SERONT VOILEES ET RUINEES.
1. Faites glisser le curseur de rembobinage situ6 sur le socle de
    I'appareil dans le sens de la fldche.
2. Apres que le film a 6t6 compldtement rembobine, le moteur
   s'arr6tera automatiquement. Cela durera environ 30 secondes avec
   des piles neuves et un film d 36 poses.
3. Ouvrez le dos et retirez la cartouche de film.
E. SOTNS A pOnren A t'applnett
-  Maintenir le verre de protection de I'objectif propre. Utiliser un    chiffon doux et propre pour nettoyer toute souillure ou impreinte des
    doigts.
-  Prot6ger I'appareil contre la poussiOre,  la pluie, I'humidit6 et la   chaleur elev6e.


            www.butkus.us
View original page 17Page 18 · Read text
-  Ne pas utiliser de dissolvants, d'alcool, ou de produits de nettoyage    abrasifs pour nettoyer le boitier de I'appareil ou le verre de protection
   de I'objectif.
  ATTENTION  : POUR EVITCR TOUT RISQUE DE CHOC
              ElecrntouE, NE pAs EssAyER DE DEMoNTER
            CET APPAREIL PHOTO.
F. DEPANNAGE
Les PHOTOS VIDES ou NOIRS peuvent r6sulter:
-  du declenchement  avant que le t6moin de charge du flash s'allume;
-  de I'obstruction de I'objectif ou du flash par les doigts;
                                                                                                                                                                                                                                                                                                                         l-  d'avoir charg6 incorrectement  le film, qui n'avance pas A travers       I'appareil.                                                          J
Les PHOTOS FLOUES peuvent r6sulter:
              pres    d'Otre          trop                du sujet;-   de      ne         pas tenir                      I'appareil-                           immobile;                                                                                                                                                                                                                 I
-  du deplacement du levier de zoom pendant le d6clenchemenr.

14
View original page 18Page 19 · Read text
Les PHOTOS CLAIRES, SUREXPOSEeS peuvent r6sulter:
       de I'utilisation du flash trop prds du sujet;
I         d'avoir dirig6     -                  I'appareil vers le soleil.                          DE REMBoBTNAGE DU FILM peut'   LA FAUTE D'AVANCEMENT ou
      r6sulter    :
     -  d'avoirpolarit6ins6r6marqu6esles oilessur incorrectement,I'int6rieur du couverclesans suivredu logementles indicationsdes piles.de
I


     I

I


                                                                      1q
                 www.butkus.us
View original page 19Page 20 · Read text
DESCRIPCION DE LAS PARTES
  1. Boton de disparo            16. Carrete bobinador
 2. Contador de exposiciones 17. Interruptor de rebobinado
  3. Sensor de escasa luz                1 B. Rueda dentada
  4. Visor zoom                  19. Guias de pelicula
 5. Flash                       20. Contactos DX
  6. Vidrio de protecci6n del objetivo 21. f apa del compartimiento de pilas
 7. Palanca de zoom
 8. Punto de fijacion de la correa de
    muneca
 9. Seguro del respaldo
10. Eje de rebobinado
11. Luz de disponibilidad del flash
12. Ocular del visor
13. Seguro del bot6n de disparo
14. Respaldo de la c{mara
15. Ventanilla de control de la oelfcula
16
View original page 20Page 21 · Read text
INSTRUCCIONES GENERALES
    A. INTRODUCCION DE LAS BATERIAS
     Introduzca las pilas seg0n las polaridades indicades en la tapa del
     compartimrento de pilas. Use 0nicamente dos pilas alcalinas de tamafro
     AA.

     B. INTRODUCCION DE LA PELICULA
    Use pelicula parc copias de color de lSo 100/21', lso 20o/24" o lso
     400/27".I     Los         contactos DX dentro del alojamiento de la pelicula pueden detectar
I    codigola sensibilidadDX, y ajustar6nde la peliculala cdmaraindicadaal valorsobrecorrecto.los carretes de pelicula con
      1. Desbloquee la cdmara, moviendo el seguro del bot6n de disparo
        hacia la posicion de desbloqueado. Deslice el seguro del respaldo
        hacia arriba y abra el resPaldo.
     2, Introduzca el carrete de pelicula, guiando primero eltope del carrete

                                                                           17
                 www.butkus.us
View original page 21Page 22 · Read text
sobre el eje de rebobinado y luego oprimiendo  la parte inferior hacia
   dentro del alojamiento.
3. con la pelicula acostada de manera lisa entre los guias de pelicula,
   pase el cebo de la pelicula encima de la rueda dentada de modo que
   descance sobre el carrete bobinador. cierre seguramente  el respaldo.
4. Oprima y luego libere el boton de disparo para avanzar la pelicula en
   un fotograma. Contin0e haciendo esto hasta que el n0mero ".1"
   aparezca dentro del contador de exposiciones.
  NOTA: El contador de exposiciones no funcionar6 si no hay pelicula
   cargada correctamente en la cdmara.
C. PARATOMAR FOTOS
OBJETIVO ZOOM
Encuadre su foto, mirando por el visor y moviendo la palanca de zoom
para consegurr el aumento deseado de la escena. Mientras va moviendo
la palanca de zoom, la escena observada a trav6s del visor cambiard de
acuerdo con lo que se ver6 en la foto final.
View original page 22
Page 23 · Read text
Puede tomar fotos con cualquier ajuste del objetivo, pero no debe de
tomarlas mientras estd moviendo la palanca de zoom.
FOTOS EN EXTERIORES
1. Ponga el seguro del boton de disparo en la posicion de desbloqueado.
2. Pulse el boton de disparo hasta medio recorrido para conectar los
   circuitos de la cdmara. Si el LED de escasa luz dentro del visor se
   enciende, es que la iluminaci6n del ambiente es demasiado d6bil y se
   requiere usar el flash para obtener una exposicion correcta. El flash
   se conectard automdticamente. Espere hasta que se encienda la luz
   de disponibilidad del flash, antes de tomar la foto. Elflash se disparar6
   cuando toma la foto y se recargard autom6ticamente  para estar listo
   para la proxima foto.
3. Encuadre la imagen, mantenga inmovil la cAmara y oprima  ' suavemente el boton de disparo para tomar la foto. TENGA CUIDADO
  DE NO TAPAR CON LOS DEDOS NI EL OBJETIVO NI EL FLASH.
   Cuando libera el boton de disparo, la pellcula avanzara
   automdticamente,
   DISTANCIAS DE USO EN LUZ DE DIA: desde 1,8 m hasta el infinito.

                                                                       19
            www.butkus.us
View original page 23Page 24 · Read text
FOTOS CON FLASH
DISTANCIAS DE USO CON FLASH
                          '1,8lSO100/2'lo     m......2,8 m
15C200124"  1.8 m.      ..3.7 m
lSO400/27"  1.8 m.            . .. ..4.5 m
Elflash se apagard por si mismo despu6s de aproximadamente  un
minuto sin uso para conservar la energia de las pilas. Esto hace que
tanto el LED de escasa luz en el visor como la luz de disoonibilidad del
flash se apaguen. Para reactivar el flash, pulse ligeramente el boton de
disparo.
  NOTA: La mdxima distancia de uso del flash cambiarA de acuerdo
        con los varios ajustes del objetivo zoom. De regla general,
         para los mejores resultados con el flash, use el mayor 6ngulo
          del objetivo zoom.
D. DESCARGA DE LA PELICULA
Alfinal del rollo, la pelicula dejarA de avanzar y el motor se apagard.

20
View original page 24From the M. Butkus archive. Original publisher and archive notices are retained.
Check the model and edition against your equipment.
PDF verified 2026-10-10.