Film cameras
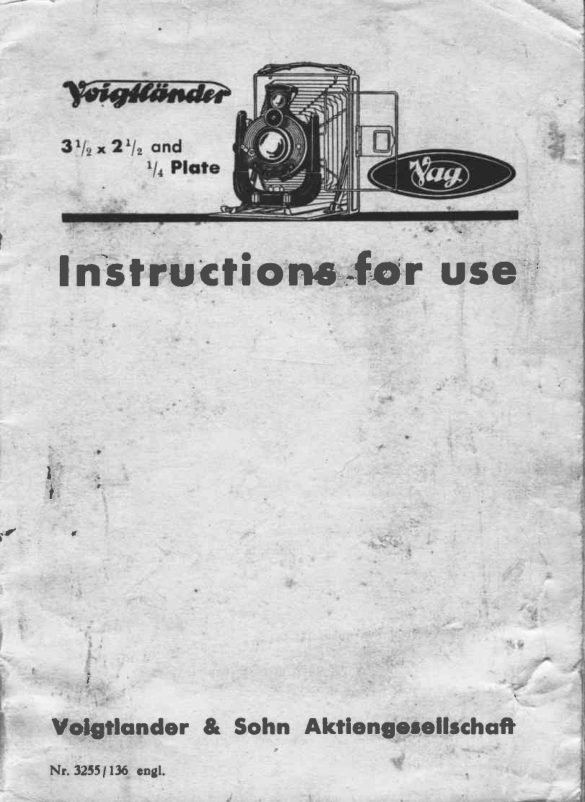
Voigtlander 3 1/2 x 2 1/2 Voigtlander Plate VAG User manual
User manual for Voigtlander 3 1/2 x 2 1/2 Voigtlander Plate VAG. 24 pages in English. Read the original PDF, download or print a copy without registration.
24 pagesEnglish3.3 MB PDF
Loading your manual…Open PDF directly
Document details
- Brand
- Voigtländer
- Model / document
- Voigtlander 3 1/2 x 2 1/2 Voigtlander Plate VAG
- Document type
- User manual
- Language
- English
- Pages
- 24
- File size
- 3.3 MB
- Category
- Film cameras
- Document date
- Not specified in catalog
Search available document text
Find a term, then jump to its page in the original PDF. Image-only pages may not be searchable; check the PDF for exact wording and diagrams.
Page 1 · Read text
I nbtrucfi on6,;f€r usG)"


        I
           i


l a t


     Volgtlonder  & Sohn Akrlengcrellgchoft

       Nr. 3255| 136 cngl.
View original page 1Page 2 · Read text
f ntroduction
  A VoigtlanderCamerais an instrumentthat will last a
lifetimeif  it is usedcorrectly. This bookletis written as a
guide to the user of such a camera.
  Do not look on a cameraas a newtoy, turning,screwing
andmovingeverypossiblepart, but readtheselinesof advice
very carefully and you will have no trouble; and the in-
strumentwill be a sourceof constantpleasure.


                     'ii

                                                                                                                                                                                     ': I1.  :il ::i !::


                                  fig.  l.  Opening  the camera

How To Open  the Csmers
   To open the camera hold  it with the left hand so that
your thumb touches the small metal ring No. 2  (fig. l)
which protects the opening catch and thus prevents ac-
cidental opening. By pressingthe inner button, the base-
board will swing out and is then pulled down until the
struts  ll  (fig. l) engage on each side; the base-boardwill
then be at right angles with the camera body.
                                 3                       www.orphancameras.com
View original page 2Page 5 · Read text
f,ig.3.  Radial lever and focussing scale
Focusslng Screen ond Hood
  By- pressingspring 13 (fig. 4) asidewith the finger, the
hood witt autbmaticallyspring open, thus revealingthe


                          fig. 4.               focussing


                        www.orphancameras.com
View original page 5Page 7 · Read text
attached to  the  shutter and allows the aperture  of the
lens to be reduced as required.  The lever 17 shows the
apertures (i. e. stops) on a scale.
   The chief purpose of the stop is to extend the depth of
focus, which question is dealt with  at greater length in the
section "Depth of Focus".   It is also 'used when the lens is
moved up or down or to one side or the other from  its
central position.    It then improves the sharpness of de-
finition  at the edge of the field which  is thus displaced.
The third use of the stop, but one seldom needed, is for
stopping down  in very bright  light so as to avoid over-
exposure of the plate.  This  is done  if the speed of the
shutter is not high enough to cut down the exposure to the
required time. By stopping down to obtain greater depth of
focus, a longer exposureis always required, so that in many
casesthere are limits to the extent to which this can be done.

Deprh  of Focus
   The lenses fitted  to our cameras are designed to give
at  full  aperture a sharp picture up  to the edges of any
object lying in the plane which is focussed on.  But when
it  is required to  obtain sharp definition, of  objects at
different distances from  the camera at  the same time,
the "depth of focus" needs to be extended over a number
of planes in the object space and the lens must be stopped
down. This applies to  all lenses.
  When focussing on a given distance each lens aperture
corresponds with a certain range of depth of focus, which
becomesgreater as the iens is stopped down. The aim of the
photographer is to adjust the stop and the distancefocussed
on so that as much as possibleof the subject falls within this
range (or region) of depth of focus.
   A glance on the ground-glass will  show that, when
stopping down, the depth of focus extends far less towards
the camera than towards the extreme distance.  For this
reason focussing is done, at the outset, on objects which are
relatively near. This applies also when there is little scope
for stopping down on account of the light or movement of
the subject, since an unsharp foreground conflicts with the
                       www.orphancameras.com           7
View original page 7Page 8 · Read text
natural  sensation experienced by  our eyes, which  are
aecustomedto perceivea near object more clearly than one
a long way  off.
   On every "VAG" camera is an engraved scaleof depth
 of focus which  is arranged on the co'ordinate system.
 In the left-hand vertical column are the distancesin feet,
and in the top horizontal column the stop values.  If you
go along the horizontal column oppositea particular distance
until you arrive at the vertical column below a certain
stop value, the  f igures you  f ind here represent the zone
of sharpness in feet that the  particular focns and stop
values give you.'

Shutter
   The camera is equipped with either Embezet or lbsor
shutter. The following instructionsfor the use of the shutter
should be carefully studied.

Embezet  Shutter  wirh  self-tirner    (fig. 0)
   The speed is regulated by means of the speed dial 16,
on which the figures T (for long time exposures)and B


         l4-
        l5 -
                                                                                                        .l


                                fig. 6.  Embezet-Shutter
I
View original page 8Page 9 · Read text
(for short time exposures)as well as those for instantaneous
 exposures(t/roo,tluortlrr,l are engraved. The speeds,although
 fractions of a second,are written as whole numbers to make
 the reading easier.
    Instantaneous exposures: The speed is regulated by
 turning the dial 16 right or left so that the required speed
 is just above the mark on the dial below it.   In the right
 position one feels a little click. The shutter is now ready for
making the exposure which is done by pressing the finger
 lever l5 or operating the cable releasescrewedinto socket 14.
   Time exposures: Turn  dial  until  letter B  is opposite
the indicator; by pressing down the cable release or the
finger release,the shutter opensand remains thns for as long
as the pressure is exercised.  If one intends to give an ex-
posure of  three seconds, count "one  little  second, two
little seconds,three little seconds",as quickly as one usually
speaks. When saying "one" press the trigger and at the
conclusion of the phrase, the pressureis releasedby letting
the lever come up.
      If the letter "T"   is above the pointer, the shutter opens
by operating the finger release 15 or the cable release and
remains open until the release is pressed a second time.
This position is used when giving exposures of anything
over twenty seconds or thereabouts; for  instance, night
pictures which may need exposuresof several minutes, and
also for flashlight exposures where the shutter is left open
and the flash makes the actual exposure.
    Selt-timer: When  giving  instantaneous exposures of
tlroo,'luoandrlru sec.this shutter may be releasedautomati-
cally by means of a delay mechanism,so that one can take
one's own portrait.  The shutter having been set to the
required speed,it is tensionedby pressingthe lever 18 (with
red knob) as far as it will go. The releasetrigger 15 or the
cable release is then operated as for an ordinary exposure,
but owing to the action of the delay mechanismthe exposure
does not take place until after the expiry of about 10 or
 I I secs.
    In the case when the delav mechanism has been set as
just directed but for some reison is not required, the lens
should be firmly covered with the palm of the hand, thus
                         www.orphancameras.com                    I
View original page 9Page 10 · Read text
allowing of the shutter being -operalgOwithout exposingthe fihil.    It  is best not to keep the delay mechanism
tensioned.
lbsor-Shutter   (fig. 7')
  The lbsor shutter is likewiseautomaticin action, but
not fitted with a self-timer. In additionto short and long
time exposures,it givesinstantaneousexposur.gsf_romI to
,lrrosec. It is manipulatedin the sameway asthe Embezet.

                                                      +


                                     fig. 7.  Ibsor'Shutter
Exposure
   The right exposure,which is the most essentialfactor in
 photography, depends on three points:
                            the                            of               1. Opening                                            iris diaPhragm.        +                                plate.                         the               2.             Speed of
               3. Value of the actinic light.
   We supply with each camera an exposu-r-ecalculatot,
 with which tlie time of exposuremay be quickly and easily
 ascertained.

 Finders
   The Voigtlander Vag-arecamera is fitted with two different
 kinds of finder, which    used as follows:
 l0
View original page 10Page 11 · Read text
Dlrect-vlslon  Finder.   This  consists of a wire frame
 (8, fig. 2) attached to the right-hand side of the lens-front
(viewed from the front) and an eye-piece9 (fig. 2) placed on
the right-hand long side of the camera-back. When not in
 use,the wire-frame enclosesthe lens panel.  It is brought into
the working position by turning it outwards through an angle
 of 1800and is then held in position by springs. The eye-
piece has likewise a spring hinge, and for use, is turned up
parallel with the wire-frame. In order to include the correct
 part of the subject, the eye must be placed so that the out-
 lines of the frame coincide with the mask of the eye-piece.
   The direct-vision finder shows the boundaries of the pic-
ture with  great accuracy even when the rising or falling
movement of the lens is used. The onlv case in which  it
does not do so is that  of very near obj-ects,owing to the
unavoidable greater difference between the positions of lens
and finder relatively to the subject. A further advantage is
that the camera is used at the eye level, thereby conducing
to better perspective in most cases. For these reasonsit  is
well to use the direct-vision finder whenever possible.
     Brilllant  Flnder. When taking  pictures at the  level of
the chest, the brilliant finder (1, fig. 2) is used, in the normal
position for upright pictures,and after turning through a right
angle for oblong pictures. The picture is viewed from the
normal viewing distance of about l0 inches, taking care to
place the eye directly above the centre of the finder. The
mask on the top of the finder is specially designedto show
both the upright and oblong pictures.
   The  small  but  bright  picture  in  the finder can be
magnified three or four times by fitting on a Finder Magnifier
(see "Useful Accessories" at end of this  booklet). When
closing the camera the brilliant finder must always be in its
normal position (for upright pictures), otherwise the camera
will be damaged.
Holding  the Gqmero
   In caseswhen some attractive subject has to be snapped
at  the  right  instant and without  attracting  too much
attention, the camera is used in the hand.  Needless to
say one must have presence of mind and, especially, con-
fidence in the apparatus.  It is therefore well to practise all
                        www.orphancameras.com                           il
View original page 11Page 12 · Read text
the required movements with  the unloaded camera until
they can be done without  thinking about them.
   Whilst  opening and focussing the  camera, a stgaQy
position-camera must be taken up, since any slight wobble of the
        during the exposure would give rise to pictures with
double outlines.   In using the  direct-vision finder, the
camera is grasped with  the  left hand on the baseboard for
upright pictures, whilst for oblong pictures it  is held with
the iigtrt hand on the top side of the body.  At the sametime  it  is most necessary to give further support to the   I
camera so that the elbows should be pressedfirmly against
the body. When taking upright pictures it_is qsually well
to  suppbrt-of   the camera against  the  forehead and  the
bridee    the nosel with  upright  pictures, against the
chin- or  cheek-bone and  nose, according to which  it  is
found most convenient for looking through  the diopter.
    In viewing the subject in the brilliant fin{er, the camera
is held, for both upright and oblong pictures, with the left
hand oh the baseboard. The camera back is pressedagainst
the chest.
   A simple but practical expedient may be recommendedto
those whir have hot a steady hand. This is just a string or
cord,5 to 6ft  in length; on the upper end is a.lo_opmade
so that  it can easily be made larger or smaller.  In taking
upright pictures, this loop is putround the baseboardbetween
the Gns front and the struts; for oblong pictures, it  is put
round the turned up diopter.  When making an exposuret
the free (lower) end of the string is pressed.underthe foot
so that the string is pulled taut when holding the camera
in the correct position.
    In operating the shutter by tever or trigger, any move-
ment of the hand is liable to be communicated to the camera,
so that the safest course is to use the flexible cable release,
held in a wide curve.  Before making the exposure, take a
deep breath inwards and then out, since the body is most
at iest after the latter.  By taking the required care, ex-
posures of rlzasec. or less may be given with  the camera
held in the hand.
     In circumstanceswhere there is time for previous prepa-
ration for the exposure, particularly as regards careful fo-
12
                                       ..';;]'"*a,i&.'.          -.iE:.,-=.,
View original page 12Page 13 · Read text
cussingon the groundglass,the camerais best screwedto a
      tripodf  If needbe,it rilay be placedon a table or other flat
      suiface. The canieraboOy is provided with two screwed
     "bushes",one for upright pictuiesand the other for oblong
      pictures.'       W'henfirst screwingto the tripod, m-akecertainthat the
      tripod screw is not t-oo long fol the bush, otherwisethe
B     thfead is easilydamaged. tfthe screwon the JTipoOis too     long it must 6e shortEnedor a little packingfitted.


I
                  fig. 8. How to hold the camcra when taking oblong pictures

      Rise ond  Foll  of LensI
           In order to avoid "drunken lines" in architectural and
       similar subjects,care must be given to ,seethat the ground-
                                      sttion of the camera,too much
                                            rle. To reduce the amount of
                  ",l,ll'J'iS1?#Tik$it'Jis madein the requireddirection
     by movingthe lens,alorrgwith the shutter,aboveor below
        ttie centra-iposition,which latter is denotedby two engraved
                                  r3                               www.orphancameras.com
View original page 13Page 14 · Read text
dots. Before the lens can be shiftedside-waysit is neces-
glry to releasethe nut l0 (fig.2) by turningit to the left.
This is best done by gripping it'wilh the thumb and first
fingerof the right hariO.fhe wfrolelens-front,with the shutter,
can then be movedto right or left in its guides. When sti
a.diu.st€d,the nut 10 must be tightenedbylurning it to the
right.


                        r2
                           fig. 9.  Closing the camera I
                                                                                                        J
Closlng the Gomero
   Before closing the camera,every part of the camera
has to be in its normal position.
     l. Seethat the RADIAL LEVER IS RIGHT HOME       *     on the infinity mark.
   2. Seethat the FRAME FINDER IS IN ITS RESTING
    PLACE.
   3. SeethattheBRILLIANTFINDER IS INPOSITION
     as used for vertical pictures.
   4. see that the RISING AND cRoss FRONT IS
    CENTRAL.
   5. Seethat the BELLOWS ARE IN THE PROPER
    POSITION, otherwisethey are likely to be damaged
         if the camerais closed.
14
View original page 14Page 15 · Read text
t


?
t


                                       fig. 10. Closing the camere II

              It  is important that the lens-frontis entirely in the
     camerabody beforeturning up the base-board;1f not, the
     runnerswil[ be bent. All being in order, hold the camera
      with both handsso that the first and secondfingerslie on
      the back whilst the underneathpart is supportedby the
     two third fingers. Gentlepressureof the thumbson the two
      struts 11 (fig. 10) will now releasethesefrom the catches,
     so that tbe base-boardcan be turned up.
        While Voigtlandercameras_alerylldly glq substantially
       built, yet FORCE MUST NOT BE USED.  They are
       instrirnientsof precisionwhich naturally call for proper
      handling.
                                           t5
                               www.orphancameras.com
View original page 15Page 16 · Read text
Loodlng the Plore holdero
     fite  loading of                        tle  plate holder takes place in the                           - dark-roomor in a fully-removeddarkenedplace. Each time befoie
 usingall dust shouldbe       from tne interiorof the slide
 and the velvet, ?s every speckof dust lying on the plale
 during exposurecauses'cl6ar glassspots'on"thenega?ive.
    In the shadowaway from
 taken out of the box. This is
 touchingthe emulsionwith  i
 is then taken betweenthe th
 the left hand in such a man
 the ruby tight. (Velvet to  t


                              fig. ll.  Inserting the plate


                                                                                                                t


16
View original page 16Page 17 · Read text
When closing the plate holder, care should be taken to
see that the slide runs correclly in the two side grooves
and that  it is thrust far enoughinto the groove on th! lower
narrow side.   It must be perfectly flaf:  a slide which is
buckled or bent may give rise to difficulty in closing and
may scratch the ptdtei.


                  Iig.12.  Removing  the ground-glass frame

   Loading of the plate holdersshould only be done shortly
before the camera is to be used.  It is not aOvisableto leav-e
plates in the plate holdersfor any length-materialof time. Chemical
action takes place and the sensitive          suffers.
      If the camera is not to be usedfor a time, remove the
plates from the plate holders and store the plate holders
with the sheathentirely withdrawn. This allows the velvet,
which forms the light trap, to rise, and the dark slideswill
be absolutely safe for light.
Inserting   the  Plote  holders
    Pull  out  the focussing-screenframe  (fig. l2).   Insert
the plate holder in its place with the slide turned towards
                                r7                          www.orphancameras.com
View original page 17Page 18 · Read text
the lens. Now turn  the catch 2l back, and, after making
sure that  the lens is not open, pull out the slide of the
plate holder, the catch preventing the plate holder itself
trom being shifted.
      It is a mistake to pull out the slide only so far  that
it  just uncovers the plate and remains in the light-trap.
The slide should be pulled right out. The reasonfor this
is that the light-trap formed by the plush on the camera
against that  let in to the plate holder is much more perfect
than that between the slide and the plush on the camera.

Afew  polnts  of odvlce  forthe  use of Golour  ploter
   Colour plates are inserted with  the sensitive side away
from the lens, glass-sidetowards the lens, and the black card
supplied with  the colour plate has to be left on its sensitive
side.  This goes towards the plate holder back.
   To compensate for this difference of focus the ground-
glass must be withdrawn and inserted glass-sidetowards the
lens. Focussing has to be done by the ground-glass only,
and not by the scale. For all colour-platesof coursea special
filter is required, which is supplied by the respectivemakers.
A  filter  is not necessary in the case of exposure by the
special Nitrophot lamps or with panchromatic flashlight.

Sundry   Hints
    In time the instrument will accumulate dust which na-
turally will adhere to the lens. This is easily removed with
a cledn handkerchief which has already be-enthrough the
wash and has no dressing in  it.
    In colder climates the change of temperature between
outdoor and indoor is considerableand very often results in
the steaming of the lens.  It is best then to wait  until the
moisture has apparently disappearedfrom the lens and then
proceed to wipe lightly with the handkerchief. In very bad
cases it may happen that  also the inner surfaces of the
lenses may collect moisture.  Then carefully unscrew the
two elements of the lens from the shutter.
l8
View original page 18Page 19 · Read text
..,sEe.

*      On no account must any attempt be made to unscrew
      the separate parts of the front and rear lens elements for  it
        is beyond the  skill of even an experiencedamateur to put
     them together again so perfectly as to restore their original
       optical quality. Anyone who tries the experiment in disregard
       of this caution will discover to his chagrin the extreme pre-
      cision with which the assemblageof a lens of this kind is done.
        Very often dust collects between the folds of the bellows.
     A good camel hair brush will remove all this dirt.  This is
      best done by removing the focussing screen, opening the
      shutter, unscrewing the lens cells and then applying the
     brush to the inside of the bellows. By blowing at the same
      time through the open shutter, the dust is readily dislodged,
      especially if the outside of the bellows be simultaneously
     tapped gently with  the finger.#
      Useful  Accessories
       The following accessoriesare not absolutely necessary,
      but  will greatly improve the final results.

      Plqte  Holders
       Each camera is snpplied with three plate holders. When
,*    going on a day's trip six plate holders may be required. On      longer journeys twelve may be required. These can be
     obtained at any time. When ordering only say: So many
      plate holders (standard fitting) requireo for the Vag Camera
      3'lzX2t1n" (6'5X9 cm.), rf nplate, or gX 12cm., whichever
      size it  is.

     Film Pock Adopter
      We also draw attention to Film Packs, for which we
     supply a Film Pack Adapter. These have the advantage of
     being able to reload twelve in daylight.  Of course, care
     has to be taken not to do this in brilliant sunshine. Withrymost film packs there is no focal difference and the same
      scale of the camera can be used as for the plates. When
      ordering say: Supply Film Pack Adapter (standard fitting)
       for the Vag Camera 3lfrX?tlr",   r/a plate  or 9x  l2cm.,
     whichever size is required.
                               www.orphancameras.com             l9
View original page 19Page 20 · Read text
Yellow  Fllters
                            Many  amateur
                               photographsare un-
                                 pleasingon account
                                       of such defects as
                             bad  skies, black
                                   flowersin a meadow
scene, grey fruit blossoms against a white skY, glaringly
white eyes or pronounced freckles in a portrait.
      If you would obtain the natural effectsof clouds,flowers
and landscapesyou must usean orthochromaticplate or film.
The same applies to getting good renderings of blue eyes,
blond hair and colouredclothing and to subduingthe appea-
rance of freckles. But in using such plate or film  it  is in-
dispensableto employ a good yellow filter on the lens.
   Vcigtlander Yellow Filters fitting  exactly any Voigt-
lander lens are supplied in two grades. For ordinary €x-               t'Moment"                                Filter (2x),  to achieve a moreposures use the
prominent effect the "Norm al" Filter (5 X ). tVhen ordering
please state : Camera (Vag 3rlz X Ztlz" or  r ln Plate), lens
(Voigtar  I  : 6'3 or Skopar t  : 4'5) and the density Moment                                                     zani
or Normal.                                                                                                                                                                                                                                                                                                                   I


                                                                                            {
                               Focor Lens

Wlde-onglc  Lenses
  when using the                  ."Vag"-standpointto include a greateramountof subject from a siyel            or wfren working inconfined           :jtullionsr-'it is necesiaryto employ a shorterfocal lengthof lens.-The focallengtirof the lins iitteO to the
20
View original page 20Page 21 · Read text
tF

"Vag" may be shortened in the easiest manner by using a
Focar lens, which is simply attached in front of the camera
objective.
   The following are supplied for use with
   Skopar f/4'5 lens of 4t/r Ins. and 56/t6 Ins. tocus.
   For 41/r ins: Focar lens N0.30; extends the image field
about l'18 times.
   For 55/ruins: Focar lens No.3l:  extends the image
f ield about l'18 times.
   Attachments for increasing the focal length can be used
only with double-extension cameras and so are not appli-
cable to the "Yag".  Nor can the wide-angle Focar be used
with the f / 6'3 Voigtar ; owing to the somewhat long shape of
this lens, the fietd of image would be cut off by the wide-
angle attachment.

The  Foceir  Portrsit   Afrochment
    In the ordinary way the focussing scale of the "Vag"
cameraextendsfrom "infinity"  to 3'5 or 4ft.  Bttt to photo-
graph much nearer obiects such as portraits and  still-life
att ttrat is necessaryis to  fit  a Focar Portrait Attachment
on the lens. The subjectsthen come out "big in the picture"
and are very much more effective.
Yag Camera 3rlz" x2rl,t"      Vag Camera l/n platg
                                                                       ( o r 9 Y t 2 c m . )
F14'5 Skopar,                F14'5 SkoPar,
    4'lelns. (10'5cm.) focus      5t/n lns. (13'5 cm.) focus
F16'3 Volgtar,                  Fr6'3 Volgtar,
    4'7,Ins. (10'5 cm.) focus      Stia Ins. (13'5 cm.) focus
ln using the FocarPortrait    InmentusingNo.the60Focar(Skopar)Portraitor Attach'No. 6lAttachmentNo.52 and        (Voigtar) and
settingpointertoI    locus is        settingpointerto   I     locus  is
the miik on scaleI  obtained on      thema-rkon scalc I   obtained on
                                              @                        . 39 ins.
    25 lect              . 34rlz             30 fcet              . 35rlz _
                                  .                  3                   1   "                                l                                     5            .32rlz    1      2             "                                                                                                  . 3 0   "                                            l0                  2                   8     8                ,                 .                .
     6                      . 2 5 1 1 2 "            7 , ,                   . 2 7
     4.5."         t23                 5 , ,                  . 2 4
     3 . 5 .                 . 2 0 r l z -             4 _              '2lllz  -
                                 21                         www.orphancameras.com
   ,,.;r.ni1t.";.';  ;;t,.                           .a:,    .r.
View original page 21Page 22 · Read text
The use of the Focar Portrait Attachment makes no
material difference to the exposuresnor to the sharpness
of the definition.  All  it does is to shorten the focal length
slightly       ?nd so allow of focussing on near objects as shown
on the table on page 21.
   The distances of such close objects must of course be
very gc.curately judged in order to take advantage of the
use of the focussingscalein this way.   It is best to ascertain
the distance with a tape measure. When taking portraits
so close to the subject it  is well to take a stanOpiftt some-
what to one side so as to get a sharp and natulal picture.


                                FlnderMagnifler
4
overcomesthis trouble. By
top of the finder four times magnification is obtained.
   This Magnifieris so small that it can be carriedin the
vgsl pocket. The fitting is quite simpleslippingit on top
of the fin der.
  When orderingsa)t-                     l'Yoigt_landerFinder Magnifier"andcamerasize. (Vagi 3tlz" X- 2rlz" or ,l^plate.)-                   *

A Lost Word


22
View original page 22Page 23 · Read text
button and think the camerawill look after everything.
It is of coursebeyondthe scopeof theseinstructionsto offer
a generalguideto photography,but, as we want every user
of a Voigt-landercameralo obtain the best from his instru-
ment,we recommendyou to study an elementarytext book
of aniateurphotograpfry.You wiil be amply repaidfor the
slight trouble by-the excellenceof the picturesyou take.


                       www.orphancameras.com            7
View original page 23From the M. Butkus archive. Original publisher and archive notices are retained.
Check the model and edition against your equipment.
PDF verified 2026-10-10.