Film cameras
Voigtlander Prominent User manual
User manual for Voigtlander Prominent. 19 pages in English. Read the original PDF, download or print a copy without registration.
19 pagesEnglish3.1 MB PDF
Loading your manual…Open PDF directly
Document details
- Brand
- Voigtländer
- Model / document
- Voigtlander Prominent
- Document type
- User manual
- Language
- English
- Pages
- 19
- File size
- 3.1 MB
- Category
- Film cameras
- Document date
- Not specified in catalog
Search available document text
Find a term, then jump to its page in the original PDF. Image-only pages may not be searchable; check the PDF for exact wording and diagrams.
Page 2 · Read text
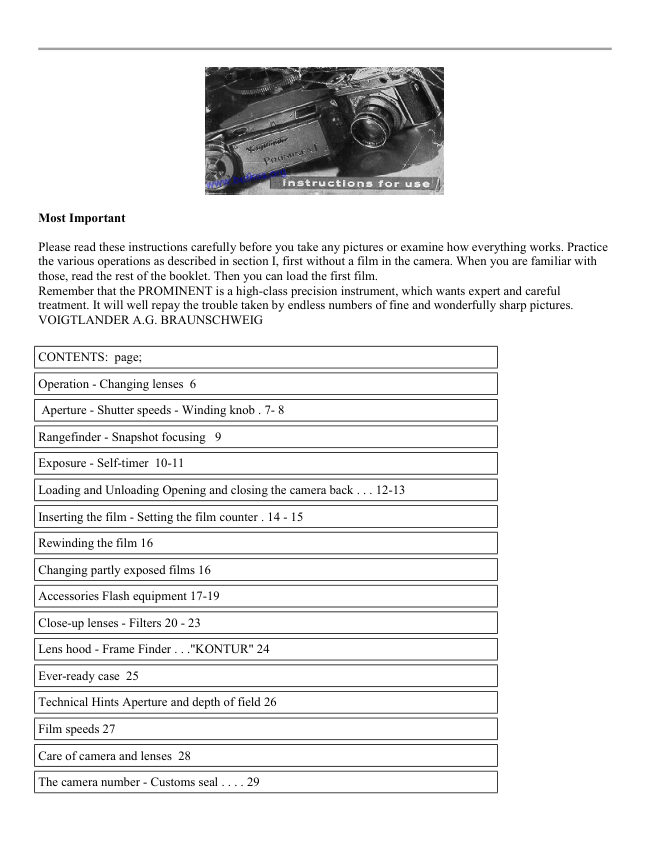
Most Important

Please read these instructions carefully before you take any pictures or examine how everything works. Practice
the various operations as described in section I, first without a film in the camera. When you are familiar with
those, read the rest of the booklet. Then you can load the first film.
Remember that the PROMINENT is a high-class precision instrument, which wants expert and careful
treatment. It will well repay the trouble taken by endless numbers of fine and wonderfully sharp pictures.
VOIGTLANDER A.G. BRAUNSCHWEIG


CONTENTS: page;

Operation - Changing lenses 6

 Aperture - Shutter speeds - Winding knob . 7- 8

Rangefinder - Snapshot focusing 9

Exposure - Self-timer 10-11

Loading and Unloading Opening and closing the camera back . . . 12-13

Inserting the film - Setting the film counter . 14 - 15

Rewinding the film 16

Changing partly exposed films 16

Accessories Flash equipment 17-19

Close-up lenses - Filters 20 - 23

Lens hood - Frame Finder . . ."KONTUR" 24

Ever-ready case 25

Technical Hints Aperture and depth of field 26

Film speeds 27

Care of camera and lenses 28

The camera number - Customs seal . . . . 29
View original page 2
Page 3 · Read text
www.butkus.us


         Mike Butkus                           Digitally                                                                                                         DN:email=mike@butkus.org,Date:cn=Mike2023.02.11signedButkus,by16:32:45Mikeo=ButkusButkusc=US-05'00'camera manuals, ou=butkus.org,


1. Aperture ring to set the iris diaphragm          6. Flash socket to connect to flash equipment

2. Shutter speed ring to set the shutter speeds      7. Shutter lever to tension the self-timer

3. Jaws to hold the reflex housing                  8. Rewind key to rewind the film

4. Back lock                                        9. Peg to hold the detachable accessory shoe

5. Synchronising-lever to set the flash contact    10. Body release

                                                11. Rewind button
View original page 3Page 4 · Read text
12. Cable release socket                       17. View- and rangefinder eyepiece

13. Winding knob to tension the shutter and    18. Film counter
wind the film.
                                              19. Film release to release the film lock
14. Rotating outer ring of rangefinder knob.   when loading or changing partly exposed
                                               films
15. Distance scale with zone focusing
settings.                                      20. Tripod bush

16. Depth of field indicator                    21. Film indicator

                                              22. Drilled pin to take customs seal when
                                              crossing frontiers
View original page 4Page 5 · Read text
www.butkus.us


                                          The Interchangeable Lenses of the
                                    PROMINENT all belong to the new series of
                                                     Voigtlander high-class anastigmats.

                                                 These instructions for changing lenses - as well
                                                        as the sections on focusing, depth of field, etc. -
                                                    apply only to the standard 50 mm. lenses, i.e.
                                                         the ULTRON f/2 and the NOKTON f/1.5.


The TELOMAR f/5.5 telephoto lens and the ULTRAGON f1:5.8 wide angle lens - both with reflex housing -
are supplied with special instruction booklets.

Changing the Lenses
The quick-change mount allows specially rapid changing of all lenses. To remove the lens, simply pull the catch
of the bayonet lock forward (left), turn the lens through about 45" to the left or right, and lilt out of the shutter.
To insert the lens, push it into the shutter and turn until the catch engages with a click. With the lens correctly in
position, the catch must be underneath the lens. When changing lenses, proceed gently; never use force!


Stops and Shutter Speeds


                         The aperture (or stop) off the iris diaphragm controls the amount of
                                    light falling on the film, and thus the exposure. If also controls the
                              depth of field (see p. 26).


The stated speed of the lens (e. g. f/2 with the ULTRON, f/1.5 on the NOKTON), is always the largest lens
aperture. Each successive setting on the aperture scale approximately halves the light transmitted by the lens.

Therefore every aperture number requires double or half the exposure of the preceding or following aperture
respectively. For instance:


Aperture f/      1.5    2       2.8    4     5.6   8    11  16

Corresponding
               1/500  1/250   1/100  1/50  1/25  1/10  1/5  1/2  sec.
exposure
View original page 5Page 6 · Read text
Setting the Aperture

Turn the aperture ring until the selected stop is opposite the index line. The whole of the scale is clearly visible
of a glance from above.


Setting the Shutter Speeds


                                          Turn the shutter speed ring until the selected
                                            speed is opposite the index line on the lens mount.
                                       The figure 1 stands for 1 second, all other figures
                                                  are fractions of a second. The shutter can be set to
                                          any intermediate speeds, except between 1/10 and
                                                  1/25, or between 1/250 and 1/500 second. All
                                              speeds other than 1/500 second can be set after
                                                 tensioning the shutter.
                                            For time exposures over 1 second, set the shutter
                                                    to B. Press the release, and the shutter will stay
                                          open as long as the release is pressed down.


Focusing with the Rangefinder


                                                           The combined view-
                                                                and rangefinder is
                                                                    coupled with the lens.
                                                  On looking through it,
                                                              you will see a bright
                                                                                   circle in the centre of
                                                                            the view.


When the rangefinder is not correctly focused the subject appears as a double image within this circle. Turn the
focusing knob of the rangefinder until the two images coincide. The lens is then accurately focused on the
subject. Alternatively, set the distance by the scale on the focusing knob.

The Winding Knob does three jobs.
Turning it through a full turn as far as it will go in the direction of the arrow tensions the shutter,
advances the film by one frame, and also advances the film counter to the next number.
Note: When the Compur shutter is set to 1/500 second, an additional tension spring comes into
action, which makes the winding knob a little harder to turn. It is therefore advisable at this speed
to tension the shutter directly with the tensioning lever. Push the lever to the left towards the red
dot with your finger as far as it will go. But remember also to wind the winding knob through a full
turn as far as it will go. You will feel a slight resistance while doing so.
View original page 6Page 7 · Read text
www.butkus.us

Snapshots at f/8

These are easy even without the rangefinder. Simply use the two point settings on the focusing
knob:
Set to  = 11 'feet, and everything between 8 1/4 and 16 1/2 feet will be sharp (see above).
Set to 0 = 33 feet, and everything will be sharp from 161/2 feet to infinity.

Instantaneous Exposures (webmaster: this is what they call shots without the need of a
tripod)


                                When taking the picture, hold the camera as shown
                                            above. Press it firmly against the face and tuck your
                                        arms well into the body, to avoid any camera shake
                                             during the exposure. Keep the eye close behind the
                                            eyepiece of the view- and rangefinder so that you
                                          can see all four corners of the image at once.
                                       Hold your breath while exposing, and gently press
                                                the release down as far as if will go. Take care not
                                                  to jerk it.


Slow Speeds
To make hand-held exposures at speeds slower than 1/25 second, e. g. 1/10, 1/5, 1/2, and possibly
even 1 second, you need a very steady hand, or some support for the arms and body.
A useful trick to reduce the risk of camera shake with shots of static subjects, e. g. inferiors, is to
use the self-timer which normally serves for taking pictures of yourself. Tension the shutter in the
usual way, set the shutter speed, and start the self-timer as described on the next page. After about
10 seconds the shutter will release itself without any shake. But do not move the camera until you
have heard the shutter close with an audible click.

Time Exposures over 1 Second


                                                   Set the shutter to B.
                                                    Preferably use a cable release with locking
                                                  screw. The release will screw into the socket
                                                behind the body release. The camera must be
                                                    firmly fixed for such shots; the best way is to
                                          mount it on a tripod.


The Self-Timer
When the shutter is tensioned, the tensioning lever is next to the red dot. Pulling it further still as
far as it will go, automatically brings a delay mechanism into action, which opens the shutter about
10 seconds after release. Note: Do not use the self-timer with the shutter set to B or to 1/500
second.
View original page 7Page 8 · Read text
The Double Exposure Lock
This automatic device prevents double exposures and blank frames.
After the exposure, the release button is locked until the film is wound on; the film transport is then
locked until the next time you press the release.

The Film Release
This is needed mainly when loading the camera or when changing partly exposed films. A short
pressure releases the film transport for one frame.
Continuous pressure releases the film transport while the pressure lasts.
Do not use the film release when rewinding the film.

Films
The camera uses perforated miniature film available in daylight cassettes for 36 exposures 24 X 36
mm. With colour film the number of exposures varies with different makes. Avoid handling the
film cassette in very bright light, preferably load and unload the camera in the shade - the shadow
of your own body if necessary.
The film indicator is provided to help your memory; choose a colour code for your films, and set
the indicator straight
after loading.


                                          Opening the Camera Back


Press together both spring locks and open the hinged back. When closing the camera again, make
sure both locks engage properly.


The Rewind Key
To pull up the rewind key when loading the camera, push the small button on top in the direction of
the arrow, to make the handle spring up. Then pull out as far as it will go.
View original page 8Page 9 · Read text
www.butkus.us


                                                      8. Rewind key:
                                                     to rewind the film. The handle is open
                                           and the key pulled up.


11. Rewind button

13. Winding knob to tension the shutter and wind he film.

18. Film counter

19. Film release to release the film transport lock when loading films or changing partly exposed
films.

23. Spool peg for the film cassette.

24. Film guides25. Film transport shaft with two sprocket wheels which have to engage into the
perforations at both edges when loading the film.

26. Take-up spool
View original page 9Page 11 · Read text
www.butkus.us

Setting the Film Counter
Turn the winding knob until it locks (if not already locked). Then pull if up, and turn the counting
disc underneath to set the letter F opposite the index mark. Push the winding knob back again,
turning if slightly, if necessary, so that it fits snugly on fop of the counting disc. Press the film
release once, and turn the winding knob until it locks. Repeat this once more. The index mark now
points to No. I and the film is ready for the first exposure.


Rewinding the exposed film


                                                     After the last exposure, lift up the handle of
                                                       the rewind key, but do not pull up the key
                                                                      itself. Then depress the rewind button, and
                                                        turn the rewind key evenly in the direction
                                                      of the arrow (right). During rewinding, the
                                                screw at the centre of the film winding knob
                                                          will also turn. It stops when the film is fully
                                             rewound into its cartridge. Now release the
                                                rewind button, pull up the rewind knob,
                                              open the camera, and remove the cassette.


Partly exposed films
are easily changed at any time (e. g. black-and-white against colour). Rewind the partly exposed film as
described, but make a note of the last number on the film counter.
When loading a partly exposed film, proceed in the usual way up to setting the film counter to No. 1. Then press
the film release, and keep it pressed down while turning the winding knob until the film counter indicates the
previously noted number. Now finish exposing the film in the normal way.

Synchronized Flash Shots


                                            The SYNCHRO-COMPUR shutter makes
                                                                           if possible to take action shots with flash as
                                                        the fastest shutter speeds up to 1/30th
                                                     second. The flash can be employed either
                                             by itself, or combined with daylight or any
                                                        other light. It is particularly useful for
                                                           lighting up the shadow areas in against-the-
                                                              light shots.
                                                      All makes of flash units - flash guns as
                                                     well as electronic flash - can be used with
                                                        the Synchro-Compur shutter.
View original page 11Page 12 · Read text
Connecting the flash unit to the camera:
First fix the camera to the bracket with a tripod screw (left). The flash unit should be to the left of
the camera so as to allow free access to the body release and winding knob. Some light-weight
flash guns can be fixed directly to the detachable accessory shoe (page 24).
Then connect the special synchronizing cable to the flash unit and push the plug over the contact of
the shutter (right). Get an expert to fix the cable for the first time to make sure that the wires are
correctly connected.

Setting the SYNCHRO-COMPUR:

The flash should reach its peak brightness just when the shutter is fully open. The synchronizing
lever - and also shutter speed and aperture - must therefore be set to suit the type of flash in use.
Flash bulbs and electronic flash tubes differ in the time they take to reach their peak. They thus fall
into several classes as shown in the table opposite. Set the synchronizing-lever either to "X" or
"M", according to the flash used (see illustration). Then set the shutter speed according to the
values shown in the table. Wind the shutter in the usual way, and the camera is ready for the flash
shot. Look up the instruction leaflet enclosed with the flash bulbs or electronic equipment for the
correct lens apertures needed.

Shots with the built-in delayed action release are only possible at the "X" setting and with the
corresponding shutter speeds. The actual position of the synchronizing lever is immaterial as the
"M" setting does not work when
is you use the delayed action release.


                           "X" Setting: the contact closes at the instant when the shutter is
                                     fully open.


"M" Setting
The contact closes a short time - corresponding to the firing delay of class "M" flash bulbs - before
the shutter is fully open.
Electrical Details:
The outer pole of the flash contact is earthed to the shutter. To avoid wiring up the leads the wrong
way round, get an expert to connect the cable to the flash gun the first time.
View original page 12Page 13 · Read text
www.butkus.us

The flash contact will carry the firing current of all types of electronic flash tubes. When used with
flashbulbs it will carry a temporary load up to 10 amps at 24 volts, thus allowing simultaneous
firing of several bulbs connected in parallel. The longest permissible exposure time in this case is
1/10 second.

The flashbulb chart

Caution: The flash contact must not be used to fire bulbs from 110 or 220 volt electric mains.
(e.g. use batteries)
View original page 13
Page 14 · Read text
Close-ups with Supplementary Lenses

Do not miss this highly interesting field of photography which so many amateurs seem to neglect.
Large-scale pictures of flowers, butterflies and other animals, small "objets d'art", etc. can yield
extraordinarily beautiful results. With the Voigtlander Focal lenses you can also copy without
trouble pages from books, stamps, or small pictures. But be careful when using Focal lenses for
portraiture as the pictures may easily show distorted perspective.

The Focal lenses shorten the focal length of the camera lens and thus allow the camera to approach
the subject much closer, giving a larger image.
The focusing table.


                                              Voigtlander Focal lenses in 47 mm. push-on mount
                                                 are available for two close-up ranges:

                                             Focal F 1 for distances from 31 1/2 to 17 1/2
                                                 inches,

                                             Focal F 2 for distances from 17 1/2 to 12 1/2
                                                 inches.

                                         These are add on + lenses which is a more current
                                         name. Push on as the lens does not have thread for
                                             a filter.
View original page 14Page 15 · Read text
www.butkus.us


Working with Focal Lenses: - the close up chart


• Mount the camera on a tripod and approach the subject until its image in the tinder is of the
desired size. Then push an F 1 or F 2 Focal lens - whichever covers the subject distance - over the
camera lens mount.

• Accurately measure the distance from the front surface of the Focal to the centre of the subject.
Look up this distance in the second or third column of the table opposite. The first column then
shows the required distance setting for the camera lens.

• The Focal lenses have no effect on the exposure time. Longer exposures are, of course, necessary
when stopping down.

• At full aperture the image is slightly un-sharp, particularly towards the corners. The definition
improves on stopping down, and reaches its usual standard at f/11.
Owing to parallax the image on the negative is no longer exactly the same as the view in the finder,
but is displaced towards the lens axis (see comparison
picture below).
View original page 15
Page 16 · Read text
Improve your shots with filters


                                     Your Voigtlander lens will satisfy your most exacting
                                     demands on sharpness, but you can greatly enhance
                                              the mood or obtain special effects in your pictures
                                          with Voigtlander filters.

                                     With a few exceptions, therefore, use a filter for all
                                          outdoor shots whenever possible. With filters the sky
                                                in particular - with or without clouds - will show up
                                  much more effectively. Do without a filter only when
                                      you need very short exposure times in poor light,
                                         such as sports shots in dull 2 weather, or fog and mist
                                                 subjects.


Voigtlander filters are made of spectroscopically tested glass dyed in the mass. All surfaces are
carefully polished and are absolutely parallel. All filters are supplied in a push-on mount (47 mm.
diameter for the PROMINENT) and can be used together with a Voigtlander Focal lens or the lens
hood or both.

Voigtlander Yellow Filter G 1
The pale yellow G I filter is recommended for all subjects where only a slight filter effect is desired
or where the greater exposure needed with the G 2 medium yellow filter is not practicable.
The filter factors are 1 1/2 -2x for panchromatic materials. 2-2'/2x for ortho emulsions. In bluish
light (in shade under a clear sky) this factor increased, with reddish light (low sun) decreased.

Voigtlander Yellow Filter G 2
This is a universal filter for all outdoor shots. It strongly shows up white clouds against blue sky,
and increases the luminosity of fair hair, ripening wheat, or spring or autumn foliage. It is
indispensable for snow scenes.
The factor is 3 x for all panchromatic emulsions, 4 x for ortho emulsions. Bluish or reddish light
may again modify these factors (see above).

Voigtlander Orange Filter Or
This is an effect filter. It strongly subdues the blue of the sky, and lightens yellowish and reddish
tones. With distant views it penetrates atmospheric haze. It also greatly suppresses skin blemishes
of outdoor portraits.
The factor is 3-5 x for highly red-sensitive pan films, 5-6 x for correct panchromatic emulsions, and
B-12x for ortho emulsions.

 Voigtlander UV Filler: this filter removes ultra-violet radiation, particularly in mountainous
regions. It still preserves the delicate atmospheric perspective with black-and-white shots without
completely cutting out all suggestion of haze in distant shots. With colour film it reduces the
unpleasant blue cast of such views, and gives a more nature colour balance.
View original page 16Page 17 · Read text
www.butkus.us

Black-and-white films need no extra exposure with this filter; with colour films the factor is 1 1/2
x.


The Lens Hood
shields the lens against reflections caused by direct light when shooting into the light and further
increases the brilliance of the pictures. The hood will fit the lens as well as the 47 mm. Voigtldnder
filters and Focal lenses or combinations of the two.

The Voigtlander Frame Finder "KONTUR"
This finder is excellent for following fast moving subjects (sports, action shots, etc.(. It is ideal for
photographers wearing spectacles. Keep both eyes open, while sighting the subject. The eye
watching the subject directly will see it in its natural size and brightness, while the eye looking into
the finder will see the frame outlining the field of view. The point in the finder shows the centre of
the field, while a dotted line indicates the parallax error with close-ups. The finder fits onto the
accessory shoe which - with the stop pin at the front - is first pushed over the fastening pegs on the
top of the camera (right picture).

The Ever-ready Case


                            for the PROMINENT is made of best quality hide, lined inside, and fitted
                        with a carrying and neck trap.


This case holds the camera even while taking pictures, without affecting its instant readiness for
action, and has many advantages:
View original page 17Page 18 · Read text
• When closed it shields the camera from the effects of bad weather, and in addition gives
appreciable protection against damage through dropping or knocks.

• The lid pivots in any direction. With upright shots it can not therefore swing accidentally in front
of the lens.

• When using a filler and lens hood, these two valuable accessories will fit comfortably in the
closed case. The lens hood is simply inverted over the lens mount for this purpose.


Aperture and Depth of Field
The depth of field of a picture is the part of the view in front of, and behind, the focused distance
which is still reproduced sharply on the film.
This depth of field, is however, not constant. It becomes greater, the more the lens is stopped down,
and if decreases the larger the lens aperture used. So remember:

Large apertures (e5 g. f/1.5 or 2) produce little depth of field.
Small apertures (e.g. f/8 or 11) produce great depth of field.

You can read off the depth of field (with 50 mm. lenses only) for each exposure from the
rangefinder focusing knob. When the rangefinder is sharply focused, the A mark points to the exact
subject distance. The focusing knob also carries two series of aperture numbers symmetrically
grouped to the left and right. of the distance mark, with the distance scale
immediately above. The depth of field always extends from the distance above the aperture number
chosen on the left to the distance above the corresponding aperture number on the 26 right. (The
illustration above the section on Snapshots at f/8 on page 9 shows an example.)

Film Speeds - ASA & BS chart - These are very old film brands. ASA 100 is the slowest you
would currently get, ASA 400 the fastest.
View original page 18
Page 19 · Read text
www.butkus.us


                                            These are very old film speeds, 100, 200 and
                                            400 are most common.
                                               Film sensitivities or speeds are determined by the
                                              makers in various ways and often measured by
                                                          different systems. The table on the right gives a
                                                rough comparison of the more usual systems.

                                               Films slower than 24° BS Log Index (20 ASA)
                                                       are extra fine grain films of the highest resolving
                                                 power, allowing very great enlargement. They
                                                    tend to be somewhat contrasty, and require
                                                      accurate exposure.

                                                 25-27° BS Log Index (25-40 ASA) Films
                                                       are best for average subjects. They are fast and
                                                    give fine grain.

                                               Films faster than 290 BS Log Index (64 ASA)
                                                       are high speed films for occasions when the light
                                                                   is poor and the subject demands short exposures.
                                                   Their high red sensitivity makes them particularly
                                                         suitable for artificial light photography. Their
                                                      grain is, however, somewhat coarser than with
                                                      other types of film.

                                           Remember: Every increase or decrease of 30 BS
                                         Log Index (double or half the ASA Index
                                              number) halves or doubles respectively the
                                                 exposure required.


Care of Camera and Lens
Successful work and long life of the camera largely depend on correct handling and proper care.
So:
• Please treat the camera gently, never use force. If anything seems to jam, better re-read the
relevant sections of this booklet.
• When changing lenses, take great care not to get any grit (sand etc.) into the shutter.
• Before inserting a film, remove any dust inside the camera.
• Avoid leaving the shutter tensioned for days on end, particularly when set to 1/500 sec.
• At the seaside, carry the camera in its closed Ever-ready case to protect it against windblown
sand. Open the case only when actually taking pictures.
• Never touch the lens surface with your fingers; fingerprints may spoil the definition.
• The surfaces, including the outer ones, of all lenses carry an anti-reflection coating. To clean the
lens, use a soft sable brush or a piece of clean soft linen. Grease spots may be removed by careful
dabbing with a piece of cotton wool moistened with alcohol.
View original page 19From the M. Butkus Camera Manual Library. Original publisher and archive notices are retained.
Check the model and edition against your equipment.
PDF verified 2026-10-10.