Film cameras
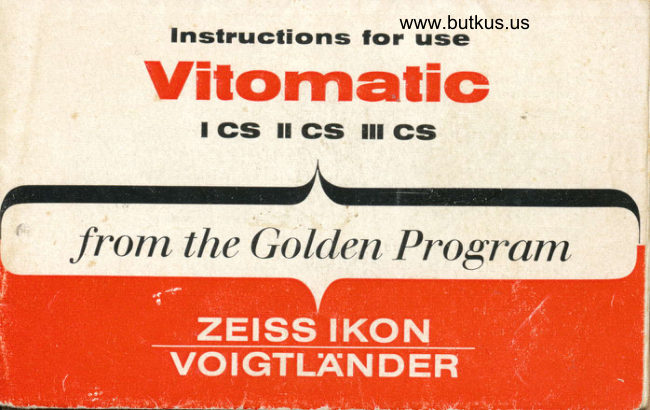
Voigtlander Vitomatic ICS - IICS - IIICS User manual
User manual for Voigtlander Vitomatic ICS - IICS - IIICS. 41 pages in English. Read the original PDF, download or print a copy without registration.
41 pagesEnglish4.0 MB PDF
Loading your manual…Open PDF directly
Document details
- Brand
- Voigtländer
- Model / document
- Voigtlander Vitomatic ICS - IICS - IIICS
- Document type
- User manual
- Language
- English
- Pages
- 41
- File size
- 4.0 MB
- Category
- Film cameras
- Document date
- Not specified in catalog
Search available document text
Find a term, then jump to its page in the original PDF. Image-only pages may not be searchable; check the PDF for exact wording and diagrams.
Page 1 · Read text
Instructions  forwww.butkus.ususe
      Wffiffiffi&s'&T  .ffi:$'ffi$'*;p
        |cs  ltcs  illcs

          ()oklen                     Pr.ogt,crnlfrom tlte
View original page 1Page 2 · Read text
The most                  is to read this carefully prepared booklet right
important       through before you load the camera with your first
advice            film and begin to think of picture taking. Open out
                the cover pages by unfolding the top and bottom,
               and you will find a clear illustration showing all the
                  controls with their names indicated and numbered.
               These control numbers are referred to in the text
               by enclosing them in brackets thus ( ).
              Remember that the cameras of the VITOMATIC
                  range, although very robust, are nevertheless opti-
                cal and mechanical precision instruments. They
                 therefore require gentle and sensible treatment.
             The camera will repay your careful handling by
                 producing beautiful pictures for many years.
            ZEISS IKON
         VOIGTLANDER
View original page 2Page 4 · Read text
@ Focuslng ring            @ Removable cover
   with distance scale                        for inserting the battery
@ Depth-of-field scale          @ Accessory shoe
@ Exposure pointer ring                      with central flash contact
@ Locking lever            @ Film rewind crank                                                                                                     l.
   for setting scales @ and @                   @ Film speed scale in DIN
@ Film speed scale in ASA                   @ Battery check button@ Film rewind lever                   @ Cable release socket
@ Flash contact
    for flash units with synch cord     @ Tripod bush
@ Aperture scale           @ Frame counter
@ Shutter speed scale         @ Base flap
@ Shutter release           @ Lock for base flap
@ Combination ring          @ Tensioning lever
   for shutter speed and aperture               for self-timer
View original page 4Page 6 · Read text
Venmo @mike-butkus-camera  Ph. 2083
PayPal Name  Lynn@butkus.org      www.PayPal.me/lynnbutkus
View original page 6
Page 7 · Read text
@ Film rewind lever
@ Base flap
@ Lock for base flap
@ Viewfinder eyepiece
@ Film rewind shaft
@ Film cassette chamber
@ Sprocket wheel
   for shutter
@ Take-up spool
   with hook for attaching
   the film
@ Rapid film wind
View original page 7
Page 8 · Read text
r

                                                                 l#- .*r Sl


   The beginning of the film
     is inserted in the slot in
     the take-up spool, and the
    hook @ fits in one of the
    sprockei holes.


                                                     www.butkus.us
View original page 8Page 9 · Read text
a                                            www.butkus.us


  The take-uP sPool  is
   rotated until the Perfora-
   tions along the upper
   edge of the film engage
   the sprocket wheel @.
View original page 9
Page 10 · Read text
This Instruction for Use contains the technical description for all three camera models of the      t
VITOMATIC series:
VITOMATIC ICS                          a
with Color-Skopar 1:2.8/50 mm and
    between-the-l ens s hutte r
    Prontor 500 SLK-V
VITOMATIC II CS
with Color-Skopar 1:2.8/50 mm,
    between-the-lens  shutter
    Prontor 500 sLK-v
   and coupled coincidence rangefinder
vtToMATtc  ilt CS
with Ultron 1:2/50 mm.
    between-the-lens  shutter
   Prontor 500 sLK-v
   and coupled coincidence rangefinder
View original page 10Page 12 · Read text
Preparing the camera
                                                                             . . . for every new film

                        All commercially available proprietary films6h-,  can be inserted in the cameras of the
                VITOMATIC series. According to the film
                     length you will obtain either 36 or 20 pic-
                    tures 24 x 36 mm, on both black-and-white
                  and colour 35 mm film.
                 The cassettes are lightproof. Nevertheless
                we recommend that you do not expose them
                    to strong light, and that you load and un-
                   load the camery only in subdued light                    your own shadow will be sufficient.      -
View original page 12Page 13 · Read text
www.butkus.us
Setting the film speed
Make  it a rule always to set the film speed
b e f o re loading the camera, because the
automatic exposure control depends on this
setting. You will find the film speed marked
in ASA or DIN on the film carton or in the
instruction leaflet accompanying the film.
Press locking lever @ and rotate the front
milled edge of exposure pointer ring @ until
the desired ASA or DIN number is opposite
the red dot. Release the locking lever.
        illustrationsIn the                  the                        film speed is adju-
                                                                             Y y r Y J'YrYft   mnno||l't{lsted     to       50 ASA (18                    DIN).                                                                                                                        rfmlrnmomrrt lv |.rv   Y yy y

                                                                                         rftriiiiTEf ft YY yrri-"-"ifrw   f r r fi   ft  t',.iroiinoillrr riy.Onaitart   I 1l
View original page 13Page 14 · Read text
Inserting the film cassette ...

To open the camera: pull up base flap lock @ and turn to the right. Open base
flap @ and camera back (see Fig. 3 at the end of this booklet).
Inserting the film cassette: push the beginning of the film into the slot in the
take-up spool so that one of the perforations fits over hook @. Pull the film
over the film track and insert the cassette in its chamber @, taking care that
film rewind shaft @ engages the film cassette core correctlylsee Fig. 4).
Now push back film rewind lever @ which causes the handle of film rewind
crank @ to jump up. Operate rapid film wind @ until sprocket wheel @ engages
with the perforations (see Fig. 5). Push back the film rewind crank, as otherwise
it will be impossible to release the shutter!
Closing the camera: by pressing the camera back against the body until you
hear it lock. Close the base flap and lock by turning the lock to the left and
laying flat.


4
View original page 14
Page 15 · Read text
www.butkus.us
. . . and preparing for action

When you close the camera, frame counter
@ will automatically return to the zero posi-
tion (black index mark f). To render the film
ready for use, operate rapid film wind @
                                                                                          1and shutter release @ alternately  until No. (f irst picture) is opposite the red index
mark y.
Each time you wind the film on after an expo-
sure, the film counter will automatically indicate
the next frame number. Remember notto continue
winding on after the last frame has been expo-
sed.  lf you do, the film will be pulled away from
the cassette core and then it would only be pos-
sible to open the camera in complete darkness.
View original page 15Page 16 · Read text
Setting the camera controls
                                        Shutter speed . aperture . distance
                                         Sighting and turning    these are the only                                 manoeuvres necessary-  for taking impec-
                                     cably exposed and wonderfully sharp pic-
                                          tures. And it is quite immaterial whether
                                  you are exposing your first film, or whether
                                     you are an advanced amateur.x'
                                    Only sighting and turning      it is as quick                               and simple as this to set- the controls of
                                     the VITOMATIC when looking through the
                                          viewfinder. Naturally you have the further
                                            possibility of selecting the combination  of
                                        shutter speed and lens aperture which is
                                  most suitable for the subject you want to
                                        photograph. You can thus adapt the camera
                                         to your own special preferences in picture
                                              taking.

                                        6
View original page 16Page 17 · Read text
www.butkus.us
Turn combination ring @ either to the left    Pre-selection
or right until the red index mark A clicks
into position beneath the desired shutter    of shutter speed
speed.
The white figures (1/500, 1/250, 1/125 and
1/60 second) are the shutter speeds you
can use for picture taking with the handheld
camera. When you select one of the yellow
figures (1/30, 1/15, 1/8, 1/4, 1/2 and 1 se-
cond) the camera must be firmly supported
on a table or tree trunk or even pressed
against a wall, tree or any other stable sup-
port in order to avoid unsharpness through
camera shake.
At "B" (time exposures of any desired
length) the shutter remains open as long as
release @ is pressed. A tripod will be ne-
cessary as well as a cable release which
can be screwed into cable release socket @.
View original page 17
Page 18 · Read text
Setting the aperture pointer    Look through the viewfinder and frame your
                                 subject as you want  it to appear in the
                                          picture.
                       A brief rotation of exposure pointer ring @                                         will line up the circular aperture pointer
                                with the pointer of the exposure meter
                                 beneath the bright-line frame ...  and you
                                         will have set automatically the correct lens
                                     aperture for the pre-selected shutter speed.
                                                         lf it is not possible to line up the two pointers
                                       in the viewfinder, this means that the lighting
                                        conditions are not suitable for the pre-selected
                                          shutter speed.
                          When you continue turning exposure pointer            incorrectly set                                            ring @ in order to secure lining up, you will feel
                                      a slight resistance because now combination con-
                                         trol ring @ will be released from its former
                                            clicked-in position, and a new shutter speed wiil
                               be set.
             correctly set              8
View original page 18Page 19 · Read text
www.butkus.us
Hints for exposure                                                              lL--                         J

o You can see the reflection of the hioher
shutter speeds in the bottom-right co-rner
of the viewfinder in conjunction with thelens aperture in use. Without taking the   il-l
camera away from the eye, you have a
constant check on the shutter soeed-lens
aperture combination.
o lf you want to alter the shutter speed-
lens aperture combination you have obtai-
ned and set the controls to get the best
result for a specific subject (see "Apertureand depth of field" on page 19), turn com-   o lf the pointer of the exposure meter is
binatioh ring @ to the l6ft oi'right  until     within the red field, do not shoot, becausethe shutter speed or aperture you intend    the lighting conditions are not adequate.
using comes opposite the red index
mark 1\. But you should make sure not to      . with the vlToMATlc  lll cs you cannot
turn the combination ring beyond the ex-    use fl2 (full aperture) with the combination
treme values of aperture scale @, as    ring set to "B". This is however of nootherwise the two pointers will no longer    importance as you will always stop down
line up in the viewfinderl                      for times exposures.
View original page 19
Page 20 · Read text
Under normal conditions of use, the battery of the
                                type "Mallory PX 13" inserted in the camera for
                                      operating the exposure meter has a lifetime of about
                                 two years. To ensure uniform current output, protect
                                                      it against extreme temperatures (below      C). lf                                       this should not be possible, use the type-10o"Mallory
                            PX 625".
www.butkus.us                  Testing and exchanging the battery
                                While you look through the viewfinder, depress the
                                     battery check button @. When the battery is all                                            right, the pointer of the exposure meter will move
                                      into the green field visible in the lower part of
                                     the viewfinder. Should the pointer stand outside the
                                  green field, insert a new battery.
                                     For exchanging the battery, move the cover @ in the
                                         direction of the arrow to the stoo and lift  it out uo-
                                      wards. When inserting the new battery, take care thbt
                                   the *  pole lies as indicated by the marking in the
                                    cover. The battery should be so inserted that you
                                   hear it click home.
                          When inserting the cover @ in the camera, the red
         t                          t        dotof themarkingscover.  will indicate the correct positioning               Red warning Green testing
       field                 field                                    10
View original page 20Page 21 · Read text
www.butkus.us
Focusing with the VITOMATIC  I CS
Turn focusing ring @ until the subject distance corresponds with the distance
 in feet on depth of field scale @ opposite the index mark $.
You will find the three red zone-focusing  indication marks inbetween the num-
bers showing distances in feet:
            o  portraits (subject distance 4,3,,)
          V groups   (subject distance 11,)
        O landscapes (subject distance 33,)
According to your subject, you simply set the distance scale to one of these
marks. When using an average aperture of f/8 (marked in red on the scale) the
following depths of field will be covered: r (portraits) from3,g,,to  5,; V (groups)
from 8'3" to 16'6"; Q (landscapes) from 16'6,, lo infinity (oo).
Zone-focusing  is particularly helpful when you are shooting live subjects where
the subject distance may change rapidly (children at play, sporting events, etc.).

                                                                                                   11
View original page 21Page 22 · Read text
Focusing with the
VITOMATIC  ll CS and lll CS
In the centre of the viewfinder image
you can see the bright circle of the
coupled rangefinder, which shows double
outl ines when the subject is not properly
focused (see top picture).
Turn focusing ring @ until the outlirtes
merge into a single image (see lower
picture). The camera is now focused on
the subject.
You can of course also use the distance
scale or zone-focusino method as des-
cribed on page 11.


12
View original page 22
Page 23 · Read text
www.butkus.us
The Voigtldnder
crystal-frame |  : I viewfinder
 is really fantastic!  lt shows the subject in
no way reduced, but bright and clear in its
 natural size. This is of particular interest
to spectacle wearers, for with this view-
finder you can see all four corners of the
image. The bright-line frame indicates the
subject area. The VITOMATIC I CS has a
point to mark the exact centre of the picture.
The viewfinder image will be slightly dis-
placed at short subject distances. The two
short lines of the bright-line frame indicate
the subject framing for a distance of
between 3'4" and 6'8,    downwards orsideways, according to whether-      the camera
is held horizontally or vertically.
View original page 23
From the M. Butkus archive. Original publisher and archive notices are retained.
Check the model and edition against your equipment.
PDF verified 2026-10-10.