Flashes & lighting
WALZ Flash Master User manual
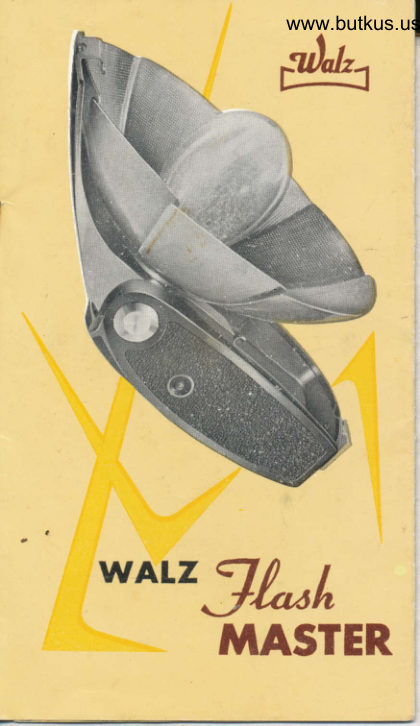
User manual for WALZ Flash Master. 11 pages in English. Read the original PDF, download or print a copy without registration.
11 pagesEnglish2.3 MB PDF
Loading your manual…Open PDF directly
Document details
- Brand
- Walz
- Model / document
- WALZ Flash Master
- Document type
- User manual
- Language
- English
- Pages
- 11
- File size
- 2.3 MB
- Category
- Flashes & lighting
- Document date
- Not specified in catalog
Search available document text
Find a term, then jump to its page in the original PDF. Image-only pages may not be searchable; check the PDF for exact wording and diagrams.
Page 2 · Read text
THE WAUZ FLASH }IASTER      ^d


          Monufoctured by the WALZ
        COMPANY, [TD. is o smortly                           i
          designed compoct flosh unit
             for flosh bulbs to be fired with
         the oid of the built-in flosh
            synchronizotion contoct of fhe
        comero. The WAIZ FTASH
        MASTER offers ulmost sofety
           in flosh light photogrophy to
         every photogropher becouse
         proper functioning of    flosh
            bulbs ond circuit con be tested
            simultoneously,  lt olso ensures
         long preservotion of  botlery
       ond copocilor becouse fhe
           chorging circuit is outomoticolly.
            cut-off when fhe front boord
          of the flosh gun is closed.

/rU %a/, ?adoa,ro
ata.    /aaaa'ctceZ fu Z& |
View original page 2Page 5 · Read text
1-


WA1Z F1ASH TASTER

        DESCTIPTION OF PANTS
    l. Front Boord       7. Fon knob
  2. Pilot lomp        8. Fon Shode
  3. Test Button        9. Bulb Socket
  4. Comporlment     10. Borrel for
      for Cord             Copocitor
  5. Flosh Cord              I l.  Bottery
  6. Accessory Shoe   12. Bottery Comport
                       ment Cover
                     13. Front Boord
                                                   | 4. Eiector Bution
 16. Fon Shode                 | 5. Guide Number
                                Diol
View original page 5Page 6 · Read text
www.butkus.us


The moct slgnlflcant
feotures of the
  WALZ FLASH MASTER
f   Functioning of  Flosh Bulb ond
Circuit con be tested to prevent
misiokes coused by foulty Flosh
bulbs.
f  The nine blodes of the fon
shode ollow o complete circulor
shode ollowing full  illuminotion
over the whole oreo.
f  The new B-C circuit ensures
long preservotion of bottery ond
copocitor units.
f  The exposure guide number
diol simplifies the determining of
the proper exposures for   flosh
photogrophy.
                                                      isf  The Wolz Flosh Moster
COMPACT thot   it  folds  into
self-contoined cose ond fits into
your pocket.
View original page 6Page 7 · Read text
Fig.                          Fis. 2
IK


         Fis. 5                          Fig. 5

PREPAIATION OF WALZ FLASH iIASTEN.
li Open front boord of the flosh unit (figure  I )
2l Remove coiled cord ond sfid cover down. Insert Eve'e
  412 or similor model of other monufoctures, with prc
   hond side os indicote (*l  on the comportment cover.
3l Slide fiosh gun into the occessory shoe of the come'c
4) Connect flosh cord to the flosh terminol of the comer(
5) Open fon reflector clockwise until fon shode ollows o cc
6l Insert flosh bulb by pushing  it into the lomp socket {f
View original page 7Page 8 · Read text
www.butkus.us


   rsf,,s,
               Fis. 7                        ris. g

                      SAFEIY TEST PRIOR
                 TO EXPOSURE
ereody 22.5V bottery No.     Press ihe test button (red
positive pole on tho left     button) ond if ihe pilot lomp
er.(figure2&31               flores up you moy rest ossured
.r'o (figore 4)                 thot the flosh ond circuit ore
ero shutter (figure 5l         intoct. This check is neces-
complete circle (figure 6)     sory only once before every
 (figure 7l                       series of exposures (flgure 8l
View original page 8Page 10 · Read text
www.butkus.us
 l. Toke the Guide Number reoding of the
    flosh bulb from the specificotion  furnish-
  ed by the flosh bulb monufocturers. For
   exomple,  if the specificotion reods , Use
   with ASA 100 film lsuper xxl ond with
   shutter speed up to    I /50 sec. the
   Guide number is 200.
  200 would be the guide number of
   your flosh bulb.
2. Set ihe block triongle on the diol to
   your guide number which would be 200
   wirh ASA 100 fllm. (figure 9l
3. Then determine the  lens-to-subiect
   distonce.  lf  the distonce is 12  ft.
   select the neorest diophrogm opening
   indicoted on the other diol which in
   cose of 12 It. would be f : 16 ond ot
  25 It. the proper diophrogm opening
   would be f ,8.

  HOW TO EJECT USED FLASH BULB
   After o picture hos been token thr used
   flosh bulbs is eiected upon pressing the
   (white) button, thus enobling you to re-
            f ood ropidly your flosh gun (figure l0l
   The shode is folded counter-clockwise  to
   reduce its size ond coiled cord is used so
  the flosh units fold into self-contoined
   cose for eosy comfortoble  corrying.
View original page 10From the M. Butkus archive. Original publisher and archive notices are retained.
Check the model and edition against your equipment.
PDF verified 2026-10-10.