Light meters
Weston Model 819 Cine Exposure meter User manual
User manual for Weston Model 819 Cine Exposure meter. 10 pages in English. Read the original PDF, download or print a copy without registration.
10 pagesEnglish0.5 MB PDF
Loading your manual…Open PDF directly
Document details
- Brand
- Weston
- Model / document
- Weston Model 819 Cine Exposure meter
- Document type
- User manual
- Language
- English
- Pages
- 10
- File size
- 0.5 MB
- Category
- Light meters
- Document date
- Not specified in catalog
Search available document text
Find a term, then jump to its page in the original PDF. Image-only pages may not be searchable; check the PDF for exact wording and diagrams.
Page 3 · Read text
www.orphancameras.com

    WESTON
CINE EXPOSURE  METER
            c*_
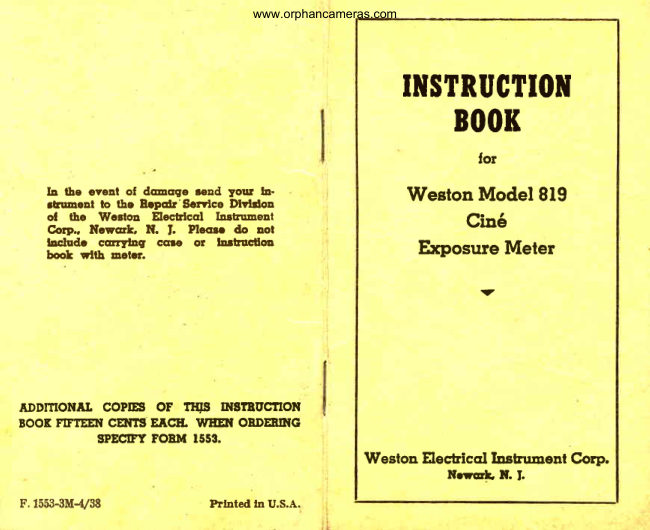
        Instruction Book
      MoK8refor


             Weston  Electriccl  lnstrument  Corp.
                           Newqrk, N. 1., U. S. A.
View original page 3Page 5 · Read text
www.orphancameras.com
USING YOUR WESTON CtNE EXPOSUREMETEN
     Correct  exposure   of motion  picture   film  depends  upon  the  proper   correlqtion     ,
 oI  the-emulsion     speed   oI  the  film-frames     per  second-type     cqmerq,    " A"   or
 "B"-operture      opening.    Co-ordinotion    o{  these  fqctor"  mckes   picture   toking   o
 fcscincting,   worry-Iree   postime.
    With  your  Model  813 you  tqke  cqre  of the  first  three  fcrctors when  you  lood
 your  cqmercr.  Then  you  tqke  a  brightness   recding    of  the  scene.  The  correct
 I:  stop  for  thct  scene   lies  directly   opposite   this  brightness   reqding   on  the
 exposure  guide.
              A TYPICAT EXAMPTE
    Assume,   Ior  exompl.e,_ you  ore  going   to  toke  pictures   in  daylight   with  q
Type  "A"  camerq   qt  16 fromes  per  second,  using   t   lilm  with  c  welton   emul-
 sion  speed  of 8  in  daylight.   (See enclosed  folder  for Weston  Speeds.)

                 WHEN  TOADING  YOUR  CAMENA
                l.  Set  the  bottom  dicl   to "TYPE  A  CAMERA,,.   (See D)
           2.  Set  the  top  diol   to  qn  emulsion  speed   ol  g.  (See C)
           3.  Turn  both  top cnd  center  diols  in  unison,  by meqns  o{
             the  tob  on  the  center  diol.  until  the  index  points  to  16
            (fromes  per second).  (See E)
   These  settings  remqin   fixed   until  you  use  o  diflerent   film  speed--frqmes
per second

                 WHEN  TAKING  YOUR  PICTURES
          4.  Aim  the  meter  qt  the  scene  qnd  note  its  recding.   (Assume
               this  to be  12.) (See B)
          5.  Glqnce  qcross  to  the  exposure  guide  cnd  you   will  find  f:6.3
              directly  opposite  the  Relotive  Brightness   of  12.  This  is your
           ccmerq   setting.   (See  A.)   Similcrly,    for  c  brightness   recding
               oI  l0  the  correct  cqmerq  setting  would  be  f:4.S,  etc.
   Remember   thot  the excmple   given  qbove   is  for  explcnotion   purposes  only.
For your  porticulor  cqmerq  cnd  Iilm  consult  the cqmerq  listings  on the opposiie
poge  cnd  the  film speed  rqtings  in the enclosed  folder.

                                                                             Page Two                                                                                                                                                                                 I                                                                                                                                                                                                         ]
View original page 5Page 6 · Read text
www.orphancameras.com
                    TAKING METEB READINGS
               The  Model   8lg  Exposure   IVIeter actually   "sees"  the  light  refiected   lrora  q
                25'  ongle,  which    is  opproximctely     equcl   to  the  cngle  lormed   by  the hands   of
              q  ciock  when     it  is  Iour  minutes   post  twelve.    This  nqrrow   ccceptcrnce   ongle
              permits  the  use  oI  the  meter  ct  the cqmerq  position   for  oll  scenes  of average
                contrqst.   Where   extreme   contrqst    is  encountered   qnd   detoil    is  desired   on  s
                porticulor    object     it  is  cdviscrble    to  tqke  q  close-up   reading   from   thot   object.
               This   is  especiolly    crdvisoble    for   color  photogrophy    where   the  brightness    ol
               the  mqin   object   is  considerobly    diflerent   thqn  the  brightness   of  the  bock-
              ground.  When  photogrcphing    o  person,  hold  the meter  within  18 to 20 inches
                 oi the fqce  or, in general,  twice  qs  fqr  lrom  the object  qs the width  of the object.
             USE OF THE METER WITH COTOR FIIM
                  Color  lilm  hqs  less  lotitude  thon  blcck  ond  white  emulsions  ond   it  is there-
               Iore  necessory   thot  exposures    for  color   Iilm  be  more   criticqlly   exqct  thqn
              exposures   lor  block   crnd  white   film.
                           TIGHTING
                    Fiot  lighting    is recommended    ot  clr  times when  using  coior  film.  Although
                  light  controsts   will  produce   pleasing   effects  with  blcck  cnd  white   film,  excessive
                 light  contrast  on  color  film  results   in  poor  rendition   of  colors.  Outdoor   colo*
               pictures  should  be  tcrken on  cleor,  cloudless  dcys.   For  indoor  work   corefuily
              plon  the  lighting  so that   it  is diffused  evenly  and  llctly  over  the subject.
                 ACCURACY OF EQUIPMHNT
                 Tests  on  color   lilm  hove  proved    tllqt  exposures  must  be  correct  to  within
            one  (1)  I: stop  in order  to obtain  correct  color  rendition.   However,   the qccurqcy
                 oI even  the  highest  grode  photogrcphi.c   equipment,   including   lens  diophrogms,
              ccrmerc  shutters  cnd  exposure   meters,  mqy  vqry   in eqch  cqse  qs much  os   f   oI
                 cr siop.   II  oll  errors  qre such  thot  they  cqncel,  no hqrm   is done.  But when  they
                    oll  tend  towqrd   over-exposure   or  unde..r-exposure, the  lilm  speed  setting  of the
             meter moy  be chonged   to compensqte   {or these equipmenl   errors.

 Page I'hreeI                          ]
View original page 6Page 7 · Read text
www.orphancameras.com
        SIMPLE METHOD OF COMPENSATION
   The  Film  Speed  Vqlues   in  the  toble  below  qre  correct  for  cqrefully  checked
equipment.      If,  with   your   cqmerq,   under-exposure    or  over-exposure    is  con-
sistently   obtained,  chcnge   the  meter  emulsion  speed  setting  as  follows.   For
under-exposure   (dense blues)  try  the next lower  speed  value.  For over-exposure
(weok,  thin  colors)  try  the  next  higher  speed  vqlue.

   These chonges   in  lilm  vqlues   ortificiully   correct  exposure  to compensqie   for
equipment    errors.   They   should   not  be  interpreted   os  representing    qctuql
chonges   in  the  lilm  speed  rcting.
  RECOMMENDEDFILM SPEHDSFOR KODACHROME
    Tests  with  ccrefully   cqlibroted  cqmerq  equipment  hqve  resulted   in  the  rec-
ommendqtion    ol  the  following   speed  v.:lues  qs  q  stqndqrd,   or  storting   point
for determining   the  correct  vqlues   for your  photogrcohic   equipment.

                          8, 16 and 35 mm. Regulqr Kodqchrome
         Doylight   (with  or without  hoze  fjlter)                         B
       Tungsten  (with   filter)--......--.........                                3

                           8, 16 crnd 35 mm. Type A Kodqchrome
        Doylight  (with  Type  A  filter)...-.                                                           I
       Tungsten                                                                                                    t 2
               PANORAMING
   Pcrnorqming   over  qreqs  which   vcry   greatly    in  brightness   requires   consider-
oble  cqre  when   color  film   is  used.   Fr:r  best  results    it  is  adviscble    to  toke
sepcrote   reodings   oI  the  bright  ond  shoded  oreqs.   Then, when   octucliy   tcking
pictures,  chcnge   the cqmerq    I:  siop,  os indicqted   by  the meter,  Ior esch  different
set oI conditions.

                                                                    Pase Four ]                                                                                                                                                      I
View original page 7Page 9 · Read text
www.orphancameras.com
      CORRECTIONS FOR SHUTTE:ROPENINGS
    Prccticclly   all cin6 cqmerqs  fcll  into two groups, either A or B, qs listed on
poge  I.  However,  certqin professionol cnd speciql cqmerqs cre equipped  with
cdjustcble  shutters or shutters which  do not  lotl  into the A  or B groups.  The
simplest method of correcting  lor these shutter openings  is to chcnge  the film
speed setting oI the exposure guide  to the equivclent  vclue  given  in the tsble
below.   First set the exposure guide  to the TYPE A cAMEnA   position before
using the tqble.

     Rated              Film Speed ot vrhich to set Cin6 Exposure Meter
      Film                   Cqlculotor  for Vcnious Shutter Openings.
     Speed                          Shutler Opening  Degrees.

                  45    90   120   150   r80    zlo    240
       1.5                                    1 . 5 2 2
      2                              1.5    2 2 2 3
      3               1.0    1.5    2     3 3 3 4
      4               1 . 5 2 3              3 4 4 6
      6               2 3 4                6 6 6 8
          a                2 . 8 4 6              6 8 1 2 1 2
     T 2               4 6 8             12    12    16    16
     16               5.6    8     12    12    16     t6    24
     24               8 1 2 1 6           16    24    24    32
     32                                    l l      1 6     2 4    24    32    32    48
     48             16    24    32    32    48    48

    Illustrqtion:   Suppose_ the  shutter  cngle   is 240 degrees  qnd we  crre using  cr film
rated  at  16. Refer  to the  verticcl  column mcrked  "Rcted  Film Speed"  ond-find   16,
then  lind  240 in  the  horizontcrl  column  marked  "Shutter  Opening  Degrees".   Under
240 and  in the sqme  line qs 16 will  be found  the value  24. This is-the vclue  at which
to set the  film  speed on the  colculator.   This  oI course dces not mecrn the octual  lilm
speed  is speeded BP due  to  the  lcrrger  shutter  opening  but  merely  corrects  for  the
grecter qmount  ol  light  received by  the  iilm becouse  of the longei  time the shutter
15 Open.
   Note.' On comercs, hcving  cdjustoble  shutters the "Shutter Opening Degrees"  will
usucrlly be found  in the ccmercr instruction  bocks,
   The Ecrstmqn Kodcr-k-Cin6 Fpecicrl hqs shutter openings  of opnroximotely   lB0'forthe "Open"  position, 90o lor  "\h  Ogen"  oni  45o lor "Vt Open".

                                                                         Pase Six                                                                                                                                                         I                                                                                                                                                                            ]
View original page 9Page 10 · Read text
www.orphancameras.com
         CAUTION                       NOTES
   Keep  glcss  lens  over  the  cell  opening
  cleqn.

    During  dry  cold weqther  the gloss on the
  instrument   is likely  to become  electrilied  by
  contqct  with  the hqnds  or clothing.   This  ct-
  trocts the pointer  ond  gives  erroneous  reqd-
  ings,  but  the  chorge  on  the  gloss  con  be
  eosily  eliminoted   by  breothing  upon   it.

       ZERO SETTING
   OF INSTRUMENTPOINTER
   When  no  light  reaches  the  "electric  eye"
  the  instrument   pointer  should   rest  directly
  over  the zero position  on the scole.
       If  this  is  not  the  cose,  qnd  there   is no
  electrostqtic  chorge  on the gloss  (see poro-
  groph   obove)   then   the   pointer   cqn  be
  reodily   set  to  its  zero  position  by  slightly
  turning  the zero corrector  loccrted below  the
  light  scole.

   When  moking   this  correction   ploce  the
  meter bqck  downwqrd   on q cord  or q book
  so os  to exclude   oll   light  Irom  the  photo-
  electric   cell,  qnd  hold    it  ot  on  qnqle   of
  qbo ut  4 5 ".


I Page Sev.en ]
View original page 10From the M. Butkus archive. Original publisher and archive notices are retained.
Check the model and edition against your equipment.
PDF verified 2026-10-10.