Film cameras
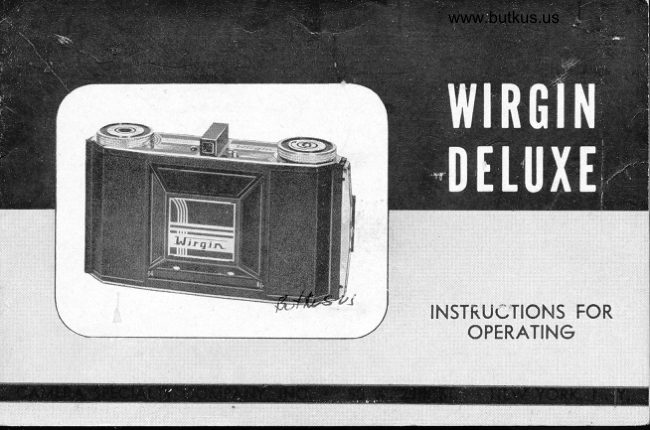
Wirgin Wigrin Deluxe User manual
User manual for Wirgin Wigrin Deluxe. 12 pages in English. Read the original PDF, download or print a copy without registration.
12 pagesEnglish3.2 MB PDF
Loading your manual…Open PDF directly
Document details
- Brand
- Wirgin
- Model / document
- Wirgin Wigrin Deluxe
- Document type
- User manual
- Language
- English
- Pages
- 12
- File size
- 3.2 MB
- Category
- Film cameras
- Document date
- Not specified in catalog
Search available document text
Find a term, then jump to its page in the original PDF. Image-only pages may not be searchable; check the PDF for exact wording and diagrams.
Page 1 · Read text
www.butkus.us


lN srKtic,rloN  s,,, FoR
,' ',.',,,,,,,,QpERATIN$,   ,,, .    ':,
View original page 1
Page 2 · Read text
YOUR WIRGIN DE LUXE CAMERA
   The Wirgin De Luxe Camera is a fine optical instrument, skillfully designe4 gld produc_edunder strict zupervision and inspection. Like all precision instruments,  jt should be carefully
handled. Read the following instructions closely. Become familiar with all the parts of the
camera and their use.
    There should be no necessity to force any of the moving parts. If you feel that anything
is wrong with the operation of the camera, ask your dealer or write to the factory.
                    FILM SELECTION
   The Wirgin takes 12 pictures,2/a" x 2Yq," size on standard 120 film. The choice of film
depends upon the lighting conditions under which the pictures are taken. A standard speed
type should be used for all outdoor work-such as Eastman Verichrome or Plus-X, Ansco
Plenachrome or Superpan Supreme, or Gevaert Superchrome. A faster film like Eastman
Super-XX or Agfa Sr.tperpu.t Press should be used for poor light or interiors with artificial
illumination. For color work, any standard color film in the 120 size is acceptable.
        PICTURE TAKING WITH THE WIRGIN DE LUXE
    The steps necessary for taking pictures can be summarized quite briefly:
Loading and Unloading ihe Camera             Taking the Picture                                                                    l. Open Camera    l. Open Back                                                    2. Set Shutter Speed
                                                                                                                                                                                                                                                                                                                                                                   I  2. Engage Empty Spool                          3. Set the Lens Opening
                                                                                                                                     1   3. Inseri Flm                                    4. Focus for Distance
   4. Wind Film                                     5. Compose the Picture in the Viewfinder                    qI
   5. Unload Film                                    6. Trip the Shutter
    These steps will be explained in greater  detail. Follorv them and yott will have no                                          tI
difficulty in taking exoellent photographs.
View original page 2Page 5 · Read text
www.butkus.us          HOW TO LOAD THE CAMERA
    Your Wirgin Camera ma1- be loaded or unloaded in daylight. Whenever prossible, these
operations should be done in modified light-never in bright sunlight.
OPEN BACK-The Camera back is locked by a sliding latch (A). Take the camera in your
right hand and move the latr,h sideways n'ith the thumb of your right hand. Grasp the metal
shoulder (B) with the index finger of your left hand and swing open the back.
ENGAGE EMPTY SPOOL-Place the camera face down. Before the film is inserted, an empty
spool must be engaged in the upper film holder (C). Turn the winding knob (D) in the
direction of the arrow. At the same time, pull the knob outward. Swing out the film holder.
Place the empty spool in the film holder with the slotted end toward the winding knob. Swing
film holder and film into the film chamber. Turn the knob in the direction of the arrow and
Jrush in until the empty spool is fullr engaged.
INSERT FILM-You are now ready to load the camera with film. Swing out the film holder
(E). Place the film in the film holder. Swing film holder and film into the film chamber.
Carry the end of the paper across the back of the camera making sure that the red or green
side of the paper is outside and the black surface is facing the lens. The start of the film will
have to be threaded into the wide slot of the empty spool, leaving the tab to go through the
narrow slot. The roll must be centered on the empty spool so that it will wind evenly. Now,
give the winding knob two turns sufficient to wind the paper and assure its firm grip on the
new wind-up spool. Close the camera back. The spring latch provides an automatic lock.
WIND FILM-The winding knob should now be turned until an indicating hand and a row of
dots appear under the red window; then proceed slowly until the number I appears. You are
now ready for the first picture. Immediately after each picture is taken, be sure to advance
the film to the next number.
View original page 5Page 6 · Read text
UNLOADING-After taking' trvelve pictures, turn the winding knob until the film is
completely wound around the spool. That can be noted rvhen the protective paper trailer
passes the window. Open the camera in modified light as previously described. Swing olt
ihe film holder rvith the film by pulling out the rvinding knob to disengage it from the
spool. Remove the film from the film holder. The film must be held firmly against the sp_ool
to prevent light from reaching the emulsion surfaces. Bend under the loose end, and seal it
rvith the attached gummed paper. The film may now be developed.
    ' The remaining spool, now empty, should be transferred into the winding knob chamber.
The camera is norv ready for a fresh roll of film.
   :         :        TAKING THE PICTURE
      , To open the'bamera, press the button (F) near the viervfinder and pull down the front
until it locks. The lens is now in a picture taking position.
    Hold the camera with both hands and pressed against the cheek. The eye should be
placed as close as possible to the viewfinder. The built-in optical viewfinder will show you
exactly the scene that rvill appear on the negative.
    Set the shutter speed (G). Set the lens opening (H). Focus for distance (I).  Compose
the subject carefully so that the center of interest is in the center of the viervfinder image. It is
important ,to hold the camera level, particularly for pictures of buildings and other objects
which have prominent vertical lines. Select a viewpoint from which the subject appears
properly lighted, and from 'rvhich uninteresting and distr:acting objects are not visilrle.
   When tripping the shutter (J ) use a slolv gentle movement and hold the camera in a
rigid position. Any camera mo\/ement at this time of exposure may result in a blurred picture.
    After each picture is taken, advance the film by turning the winding knob until the next
number appears in the red window.
   To cloie the eamera, hold it in both hands facing you. Press the lens supports dowh with

                                                                                                                                                                                                                                                               .both thumbs and snap the door shut.
View original page 6Page 7 · Read text
www.butkus.us                    CORRECT EXPOSURE
                 'l'here are tl'o chief requirements lou need to fill in order to get technically good pictures;
               fir'st, correct focus to assure sharp, distinct images; second, proper exposure time to give you
       a good negative that \vill yield a sharp print.
           The Wirgin De Luxe, equipped rvith an f4.5 coated lens set in a variable focusing mount,
         provides needle-sharp focus from 4 feet to infinity. The shutter speeds vary from l/25th to
          l/l2lth  of a second including time and bulb. The lens openings vary from f4.5 to  f 16.
      FOCUSING-When focusing for a picture, pace off the distance, knowing the length of your
          stride, from the sulrject to the camera. Distances of trventy-fir'e feet or rnore can l-re safely
         estimated. But make it a point to measure shorter distances. Turn the lens mount on the front
         of the lens until the distance engraved on the lens ring corresponds to the pointer.
       LENS OPENING-The opening of the lens may be varied by moving the pointer (H) on the
        top of the shutter. For average picture taking outdoors with standard speed film, the follorv-
         ing table will prove useful:
           LIGHT CONDITION                  SHUTTER SPEED     LENS OPEN  I NG
                    (Strong                           Shadows)         Bright            Sun                                                                                           fl6                                                                                                                                                                                     | /50,l                                                                                                                                               '                                                                                                                                                                                     |                          Shadows)                    (Soft       Hazy Sun                                                                                                                                                                   f ll                                                                /s0
        Cloudy Bright (No Shadows)                                                                             | /50                       f8        Cloudy Dull (Dark Sky)                             .     ./50                        f5.6
            For portraits, landscapes, and slorv nror"ing olljects use the l/25 and l/50 shutter speeds.
       For fast mor ing objects, use the l/100 and l/125 shutter speeds. Under very poor light
         conditions you may open the lens further or increase the exposure time. If you wish to shoot
         at faster speecls than those indicated al-rove, open the lens an additional stop. fn general, the
         faster the shutter speed, the Iarger the lens opening; the poorer the lisht condition, the
         grerter the exposttre time. You will find the Wirgin exposrlre Meter an invaluable guide in
         rnaking the proper settings for correct'exposure.
View original page 7Page 8 · Read text
INDOOR PICTURES-For taking pictures indoors )-ou may use Photoflood lanrps and reflectors.
Exposuris for various lamp-to-subject distances are given in lighting guides.   -    Flash pictures can be taken in two rvays; by utilizing u'hat is known as "open flasho'or
with a synihonized flash gun. For "open flash,oo the shutter set at ''8" is opened, the lamp
is {lashed, and the shutter is immediately closed. When taking pictures this rvay, turn off all
                                                                                             s,n-nchronizedlights near the subject to avoid premature exposure. Pictures taken 1.it_h a
flashgun are shot in the conventional manner. The construction of the flashgun insures that
the bulb will be flashed at the moment the shutter is opened.
   To prevent blurred pictures, the use of a tripod and a cable release is necessary when
taking indoor pictures. For specific flash exposures consult a flashbulb guide.
TIME EXPOSURES-Time exposures are usually required when the light is too poor for
instantaneous shots. The pointer on the shutter js moved to '0T." The shutter arm is pressed
down. At the end of the exposure time, the shutter arm is pressed down again, closing the
shutter and completing the taking of the picture. The shutter should be left open from Yz to
several seconds depending on the quality of the light. The camera should be supported by a
tripod and a cable release should be used to trip the shutter. Any camera movement during a
time exposure will result in a blurred picture.
              LENS AND DIAPHRAGM SYSTEM
DIAPHRAGM OPENING-The shutter of the camera controls the amount of liglrt permitted
to enter and register on the negative. On the top of the shutter you rvill notice markings from
f4.5 to fl6. These are the diaphragm openings. Open the back of the camera, set the shutter
speed at "T," and notice the diaphragm against the light. You will notice that as you move
the pointer from f4.5 to fl6, the opening behind the lens gets smaller. This variable diaphragnr
opening controls the amount of light that can enter the camera at any given shutter speed.
When taking pictures indoors rvhere you want all the available light to enter the camera, yotl
use a large diaphragm opening like f4.5 or f5.6. Vhen taking pictures in sunlight, where yott
want to prevent too much light from entering, you use a small diaphragm opening like fl6.
View original page 8Page 9 · Read text
www.butkus.us DEPTH OF FIELD-An inrportant characteristic of lens operation is rvorth noting. When a
 srnall diaphragnr opening is used, the resulting snapshot has a large depth of field. Objects
 iIt front of and in back of the focusing distance rvill register sharply in focus. When a large
 diaphragnr olrening is used, only a short distance before and after the focusing distance will
 llso be in focus. The follorving table will prove useful in finding depth of field at \'arious
 diaphragrrt openings; for example, if you focus at 4 feet at  f 16, everything frorn 3 feet 2
 inches to 5 feet -X inches will appear sharp.
    THE DEPTH OF FIELD FOR DIFFERENT LENS OPENINGS FOR WIRGIN DE LUXE

DISTANCE
FOCUSED         +4.s                f5.6                f8                           f rl              fr6
  U PON
   INF       55'7" io inf.     44'7" to inf      3l'3" to inf      22'9" to inf       l5'7" to inf
  25 I+      l7'3" to 45'5"      15' to 57'      l3'10" to 125'      tl   I l" to inf      9'7" to inf
   t5 fr           l l'10" fo 20'6"      I  f '2" to 22'7"         l 0'l " lo 28'1 0"      9' lo 44'       7'7" to 375'
   l0 fr      8'5" fo l2'2"    8'2" lo l2'l  I      7'7" to l4'8"    6'l l" to I7'10"     6'f " io 27'9"
    7l|.        6'2" to 8'        6' to 8'3"        5'8" to 9'       5'4" to l0'  I "    4'10" io l2'8"
   5ff      4'7" to 5'5"     4'6" fo 5'7"     4'3" io 5'l  I      4'l" io 6'5"      3'9" to 7'4"
   4++      3'8" fo 4'3"      3'8" lo 4'4"      3'6" to 4'7"     3'4" lo 4'10"     3'2" to 5'4"
View original page 9Page 10 · Read text
WIRGIN CAMERA ACCESSORIES
                 EVEREADY CASE FOR THE WIRGIN CAMERA
   your Wirgip Camera should be protected at all tinres rvith this gentrine leather Evereadv
case. Ir is proili{ed with a safety ,"r"." that prer ents tl-re camera from falling out of the case;
and permit-. using the cameru o., a tripod without remor ing it from the carrying case. The
iJi  ll"gt6      ,irup is so designed that one section- may be-removed to- pror-ide a short hand                                                                                                       .$5.50            """tfr-ont und top are hiiged to drop otrt of the u:ay for instant shootingr;."p. fhe
                         WIRGIN FILTERS
    By absorSing some colors and allowing other colors to pass throrrgh freely, Wirgin }-ilters
        the differelr'e in tone value lretrveeirvhat the eye sees and rvhat rvould normally appear
"or.""ion the negative.
YELLOW FILTER (Y2)-For natutal effects; deepens qky fo_r cloud effects; emphasizes detail
                                                                                                                       .....$1.95in distant landscape;'darkens blue tvater; renders foliage lighter, etc..........'......
                                                                                           reyrloduceGnief..f FILTER Gzl-Used with Type C Panchromatic under Tungsten light tomolochr-omaticaliy tire colors of the".sullject in daylight. Prevents reds from photograp)ring
n-EO fTlfgn (R)-Cives extreme contrast to outdoor scenes rvherein blue sky, rvhite clouds,
                                                                                                                                                           ...$ Ir95and a strongly lighted foreground are the principal faatures...............
ORANGE fitfgn  (O)-similar in effect io the-yellol'filter,  it produces greater contrast for
KODACHROME A (ORANGE) FILTER-This filter must be used when Kodachronne Typg A
is userl outdoors. Eipos,,,-e is the same as Kodachronre regular rvithout filter. This filter
                                              jre used with Kodachrome regular indoors. This filterKODACHROME B (BLUE) FILTER-To
redur.es the yellow and o.a.rge light of photofloods to a ligh-t of daylight quality..:.  :......'.'......$3.75
KODACHROME HAZE FILTtR-Used Tor the reductionlf tit-  material sensitivity to violet
View original page 10Page 11 · Read text
www.butkus.us                      WIRGIN FILTER HOLDER
                                                                                     is specially  A specially designed filter holder is available for the Wrjg-rn Camera. It                                                                                                                                                                                                                           ....................$ 1.00udupl"JTor the lens o"f the camera and holds any of the Wirgin Filters.
                       WIRGIN SU NSHADE
    This fine sunshade is carefully designed to give maximum protection from unwanted side
lighting.  i" it ir *uy th" sha.pness of th-e negatiie is incre-ased.- The Wirgin Sunshade is used                                                                                          awith the Wirgin Filier Holdei. Either by it;lf  or in combinaton wth a Wirgrl Filter, lt is
valuable
                      WIRGIN SELF TlMER
    Yott can get into the picture by using the Wirgin Self Timer.  It attaches to the cable
release that fits into the shutter. Made lvith watch-like accuracv and a powerful spring motor,
it allows a full half-minute before tripping the shutter...............                               $3.e5
                     WIRGIN EXPOSU RE METER
    Every camera fan rvill appreciate this miniature ertinction type meter. It is only lr/a inches
long yet it is remarkably accurate. It will ea-sily {it into the vest pockqt for ease.in ca_rrying
           It's operation  ii so fast and -simple thai anvone can- use it. Effective under all light
conditions,";;;"d-     ind^oors and outdoors, rvith any kind of lilm. l,igh_tweight alumin-um-construction.
Attached cover protects meter against accidental damage. Complete rvith leather case and

                 WIRGIN s-SECTION DE LUXE TRIPOD
                          Specially Designed for the Wirgin Camera
    The Wirgin Tripod combines firm carnera support, li_ght weight and _easy_ portability. It
extends to Sfl-inches^and closes to 14 inches. It rveighs only 28 ounces. The Wirgin S-Section
Tripod is constructed of tubular brass, rustproof and corrosion proof.............. $7.95 plus $.85 tax
View original page 11From the M. Butkus archive. Original publisher and archive notices are retained.
Check the model and edition against your equipment.
PDF verified 2026-10-10.