Film cameras
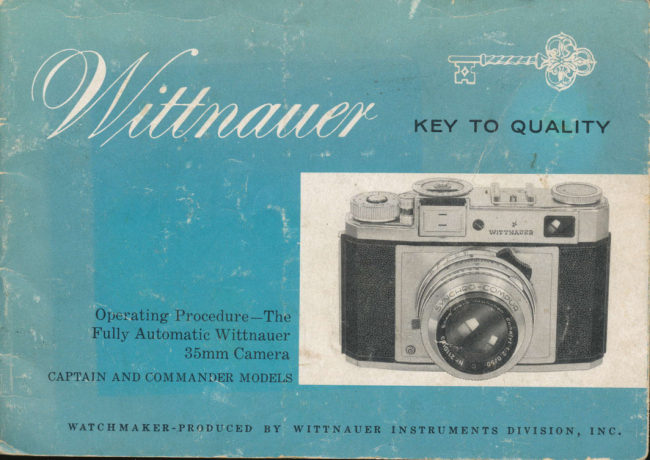
Wittnauer Captain - Commander User manual
User manual for Wittnauer Captain - Commander. 28 pages in English. Read the original PDF, download or print a copy without registration.
28 pagesEnglish11.5 MB PDF
Loading your manual…Open PDF directly
Document details
- Brand
- Wittnauer
- Model / document
- Wittnauer Captain - Commander
- Document type
- User manual
- Language
- English
- Pages
- 28
- File size
- 11.5 MB
- Category
- Film cameras
- Document date
- Not specified in catalog
Search available document text
Find a term, then jump to its page in the original PDF. Image-only pages may not be searchable; check the PDF for exact wording and diagrams.
Page 3 · Read text
The Automatic W tttnauer
Captain and Comma,nder Cameras
 1. Rapid wind lever         13. Exposure caleulator
     (single stroke advances         for time exposures
     film. counts exposure           (green numbers).
   and winds shutter).       14. Diaphragm  setting
                                            lever.              counter f. Exposure                                 Focusing lever.     (subtractinet                  type).       15.
                                               rangefinder                                Combined                            16. 3. Shutter release with                                         viewfinder                              and
    built-in cable release          windows.    socket.                            17. Rewind knob (returns
 4. Cover latch.                      film cartridge after
 5. Focusing and depth                all exposures have
    of field scales.                 been made).
 6. Shutter speed             18. Viewing and
    setting ring.                    rangefinder eye piece.                                 (Back of Camera)
         Synchro 7. Flash                     lever       19. Accessory shoe.                 as     (also serves
    cocking lever for         2O. Photoelectric cell
    self-timer).                       cover.                         21. Exposure meter 8. Flash contact.                  indicator
 9. Incident light           22. Exposure meter
    attachment.                       calculator.
1O. Simplified light value     23. Dual range built-in
     scale.                          exposure meter.
                          24. Exposure meter11. Tripod socket.                  "zero set" adjustment.
12. Rewind button.                                 { Back of Camera)
View original page 3Page 4 · Read text
0NGRATULATIoNS on your choice of the fully automatic Wittnauer
       camera. Your new camera will repay you manyfold with years of
         fine photography. For here, truly, is the perfect blend of optical and
engineering automation. Made with wATCHMAKER skill and precision,
the outstanding Wittnauer 35mm camera offers every advanced and useable
photographic feature.
The new Wittnauer "high definition" cHRoNoN and cnnoNosrAR lenses
have been computed with the most modern mathematical formulas and are
ground to exacting specifications to insure razor-sharp clarity and full color
fidelity. All glass-air surfaces are coated to reduce internal reflections and
assure brilliant pictures. Wittnauer quality cameras are versatile enough
to meet the most demanding photographic assignments.
On the following pages you will find a full description of the many features
designed to make Wittnauer picture-taking more successful. Please read
this booklet carefully before using the camera.


                      THE LONGINES-WITTNAUER                                                                4               BUILDING
                        58O FrFTH AVENUE, NE\^/ YORK 36, N. Y.
                         www.butkus.us
View original page 4Page 5 · Read text
These heading were printed in light green,
 so they show up very light.
                                                                                   Ct(t?n,et'Q,Operation o.f the Fu"tt,y Aut,rtnt.ut,ic \I'itt,nouer ;JStnrn

  1. Advance film and wind shutter by moving rapid wind lever once.
  2. Measure light value with built-in meter (Captain, Commander and
     Professional models onlY).
  3. Set light value exposure-
     thus automatically Provid-
     ing correct combinations
     of shutter speeds and dia-
    phragm openings.
  4. Choose most desirable shut-
     ter speed (diaPhragm ad-
      justs automaticallY).
  5. Focus and view subject.
  6. Release shutter-take Picture.
View original page 5Page 6 · Read text
To Open the Camera

Pull out the back panel cover latch located directly
below the rapid wind lever. When the locking bar
has been disengaged, the back panel will swing out-
wards. The back panel can then be fully opened and         www.butkus.us
pivots on a hinge on the left side of the camera. Do
not put excessive strain on the back while open as it
has been carefully fitted at the factory and proper
alignment is important to correct closure and long
life.
   a. fi.lm retai,ning c.oller (recessed, so metal
       rollet' does not actually contact negatiue
      area).
   b. pressure plate holils fi,tm perf ectlg flat and,
       in focal plane durtng exposure.
   c. cartridge retaining spring.
   d. rewind, post.
   e. fiIm plane guid,e channels.
    f. fi,lm aduance sprocket.
   g. fi,lm take-up spool.
                        www.butkus.us
View original page 6Page 7 · Read text
I n sr rt  i.ti g
                tite F.ilnt

Pull out the rewind knob as far as it will go and
insert a fresh cartridge into the empty chamber.
The cartridge is inserted so that the long projection
is towards the bottom of the camera. Push therewind knob back into its oliginal position, turning                                         ':..
it gently at the same time so that the slot in the
rewind post engages the crossbar of the film spool.
Modern emulsions are extremely light sensitive and
even the most calefully constructed cartridge
should be protected flom the direct rays of the
                                    the shadow                      camqra                                     in                      the         and unioad    Loadsun.                                                  of                              ...-|                      shadow                                      al'eas                                    are avail-                  no      or building.  treea                        If                                                                             ,-,/,-\able, turn your body so that your own shadow                                      __--.----.-.r/r/>\.-_-___
will offer protection.                                                                                       ./r///lt
Pi'otect film cartridge fi'om physical damage or'
abuse. Rough usage may tend to distort the car'-                             \'//l11                                                      \\  /   '  litridge and destroy its light-ploofing ability. Tofurther protect film, do not allow loaded cartridges                  Dr) 'to be stored at high temperatures.                                     l'li                              a)     |
View original page 7Page 8 · Read text
,ii   lii       :',:      I

          Pull out enough of the trimmed film leader so that
         the end can be inser.ted into the slot of the take-up
          spool. The notch in the take-up spool should catch
        on a film sprocket hole. The take-up spool may be
          freely lotated by tui.ning in the direction indicated.
        At the same time, engage the perforations in the
          film with the sprockets of the film advance wheel.
         Continue to turn the take-up spool and draw film
         out until the sprockets have engaged perforations
       on both sides of the film. Enough extra film has
        been supplied by the manufacturer to provide for
         the leader used when loading. The correct number
         of exposures  still remain in the cartridge. Now,
           close the camera back. A slight pressure will be felt
        when the back is almost closed. This is normal and
{         is the result of the action of the pressur.e plate
        which forces the film into the correct focal plane.
        With the back held firmly closed, snap the cover
         latch into position and the camet.a is made com-
          pletely light tight.

                               www.butkus.us
View original page 8Page 9 · Read text
i"    y.;i,.\Ii,i     {"tilttlt't'                                                  "
The exposure counter is located on the    number 36 (or 20) is opposite the indicator
rapid wind lever and is of the SUBTRAC-    mark. Advancing these two fi'ames removes
TION TYPE. It will count backwards to     film that may have been "fogged" during
show, at a glance, the number of UNEX-     the loading process.
POSED FRAMES still available.          N ote : Champion, Constellation, Clmlleng er
Before taking the first picture, set the ex-    and Continental models are prouided with a
posure counter by bringing the red dot     built-in fi,Im speed reminder dial.
(near the number 36) into registel with   When setting the exposure counter, also set
the black index mark on the rapid wind    the film speed dial.
lever. (When using a 20-exposure caltridge,    This handy indicator
register the green dot). This is accom-     will r:emind you (after
plished by rotating the counter disc in di-    the camera has been
rection of an'ow. Now, advance the t'apid     put aside) of the type
wind lever fully and lelease. Pless the    and speed rating of the
shutter release button. This operation is    film currently loaded
repeated a total of two timei until the     in the camela.
                                                                                                                                          ."!li:.;;.li  ii.,l.e  :.-rlir: .iI:'   i


                                #*


                                                                                                                    ,,i
View original page 9Page 11 · Read text
{   ;; t r :i  ,i t i

When the Iast frame has been exposed, the   CHECKING THE REWIND ACTION
exposure counter will indicate the number'    The lewinding action can be checked by
1. Do not continue to advance the film be-     releasing plessule on the locking button
yond this point or it may be torn from its    during the rewinding operation. If  the
protective cartridge.                       mechanism is working properly, consider'-
                                                able resistance to further i'ewinding will beExposed film should be rewound into the                                                 noticed. Do Nor ATTEMPT To FoRCE THE RE-cartridge so it may be taken flom the                                      WIND KNOB, OR THD FILM PERFORATTONS WILLcamera in ordinary room or dayiight. To do                                         BE ToRN. To continue the rewind operation,this, turn the camera over and depress the                                          depress the rewind locking button oncerewind locking button. At the same time,                                          more. If, during the above test, no resist- lift the rewind knob slightly and turn it in                                             ance is noticed after the iocking button hasthe direction indicated by the engraved                                           been released the film has been pulled from                                 The                      been rewound.                  has               all film al'r'ow        until                                        the cartridge and the camela should be                        be held down                   must               button        lockinglewind                                           opened only in a darkloom. during the entire rewinding process. When
 rewinding has been completed, you wili
 "feel" a definite slacking in the resistance
of the rewind knob. In addition' you can
 "hear" the film leader as it slips off the
 take-up spool and returns to the cartridge.
When completeiy rewound, the camera's
 back may lie opened and the film replaced
 with an unexposed cartridge.    '
View original page 11Page 13 · Read text
an d 1"'ie u'itr, g                                                         li'  r t t'tt.siti                                               ll


   SHARP PICTURES ALWAYS
    \^/ITH THE WITTNAUER
   HIGH PRECISION COMBIN.
   ATION RANGEFINDER AND
    VIEWFINDER.
    Your built-in coupled range-
      finder is a precision optical de-
     vice which wiII measure the
     camera-to-subject distance with
                                                                                                                                                                                                                                                                                                                                                  ,     gleat accuracy.                                                           4..r'   r
     Sight through the viewfindei'
    window. In the center of the
      field of view, you will see a
    bright amber colored circle.
     This is the rangefinder image
     and since the rangefinder is in-
      ternally coupled to the lens, set-
     ting the finder automaticallY
     adjusts the lens for perfect
      focus.

10
View original page 13Page 14 · Read text
Focus the lens by turning the focusing lever
              on the lens mount. At the same timJ sight
                  thlough the viewfinder.and  notice that adouble
                 image of the subject will appeai.in the cilcular
                   bright spot in the center of thu field. By turn_
                   ing_the focusing lever., the two images can be
               made to coincide pelfecily. When tfiis occur.s.
                     corlect focus has been attained and no fultheil
                  adjustment is necessar.y.
                  The exact camela-to-subject distance can be
               lead (in feet) fi'om the scale on the lens             mount'                            1stuAfr.5^s, Focus so that the
                  -?.j    ---il1,-+L       i.ntltortunt paft of the                      su DJ ect
                   the t'angefinder.. An ar.ea in ?i,ont ofand behind
                  the subject will also be in focus (depending on
                        the_ diaphlagm opening selected)'. This ur.Ju i.                   called "depth of field',. Fot. morle infor.mation
               on how to use youl built-in ,,depth of field"
                     scales, see page 18.
                       xorp: Always set focusing mount to
                            infinity  before closing carrying case,                                                                   :i,
        www.butkus.us                              11  fi
                                                                                                                                                                                                                                $ir
                                                                                                                                                                                                              $i!
" " 4:itWL                                                                               $d
View original page 14Page 15 · Read text
The built-in  liglt.t ualue erposure meter                Setting the Filmspeed
     prouides tuto scales of tneasurement-one         Merely set the triangular mark opposite the filmspeed
     scale for briglft sunligltt and additional         TIONSrating.ARENo NECESSARY.FURTHER ADJI]STMENTS OR METER CALCUI.A-
      sensitiuitE  f or useak liglft-rea,dings.                                                 The letters ASA on the
     Light can be measuled in two basic ways-         dialican standStandardsfor the Associa-"Amer-
                                                                            tion".  l'ilm  speed ratings
                               l.    ,      ;      -or the light actu-      on most film purchased in                       ally REFLECTED from the subject       the United States are cal-
                    to the camera lens.                         ibrated by ASA methods.
                                           On the  left  side of the
                   This is the most commonlv used form       meter  ring  are ratings
                  of measurement and-Wittnaueris unusually         for the European or DIN                    well adapted to the           cam-       system. This scale may
                                   lens and built-in meter      be useful when tlaveling         -r''\Y   era since the                       are, for all practical purposes, at the       abroad. Filrn speeds are
                 same point, and so receive the same      marked on the carton or
        EPi     amount of reflected light.              on the direction sheet of
                                                        each package of film you
                    i i" 1 I I 'i  l;    I    2.:,        i   :  ,;'-orthelightfailing        pulchase.  Professional
   A. Light Sourre  on the subject. Your built-in meter       workels often adjust the                         will also measure incident light, Sim-       rated filmspeecls to  coin-
   B. Subject        ply place the small opal adapter over        cide with  theil own par-    C. Position of   the honeycomb meter window. Note        ticular  processingi tech-       ry.@ffii       Lisht                                                                                                    to                                                              you intend                                                                        nitlues.                                                                                                                   If                                                   is measured                                                      at the                            incident                                      light           Meter   that                                                    *co fi,       Position    X.                                                                                processed                                                                             your'                                                        have                                                                                 films                    position                                    The meter                                      subject.                            of the
       fronr rhich   should be pointed tou.nrds the position        commercially,  r'ely on the       picture                   uiII                  from which the picture will be taken.        pulrlished filmspeed data.      be taken
                                                                                       www.butkus.us
t2
View original page 15Page 16 · Read text
' ,;     ,
Hold the camera in taking position, with      7. Screen the meter from the influence of
the meter pointed towards the subject. The    ercessiue skylight (beach, sno,u.) or land,-
needle will point to a black or white sector    scape scenes) bE tilting the camera sliglLtly
associated with a LIcHT vALUE NUMBER.          rloutrutsard when taking a reading.
                                                   2. To take an exposure reading d;irectlyNote that there ale Two light value scales                                            against the sun, shade th.e honeEcomb cell(one engraved in black, the other in red).                                             in tlrc salne uaA Aou would shade the lens.For bright light, keep the metet' cover                                                                                .9. If in rktubt, take closeup meter readingsclosed and use the slacr scALE. For dim
light, open the meter cover and read the     of tlte ntost important parts of the subject.
light value flom the noo scALE.              Zeroing tlte Meter
The r,rcnr vALUE can be transferred di-       If , with, the ltoneycomb uindou completely
rectly to the shutter and will automatically     darkened, tlze indicator does not coincide
provide both shutter and diaphragm with     eractly u;ith the 0 mark, it can be adjusted
                                                                                                                         th,eall information needed for perfect exposure.    by turning tlze small reset screu) oru
                                           back of tlrc camero. NorE: The zero adjust-
For further details, see page 16.           ment is a del;icate one-use ertreme care.


                          www.butkus.us
View original page 16Page 17 · Read text
Thr {"iglu{ I"nlttru, S:,y*tent
    The brilliant new light value system has    L/250 of a sec. at, f :2.8; this is the same as
     enormously simplified exposure calculation     L/725 sec. at f :4.0; or 7/60 sec. at f :5.6; or     without destroying the controls so neces-                                                 1/30 sec. at f :8.0 ; or l/I5 sec. at f :11-and     sary to creative photography.                                                         so on. In other words, each of the above com-
                                                  binations will admit the same amount of    Whatis LIGHT VALUE?                                                          light and so, any one of them might be used
     Light reaching the film is controlled by the    to provide a correct exposure. It remains
     shutter and the diaphragm of the camera. A    only for the photographer to choose which
     short shutter speed, for example l/250 sec.,    combination best suits his ar.tistic require-
     aliows less light to reach the film than a     ments, in terms of action-stopping ability or
    longer exposure of 1/30 sec. In the same     depth of field. The r,rcnr VALUE sysrulr sim-
     way, when the diaphragm  is "stopped" down,      plifies and speeds exposure calculation-yet     less light can reach the film than if the dia-    phragm is opened "wide". From this, it can    maintains control for the serious worker.
   be seen that every combination of shut-
    ter speed and diaphragm opening can be
    represented in terms of the AMoUNT oF                                 #11
    LIGHT this combination admits to the film.
    This amount of light has been called the
    LIGHT vALUE. It can be seen, too, that sev-
    eral combinations of openings and speeds
    can have the same LrcHT vALUE.
                                                                                          Diaphragm  f,/2.8
                                                                                                    Shutter Speed    For example, a light value of 11 represents                                                           1,/250 sec.
I4                                         A giaen li,ght nalue nutnber repreeents a cbw                                                                 stant erposure combi,nation-rega,rd,Ieas  of
                                                                                       eh.utter speed, or diaphragm openi,ng selected.
                                                                                                                                                                                                            j
View original page 17Page 18 · Read text
'7"i,                                        'r{                               5r' t  { li {' i,t,il  li f  I    11tr'

                                                                                                toAfter the pi'opel light value has been read   away  f lom housing - and then rotatedflom the exposure meter', (most modern    bring desiled light value number into reg-
meters read directly in light values) it is     istel with the engraved arrow above the
tlansferred to the shutter'. Light values are     I/60th sec. mark on the shutter speed ring.
shown on the shuttei'speed setting ring and      It is also possible to set half light values-are set by bringing the desired value into                                                                t.e., tk between 8 and 9. In the light ua"Iuelegister with the red dot on the diaphragm                                              system, shutter and diaphragTn settings aresetting ring. Diaphragm setting and expo-                                           coupied. Wlzen you adjust the ,sh,utter,sule time are thus automatically combined.To change the light value setting, pi'ess the      th.e diaphragln opening is automatically                                       changed to insure continued correct enpo-diaphragm setting lever inwar.d (towards                                                sure. Conuersely, if the diapltragm settingthe camera housing) and r.otate the r.ing.                                                 is cltanged (to correct for depth. of fi,ekl,Note-In Continental and Pr.ofessional mod-      etc.) then the shutter time adjusts to main-
els, the diaphragm setting r.ing is lifted     tain perf ect erposure relationship.
                                           Exposure constants can be set manually, as
                                           with older cameras, by setting the shutter
                                          speed first, and then selecting the desired
                                   diaphragm opening. In this case, the
                                                    selected speed and opening are aligned with
                                         the setting line on the depth of field ring
                                        and the light value numbers may be ignored.
                                                Set the shutter first by r.otating the shutter
                                         speed ring. Then depress the diaphragm
                                                    lever and set the diaphragm.
                          www.butkus.us                                          15
View original page 18Page 20 · Read text
f )t:1,tt lt o.i f" it,Itt'

    When you focus on this point.  . .

                                            Sort o IIints
                                        When your principal subject has
                                                   great depth-use a small opening
                                               and achieve overall sharpness.
                                        When the background is disturb-
                                                                                        large   | <- DEPTH oF FrELD -+                             ing-eliminate it by using a
    I Picture toill be sharp !ront                                 opening...offering a shallow depth
  l<-Here    ,to...Here1                                   of field-and allow the background
...you are actually in focus throughout an                 to become blurred and out of focus.
entire zone. This area is called the DEPTH
OF FIELD.
The Depth of Field varies according to the
diaphragm opening selected. A small dia-
phragm opening will provide great depth
of field. A large opening will offer a shallow
depth of field.
                          www.butkus.us
View original page 20Page 21 · Read text
I)cyttlt rif'Iliclrl Sca{c'l'c{[,s.-l]'{'ft of li'ot:lt,s.l'or  Iir'(t'!.! t'''itttt)'€


    First focus on the most important subject.
   Then the zone of sharpness may be read
   from the scale englaved on the lens mount.
   Example:
     If the light value and shutter. speed selected
    lesult in a diaphragm opening of  f :8.0,
   read the englaved footage markings oppo-
    site f :8 on each side of the lens mount. One
    side will plovide the closest, and the othei.
   the farthest limit of sharpness. To adjust
   the depth of field mei'ely change the dia-
   phlagm opening and the shutter will adjust
   automatically to maintain correct exposur.es
   while changing the shalpness zone.


18
View original page 21Page 22 · Read text
It' ryrtit ()u'It (r itr",lli' titi( i'{'r,iii tri* rrlr{ { t,i'  t'ri",,l'l'r".r ittri{t{ ,1'{r,rlt:!


   Your camela is equipped with the remark-  When taking por.traits, a shallow depth of
   able new AUTOMATIC DEPTH OF    field may be used to advantage. Merely turn  FIELD INDICATOR. Notice the two r.ed   the shutter speed r,ing which changes the
   pointers on top of the lens mount (on the   depth of field automatically and makes cor'-
   distance scale). These pointer.s automati-   responding changes in diapht.agm and shut-   cally desclibe the "neat" and "fat.', limits    ter settings.
   (depth of field) of per.fect focus for any
    selected shuttet' speed and diaphragm com-
   bination. By changing the LIGHT VALUE,
   you change the DEPTH OF FIELD and the
   red pointers adjust themselves accordingly.
   With a little pr.actice, it will be possible to
    tell at a glance the depth of field available
   for any particular. pictui.e-taking situation.
    Similai'ly, it is now possible to adjust the
   diaphi'agm-shutter. combination to suit a
   depth of field problem. When taking land-
   scapes, etc., adjust foi'a great depth of field.

                         www.butkus.us
View original page 22Page 23 · Read text
The built-in delayed action shuttei' r'elease    IMroRTANT: If the self-timer is blought
      will allow you to take a pictule of youlself.     into position "v" while the shutter is wound
       It is no longer necessaly fol the photog-      (film advanced and leady to photoglaph),
     i'aphel to be missing flom evely group he       it should be allowed to run down as de-
     photoglaphs-nor  is it necessaly to ask a     sclibed above. Do not folce the level back
     strangel to take the pictule fol you. The     to the "x" Dosition.
     Synchlo-Compul and Compul Rapid shut-
       tei's will wait a full ten seconds befoi'e mak-
    ing the exposule when the self-timel  is
     actuated. Set and wind the camela in the
     usual fashion. Then wind the delayed action
     lelease level by moving it flom "x" to posi-
     tion "v". View and focus the camela and
     set it upon a fir'm table ol tlipod. Pless the
     shutter release and take position in ft'ont of
                                                                                                                                                                                                       Bff     the camera. After apploximately ten sec-   JI4Jr1                             V XM    onds have elapsed, the shutter will release           ---              E=---
      itself, thus exposing the pictule.                                                                                                                                                                                                  :
     Aftel the pictui'e has been taken, the de-
     layed action level will automatically leturn
     to the "x" position.


20
View original page 23Page 24 · Read text
J

Internul Synclaronizat,i,on Make.s     expensive to use in the long run because
Wittnauer Flaslt Pictures Simple to     there are no bulbs to replace.
T uke-M aintains Ac curate E rpo sur e    To use electronic flash, plug the flash cable
The fine Compur shutter on your Wittnauer.     into the contact on the front of the camera.
camera is fully synchlonized for both elec-     Set the shutter lever to "x". Wind and set
tronic flash and flash bulbs.                    the camera in the normal way. When the
To use erpendable FIash Bulbs                exposure button is released, and the shutter                                            blades are fully open, an electric contact
Set the synchronizing lever to the "M" posi-    within the camera is closed and the elec-tion. Plug the flash cord (flom flash gun)                                                  tlonic flash is fired. In this way, the expo-into the flash contact on the front of the     sure is made at the propel'moment for high-camera. Once fir'ed, flash bulbs take from                                                      est efficiency.10 to 15 milliseconds to reach their "peak".
With the synchro lever set at "M", the    Flash exposures are determined by "guide
shutter automatically closes the bulb's elec-    numbers" and full instructions accompany
tlical contaet' approximately 15 millisec-    your flash .unit, or can be found on every
onds befoi'e the shutter blades ale fully     package of flash bulbs.
open-thus assuring utilization of the full
light output of the flash bulb. With the    Note : Wittnauet' Cltampion models perform                                                                                     describedfully syncht'onized syNcHRo-coMpuR shut-    the same basic flash functions
ter any speed may be used in combination    above without the need for.the "M" setting.
with flash bulbs-even 1/500 sec.          On these cameras, electlonic flash may be                                            used at any shutter speed (even t/500 sec.).
To use Electronic Flaslt                When using flash bulbs the best r.esults
Electronic flash gives a mot'e powerful and     will be obtained with shutter speed of 7/30
a softer light than a flash bulb and is less     sec. or slower.
                           www.butkus.us                        2L;
                                                                 v
View original page 24Page 25 · Read text
1l'lltriutt{'t'(irttititi''ititrl qnd Prc/r'ssittitrrl  ,1l,tir'l-s F'(etitrr !tttrt'
ghatt qra{tlt' Lru,e1's          II'irlr' ,-ln 1tl,t in' tllo;it'itp Itltittoylt'aplt  ry.                       -.fo/'
All interchangeable Wittnauer lenses are    with the RED Dor on the bayonet mount of
bayonet mounted; may be interchanged in    the camera housing. Align the dots; then
a matter of seconds and are internally     press lens and mount together and give the
coupled with the built-in rangefinder. Each     lens a short turn to the right  and it will                                                                               -is equipped with the Automatic Depth of     lock in position.
Field Indicator described on Page 19.                                 To get the most out of your wrrrNAUER
To Remoue Lens                           CONTINENTAL or PROFESSIONAL Camera, in-
Press the catch on the underside of the     vestigate the complete interchangeable  lens
shutter; lift up the exposure value setting     systems available. For example, a 135mm
ring by means of the lugs and by tui'ning     telephoto lens will bring the image over two
the lens slightly to the left; r'elease it from    and a half times closer than the standard
the bayonet mount.                     50mm iens. All supplementary lenses are of
When inserting the lens, the npo oor on the     cuRoNosr.Ln quality and are available com-
inner side of the lens mount must coincide     plete with leather carrying pouches.
View original page 25From the M. Butkus archive. Original publisher and archive notices are retained.
Check the model and edition against your equipment.
PDF verified 2026-10-10.