Film cameras
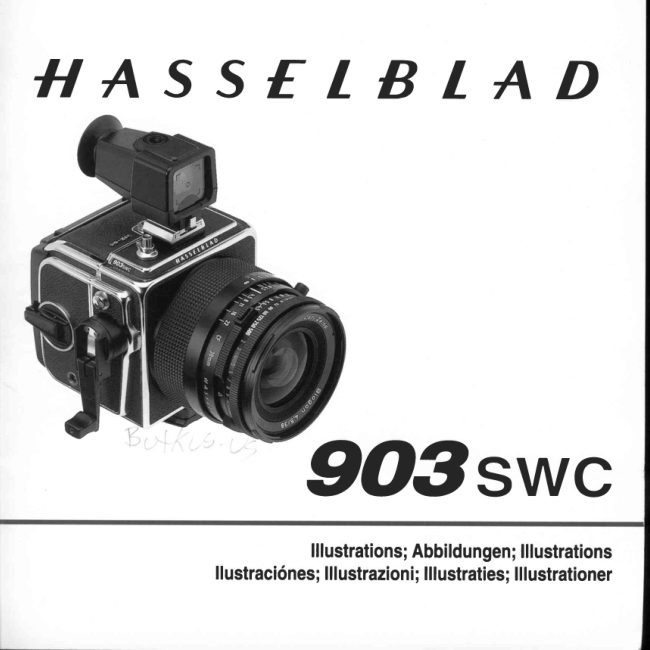
WRITTEN INSTRUCTIONS Hasselblad 903 SWC User manual
User manual for WRITTEN INSTRUCTIONS Hasselblad 903 SWC. 15 pages in Spanish, Swedish. Read the original PDF, download or print a copy without registration.
15 pagesSpanish, Swedish3.5 MB PDF

Loading your manual…Open PDF directly
Document details
- Brand
- Hasselblad
- Model / document
- WRITTEN INSTRUCTIONS Hasselblad 903 SWC
- Document type
- User manual
- Language
- Spanish, Swedish
- Pages
- 15
- File size
- 3.5 MB
- Category
- Film cameras
- Document date
- Not specified in catalog
Search available document text
Find a term, then jump to its page in the original PDF. Image-only pages may not be searchable; check the PDF for exact wording and diagrams.
Page 2 · Read text
il A S S f L B T A D


     g0gswc

         Instructionmanual;Gebrachsanweisung;Manueld'instructions
     Manualde instrucciones;Manualed'instruzioni;Gebruiksaawijzin
                                          Bruksanvisning
View original page 2Page 3 · Read text
Contents
  2   lntroductian                                   HyperfocalSetting
      Parts& Components                         MagazineOperation
                                                                                                                          1   LoadingtheMagazine  3  GETTINGSTARTED                                      B  FilmLoadIndicator
     LensProtectiveCover                    B  RemovingJilm{romtheMagazine
     RearcoverMultiControl                   B  MagazineSlideHolder
      AttachingtheMagazine                                              I   FilmTabholder
                    IA  RemovingtheMagazine                                    q   FilmPlaneposition
   +  MagazineStatusIndicator                                                                                                                          q   MagazineforPolaroidFilm
   1+  AttachingtheVieMinder                                             I   Viewfinder
       A+  RemovingtheViewfinder                                            I    SoiritLevel
     TheWindingCrank                            lmageParallax
    6   StrapLugsandStrap                                                   I   OtherHasselbladViewfinders
      Holdingthe903SWC                                                  I   FocusingScreenAdapterSWC
                                             10  HasselbladMeterPrismViewfinders
  5  OPERATINGDETAILS
                                           10  OPTICALPROPERTIES  5  Exposure
  5  TimeExoosureLock                        1 0  MTF-function
  5  CableRelease                            1 0  Relativeillumination
  5   MultipleExposures                        1 0  RadialDistortion
  6  LensandShutterFunctions
  6  ShutterSpeeds                           1 1  ACCESSOFTES
  6  Aperture                                          11  AccessoryMounts  6  ExposureValues                                          11  HasselbladAccessoryChart  6  InterlockedShutterspeedandAperture
  6  FocusingandDepth-of-field                 11  Cameracare
  7   InfraredPhotography                      12   Troubteshooting
  7  FlashSvnchronization                   12  ServiceandGuarantee
                                           13   TechnicalSoecifications

Copyright@1997,VictorHasselbladAB
AIIrightsreserved.Nopartsof thismaterialmaybereproduced,storedin a retrievalsystemor transmitted,inanyform
orbyany means,electronic,mechanical,photocopy,recording,or otherwise,withoutthepriorwrittenpermissionof
thec)mpany.

                              www.orphancameras.com                  Contents  1
View original page 3Page 4 · Read text
6               GD)
    Welcometo theHasselbladCameraSystem
  As a Hasselbladovmer,youhavein yourpossessiona    FocusingscreenadapterSWCtogetherwithanyoneof
   cameraof exceplionalquality,he productof an interna-   themanyHasselbladviewfinders.
    tionallyrenownedfiaditionof excellencein the worldof    TheHasselblad903SWCacceptsalldifferenttypesof
    ptntograptty-ltgivesyouaccessto he world'slargest   Hasselbladfilmmagazinesfor 120,220and Polaroid
  mediumformatcamen system,he HasselbladSys-   typefilmswith6x6cmand6x4.5cm imageformats.
   tem,whichsuccessfullyhasbeentakento the endsof                                 The Lens   he earh andbeyond- intospace- to eam its world-
   widereputationbr qualityandreliability.             LikeallHasselbladlensessincetheearly1950'switha
   A rangeof accessoriesaffordgreatflexibilityand    singleexception,the BiogonCF 114.538 mm lensis
   potentialfor successfulphotographyin almostany   manuhcturedby CarlZeissin Germany,Thelenscan
   application.                             befocuseddownto 0.3m (1ft.)andprovidesa fullim-
   Amongthe differentcameramodelswithinthe   agecoveragewitha 90"diagonalanglefieldofview,an
   HasselbladSystem,the 903SWChasa uniqueposi-   exceptionallyhighdistortioncorrectionanda highlyim-
    tion,beingtre onlymodelhatis nota singlelensreflex   provedilluminationdistribution.Thelenselementshave
   type.Thereasonis the famousZeissBiogonCF f/4.5   thehighlyefficientCarlZeissT. multi-layeranti-reflec-
   38 mm wide-anglelens.Thesymmetricaldesignand    tioncoatingon allglass-to-airsurfaces,
   veryshortfocallenghof thislensleavesno roomfora    Seealsopage22 fordetailedinformationon theopti-
   viewfindermirrorbetweenhe rearof the lensandthe    calproperties!
    film.Insteadof beingattachedto a singlelens reflex    Thisinstructionmanualprovidesa detaileddescrip-
   camerabodythe lensis permanentlyattachedto the    tionof howtooperatetheHasselblad903SWCcamera.
   shortandveryrobustdiecastmetalhousing.        Theknowledgegainedfromcarefullystudyingit willgive
   The Hasselblad903SWChas a detachableoptical   youaccessto theHasselbladpotential.Exploitingthat
                                                    potentialis leftto yourskillandimagination!   viewfinderwitha built-inspiritlevel.Through-the-lens
   viewingis possibleby meansof thespeciallydesigned
        Congratulationson yourchoiceof a uniquecamera!
   SERVICEANDMAINTENANCE      GUARANTEE                               I
   :rWhileHasselbladequipmentisextremelyreliableand      tlf yourcamerawas purchasedfroman authorized
    :,durable,camerasand lensesthat are in constant   Hasselbladoutlet,it is coveredby an international
   iintensiveuseina professionalenvironmentshouldbe    guaranteeforoneyear.Furtherdetiilsontheguaran-
       i maintainedandservicedbyanauthorizedHasselblad   teecanbefoundon page12.
       i $erviceCenteratregularintervals.Furtherinformation
    j.onserviceandmaintenancecanbe foundon page
    11-12.

      Introduction

                                                        "* i * ** ***&!4
View original page 4Page 5 · Read text
i   l, e $055 C'Feft;CndComponents                                                                                                                      i
  1 Viewfinderwithbuilt-inspiritlwel           14 Eryosurevaluescale(EV)           2s Sraphtg
 2 Rubbereyepiecestnylightprotection      15 Internallersaccessoryrnunt       29 PcfldrbmiC
 3 ShutterreleasebuttonwithttrreadedcaHe    16 Aperturedng                                              il  l@aziresppce
     releasesocket                     17 Shutterspeedscah              31 TlFodsodcts,Iry dd  3,filre*
 4 Magazinecatchbutton              18 Extemallensa@ssorymount        32 Aic*nprrg@
 5 Magazinedesignation              19 Shutterspeeddng                  3} Magazircsleffi
 6 TimeexposureffTL viewinglock          20 Aperturescale                 34 Filmtabhottu
 7 Filmwindingcrank                   21 Lerscentralindex                35 Magazirrcsldehoderdd
 8 Framecounter                    22 Deptrcf-fiebscale             S  Flnloadhftfrr
 9 MagazineStatusindicator              23 Exposurcvalueinterlockfufron        S/ Filmholderkry
 10 Windingcrank                      24 Vieryfindermount               38 Filmholder
 11 Focusingring                       25 Vlervfinderrcleasecadr
 12 Focusingdistancescale,irrches/bet and     26 illagazineslitb
    meters                          27 Magazinehoolcs
 13 Exposurevalueindex
       mnete
           takinga photqraph,i. e. the lensis on thefront,theviewfinderon he W, andhe wirdtrgcrank  E   I
              is on theight handside

                             p3 LensPiotectiveCovef                                                               ' 1148:E
Thissectiondescribesthestepsyoumusttaketo make   Turn the cover (bayonet fitting)  in the direction
he camerareadyto use.Youwillfindcomprehensive  of the arrory (counter-clockwise) and remove-
informationon howto operatehe camen in thefollow-                                                                  'ffi
         Paragraphingsections.                numbers                               in italic                                      in he heaG                                € 4 Aiar Cover MultiGontrol      ]Elines   andinthe            textreferto                  conesponding                                     illustrations                                                in                                              Depress the catch, tilt the cover backwards, and lifttheattachedillustrationsbooklet.                                                                         itoff.
Withthecamerabody(completewithlens)andhe film
magazineunpackedbutnotassembledensurchatthe                                    u,oAttachingthe l$lagazinecamerais wound.Thewindingcrankon he dghthand E
sideof thecamerais lockedagainstdockwiserotalion   Ensure that the magazine slide is fully inserted and
ifthecamerais fullywound.Counter+lockudserotation   that the magazine status indicator  is white.If  the
ispossibleas the windingcrankis on a lzttdtet.lf he     indicator  is not white, refer to the instmction  on
crankis not locked,rotateit clochriseuntilit stops.     page+
                                                                                                                                                                                                                                                                                                                      Ill
                              www.orphancameras.com                 Gettingstarted   3
View original page 5Page 6 · Read text
utCI
   Rest the magazine on the camera's magazine    been advanced after the latest exposure.
   supports and ensure that  it is properly located.                                                             9.  Do not attach a magazine showing white to a
    Carefully swing the magazine towards the camera                                             camera that is not wound! Wind the camera first
   body and check that the camera'smagazinehooks                                                 by u full turn of the winding crank, otherwise you
      fit into the magazine slots. Push the magazine                                                                     will lose one frame.
    gently but firmly against the hooks while sliding
    the magazine catch button to the right.               70. Do not attach a magazine showing red to a
                                                                      fully wound camera! It could result in an uninten-
   Releasethe magazine catch button when the ma-                                                             tional double exposure, since the frame in posi-
    gazine makes contact with the rear plate of the                                                              tion in the magazine probably already is exposed.
   camera,and push it to the left to ensure that it has
   reachedthe locked position. Removethe magazine       If the status indicator shows red, releasethe cam-
    slide and insert it in the slide holder on the back    era (page 5) before attaching the magazine.Then,
    of the magazine(seepage 8).                  when you wind the camera, the film will be ad-
                                               vanced to the next frame.


    the magazinestatusindicator showing white.If the    With the catch facing forward slide the viewfinder
   magazinestatus indicator shows a red signal, then     into the accessoryand viewfinder mount until  it
   wind the camera first.                                  positively latchesonto the stud located at the front
                                             end of the mount.
    Insert the magazine slide into the magazine with
    the hinge towards the front of the camera.
    Slide the magazine catch button to the right,  tilt
    the magazineback and lift  it off the magazinesup-
    ports,                                            catch in the direction of the arrow while sliding
                                                       the viewfinder towards the rear of the camera.                 ,{_ilffilWelli#,llteiatyi effiintffiywnbffi111qffir.littwd'
                 iffil#rtn',t      ii6,:,:,lWi,1Elat$lliffiiitsortsid        I                 'iiii,,aafiaiina                     eannotherem,ovedwith-
                     fti,,ft,,ilinlierf,W1,1           ,                                                         ratchet to enable the operator to rotate the crank
                                                     counter-clockwise.This design allows you to po-
                                                                sition the crank to any desired starting point and
                                                    operate it either by one full turn or by u pumping
   magazine shows whether the magazine is ready to    action. The latter is necessarywhen the camera is
   operate (white) or not (red), i.e. the film has not    used with a magazine for Polaroid film.


  "::.r::;li     ",, Getting Started
View original page 6Page 7 · Read text
'CItll
  14,15$trapLugs;,Attachingthe                    - Normal setting used for all shutter speedsex-                                                      cept'B'
 Placethe main body of the strap clip over one of          -                                        T  The releasebutton locks after being depressed
 the camera'sstrap lugs. Press the tip of the clip                                              and remains locked until the lever is returned
 towardsthe camerawhile pulling back on the strap                                                           to the'O'setting
 sothat the strap clip slides over the strap lug and
 locksinto position.                               The'T' setting can be used for time exposuresin
                                                 conjunction with the shutter speedbeing set to'B'.
                                         The winding crank is locked until the lever is re-
                                               turned to the'O' settirg.
 Lift the clip locking plate high enough to passover
 the strap hg. Slide the clip forward in the direc-                    ,
 tion awayfrom the strap until  it is free.                               t     1fhen69&bl$i,,                                                   I',with; ih''o'B'',se,'#ing1,,,an


Youwill find that holding the camera in your left
handas shown in the illustration is the most con-
venientgrip when the camera is hand held. The                                              Normally the combined use of a cable releaseandright hand is then positioned to steady the grip                                            a camera support is recommended for shutterand the index finger on the right hand is used to                                          speeds slower than ll60 s. The cable releaseisoperatethe camera releasebutton.                                                attached by screwing it into the threaded socket
                                                            in the shutter releasebutton.


                                       The camera is designed to prevent accidental
                                              double exposures. However, intentional double
 17 Expos,ure:l                          and multiple exposureson the sameframe can be
                                                    carried out as follows:Theshutter releasebutton for the 903SWCis situ-                                                        1. Depressthe shutter releasebutton and make theatedon the top of the camera.                                                                         initial exposure.The magazine status indicatorEnsurethat the camera is wound and the maga-                                                                   will changeto red.zineslide removed before an exposure is made.                                                         2. Insert the magazineslide, remove the magazine.
'-'t$-/1l4t|                                        3. Wind the cameraby rotating the winding crank
                                             one full revolution or by using a pumping ac-     "
The time exposure lock lever has two settings:          tion until the crank stops.

                             www.orphancameras.com             OperatingDetails,,,,':,,',,,i,
View original page 7Page 8 · Read text
Is@
    4  Replace the magazine and remove the slide.
      The unit is now ready to make a second expos-
       ure on the sameframe.You can make additional
                                                                                             If you want to change either the shutter speed or
                                                     aperture without  changing the EV (Exposure
                                                         Value), you can interlock the shutter speed and
                                                        aperture setting rings. This is carried out by de-
                                                       pressing the interlock button on the right of the
                                                        aperture scale,then turning the interlocked rings
                                                              to the desired aperture and speed combination.
                                      When interlocked  the rings move together,
                                                         increasing or decreasing the aperture and shutter
                                                speed while maintaining  the EV for correct ex-
                                                     posure.


    The shuffer speed selector ring is the ring located
     closestto the front of the lens. The desired shutter    The focusing ring is the wide ring with a knurled
    speedis set opposite the lens index.                 rubber grip, set closest to the camera body. The
    The white scale shows the shutter speeds,and the    distance scales appear on this ring. The lens is
    orange scale the exposure values (EV).              focused by rotating the focusing ring  until the
                                               measured or estimated distance between the sub-
   The aperture ring is located behind the shutter     ject and the film plane appears opposite the lens
    speed ring. The desired lens aperture is also set    index. The distance is shown in white for metres,
    opposite the lens index.                         and in orange for inches/feet .
                                                      Objects closer or further away than the selected
                                                        distance will appear sharp, within  certain limits.
   The combination of aperture and shutter speed set   The range of sharp focus, i.e. depth-of-field varies
    opposite the lens index, determines the exposure.    with the aperture.
    Every combination of shutter speed/aperture has                                              The depth-of-field available at any given aperture
    an equivalent exposure value (EV) which you can                                                             setting can be read off the depth-of-field scale on
    read or set against the orange EV index on the side                                                     both sides of the central index. The setting in the
     of the lens.                                                                illustration  indicates how to read the depth-
    Exposure values can also be determined by using      of-field scale at an aperture of  flll,   i.e. approxi-
    an exposure meter having an EV scale.             mately from 0.65m (2.3 ft.) to l.5m (5 ft.).

     Lens and Shutter Functions
=
View original page 8Page 9 · Read text
'1"-":Ei;1                                     graphic image extendsboth in front of and beyond         ..|fit#a.*uu....'...nn.ffiu$..repffit..'.,t.".',.i,,',','1,1,,r,',,:',.1...,.,...'.....'...:                                                  the focusing point as describedin the section cov-
 Infrared (IR) rays (wavelengths longer than 800    ering'Focusing and depth-of-field'. The distances
 nm) form an image on a plane further awayfrom      limiting the sharply defined areaareknown as the
                                                  'near thelensthan the image plane for visible light. To          limit'and the'far limit'.
 compensatefor this difference you have to align                                         To usethe hyperfocal distancesetting method, first
 the chosendistance against the red IR index in-                                              determine the EV-setting and then selectthe slow- steadof the normal lens index. Proceed as follows:                                                    est applicableshutter speed.This will give you the
  l. Establishthe distance to the subject either by    smallestpossible aperture, and therefore the larg-
   measuring or by focusing on the focusing    est depth-of-field. Rotatethe focusing ring so that
   screenadapter (seepage 9).                     the infinity mark is set to the far limit, i.e. oppo-
                                                          site the selectedaperture number to the right of 2, Note the measured distance or mark the dis-
                                                  the lens index. Now you can read the near limit   tancepoint on the focusing scaleopposite the
                                                distance opposite the aperture number to the left   lensindex line.
                                                        of the lens index. Using this method you will get
 3. Adjust the focusing ring until the established   an image that is sharp from the near limit to in-
   distancepoint is opposite the red IR index.          finity.
                                           Example: The measured EV is 13. The selected
                                                   shutter speedis 1/60 s. This results in an aperture
                                                value of  fll  l. By setting the infinity mark at flLLThebuilt-in shutter in the Biogon CF lens is fully
                                          on the far limit, the near limit will land at a dis-synchronized.A flash connected to the PC ter-
                                             tanceof t .2 m (4 ft.).minal fires when the shutter is fully open.
ThePCterminal has a rubber bushing that secures   At the widest apertur e (fla.s) the near limit is 3 m
the cable connector. Always push the connector      ( I 0 ft. ) and at the smallestaperture (f122)the near
 all the way in!                                              limit is as closeas 0.65 m (26 in.).
Electronicflash units can be used at all shutter
speeds(B and I s -11500s).


Thevery short focal length of the 38 mm Biogon
CF lens provides both a 90o angle and a large
depth-of-field. This allows successfuluse of the    The magazine may be loaded on or off the cam-
hyper-focaldistancesetting method.It is basedon     era. If  it is to be loaded off the camera, then the
the fact that the sharply defined area of a photo-    magazine slide must be inserted, its flat side

                             www.orphancameras.com          Magazine Operation  7
View original page 9Page 10 · Read text
u'trD
   towards the rear. This allows removal of the film    The figure ( 1) will now be displayed in the frame
   holder for loadirg.Follow the procedure below in    counter window, indicating that the magazine is
    correct order to load the magazine                loaded and ready for use. The magazine's film
                                                  winding crank is blocked, but only at frame (1).
    tu"t"',lr':ri'l'jtH'jff!f#fff                    A partially exposed film may be wound off at any
                                                 frame after that.
    3I. Fold out the film holder k y.                The frame counter is automatically resetwhen the
    32. Rotate the key C-CW and withdraw the film      film holder is withdrawn from the magazine.
        holder.
   33. Place an empty take-up spool under the
      grooved knob of the spool clamp bar. Insert a        i;  ;h;;l"trf   or the film holder k y there is a cres-
          roll of film under the other end of the bar,    cent-shaped indicator window that shows white
       turned the sameway as in the illustration.      when the magazine is freshly loaded. It gradually
     Be sure to remove all the paper band sur-    changes to red as the film is wound through. An
       rounding a new roll of film!                             all red indicator shows that the film is used up or
    34. Turn the film holder k y CW to open the film     that the magazine is empty.
       clamp. Pull 8-10 cm (3-4 in.) of paper back-
        ing off the film  roll and slide the edge under
       the clamp.                                                         After the last frame has been exposedand the film
    35. Insert the tongue of the backing paper into the    advanced,the magazineblocks the camera against
        slot in the take-up spool.                          further release.To remove the exposed film fold
                                                       out the film winding crank and rotate it clockwise    36. IMPORTANT!
                                                                    until you can feel that the film is leaving the sup-       Turn the grooved knob CW  until the arrow
                                                         ply spool. Withdraw the film holder from the      on the paper backing is aligned opposite the
                                                magazine and remove the film.        triangular film load index on the spool clamp
        bar, but no further.
    37. Turn the film holder k y C-CW and insert the
         film holder into the magazine. Ensure that it   On the rear of the magazine is the slide holder
         is correctly positioned. Turn the film holder    where the magazine slide could be stowed away
       k y CW to lock the film holder in the maga-   when not in use.Turn the slide with the hinge to-
        zine and then fold it back in place.             wards the rear to fold the bow fullv into the slide
                                                   holder recesses.    38. Fold out the film winding crank and rotate it
    CW about ten turns until  it stops. Turn the
       crank C-CW  if necessaryand fold it in.
      ',,,Magozine Operation
View original page 10Page 11 · Read text
u                                                                                                             tCI
 42 FilmTabHolder                                  #,f,tt''r,'t11,y9;,;6itil1i'f]i*i;ru,:,r:tttiu$  ll!
Theendtab of the film pack can be inserted in the   A transparent spirit level is built into the top of
 holderon the back of the magazine as a reminder     the viewfinder body. The spirit level is displayed
 of the kind of film that has been loaded into the    beneath the viewfinder image area.It has an ac-
 magazlne.                                     curacy of 1o for each mm of bubble travel, i.e. as
                                                long as the bubble stays within the centre circle
    Fifm Planeposition ,   ,      :; :: ':::     the deviation of the camera position from hori-
                                                   zontal does not exceed1o.
The film plane position is represented by the
chromeand leatherette contact line behind the
 magazineslide insertion slit.
                                         The position of the viewfinder - aboveand slightly
                                             behind the lens causesa minor deviation between
                                                  the area covered by the viewfinder and that cov-
When a magazine for Polaroid film  is used with     ered by the lens. This area covered by the view-
the903SWCthe film winding crank cannot com-     finder is coloured red in figure 46. The centre of
pletea full revolution.                              the viewfinder areais located about7 .5 cm (3 in.)
In order to wind the cam era, fold out the film    above the centre of the lens area.The differences
winding crank and move it up and down with a     in location and size of the viewfinder and lens
pumpingmotion until  it stops.                  image areas are illustrated in the figure. At suc-
                                               cessivelylonger object distances the parallax
                                       becomes small compared with the field of view.
                                             For accurate composition and focusing use the
                                                focusing screenadapter (seebelow).
The optical viewfinder can be attached to the
mount on top of the camera body. It shows an
imagethat is slightly larger than the image re-
cordedon the film. There are corner marks that                                                          All Hasselblad viewfiders can be used on theindicatethe height of th e 6x4.5 cm format and also                                 903SWC together with the Focusing screena centremark. The lens scalescan be seenthrough                                             adapterSWC (Cat.No.41050).a crescent-shapedbifocal optical system in the
lower part of the viewfinder image. The optical   47"'FoC.u;.e'i.fg...'$i.ien....'.n.u.aftQf.',:....'..,",,systemallows the wearing of spectacleswithout                          ....$WC'
                                       You can usethe Focusingscreenadapter SWC  toproblem. The rubber eye-cup, which protects
                                            check the depth-of-field, the exact area coveredagainststray light, may be folded forward  if
                                          and image composition.preferred.
                             www.orphancameras.com               Viewfinder SWC  ,'"9,
View original page 11Page 12 · Read text
u'CI@
   The adapter attaches to the camera body in the
   samewayasthe magazine.The image on the screen
   can be viewed through any Hasselblad viewfinder
   and focusing hood.                           Even at the widest aperture the image produced
                                       uri'|,ubyacterizedthe Biogonby T*extraordinaryCF 4.5135mmsharpnesslens is char-and    ,,,,',rtt'ffi'ffiiffififi,i,i:liyFd#fis{*i#,;'##inffiilrlffi                                                                brilliance. This together with the very low radial
    1. Set the shutter to B.                                 distortion and the remarkablywide focusing range
    2. Set the lens to the maximum aperture (f14.5).    from 0.3 m to o makes it very suitable for archi-
                                 'T'and                tectural, fashion, industrial and technical photo-    3. Setthe time exposurelock to       pressthe                                                 graphy or whenever the highest image quality is
       shutter releasebutton.                                                       required. The graphs (figs 49-51) represent the       : : . - : , :                                                             typical characteristicsof MTF (Modulation Trans-                             ' "':79,g:':::';t
             !                                                      fer Function), Relative Illumination and Radial
                                                       Distortion. In the graphs the horizontal axis
                                                     representsthe distance from the image centre.    4. To check the depth-of-field selectthe appropri-
       ate working aperture.
    5. After checking return the time exposure lock
            'O'.            This closesthe shutter.                The graph shows the Modulation Transfer Func-        to
                                                                  tion, which is a representation of the overall lens    6. Wind the camera to cock the shutter. Replace                                                                 quality, for a spatial frequen cy of 2Dline-pairs/ mm       the focusing screenwith a magazine.                                                             at an aperture of f/S. A flat curve with a relative
                                                     value near 1.0 indicates a high quality recording
                                                        with small lossesonly.

   Meter prism viewfinders PME51 and PME90 can
   be used for accurate light metering on the screen    This graph representsthe fall-off of illumination
    of the Focusing screen adapter SWC.               from the image centre,which is given the value 1.0,
   The Meter prism viewfinders PME3 and PME5    towards the edges.It includes "natural fall-off" as
    also provide correct metered values. However,     well as vignetting.
    older Meter prism viewfinders, Focusing screen
    adapters or their combined use require a reduc-
    tion of the metered value by I - 2 stops.
   Experiment to determine the precise reduction!       distance from  the image centre of an image point

      Optical properties
View original page 12Page 13 · Read text
from its theoretical position. Translated to abso-
lute values the max. distortion  of the Biogon CF
lensis far less than 0.1 mm.                    Hightemperaturescanhavean adverseeffecton both
                                            thefilmandthecamera.Forthisreasonyoushouldnot
                                      keepyourcamerainplaceswhereitwillgethot,suchas
                                                        indirectsunlightorona shelfabovea radiator.Intropical
                                        environmentsfungusgrowthcanbepreventedbyensur-
                                              ingyourequipmentis keptin an areawheretheair is
                                                  circulating.Frequentrapidand severetemperature
                                      changescancauseproblemssuchasthecorrosionof
                                                  electricalcontacts,and shouldthereforebe avoided.The underside of the camera body has 3/8" and                                Whenworkinginextremelycoldtemperatures,cameras ll4" thread tripod sockets in the centre of the                                     andespeciallylensesshouldbe protectedas muchasquick coupling plate. The plate and socket accept
flash gun brackets and the plate also fits and
easilylocks into the Hasselblad Tripod quick-
couplings.
                                   Youshouldtakecareto preventdirtof anykindfromThe lensesaccept A60 filters and lens shades on
                                               gettingintoyourcamera.Whentakingphotographsinthe front bayonets.
                                             coastalareasfor example,thecamerashouldbe pro-
                                             tectedfromsandandsaltwaterspray.
                                        Duston thelensglasssurfacecanbe removedwitha
Theaccessorychart indicates the range of access-   blowerbrushor a verysoftbrushif necessary.Smears
ories available within  the Hasselblad System.   on thelensglassshouldbetreatedwithgreatcaution.
Pleaserefer to the Hasselblad Product Catalogue    Lightsmearscouldbe removedwitha highqualitylens
for completeinformation on the entire Hasselblad   cleaningsolutionona soft,cleantissue.Heavysmears
CameraSystem.                             shouldbetreatedby a Hasselbladservicecenter.lf in
                                         doubtdo notcleanlensglassyourself.
                                       Alwaysbeverycarefulnotto scratchthelensor touch
                                       anyof theglasssurfaceswithyourfingers!
                                                                                                                                        l.'*t*.tl'".t."'t='"'-t"t'"t"
                                      Yourcameracanbedamagedbyseverephysicalshocks.
YourHasselbladcamerais designedto withstandthe   Whileyouwillobviouslytrynotto dropit,youshouldalso
rigoursof professionaluse in mostenvironments.In   takecarenotto leaveit whereit canfallor beknocked
orderto avoidthe possibilityof damagehowever,the    totheground,or rollabout,suchasontheseatofa car.
camerashouldbeprotectedfromthefollowing.
                            www.orphancameras.com        Accessories,Camera Care
View original page 13Page 14 · Read text
Yourcameraisbuilttogivelongandtrouble{reeseruice.lf howeveryouencounteranyoperatingdifficultiesbecause
   youarenotlamiliarwiththeHasselbladcamerasystem,thelollowingtablemayhelpto resolvethem.


   YOucannotoperatethe                                   Rdm'ove,the,,sl[det,,t'
     shutterreleasebutton


                                                                                                                                                                                                                                                                                                                                                                                                                                                                                                                                                                                                                                                                                                                                                                                                                                                                                                                                                                                                                                   t       l
                                                                     lLoada newrollof film

                                                   Windthecamera


    Youcannotremovethe        flhe.ma$ T'ilil/e:,:lidq,fb..lnfi.'fu,lty       l.n'$ert.tlte',ma$.alrihd,,$|id:e,c0m-
    magazine                   inserte-d                       pletely


   Faultlesscameraperformanceisessentialtotheprofes-    lf you purchasedyour camerafrom an authorized
   sionalphotographer.lt is thereforeadvisableto check  Hasselbladoutlet,it iscoveredbyaninternationalguar-
   thatyourcamerais functioningcorrectlybeforean   anteefor oneyear.The guaranteedocumentanda
   impoftantassignment.You shouldalsoreturnyour   registrationcardaresuppliedwiththecamera.Keepthe
  camerato a HasselbladAuthorizedServiceCenterfor   guaranteedocumentcarefully,butfillintheregistration
   occasionalcheckingand preventivemaintenance.lf   cardandreturnit to yourHasselbladdistributor.
   yourcamerais usedconstantlyandintensively,expos-
   ingforexamplehundredsof rollsoffilmperweek,check-
  upseverysix monthsare recommended.Hasselblad
   ServiceCentershavetheexpertstaffandspecialized
  equipmentnecessaryto ensurethatyourcamerare-
  mainsin perfectworkingorder.
1,2 Troubleshooting
View original page 14Page 15 · Read text
,iffiii fi  fi G I,.r'.1ii1=|1Manualadvancewith$imuttahe0u$shUttercOc,king.
                                                  v   I v     '  '  I V
:;,,;l;'.;....;';,;,;;.;;;;'l;;'''.;..;.l.,,,,,,',,,,,1:',-...,,,.';,.',,,.,,,,...,,.l.','.,..,:.',,..,',.l.,;.,.l..


fif$ffii'X$U. i : : : : : : : ' : . : . ] : : : . : ' . : : . : . : : : : : . : : . i : . : l : .                |  $1.1.1''..i,...3/8"and1/4"socketthreadandplateforQuick-,Couplingattacrhment.
iEffierfifi,li;.|.1|,i|.i...|.,;|;|..i:r bodyonlywitl            rfinderis show
$ffiffiulHfi*i.1.:.t,|.1+1.''Camerabodyas abovewithmagazineA12:14;1Lx112Wx 153Hmm


::.::r::::
ffisff:tlli:.:*ii'lliliiiiilillllll..'.ll::.:..::i: :.:::::::r.:. :. :.j:.::. ::.::'.:.',',':. :': .:.-,,. .  . , ..,.. ,:.. .:   . Camerabodyonly,withlensas above:940g (2 lb 1:2 o:iil"

Thecamerabody(chromemodel,productno. 10052or blackmodel,productno. 10201),comeswithviev,iinder,
neckstrap,andfrontcoverand RearcoverMultiControl.

Forcomprehensiveinformationon accessoriespleasereferto theHasselbladProductCatalogue.

Hasselbladreseruestherightto makechangesin thepublishedspecificationswithoutpriornotice.

                             www.orphancameras.com       Technical specifi cat i on s   1,,$
View original page 15Related documents and language editions
From the M. Butkus archive. Original publisher and archive notices are retained.
Check the model and edition against your equipment.
PDF verified 2026-10-10.