Film cameras
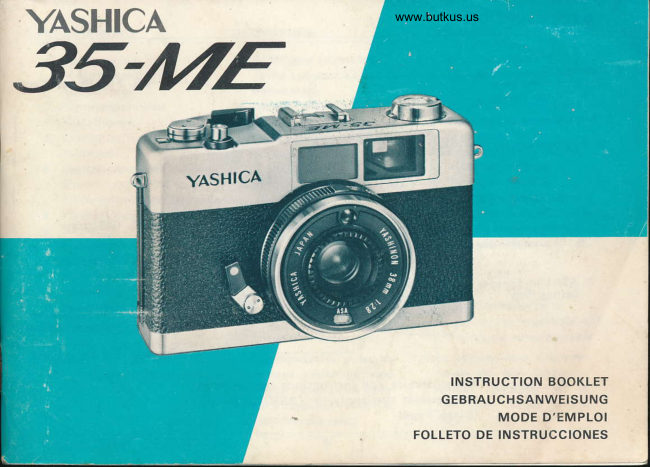
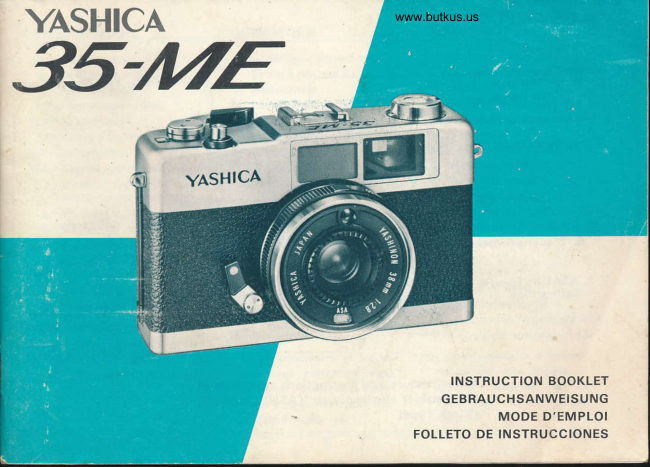
Yashica 35-ME User manual
User manual for Yashica 35-ME. 13 pages in English. Read the original PDF, download or print a copy without registration.
13 pagesEnglish1.3 MB PDF
Loading your manual…Open PDF directly
Document details
- Brand
- Yashica
- Model / document
- Yashica 35-ME
- Document type
- User manual
- Language
- English
- Pages
- 13
- File size
- 1.3 MB
- Category
- Film cameras
- Document date
- Not specified in catalog
Search available document text
Find a term, then jump to its page in the original PDF. Image-only pages may not be searchable; check the PDF for exact wording and diagrams.
Page 2 · Read text
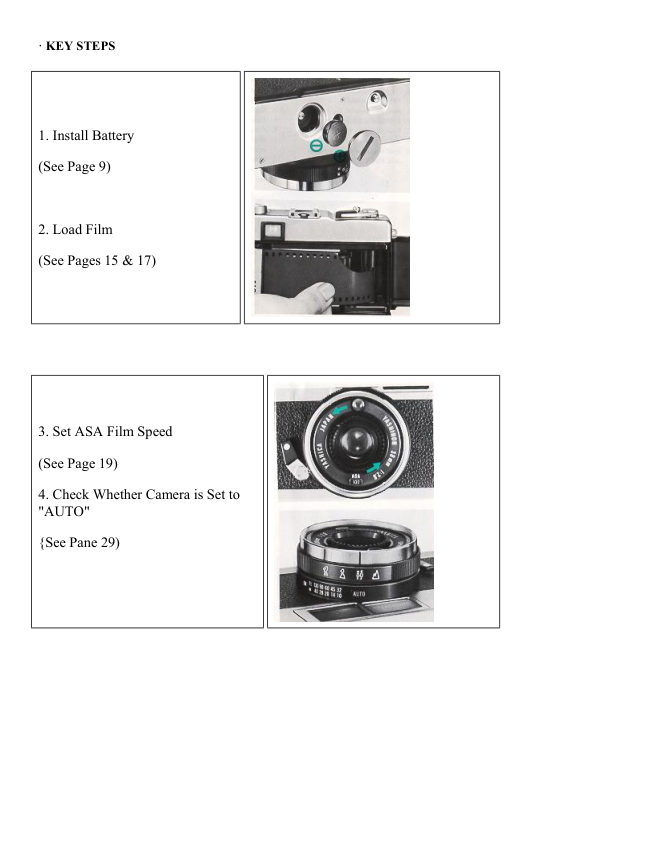
· KEY STEPS


1. Install Battery

(See Page 9)


2. Load Film

(See Pages 15 & 17)


3. Set ASA Film Speed

(See Page 19)

4. Check Whether Camera is Set to
"AUTO"

{See Pane 29)
View original page 2Page 4 · Read text
· BATTERY LOADING


Always use a 1.3 V mercury battery
(Eveready EP-675E, Mallory RM-675R or
equivalent) and load according to the
following steps:
(Webmaster: there are replacement 1.4V
batteries. They are "air" type that only last
3 - 6 months.
See this link on a Wein Air replacement
battery.

1. Open Battery Compartment Cover on
camera base by turning it counter-
clockwise with the edge of a coin.

2. Install mercury battery, minus end first,
and replace Cover.


· BATTERY CHECKING
  To check battery power, aim camera at bright spot.  If pointer in the finder fails to move, replace battery.
  To minimize battery power drain, replace lens cap when camera is not in use.


· FILM LOADING


Always load film by avoiding direct sunlight

Open Back Cover by pulling Film Rewind Knob all the
way out. When Back Cover is opened, Exposure
Counter resets automatically to "S" (start).

2 Place a standard 35 mm film cassette right side up in
film chamber and push Film Rewind Knob down to its
original position.

3 Insert film leader into any one of the slots on Take-Up
Spool spindle and wind film on Take-Up Spool by
manipulating Film Advance Lever.
View original page 4
Page 5 · Read text
www.butkus.us


4. After making sure the sprocket teeth properly
engage the perforations along both edges of the film,
close Back Cover.

5. Advance film by manipulating Film Advance
Lever and pressing Shutter Release Button alternately,
until Exposure Counter registers figure "1

6. To check whether film is advancing properly,
gently turn Film Rewind Crank Handle clockwise
until a slight resistance is felt. As film is advanced,
Film Rewind Knob should rotate counter-clockwise


· ASA FILM SPEED SETTING


1. After loading film, always check whether 1 your
camera is set according to the ASA speed rating of the
film in use.

2. Turn ASA Film Speed Setting Ring until 2 figure
corresponding to the ADA speed rating of the film in
use appears in ADA Film Speed Indicator Window.

· See that ASA Film Speed Setting Ring falls properly
into the desired click stop setting.

· ASA film speed setting is vital to obtaining precise
automatic exposure.


· SHOOTING POSTURE
In order to obtain perfect shots, the camera must be held firmly and steadily. Otherwise perfect shots are very
often spoiled because of camera shake at the moment of exposure.

Before attempting to shoot your first series of pictures, therefore, get the 'feel of the camera and acquaint
View original page 5
Page 6 · Read text
yourself thoroughly with the proper shooting postures.

For horizontal format shots, grip the camera body gently with your right hand, while supporting the lens barrel
and base with your left hand as illustrated. Trip the shutter with your right index finger.

For vertical format shots, hold the camera with your right hand with your right thumb on the shutter release
button (See bottom photo).


Bright Frame
The Bright Frame outlines the area which will be reproduced on the film. In normal situations, compose your
picture within this Bright Frame.

Parallax Correction Mark

When photographing at a range of 1.5 meters (5 feet) or closer (Zone Focus Symbols           ), frame your
subject within this parallax correction mark.

Correct Exposure Zone
 Correct exposure is indicated if the pointer remains anywhere within this zone. The figures on the left and
within the yellow zone are programmed combinations of shutter speeds and lens aperture.

Shutter Speeds 30(1/30), 60(1/60), 125(1/125), 250(1/250), 650(1/650) (sec.)

Lens Aperture 2.8 - 4 - 5.6 - 8 - 14

Over-Exposure Warning Zone
 Over-exposure is indicated if the pointer swings into this zone. For automatic compensation of exposure,
mount an ND filter over the lens.

Under-Exposure Warning Zone Under-exposure is indicated if the pointer swings into this zone. The use of a
flash is therefore advised.
View original page 6
Page 7 · Read text
www.butkus.us

Zone Focus Symbols
The zone focus symbols on the lens barrel are visible through this window. Select the appropriate symbol
corresponding to the camera-to-subject range.

· AUTOMATIC EXPOSURE


1. Set camera to AUTO .
Rotate Auto Ring and align "AUTO" setting with
index line. This simple step sets the camera for
automatic exposure.

2. Sight through Viewfinder and check pointer on
right.
If pointer is within the correct exposure zone
(yellow zone), trip the shutter. Perfect exposure is
obtained automatically.


· If pointer swings into the over-exposure warning
zone, mount an ND filter over the lens to make
automatic exposure compensation.

· If pointer swings into the underexposure warning
zone, switch to flash photography by overriding the
"AUTO" setting.
View original page 7
Page 8 · Read text
· FOCUSING


While sighting through the finder, turn Focusing
Ring and select the appropriate zone focus symbol
corresponding to the camera-to-subject distance.
Proper focus can also be secured by aligning the
symbol on the lens barrel with the index line.

· A distance scale calibrated in both meters and feet
is provided on the lens barrel directly opposite the
zone focus symbols


                   For portraiture and close range photography.


                   For group photography and snapshots.


                   For landscape photography and shooting of subjects.
View original page 8Page 9 · Read text
www.butkus.us


· USE OF FILTER


1. In case over exposure is indicated when shooting
beach or snow scenes or when photographing subjects
under extremely bright light, use an ND filter to make
automatic exposure compensation.

For special effect, use other types of filters (See
FILTER section).

2. To mount the filter screw it onto the 2 screw-thread
mount around the lens.

3. Because the filter covers the CdS sensor located
directly over the lens, perfect automatic exposure is
assured without the need for any troublesome
compensation of the filter factor.

· Two filters cannot be mounted over the lens at one
time.


· FLASH PHOTOGRAPHY


Always override the "AUTO" setting and align the
guide number of the electronic flash (or flashbulb) in
use with the index line. At this setting, the shutter is set
automatically at 1/25 sec. Do not attempt taking flash
shots with the camera on "AUTO".

For flash shooting with Yashica MS-14DX (GN 14--
ASA 100 in meters), follow these simple steps. The
same procedure, can be applied correspondingly when
using other flash units.

1. Slide the MS-14DX flash unit all the way into the
accessory shoe (X contact hot-shoe). This simple step
establishes electrical contact and dispenses with the
need for using the PC cord.

2. Turn the Auto Ring to override the "AUTO" setting
and align the figure " 14" with the index line. This
guide number setting must be altered accordingly when
using film with a speed rating other than ASA 100.
View original page 9
Page 10 · Read text
3. Secure focus by turning the Focusing Ring until the
Zone Focus Symbol    (3 m) appears in the window on
the lower right corner of the finder field.

4. When thus adjusted, all subjects within the 4 range
from 2.5 meters to 5 meters will be in perfect focus and
perfectly exposed, automatically.

The following table shows the EZ-flash ranges with the
Yashica MS-14DX when using different types of film.


· When using a flashbulb or an electronic flash unit other than the Yashica MS-14DX, select the appropriate
lens aperture corresponding to the flash-to-subject distance by referring to the exposure table which comes with
the flashbulb or flash unit.
Your Yashica 35-ME is designed so that the aperture changes as shown in the following table when the guide
number is set accordingly:

· When using an ASA 251DIN15) film with the MS-14DX flash unit simply align the index line with the figure
GO on the GN scale. At this setting, perfect exposure can be obtained on all subjects within the range of 1.7 and
3.5 meters (5.6 and 11 feet). (See Page 43)


 · SELF-TIMER


Use the self-timer when you wish to include yourself
in the picture.

To take pictures with the aid of the self-timer, follow
these simple steps:

1. Give the Film Advance Lever a full wind.
2 Set the Self-Timer Lever by shifting it all the way
in the direction of the arrow.
3. To activate the self-timer, press the Shutter 3
Release Button. The shutter will then be tripped at a
delayed action of 8 seconds.
View original page 10
Page 11 · Read text
www.butkus.us


· PROGRAMMED SHUTTER -


The programmed shutter of the Yashica 35M E is controlled automatically by the CdS exposure system. The
programmed combination of the shutter speed and lens opening is selected automatically according to the
subject brightness. Therefore, all you have to do is to aim the camera at your subject, focus end trip the shutter.
Your Yashica 35ME does the rest and delivers perfect exposure every time.


· FILM UNLOADING


1 After exposing the last frame, do not attempt to
advance film forcibly as it may tear or come loose,
making it impossible to rewind it into the cassette.

2. Before removing it from camera, exposed film
should be returned into its cassette. First, push in Film
Rewind Release Button on camera base.

3. Fold out crank-handle on Film Rewind 3 Knob and
turn it in direction of arrow until a slight resistance is
felt. Continue turning until it rotates freely. Then, open
Back Cover, take out film and send it out for
processing.
View original page 11
Page 12 · Read text
· ACCESSORIES

Filter
The Yashica 35ME features a CdS sensor directly over the lens. The exclusive Yashica 46 mm screw-in filter
will cover the sensor. Thus, eliminating the necessity for exposure compensation of filter factor.

Lens Shade
Wards off extraneous light and assures crisp and clear results. Mount lens shade by aligning Zone Focus

Symbol   with the index line.

Yashica Grip/Tripod ST-7
A handy accessory for your Yashica 35ME the Yashica Grip/Tripod ST-7 provides multiple uses for steadying
your camera. It can be used as a grip, tripod, wall or chest support, etc.

YASHICA MS-14DX
Compact, handy electronic flash unit designed specifically for use with cameras of the size of Yashica 35ME.
Affords maximum camera maneuverability and delivers just the right light output for all photographic needs.


· FEATURES

Lens
Yashinon f/2.8 38mm
4 elements in 3 groups
Angle of view 59°
Minimum focus 1 meter (3.3 ft)

Shutter
Programmed shutter with speed range from 1/30 to 1/650 Sec.
X sync (X-Contact Hot Shoe) built-in self-timer
Shutter sets to 1/25 sec. in flash photography
Exposure Control
Fully automatic EE exposure control with CdS sensor situated directly over the lens
Sensitivity range from EV8 (f/2.8 at 1/30 sec.) to EV17
 (f/14 at 1/650 sec.) at ASA 100
ASA range from 25 to 400
Power source: 1.3V mercury battery (Eveready EP-675E, Mallory RM-675R or equivalent)
 See this link on a Wein Air replacement battery.

Viewfinder
Incorporates bright frame, parallax correction mark, indicator showing shutter speed/lens aperture combination,
over- and under-exposure zones and flash mark
Magnification ratio: 0.5X

Focusing
Focusing by four zone focus symbols or distance scale setting
Zone focus symbols visible through the finder
View original page 12
Page 13 · Read text
www.butkus.us

Film Advance
Single-action film advance lever

Other Features
Mult.-slot Take-Up Spool for easy film loading; automatic resetting exposure counter, foldaway crank-handle
film rewind; EZ-flash through guide number setting
Filter Size 46mm screw-in type
Lens Shade 48mm slip-on type
Dimensions 114 x 72 x 53mm
Weight =385 grams


· CARE OF YOUR CAMERA

· Keep both the inside and outside of your camera clean at all times. Use a soft, clean cloth to wipe
occasionally.

·To clean the lens, first blow away dust or grit, then clean with a lens brush or soft, clean lintless cloth.

· Avoid storing your camera with the shutter charged.

· Do not leave your camera in the glove compartment or trunk of your car. Never expose it to direct
sunlight for any length of time, as heat may affect the film, battery, etc.

·When your camera is not in use for a long period of time, remove the battery from its battery
compartment and store it separately in a cool, dry place. It is advisable to carry along a spare battery on
long outings.

· Do not dismantle the camera or its lens for cleaning.
View original page 13
Related documents and language editions
From the M. Butkus archive. Original publisher and archive notices are retained.
Check the model and edition against your equipment.
PDF verified 2026-10-10.