Film cameras
Yashica Yashic Electro 35 GX rangefinder User manual
User manual for Yashica Yashic Electro 35 GX rangefinder. 38 pages in German, French. Read the original PDF, download or print a copy without registration.
38 pagesGerman, French1.6 MB PDF
Loading your manual…Open PDF directly
Document details
- Brand
- Yashica
- Model / document
- Yashica Yashic Electro 35 GX rangefinder
- Document type
- User manual
- Language
- German, French
- Pages
- 38
- File size
- 1.6 MB
- Category
- Film cameras
- Document date
- Not specified in catalog
Contents
- Untitled-11
- Untitled-22
- Untitled-33
- Untitled-54
- Untitled-65
- Untitled-76
- Untitled-87
- Untitled-98
- Untitled-109
- Untitled-1110
- Untitled-1211
- Untitled-1312
- Untitled-1413
- Untitled-1514
- Untitled-1615
- Untitled-1716
- Untitled-1817
- Untitled-1918
- Untitled-2019
- Untitled-2120
- Untitled-2221
- Untitled-2322
- Untitled-2423
- Untitled-2524
- Untitled-2625
- Untitled-2726
- Untitled-2827
- Untitled-2928
- Untitled-3029
- Untitled-3130
- Untitled-3231
- Untitled-3332
- Untitled-3433
- Untitled-3534
- Untitled-3635
- Untitled-3736
- Untitled-3837
- 3938
Search available document text
Find a term, then jump to its page in the original PDF. Image-only pages may not be searchable; check the PDF for exact wording and diagrams.
Page 1 · Read text
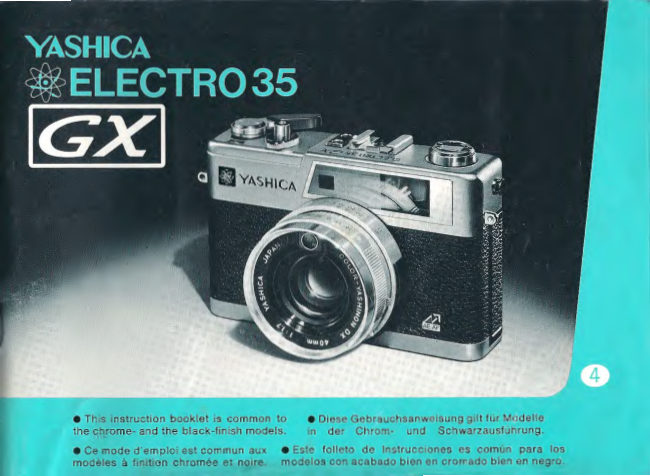
e This instruction booklet is common to   e Diese Gebrauchsanweisung gilt fUr Modelle
the cnrome- and the black-finish models.     in  der  Chrom-  und  Schwarzausfuhrung.
• Ce mode d'emploi est commun aux  e Este  folleto de lnstrucciones es comun  para  los
modeles a finition chromee et noire.  modelos con acabado bien en cromado bien en negro.
View original page 1
Page 3 · Read text
Congratulations on your choice of a fine equipment.           Wir danken Ihnen dafur, dar!. Sie sich fur eine ausgereifte
The Yashica  Electro 35 GX of w hich you have  just       Kamera entschieden haben.
become a proud owner incorporates a fu lly automatic       Die Yashica Electro 35 GX, deren stolzer Besitzer Sie
exposure  system,  enabling  you  to  make  automatic       eben geworden  sind,   ist  durch  ein vo llautomatisches
exposures  under  virtually   all  light  conditions, from        Bel icht ungssystem   gekennzeichnet,  das   Ih nen  ·die
candlelight dimness  to  glaring brightness of snow or         Mi:iglichkeit gibt, bei praktisch allen Lichtverhaltnissen
beach scenes.  In addition,  it  features a unique Electro     -von f lackerndem Kerzen licht bis zur bl en denden Helle
Auto  Flash  System  which  permits you  to  go  fully       von   Schnee-   oder   Strandszenen      automatische
au t omatic in flash exposures as well.                      Aufnahmen zu machen. Auf!.erdem verfugt sie uber die
Particularly in automatic flash exposure, the use of the         einzigart ige  Electro-Biitzautomatik,  die  ebenso  vo ll-
exclusive  ES-20  A UTO  strobe  unit  developed  by       automatische Blitzauf nahm en ermi:igl icht.
Yashica affords the utmost convenience. Whi le mounted       Besonders  bei  automatischer B lit zbelichtung   ist  die
on your camera, thi s unit can be swiveled to the right or       Verwendung des exkl usiven, vo n Yashica ent wickelten
left for bounce flash technique.                              automatischen Blitzgerates ES-20 AUTO auf!.erst vorteil-
A ll  sorts of  f lash techniques, such as off-camera  f lash,         haft. Nach dem Befestigen auf lhrer Kamera kann dieses
twin  flash and bounce flash, can be employed most ef-       Gerat fur eine Ruck praii-Bi itzausleuchtung nach rechts
fectively and exposure  in these cases w ill also be fully       oder links gedreht werden.
auto mat ic. T o enable most efficient application of these        Aile mi:iglichen Blitzt echniken, w ie z.B.  Blitzausli:isung
flash tech niques , such accessories as Hot-Shoe Extension      wenn das Blitzgerat nicht auf der Kamera befestigt  ist,
Cords, Twin-Flash A dapter and Techno Bracket ST-7       Doppelbl itzausli:isung  und  Ruckpraii-BI itzausleuchtung
are ava ilable.                                                           ki:innen  auf  sehr  w irkungsvolle  Weise  angewendet
In both normal auto mat ic exposu re and automatic  f lash       werden, wobei in diesen Fallen die Belichtung ebenfalls
exposure, your Electro 35 GX wi ll open new and more       vollautomatisch    ist.  Um   diese   Blitzt echniken  am
exciting fields of photography.                                   vorteilhaftesten  an zuwenden ,   ist  Zubehi:ir,  wie   z. B.
                                                              Mitten kontakt- Verl a ngeru ngskabel , D oppel blitz-Adapter
                                                       und der Techno-Befestigungsarm ST-7 erhaltlich.
                                                      Sowohl bei normaler automatischer Belichtu ng als auch
                                                                          bei  automatischer  Blitzbelichtung  zeigt  Ihnen  lhre
                                                                 Electro  35 GX  neue  und  aufregendere  Seiten  der
                                                                 Fotografie.


3
View original page 3Page 6 · Read text
KEY STEPS for Normal  Automatic
  Exposure
GRUNDSCHRITTE fur
  normale automatische Aufnahmen
OPERATIONS PRINCIPALES pour
   l'exposition automatique normale
~ASOS PRINCIPALES para exposici6n
  normal automatica
1  Install batteries. (See Page 9)
    Batterien einsetzen. (Siehe Seite 10)
    Installer les piles. (Voir Page 10)
   Coloque las baterias. (Ver Pag. 10)
2 Open Back Cover and load film. (See Page 13)
   Ruckwand offnen und Film einlegen. (Siehe Seite 14)
   Ouvrir le couvercle du dos et charger le film.(Voir Page 14)
   Abra Ia tapa posteri or y cargue el film . (Ver Pag . 14)
3 Set ASA speed rating of film in use. (See Page 17)
   ASA-Filmempfindl ichkeit des verwendeten Filmes einstellen.
      (Si ehe Seite 18)
   Regi er Ia vitesse nominale ASA suivant le film util ise.(Voir
    Page 18)
   Establezca Ia sensibil idad ASA del fi lm que se usa. (Ver Pag.
    18)
View original page 6Page 7 · Read text
4 Set exposure symbol by turning Aperture Ring. (See Page25)
   Belichtungssyn.bol durch Drehen des Blendenrings einstellen.
     (Siehe Seite 26)
    Regier le symbole d'exposition en tournant Ia bague d'ouver-
     ture (Voir Page 26)
   Coloque el si mbolo de exposici6n girando el aro de Ia aber-
     tura. (Ver Pag. 26)

5 Advance film.
     Fi I m transportieren.
    Faire avancer le fi lm
   Corra el film hacia adelante
6 Secure focus and trip shutter. (See Page 21)
   Scharf einstellen und Verschrurs auslbsen. (Siehe Seite 22)
    Regier  Ia foca lisation et declencher l'obturateur. (Voir Page
   22)
   Asegure el enfoque y dispare el obturador (Ver Pag. 22)


Out of Focus                       Focused
Nicht scharf eingestellt                Scharf ei ngestellt
Mauvaise mise au point             Bonne mise au point
F uera de foco                      Enfocado
                                                                    8
View original page 7Page 8 · Read text
BATTERY LOADING

Th e shu tter and exposure control of you r Elect ro 35 GX w ill
not  funct ion   precisel y  unless   th e  batteries   are  loaded
properly. Always use two 1.4 V mercu ry  batteri es (Eveready
E640N, Mall ory PX640 or equivalent ).

1  Open the Battery Compartment Cover by  sl idi ng it in the
direct ion of the arrow and  lifting   it  up while cat ching the
groove wi th the ti p of your  f ingernail. Do not force open the
cover. Open it out as shown in the illustrati on.

2    Install the mercu ry bat teries by referring to the polarity
 diagram  in  the  battery com pa rtm ent.   If  their  polarity  is
 reversed,  al l  indi cator lamps  will  fail to com e on and the
 shutter wi ll fail to function properly .
 See that the batteries are set over the pl astic tab. When th us
 installed, they can be removed  f rom the batte ry compartment
simply by pull ing on the ta b.

3   After ascertaining that  t he batteries are loaded properly,
close the Battery Compartment Cover by gi ving  it a slight push
in the di rect ion of the arrow.
9
View original page 8
Page 9 · Read text
BATTERY CHECKING

To  check  the  battery  power,  press  the  Battery  Checker    f!j ·~\\~~=~\~....:::~~~~~~~j
Button.  If the lamp incorporated  in the Exposure Counter       ~
comes on, sufficient battery power is indicated.
Th e Battery Checker  also doubles  as the exposu re counter
 illuminatior, permitting check ing of the number of exposed
frames   in  subdued    I ight  situations.  Because  this  system
consum es a considerably high power, however, avoid pressing
on the Battery Checker Button continuously over any great
length of  t ime.
The Battery Checker Lamp wil l not come on  in the following
instances :
 ( 1) When  the  batteries  are  installed  with  thei r  polarity
reversed.
 (2)  In case of poor contact due to oil smears on the contact
ends of the batteries.
 (3) When the battery power has drained ·below the requi red
voltage level.
 (4)   If the Battery Compartm ent is empty of batteries.


11
View original page 9
Page 10 · Read text
Fl L M LOADING


1  Open the Back Cover by lifting up the Film Rewind Knob
and pulling  it out forcibly.
As soon as the Back Cover is opened, the Exposure Counter
will reset automatically to the red 'Start' zone.


2    Install a 35mm  film cassette,  right side up , in the film
chamber and push the Film Rewind Knob down to its original
position.
Always use a standard 35mm film cassette of  72, 20 or 36
exposure load.


3   Insert the tip of the  fi lm leader securely into any one of
the slots on the Take-up Spool.

(Avoid direct sunlight when loading the film.)
13
View original page 10
Page 11 · Read text
4  Advance the fil m.
Make sure the Film Advance Lever is given a ful l wind when
advancing the fi lm.
After ascertaining that the Sprocket teeth properly engage the
perforations on both edges of the fi lm, close the Back Cover
and press gently to lock it in place.
Turn the Film Rewind Knob  in the firection of the arrow
engraved on the knob to take up the  fi lm slack withing the
cassette.


5   Press the Shutter Release Button and manipulate the Fi lm
Advance Lever alternately until the Exposure Counter registers
the figure '1 '.
The Exposure Counter will automatically register count of the
number of exposures.
                                                                                           II'                                                                                             ll                                                                                                               !If
                                                                                                    ~ a~ za  t~>1"'                                                                                                                                                                                                   *Ill •u a

6  To check  the  film advance, observe the Film Rew ind
Knob while manipulating the Film Advance Lever.  If  it rotates
in the course of  fil m wind,  it means that the f ilm is advancing
properly.
15
View original page 11Page 12 · Read text
ASA FILM SPEED SETTING

After loading the  f ilm , make  it a rule to set the ASA  f ilm
speed. While pressing the ASA Film Speed Setting Lever  ( t:J ),
slide and align  it w ith the  f igure corresponding  t o the ASA
speed rating of the fi I m in use.
•    Because the ASA film speed  is a factor vital to assu ring
correct automat ic function of the cam era's exposu re cont rol,
always make sure  it is set properly.
See that the figure corresponding to the ASA speed rating of
 the film in use is at the c/ickstop setting in perfect alignment
 with the index.


ASA Film Speed Rating
By ASA speed rating,  it is meant the degree of light sensitivity
of the f il m em ulsion. The A SA speed rating is indicated cl early
on the outer box or the instruct ion sheet whi ch comes with
the f ilm .

 ASA 25 32• 40• 50 64• 80 100 125•  160•  200 250• 320• 400 500•  640• 800
 D IN  15 16 17 18 19 20 21  22  23  24  25  26  27  28  29  30

17
View original page 12
Page 13 · Read text
SHUTTER LOCK

Turn the Shutter Lock and align the lug with the 'L' setting.
When  thus  adjusted,  the  Shutter  Rel ease  Button  wil l be
locked,  and  acci dental  tripping of the shutter w ill be pre-
vented. Make  it a rule  t o lock  the Shutter Release Button
when your camera  is not  in use. When locked , u·ndue power
drain w ill  be prevented even  if the Film Advance Lever  is
wound ful ly.

      L                        L


          Locked                  Unlocked
VIEWFINDER


The V iewfinder of you r Electro 35 GX incorporates a bright
frame which ou tlines the area that wi ll be reproduced on thefilm.                 ,_
When composing your picture, see that your subject  is placed
w ithin this bright fram e.
In the cou rse of focusi ng, this bright fra me moves diagonally
to compensate fo r parallax.  If your subject  is placed w ithin
this frame, therefore, there w ill be no possibility of cropped
head or similar errors in compos ition.
19
View original page 13Page 14 · Read text
FOCUSING

To secure focus, sight your subject through the viewfinder and
turn the Focus ing Ring until the two images at the center of
the viewfinder f ield appear perfectly superimposed.
 If two  identical  images  can  be  seen  in  the  bright center
focusing  area,   it means  that your camera   is  not  focused
properly. Therefore, turn the Focusing Ring until they form a
single image.


Focused                            Out of Focus
Scharf eingestellt                       Nicht scharf eingestellt
Bonne mise au point                    Mauvaise mise au point
Enfocada                          F uera de foco

21
View original page 14
Page 15 · Read text
SHOOTING POSTURE

The basic step to good picture-tak ing  is to hold your camera
steadi ly. Otherwise perfect shots  are very  often spoiled by
erratic movement of the camera at the critica l moment of
exposu re.  Before  attempting  to  shoot  your  first  series of
pictures,  therefore,  hold  your camera  in  your hands and
fami liarize yourself w ith the proper method of operation.
A lways  see   t o  it  that the Shutter  Release Button  is pressed
gently with the ball of your  ri ght index finger. When tripping
the shutter, make sure your  fi ngers or the cover of the carrying
case, shoulder  strap,  etc. do not cover the lens or the SBC
sensor.

Basic Rule to Good Picture-Taking
For best resu lts, have the sun behind you r shou lder. When the
subject receives the ligh t from the front, the cond it ion is ideal
for photography and the best possibl e co lor reprodu cti on can
be obtained.
                                             '0,11,__                                  -      -                                        -/ 1   I   I  \ '-


23
View original page 15Page 16 · Read text
AUTOMATIC EXPOSURE

Your Yashica  Electro 35 GX  is designed to deliver perfect
exposures  automatically  under   al l   I ight  conditions,  from
candlelight dimness to  glaring  brightness of snow or beach
scenes.

1  Turn  the  Aperture  Ring  and  align  the  appropriate
Exposure Symbol with the index.


 -3CE-  Outdoors under bright sunlight                 16 · 11 ·8
   c:::::=:>  Outdoors under overcast or in shade            5.6·4 ·2.8
  m::::J   Indoors or night photography                   2·1.7


25
View original page 16
Page 17 · Read text
2  Advance the film.  In the course of the film w ind , a fa int
cl ick wi ll be heard. Th is indicates that the automatic exposure
control has been set to 'standby'.


3   Sight your subject through the V iewfinder and depress the
Shutter Rel ease Button half-way to check the exposure.  If the
 red  indi cator arrow  fail  to come  on,  depress the Shutter
 Release Button al l the way to trip the shutter.


27
View original page 17
Page 18 · Read text
EXPOSURE CHECKING

The Shutter  Release  Button  provides a two-way  funct ion.
When depressed half-way, it activates the exposure control and
the exposure indicator system. When pushed all the way down,
 it trips the shutter.
•   No Exposure Indicator Arrow  is signal to go ahead and
shoot.
In case either one of the Exposure Indicator A rrows fa i Is to
come  on  when  the ·Shutter  Release  Button   is  depressed
half-way, press the button all the way down . Correct exposure
will be made at a shutter speed faster than 1/30 sec.
•   Red Exposure Indicator Arrow indicates over-exposure.
Over-exposure  is indicated in case the red Exposure Indicator
Arrow comes on when the Shutter Release Button  is depressed
half-way.  In th is case, turn the Aperture Ring in the direction
of the arrow until the exposure indicator lamp goes off.
 If the lamp fai ls to turn off even then, mount an NO filter over
the lens to compensate for over-exposure.


29
View original page 18
Page 19 · Read text
•   Yellow Exposure Indicator Arrow warns against camera
shake.
When the yell ow Exposure Indicator Arrow comes on, correct
exposure will be assured but the exposure wi ll be made at 1/30
 sec. or slower shutter speed. Take utmost precaution, there-
 fore, to prevent camera shake.
 Follow these steps when the yellow Indicator Arrow comes
on:
Turn the Apertu re Ring in the direction ot the arrow until the
exposure  indicator lamp goes  off.   If  it goes off, hand-held
photography can be safely attempted because the shutter will
 operate at a speed faster than 1/30 sec.
 If the yellow  indicator lamp  fails to go off even when the
Aperture Ring  is turned  all the way, mount the camera on a
 tripod  to  prevent camera shake. Or  else,  use the exclusive
strobe unit.


Exposure Indicator Arrows
The exposure indicator arrows are also featured on the camera
top.


31
View original page 19
Page 20 · Read text
SHOOTING BACKLIT OR SPOTLIT SUBJECTS

A lthough  the basic  rul e calls for shooting front-lit subjects,
 there are instances where you have no other choice than to
 shoot subject against light or in glaring spot light . In such cases,
your  main  subject  will  be  either under-exposed  or  over-
exposed  if normal automatic exposure is attem pted.


 Backlit Subjects
 Resort  to automatic  f lash exposure by  using the exclusive
strobe unit (Yashi ca ES-20 A UTO). (See Page39)
 If , for instance, an ASA 100 film  is in use, reset  t he A SA  f ilm
speed of your camera to ASA 50 or 25.
• The use  of the lens shade  is recommended when shoot ing
back lit subjects.


33
View original page 20
Page 21 · Read text
Spotlit Subjects
  If automatic ·exposu re  is attempted  in the normal manner,
 your main subject wi ll be over-exposed. Therefore,  re-adjust
 the ASA  fi I m speed setting.
 If an ASA 100 film  is in use, reset the ASA film speed setting
 of your camera to either ASA 200 or 400.
 After shooting backlit or spotlit subjects by resetting the ASA
 film speed, always make sure that the ASA Film Speed Setting
 Lever is returned to its original position.


35
View original page 21
Page 22 · Read text
SELF-TIMER

Use  the  Self-Timer  to   t rip the shutter when you  wish  to
include yourself in the picture.
1  Secure focus and advance the fi I m .

2  Wh ile pressing the Self-Timer Lock on  the  lens barrel ,
slide up the Self-Timer Lever.


3  When the Shutter Release Button is depressed all the way,
the Self-Timer  Lever wi ll begin  to move slowly toward  its
original position and the shutter wil l be tripped at the delayed
action of about 8 seconds.
The  Self- Timer  Lever  will not move unless  the Self-Timer
Lock  is depressed.
                                 ~YASHICA

37
View original page 22Page 23 · Read text
AUTOMATIC FLASH EXPOSURE

Flash exposure with Yashica ES-20 AUTO
By  using  the  Yashica  ES-20 AUTO  in concert w ith your
Electro 35 GX, you can take flash pictures automatically with
utmost simplici ty.

Basic Steps
1  Mount the strobe unit.
Slide the unit  all the way into the Accessory Shoe (direct X
contact shoe) and  fi x  it securely by turni ng the thumbscrew.
With this simple step, elect ric contact is established.
Before mounting  the strobe  unit, remove the  Plastic Shoe
Cover from the Accessory Shoe and make sure the Protective
Cap is placed over the Synchro Term inal.
View original page 23
From the M. Butkus archive. Original publisher and archive notices are retained.
Check the model and edition against your equipment.
PDF verified 2026-10-10.