Film cameras
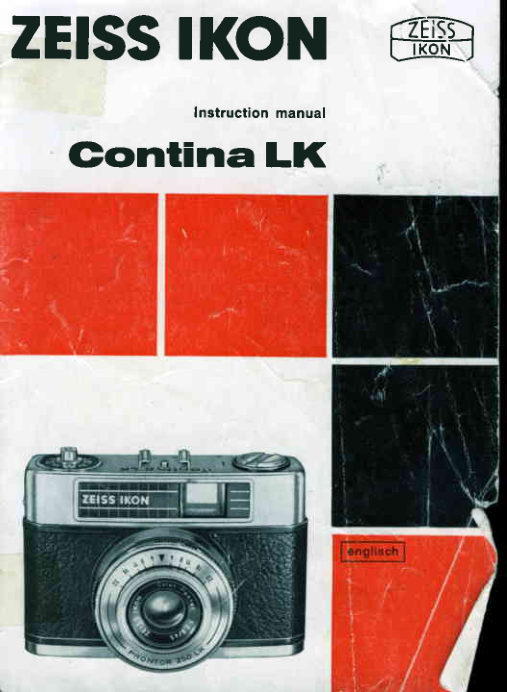
Zeiss Ikon Contina LK User manual
User manual for Zeiss Ikon Contina LK. 13 pages in English. Read the original PDF, download or print a copy without registration.
13 pagesEnglish1.0 MB PDF
Loading your manual…Open PDF directly
Document details
- Brand
- Zeiss Ikon
- Model / document
- Zeiss Ikon Contina LK
- Document type
- User manual
- Language
- English
- Pages
- 13
- File size
- 1.0 MB
- Category
- Film cameras
- Document date
- Not specified in catalog
Search available document text
Find a term, then jump to its page in the original PDF. Image-only pages may not be searchable; check the PDF for exact wording and diagrams.
Page 7 · Read text
To measure the exposure, hold the CONTINA LK up   i
   your eye as though to  take a  horizontal (landscape-
   format) picture and point  it towards the subject. At the
   top of the viewfinder frame you will see the pointer of
   the exposure meter. By  adjusting the aperture setting
   knobs 2,  it  is possible to position the pointer so that it
    is exactly centred in the notch. This automatically sets
   the lens diaphragm to the correct aperture, which you can
   read  off (together with  the  pre-selected shu[ter speed)
   from the bottom right-hand side of the viewfiAder frame.
     lf you find  it impossible to line the pointer up with'the
   notch, then you should select a faster or slower shutter
   speed according to the lighting conditions.
2. Pre-selecting the  aperture. Under  certain  conditions   it
  may prove preferable to use a specific aperture setting.
   Turn the setting knobs 2 so as to  line up the desired
   f/number with the setting mark 10. Once again, hold the
   camera up to your eye  in the horizontal position and
   point  it towards the subject.
   The exposure meter pointer is then adjusted by turning
   the shutter speed setting ring 6.  lf the correct setting
   should fall between two shutter-speed values on scale 9
   (as you can easily see whilst looking into the viewfinder),
   then select the nearest marked shutter speed and  re-
   adjust the aperture by means of the setting knobs 2.
   The exposure meter is calibrated against a standard and
   under the majority of lighting conditions it will indicate the
   correct exposure. Under certain circumstances -  for ex-
   ample when photographing open landscapes with  large
   areas of sky and particularly with back-lighted subjects -
    incorrect exposures may result when the exposure meter
    is used in the manner described above, since the very
   much lighter sky area or the back lighting shining into the
   meter will falsify the reading. ln situations like these, it is
   best to tilt the camera downwardsslightlysoasto measure
   the foreground (only when taking the reading) or else to


                            www.orphancameras.com
View original page 7Page 8 · Read text
When taking pictures at less than 1 metre (3  ft) distance,
 do not allow the upper edge of your subject to extend above
 the two notches at the sides of the viewfinder field.
 To release the shutter, depress the release button 11 gently
 and steadily -  never jerk  it abruptly.
 Finally swing the rapid-wind lever 1g right up to  its stop
 once again. The shutter can remain tensioned for  long
 periods without coming to harm.                                                              I


                                                                                 a ,
Taking pictures by flash
The flashgun can either be pushed into the accessory shoe
 16 or attached to  the tripod bush 25 with the  aid  of  a
bracket. Plug the synchro cable into the flash c6ntact 1. Do
this before inserting the flashbulb into its holder. The shutter
speed when using flashbulbsshould be 1/n sec., whilst with
electronic flash units any shutter speed (1/zo-1/zsosec.) can
be selected.
The aperture setting to use depends on the guide number
of the flash and on the ftash-to-subject distance. you  will
find more information in the instrucfions which accompany
your flash unit.
                                   rl
Care of the CONTINA LK
From time to time, clean the spool chamber and the inside
of the camera back with a soft brush. The lens should be
cleaned only when absolutely necessary, using a soft well_
washed linen cloth (not wash leather) to wipe  it with great
care. First remove all dust with a soft brush.

we, reserve the right to introduce alterations in the interests oftechnicalproqress.
i;.sli.dr   l-    GA/10.0615    printed in Germany   15.0|{,4/04_1
                                   Author prof. Dr. J. Striper
View original page 8Page 9 · Read text
Loading and unloading

                                                                                                     t

 Loading the film
 Never perform this operation in direct sunlight.
 Open the camera by turning catch 29 to the red dot mark-
 ing 28 and then pull off the back.
 Insert the film cassette, making certain that thtii bar aqross
 the base of the cassette core engages in the ioupling "dog
 13. Guide the beginning of the fifm into the slot in take-up
 spool 23 and hook the small lug into the second or third
 perforation hole.
Wind on the film by turning the take-up spool flange 22
 until the sprocket 17 is engaging the perforations on both
sides of the film. Replace the back from above, positioning
 it so that half the width of the film is still visible.
Then push the back upwards to  close   it completely and
secure the catch (turn point of catch lever to white dot 30).
Setting the frame counter and checking the film advance
Swing out the rewind crank 12 and turn  it in the direction of
the arrow until a resistance is  felt (the film  will then be
wound taut in the cassette). Fold back rewind crank.
Then swing rapid-wind lever 18 right up  to  its stop and
release the shutter (knob 11); repeat both operations once
again. The centre disc of the rewind crank 12 should rotate
in the opposite direction to  that indicated by the arrow;
this allows you to check that the film  is being wound on
correctly. Then operate the rapid-wind lever for a third time,
and set the white mark on the knurled ring of the frame
counter disc 20 to  the  figure which corresponds to  the
number of exposures provided by the film you are using
(e. s. , to 36).
The frame counter always indicates the number of frames
still to be exposed.

                            www.orphancameras.com
View original page 9Page 10 · Read text
lmportant! Always set the film speed immediately after load-
ing the film (see page 6).

Fllm-type reminder disc
This acts solely as a reminder of what film is in the camera.
It  is set by means of knob 19; the following symbols will
appear in the window 21:
      p,!r  fz      flt Et [e

1 No film in camera
2  Black and white film
3  Colour negative film
4  Flash-type colour reversal film
5  Daylight-type colour  reversal film
6  Artificial-light colour negative film


Unloading the film
After the last exposure -  when the frame counter indicates
1 -  fold out the rewind crank and turn  it in the direction of                'thethe arrow, at    same time maintaining pressure on the
declutching button 24, until you feel a slight resistance; this
indicates that the film has come free from the take-up spool.
Then (and not before) open the camera by turning catch 29
to the red dot 28 and take out the film cassette. Always keep
the take-up spool and film track clean.
View original page 10Page 11 · Read text
hold the camera as close as possible tothemostimportant
   section of your subject, taking care not to cast a shadow
   upon  it. Alternatively, you can measure the exposure in
   the normal way and then correct the aperture setting by
   opening the diaphragm by a half or whole f/stop (for ex-
   ample, from aperture setting f/8 to f/5. 6). This correction
    is also necessary when taking pictures of low-contrast
   subjects, e. g. when the sky is overcast, on colour reversal
      f i l m .


Aperture and depth of field
Every photographic lens will  only form a sharp image of
objects within a  certain distance before and beyond the
focused distance. This  depth-of-field range  will  become
greater the more the lens is stopped down. The depht-of-
field scale 6 indicates its extent at specific aperture settings.
Example (see illustration): distance setting 20 ft
                       Depth of field at f/8, from
                          9 f t t o o

 22 16118 4    4  811 16 22

Always remember:
      Large aperture (112.8')= minimum depth of field
      Small aperrure (t122) = maximum depth of field

Reldabing the shutter
Everything which you can see inside the brightline frame of
the viewfinder will be recorded on the film when you release
the shutter.       (
                            www.orphancameras.com                  8
View original page 11Page 12 · Read text
Operating instructions


  I  Flash contact
 2 Aperture scale with setting knobs
 3 Film-speed setting scale (DIN)
 4 Film-speed setting mark (DIN)
 5 Key for setting the film sPeed                                     '
 6 Shutter-speed setting ring
 7 Depth-of-fleld scale with distance (focus) setting mark
  I  Distance (focus) setting ring
 9 Shutter speed scale
r0 Seftlng mark for aperture and shutter speed
 t l  Release button with screw-in thread for cable release
1 2 Retractable rewind crank
r3 Goupllng dog for engaging in the bar of the cassette core
1 4 Vlewflnder eyeplece
 t 5 Marklng to indicate position of film plane
 r 6 Accessory shoe
 l 7 Sprocket wheel for engaging in the perforations of the
    film
 r 8 Rapid-wind lever
1 9 Knob for setting the film-type reminder disc
20 Frame counter                                                                                                                                                                                               j
 2l Window for reading the film-type reminder disc                 It
22 Flange for turning the take-up spool
23 Take-up spool with slot and lug for securing the begin-
    ning of the film
 24 Declutching button for rewinding                                                        l25 Trlpod bush
 26 Film-speed scale (ASA)
 27 Setting mark for ASA  film speed
 28 "Back open" marking
 29 Catch for camera back
 30 "Back closed" marking
View original page 12Page 13 · Read text
Accessories
                                          Order No.
Key: A  -  Diameter of mount in mm
     S -  Screw-in mount    G -  Yellow  GR = Green
           [  = Push-on mount     O  - Orange   R - R e d
Ever-ready case                            23.0100
Shoulder        pad for                 ever-ready                          case                          .   20.7699Colour filters          G - GR                                  - O - R- UV
fkolor B, C and F, A S 27                                     :   20.1000
1 set of filters (G, GR, O, UV) O S 27, with case     20.7071
Lens hoods
Ffexible A S 27 (remains on the camera)          20.0703
Leather container for lens hood and
3 filters O S-27                                20.7841
ZEISS PROXAR lenses
A A 28.5, for close up pictures
From approx. 40 to 20 in. ( = 1 m)                 20.0800
From approx. 20112to 13112in. (f = 0.5 m)           20.0801
From approx. 13Uzto 10 in. (f = 0.3 m)              20.08,02
From approx. 81h to 63h in. (f = 0.2 m)             20.0803
1 set of Proxar lenses with depth of field
calcufator and container                  .                20.7070
ZEISS PROXAR doublet lens, for close-ups down
to 31/zin., A S 27                           2O.O8O4
CONTAMETER close-up attachment
for taking pictures at distances of 20 and 12 in.     20.164.I
                                          o'other  accessories
Cable release with lock                          20.0281
f KOBLITZ 5 capacitor flashgun                  .
for capless flashbulbs                       22.W2
for_metal-capped bulbs                                                           I                 22.0003
IKOBLITZ L capacitor flashgun                  22.0010


                             www.orphancameras.com
View original page 13From the M. Butkus archive. Original publisher and archive notices are retained.
Check the model and edition against your equipment.
PDF verified 2026-10-10.