Film cameras
Zeiss Ikon Voigtlander CONTAFLEX 126 User manual
User manual for Zeiss Ikon Voigtlander CONTAFLEX 126. 17 pages. Read the original PDF, download or print a copy without registration.
17 pagesOriginal document1.7 MB PDF
Loading your manual…Open PDF directly
Document details
- Brand
- Zeiss Ikon
- Model / document
- Zeiss Ikon Voigtlander CONTAFLEX 126
- Document type
- User manual
- Language
- Check the original document
- Pages
- 17
- File size
- 1.7 MB
- Category
- Film cameras
- Document date
- Not specified in catalog
Search available document text
Find a term, then jump to its page in the original PDF. Image-only pages may not be searchable; check the PDF for exact wording and diagrams.
Page 2 · Read text
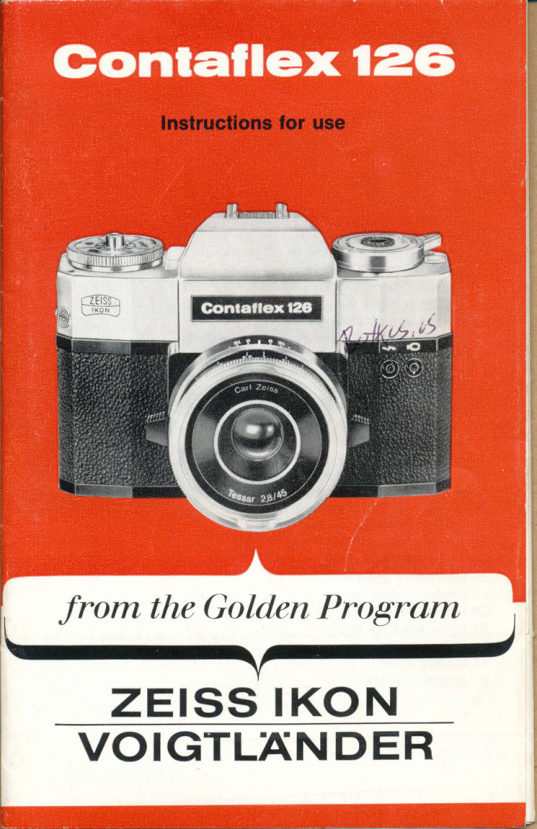
Instructions for use

ee eZ

—"
©

Jrom the Golden Program

ecm cae mm

ZEISS IKON
VOIGTLANDER

i
View original page 2
Page 7 · Read text
Controls


 1 mllled rlng for setting flash guide number
 2 Interdrangeable  lens
 3 focusing mark wlth depth of field scale
 4 dislance scale in metres and feet
 5 focusing grlps
 6 shulter release with thread socket for cable release
 7 shutter speed setting mark
 8 lever for switching on automatic flash
 9 flash guide number setting mark for standard lens
     (f - 45 mm focal length)10 flash gulde number setting mark for wlde angle lens
     (f - 32 mm focal length)11 focal plane mark
12 accessory shoe
13 shutter speed ring
14 loc*ing pawl for cfianglng lens
15 llash sod<et tor electronic flash
16 flash socket for llashbulb equlpment
17 lod< for opening camera back
18 loaded fllm cartridge 126
19 eyeplece cover slide
20 viewfinder eyepiece
21 control indicator (for exposure number)
22 battery testing key
23 rapid winding key
24 tripod sod<et
25 battery catch
26 loaded battery


                           www.butkus.us
View original page 7Page 8 · Read text
Loading and unloading


Open the camera back by pressing down lock 17. Insert "film
cartridge 126" as shown in the illustration (writing on the film
cartridge must be upside down) and close the camera back.
Keep pushing rapid winding key 23 to the right until it locks. The
figure "1" is now in the control indicator on the camera back.
The camera is ready for taking shots. The key has to be moved
about 1 1/z times to advance the film after each exposure. After
the final exposure and according to the type of film in the ca-
mera either the figure 12 or 20 will appear in the film counter -keep pushing rapid winding key 23 to the right until no yellow
paper is visible in the control indicator on the camera back. Only
now should the camera be opened and the film cartridge re-
moved.


Taking an exposure

Focusing
Hold the camera against the eye and using grips 5 bring the
split image visible in the viewing area into coincidence or use
the fine focusing ring when the subject has no distinct lines to
obtain a sharp picture.
The focused distance is indicated on scale 4 at setting mark 3.
View original page 8
Page 9 · Read text
focusing                               focusing
with split image                       with fine focusing ring

Aperture and depth of field
Each photographic subject is recorded in sharp outline over a
limited area in front of and behind the focused distance. This
zone of sharpness increases as the diaphragm is stopped down.
The range for the individual apertures is indicated on depth
of field scale 3. lt extends from thc distance opposite the aper-
ture value on the left to the distance opposite the same aperture
value on the right.

Please nole:
large aperture (2.8) :  small depth of field
small aperture (22) = largest depth of field
For special photographic subjectswww.butkus.usexact values can be taken
from the attached booklet containing the relevant tables.
View original page 9
Page 10 · Read text
Settlng the shutter speed
 Turn milled ring 13 until the desired shutter speed is opposite
 setting mark 7. Do not set at an intermediate value! The
 numbers on ring 13 indicate fractions of a second (60 is
 r/eoth sec, etc.). Selection of the shutter speed depends on the
 available light and lhe movement of the subject to be photo_
 graphed. The faster the movement, the shorter the exposure
 time. The symbols on the setting ring are intended to indicate
 suitable settings.


 Automatic exposure
The CdS light metering system provides fully automatic setting
 of the aperture. The film speed is also set automatically when
 film cartridge 126 is loaded in the camera. lf there is no film
 cartridge in the camera, the indicated value refers to a film
speed of about 30 DlN.
 Pre-select the shutter speed. Hold the camera against the eye
and towards the subject to be photographed.  lf the exposure
meter needle lies within the aperture scale (on the left of the
viewfinder), adequate light is available and the picture can be
shot.
The automatic aperture setting can be read direct from the
scale in the viewfinder (when checking the depth of fietd).
 lf the exposure meter needre lies in one of the red zones,
exposure is not possible under the prevailing light conditions
or at the pre-selected shutter speed. Adjust the shutter speed
until the needle swings back into the aperture scale. lf the
available light is not adequate for automatic exposure, the needle
will remain in the red zone even after adjustment of the shutter
speed (use flashlight).
When the shutter is run down, the exposure meter needle is
blocked.
lf a definite aperture is desired. this can be set by turning
shutter speed ring'13 until the exposure meter needle is opposite
the desired aperture value. Use only a clicked-in shutter speed.
The shutter speed ring has full stops at 1/ro sOC and r/soo sec.
View original page 10
Page 11 · Read text
red warning zone

                                  aperture 4


                                  aperture 8
                               exposure meter needle
                                aperture 16

                               red warning zone


Exposure
When taking an exposure press down shutter release 6 gently
and smoothly -  not jerkily. At the exact moment of exp-osurethe viewfinder image disappears and the shutter release is
blocked. The viewfinder image reappears onry after advancing
l:ey 23.

Exposure meter
The light falls on a cds cell arranged in the viewfinder. By
means of this arrangement only that light is metered which
actually reaches the film through the lens. Lens of any focal
length can be fitted to the camera and still high precision light
metering is provided.
when taking photographs with a tripod and cabre rerease, right
can reach the highly sensitive cell through viewfinder eyepiece 20
which is not covered by thewww.butkus.useye. In such cases, the viewfinder
eyepiece should be covered by pulling up slide 1g.
View original page 11Page 12 · Read text
The battery, type "Mallory PX 13", loaded in the camera for
operating the exposure meter will last for about 2 years with
normal use. In order to avoid unnecessary drainage  it should
be protected from extreme temperatures (below -10o).  lf this
is not possible, use type "Mallory PX 625".

Testlng and changlng the battery
Tension the camera and hold it against the light so that the
exposure meter needle lies in the centre of the aperture scale.
Then press down battery testing l<ey 22 briefly. lf the needle drops
more than one aperture stop within 1 to 2 sec, the battery must
be changed. lt is accessible by lifting up catch 25. Insert the
new battery as indicated on the catch. Batteries are obtainable
from photographic dealers.


Exposures with filters
When using filters, the filter factor for the exposure is adjusted
automatically through the cell being positioned behind the lens.
The filters are attached to the lens bayonet mount.


Glose-ups
The supplementary lenses available for the CONTAFLEX 126,
like each filter, fit all CONTAFLEX lenses from 32-135 mm. In
order to obtain an adequate depth of field, the shutter speed
should be so selected that an aperture of at least 5.6 is possible.
Any additional filters should be mounted in front of the supple-
mentary lens. Attention is drawn here to our universal copying
unit REPROPHOT which is equipped with the practically  in-
dispensible focusing slide for close-ups.
View original page 12
Page 13 · Read text
Flash exposures with automatic flash
                                                                    theAll types of    f lash equipment can be connected to
CONTAFLEX 126. Only the cableless flash equipment with M-
contact requires an adapter which is available from photo'
graphic dealers. The synch cable is connected at socket 15
fttash symbol) for electronic flash and socket 16 (flashbulb
symbol) for flashbulb equipment. Now set the guide number of
the flash by turning milled ring 1. (The guide number is given
on the flashbulb packing or in the instructions for use with the
flash equipment.) lf the engraved numbers do not include the
guide number that is given for the flash, select an intermediate
setting. The setting t = 45 in fig' 9 applies when using the
standard lenses ZEISS TESSAR or COLOR-PANTAR 2.8/45 mm'
| = 32 -  in fig. 10 -  for wide angle lens ZEISS-DISTAGON
2.8/32 mm.
Measure the distance before taking a flash exposure. When
taking photographs of subjects with greater depth, focus a spot
in the central zone. Move lever 8 as far as it will go when taking
a flash exposure and hold in this position whilst pressing down
the shutter release. This automatically selects the correct
shutter speed and the appropriate aperture. The exposure meter
and setting of the shutter speed with milled ring 13 are now
cut out.
When lever 8 is moved a flash symbol appears at the right-hand

       @'


            10   I   I                            www.butkus.us
View original page 13Page 14 · Read text
edge of the picture in the viewfinder. lf this symbol is fully
covered by a red disc, this indicates that the flashlight is either
too strong for the selected distance.
The distance between the camera and the subject must be
corrected and the distance re-set until the red disc no longer
fully covers the flash sYmbol.
When lever 8 is released the camera reverts to automatic ex-
posure.

Changing the lens
The lenses can be interchanged in full daylight without fogging
the film but it is obvious that the opening in the camera should
be protected from direct sunlight'

Removal
Press locking pawl 14 towards the camera and turn the lens
anti-clockwise as far as it will go and take out.

Attachment
Place the red dot on the lens opposite the red dot on the
camera bayonet mount. Push the lens in as far as it will go
(do not tilt) and then turn colckwise until locking pawl 14 clicks
in audibly.
View original page 14
Page 15 · Read text
Accessories


Lenses
11.1101 ZEISS DISTAGON 2.8/32 mm
11.1102 COLOR-PANTAR  2.8/45 mm
11.1103 ZEISS TESSAR 2.8/45 mm
11.1104 ZEISS SONNAR 2.8/85 mm
11.1105 ZEISS TELE-TESSAR 4/135 mm

Vlewllnder accessorles
20J614 angle telescope
35.0207 eyepiece shield
20.0504 eyepiece correction lens * 0.5 to * 5 dptr.

Lens hoods
n.0718 Lens hood (telescopic)  lor 32 to 85 mm lens S. 56 @
       The ZEISS TELE-TESSAR has an adjustable lens hood
         incorporated in the lens mount.

Filters
20.1051 yellow for    32 to 135 mm lens B 50 @
20.1052 green for     32 to 135 mm lens B 50 O
20.1053 orange for    32 to 135 mm lens B 50 @
20.1054 red for       32 to 135 mm lens B 50 @
20.1055 UV for        32 to 135 mm lens B 50 O
20.1058 skylight for   32 to 135 mm lens B 50 @
20.1056 IKOLOR A for 32 to 135 mm lens B 50 @
2O.1O57 IKOLOR B for 32 to 135 mm lens B 50 @
20.1208 polarizing filter (Contapol) for 32 to 135 mm lens B 50 @
Accessorles for close-ups
20.0846 supplementary  lens  = 2.0 m 0.5 dptr. B 50 @
20.0847 supplementary  lens  = 1.0 m 1.0 dptr. B 50 @
20.0848 supplementary lens  = 0.5 m 2.0 dptr. B 50 @
20.0849 supplementary  lens  = 0.3 m 3.0 dptr. B 50 @
20.0850 supplementary lens  = 0.2 m 5.0 dptr. B 50 @
20.1853 REPROPHOT, universal copying unit
20.1850 table copying unitwww.butkus.us
20J852 lighting equipment for table copying unit
View original page 15Page 16 · Read text
Cases and contalners
23.0015 ever-ready case (real leather)
23.1004 leather case for 32, 50 and 85 mm lenses  (individually)
        and 1 filter or one supplementary lens
23.1005 leather case for TELE-TESSAR 135 and 1   f ilter or
       1 srtpplementary lens
23.2OO7 case for 3 filters or 3 supplementary lenses

Serial number
Each CONTAFLEX 126 has a serial number engraved on the
camera base (number preceded by a serial letter). The lens
also has a serial number on the focusing ring. We advise you
to make a note of these numbers so that you can establish
ownership in the event of loss or mistake.

Care of the CONTAFLEX 126
The inside of the camera should be cleaned occasionally with
a hair brush. (Notel Do not scratch the shutter blind!) Dust and
other particles on the focusing screen and mirror can be
removed with a fine hair brush when the lens is removed. Finger-
marks on the lens surface and viewfinder eyepiece should be
carefully removed with a soft linen cloth.
Not only photographic dealers but also the photographic ad-
visory service of the ZEISS IKON-VOIGTLANDER  Vertriebsgesell-
schaft mbH, 7 Stuttgart, Postfach 540, will gladly advise you and
supply information on all photographic problems.
ZEISS IKON-VOIGTLANDER  offer a world-wide guarantee -  a
valuable service covering all countries and frontiers. A guarantee
certificate is provided with each camera. Make sure that your
photographic dealer confirms the date of purchase with his
signature on the back of the certificate.
Please take good care of this certificate in your own interest as
it contains a list of the repair agents throughout the world for
ZEISS IKON-VOIGTLANDER  products.
We reserve the right to make alterations in line with technical
progress.
View original page 16Page 17 · Read text
iengiiffi-t cA/10.1102-3 Printed in West-Germany  51167/02-'l A
                            Author: W. Kaiser
    Z,EISS IKON
  VOIGTLANDERwww.butkus.us
View original page 17Related documents and language editions
From the M. Butkus archive. Original publisher and archive notices are retained.
Check the model and edition against your equipment.
PDF verified 2026-10-10.