Film cameras
Zenith EM User manual
User manual for Zenith EM. 34 pages in English. Read the original PDF, download or print a copy without registration.
34 pagesEnglish2.1 MB PDF
Loading your manual…Open PDF directly
Document details
- Brand
- Zenit
- Model / document
- Zenith EM
- Document type
- User manual
- Language
- English
- Pages
- 34
- File size
- 2.1 MB
- Category
- Film cameras
- Document date
- Not specified in catalog
Search available document text
Find a term, then jump to its page in the original PDF. Image-only pages may not be searchable; check the PDF for exact wording and diagrams.
Page 2 · Read text
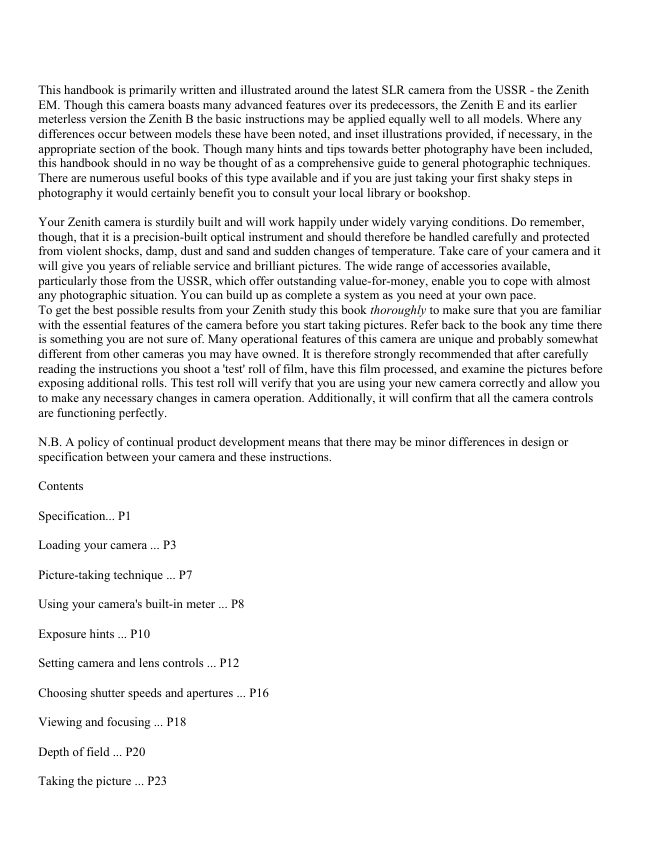
This handbook is primarily written and illustrated around the latest SLR camera from the USSR - the Zenith
EM. Though this camera boasts many advanced features over its predecessors, the Zenith E and its earlier
meterless version the Zenith B the basic instructions may be applied equally well to all models. Where any
differences occur between models these have been noted, and inset illustrations provided, if necessary, in the
appropriate section of the book. Though many hints and tips towards better photography have been included,
this handbook should in no way be thought of as a comprehensive guide to general photographic techniques.
There are numerous useful books of this type available and if you are just taking your first shaky steps in
photography it would certainly benefit you to consult your local library or bookshop.

Your Zenith camera is sturdily built and will work happily under widely varying conditions. Do remember,
though, that it is a precision-built optical instrument and should therefore be handled carefully and protected
from violent shocks, damp, dust and sand and sudden changes of temperature. Take care of your camera and it
will give you years of reliable service and brilliant pictures. The wide range of accessories available,
particularly those from the USSR, which offer outstanding value-for-money, enable you to cope with almost
any photographic situation. You can build up as complete a system as you need at your own pace.
To get the best possible results from your Zenith study this book thoroughly to make sure that you are familiar
with the essential features of the camera before you start taking pictures. Refer back to the book any time there
is something you are not sure of. Many operational features of this camera are unique and probably somewhat
different from other cameras you may have owned. It is therefore strongly recommended that after carefully
reading the instructions you shoot a 'test' roll of film, have this film processed, and examine the pictures before
exposing additional rolls. This test roll will verify that you are using your new camera correctly and allow you
to make any necessary changes in camera operation. Additionally, it will confirm that all the camera controls
are functioning perfectly.

N.B. A policy of continual product development means that there may be minor differences in design or
specification between your camera and these instructions.

Contents

Specification... P1

Loading your camera ... P3

Picture-taking technique ... P7

Using your camera's built-in meter ... P8

Exposure hints ... P10

Setting camera and lens controls ... P12

Choosing shutter speeds and apertures ... P16

Viewing and focusing ... P18

Depth of field ... P20

Taking the picture ... P23
View original page 2
Page 3 · Read text
www.butkus.us

Removing exposed film ... P24

Taking flash pictures ... P26

Using the self-timer ... P29

Changing lenses ... P31

Care of camera and accessories ... P33

Trouble-shooting ... P35

Taking better pictures ... P37

Choosing lenses and accessories ... P40

The illustration/description of equipment and accessories throughout this book - is for information only and
should by no means be considered an offer of sale.


Format

24 X 36mm; using standard 35mm cassettes of 12,20 or 36 exposure. color or black and white film.

Shutter

Horizontal traveling Focal Plane type, speeded 1 /30,1 /60,1/125,1/250 and 1 /500th second plus B (brief time).
Linked to self-timer giving approximately 7 seconds delay.

Flash synchronization
Switch control for bulb & electronic synchronization at 1 /30th sec.through a standard 3mm co-axial socket.
View original page 3
Page 4 · Read text
Viewing/Focusing system
    Eye-level pentaprism/instant return mirror shows upright laterally correct image. Bright Fresnel focusing screen
    with central ground glass/microprism spot on Zenith EM. Plain fine ground screen on E & B models.


                                                                         Digitally signed by Mike Butkus
                                                       DN: cn=Mike Butkus, o=Butkus camera manuals, ou=butkus.org,
                                                           email=mike@butkus.org, c=USMike Butkus           Date: 2023.05.17 16:21:27 -04'00'


   Exposure meter
    Built-in selenium cell with match-needle shutter/aperture read-out. Calibrated for: Film speeds 25-500 ASA/13-
   28 D I N. apertures f/2-f/32. shutter speeds 1 /500th sec. to 30 seconds.

   Frame counter
    Additive 0-36 manual resetting type.
View original page 4Page 5 · Read text
www.butkus.us


  Standard                                                                       Industar 50 (E &
                    Helios 44m (''EM'')              Helios 44 (E&B)
    Lens                                                                  B)

                                                                   4 elements in 3
Construction      6 elements in 4 groups        6 elements in 4 groups
                                                                              groups

 Focal length          58mm                 58mm             50mm

                  Fully automatic instant re-
 Diaphragm
               open -optional manual over-         Manual Pre-set            Manual
    type
                               ride

  Aperture       f/2 - f/16 with click stops at      f/2 - f/16 with half apertures    f/3.5 - f/16 (no
    range             full and half apertures         click stops at full apertures    click stops)

  Distance
                   0.55m - infinity              0.5m - infinity          0.65m Infinity
    scale

  Angle of
                     40 degrees                  40 degrees             45 degrees
    view

                                                             33/35mm screw
               52mm screw            49mm screw  Filter size                                                               36/37 mm push
               54mm push-on           51mm push on
                                                                         on

                    'Universal' (42mm) thread
                                                     'Universal' (42mm) thread accepts standard non-
                  accepts standard single pin
 Lens mount                                  automatic lenses and accessories (Some early E &
                    automatic lenses and
                                   B models fitted with 39mm mount)
                          accessories


                                   Loading your camera

Precautions:
(a) Your Zenith camera accepts any standard 35mm cassette, of color or black and white film.

(b) Always load the film in subdued lighting conditions. If outdoors look for a shady area or shield the camera
from direct sunlight with your body or coat.

(c) Whenever possible avoid loading in a dusty place or at the seaside where strong salty wind is blowing.

(d) When loading take care not to touch the shutter blinds.

(e) Make sure Shutter Release has not been set in the 'T (or Time) Lock' position. (See p. 13).

Procedure

1. Raise the Back Lock-catch [20] and swing the Camera Back [38] open.

2. Before loading ensure rewind release mechanism has been cleared. With the EM camera the Rewind Release
Ring [3] must be turned :clockwise so that the three dots are fully lined up. Turn Film Transport Lever [1 ]
through a couple of short strokes till no further movement is possible while holding back Sprocket wheel [32]
lightly with finger. The Sprocket should rotate in time with the lever action and not free-wheel.
View original page 5Page 6 · Read text
3. Push up the Cassette Retaining Spindle [28] from inside the camera. Place the cassette into its chamber [ 27]
ensuring that the cassette's projecting end faces down. Push Rewind Knob [22] back to its original position to
hold the cassette in place - you may need to turn it clockwise a little until it seats properly in the cassette spool.

4. Draw out from the cassette enough film (about 3") to insert the leader into the Take-up Spool [34].


With the EM camera the leader can be inserted into any one of the spool's slots - with E & B cameras fix the
film's leading edge under the Take-up Spool spring (turn the bottom knurled flange with finger to get this
uppermost). With all models ensure that one perforation hole is caught by the Take-up Spool tooth, also see that
the Sprocket wheel [32] engages in a perforation.

5. Make sure film cassette lies flat, then alternately depress Shutter Release Button [2] and turn Film Transport
Lever [1 ] until perforations on both sides of film are engaged by the Sprocket Wheel [32]. The film should also
be taut around the Take-up Spool -turn bottom spool-flange with finger towards cassette position to take up any
slackness.

Note - Film is advanced by sprocket drive, so it is most important for sprockets to engage film perforations
properly.

6. Complete film wind, if necessary, to its limit. Press Shutter Release Button [2] then close the Camera Back
[38]. Firm pressure only required on the Zenith EM as the back has a self-locking catch. With E & B models
this catch [20] must be returned manually to the locking (downward) position.

7. Take up any slackness of film within the cassette (especially important with shorter than 36 exposure lengths)
by slowly turning Rewind Knob [22] clockwise till slight resistance is felt. On the Zenith B the Rewind Knob is
ready to hand. On the Zenith E & EM cameras, the Rewind Knob is spring-loaded and recessed within the
exposure meter controls.
View original page 6
Page 7 · Read text
www.butkus.us


To bring the knob into rewind position press it down firmly, twisting it slightly anti -clockwise at the same time
- to re - lock the knob press down fully whilst twisting it clockwise.

8. Move Film Transport Lever (2) through two or more short strokes (letting it return to the starting position
after each stroke) until no further movement is possible, watching to see if the Film Rewind Knob [22] turns
while doing so. If the Rewind Knob turns it shows that the film is correctly loaded and moving properly through
the camera. If it doesn't turn, and you have taken up the slack as described in step 7, then the film may not be
securely attached to the Take-up spool or properly engaged by the Sprocket Wheels.


9. Now turn Frame Counter Dial [4] until the number '0' shows against the Frame Counter Index [33] and press
the Shutter Release [2] once more.
If you are not going to take photographs immediately do not wind on the film at this stage since it is always best
to leave the shutter in the fired position, just in case the camera is put away without being used for some time.

10. If you are ready to take photographs, wind Film Transport Lever [1] fully, and your first film frame is in
position, as shown by the Frame Counter Index [33].
View original page 7
Page 8 · Read text
Notes:
(a) Always make sure the Transport Lever [1 ] has been fully wound. This is easiest when you move this lever
in two short strokes. When the lever stops during the second stroke, you are assured that the camera's film,
shutter and frame-counter are all ready for exposure. Failure to wind the Transport Lever fully may result in a
'blank' exposure.

(b) To maintain accuracy in use, the Frame Counter Dial [4] must be zeroed only after winding the film/shutter.
After this, every time you wind on the dial will come to rest with the next division opposite the Counter index
[33]. The counter tells you how many frames (pictures) you have taken and when it reaches 12, 20 or 36
(depending on film in use), you will need to rewind the film into its cassette and put in a new film. Color film
especially should not be left in the camera for long periods and for the
best results should be processed as soon as possible after exposure. Incidentally do carry a spare film - nothing
is more annoying than to run e out of film just before the best shot turns up

(c) The disc on the rewind knob of Zenith B models is there simply to remind you of the speed or type of film
you are using - it has no effect on the camera mechanism what so ever. To set the reminder disc hold the rewind
knob, then apply s finger or thumb pressure to the disc and turn it until the film speed or type lines up with the
red mark.

Picture-taking technique

Once the camera is loaded you have to consider three aspects of taking a picture exposure, focus and
composition. The first two of these are purely technical; the following sections, together with a little experience,
will soon enable you to handle your Zenith with sufficient enough ease to leave you free to concentrate on the
third aspect, composition, which is the artistic one.

Exposure
Though sometimes thought to be photography's biggest problem, obtaining correct exposure is not really so
difficult thanks to the latitude of modern day films. There are three governing factors: sensitivity to light of the
film (usually expressed as an ASA speed rating); shutter speed, which controls the amount of time the image is
allowed to affect the film; and the lens aperture, which controls the brightness of the image falling on the film.
There are two methods of obtaining the total amount of exposure required for a film of certain sensitivity under
certain conditions of lighting. First is by using the exposure tables supplied with the pack of film you buy -these
of course only hold good under average subject and lighting conditions, but are usually a quite accurate guide
and certainly more than adequate to begin with. A better and far more accurate method (especially important
with color slide films, as the slide is your final result) is to measure the brightness of a scene by means of an
exposure meter.
View original page 8
Page 9 · Read text
www.butkus.us


The Zenith B owner can probably work quite happily with the first method but if preferred can always purchase
a separate handheld exposure meter (our own excellent Leningrad 4, for example). For convenience and speed
of use, Zenith EM and E models incorporate a sensitive built-in photoelectric meter [23] to help obtain correct
exposure under widely varying conditions. No batteries are required since at its heart is a selenium cell that
converts light reflected by your subject into electrical energy which directly activates the meter needle [15].

Whichever method is chosen it is recommended to use a minimum shutter speed of 1/1 25th second where
possible. (certainly for the majority of outdoor subjects). This speed is fast enough to prevent most 'blur' due to
camera or subject movement, yet is slow enough to permit picture taking in a wide variety of lighting conditions
with today's sensitive films. If it's necessary to shoot at 1 /60th or 1 /30th second, hold the camera as steady as
possible -ideally by using a tripod, or by bracing your arms on a nearby table or other support.

How to use your camera's built-in exposure meter

1. Set Film Speed - Beneath the Aperture Indicator Dial [18] are two scales of figures. One scale marked for
films rated at 25, 50, 100, 200, 400 and 500 ASA registers in the ASA speed Indicator Window [17], and the
other marked in DIN ratings of 13,16,19,22,25 and 28 registers in the DIN speed Indicator Window [16]. Turn
the Aperture Indicator Dial until the speed number for your film shows against the index mark in the
appropriate window. Should your film be rated at an intermediate speed, simply position the ASA or DIN index
mark between the next smaller and larger number (for example for a 64 or 80 ASA film set the ASA index mark
between 50 and 100, for a 23 DIN film set the DIN index mark between 22 and 25). On some E and EM camera
as there are dots between the marked numbers indicating these intermediate film speeds, but in any event if you
do as described your meter will operate well within the exposure tolerances (latitude) of most film types.


2. Aim Exposure Meter [23] at your subject -
see last paragraph on page 10.
(For a practice reading aim the meter at a brightly-lit scene, or, if indoors, at a nearby lamp - making sure your
fingers do not obstruct the meter window). As you do so you will note the Exposure Meter Needle [15] moves
to a certain position and then stops. Holding your camera in this position you now . . .
View original page 9
Page 10 · Read text
3. Match the Needle [15] so that it is centered beneath the Meter Cursor [14] by turning the Shutter Speed
Indicator Dial [19].


4. Your Light Measurement or Reading has now been taken. Each combination of lens opening (f/number)
and shutter speed shown on the Aperture Indicator Dial [18] and Shutter Speed Indicator Dial [19] will give the
right amount of exposure. For example in the illustration shown, these scales show that correct exposure will be
obtained with a shutter speed of 1/125th of a second and at a lens opening of f/8 era speed of 1 /250th of a
second and a lens opening of f/5.6 etc The combination chosen will of course depend on the subject to be
photographed (see p.16) and the appropriate shutter speed and aperture should be set on the camera and the lens.


Note: Only the numbers appearing in black on the Shutter Speed Indicator Dial [19] can actually be set on the
camera. The Red numbers 15, 8, 4 and 2, appearing next to the Black numbers 30-500, represent fractions of a
second. "15" is 1 /15th second, etc. These appear for information purposes only, say for when using your
camera's meter to determine exposure with cameras lacking a built-in meter. The set of Red numbers 1, 2, 4,
8,15 and 30 which are furthest from the Black numbers 30-500 on this Dial [19] show exposure time in whole
seconds and can be used in certain circumstances

(see 'Time Exposure', p. 12) when so indicated by the exposure meter reading (See "In extremely dim light"
following).

Helpful hints for better exposure

Remember that your exposure meter measures all the light that reaches its cell and 'averages out' the brightness
or contrast range before giving a reading. With subjects of average contrast (e.g. scenes lit from the front, or at
an angle from the side, where there are no heavy shadows and dark and bright areas are fairly balanced) the
right amount of exposure is indicated automatically. However, to obtain the best results with subjects of widely
varying brightness range it is wise to take a few precautions.
View original page 10
Page 11 · Read text
www.butkus.us

* If your main subject is much lighter than the background (e.g. a portrait of an illuminated face against a
darkened doorway, arch or foliage) or, if it is much darker than the background (e.g. a person, boat or chalet set
against a seascape or mountain scene directly lit by the sun) move right up to your main subject until it fills the
viewfinder, and take a close-up reading with the exposure meter. Set the appropriate exposure combination
found from this reading on your camera and lens controls before returning to the original viewpoint to take the
picture.

* Take a substitute reading. Sometimes a close-up reading is not possible: if this is the case aim the exposure
meter at an alternative subject of average contrast under the same lighting (the back of one's hand is a good
example or ideally a sheet of neutral grey card). Again. use an appropriate combination from this reading on the
camera and lens controls. Alternatively, close the lens aperture by 1 to 2 stops (f/ #'s) as compared with a
straightforward meter reading of the former subject and open up the aperture by 1 to 2 stops to that indicated for
the latter subject - this too will prove more correct in most circumstances of this nature.

* Always be careful to aim the exposure meter exactly in the direction of the subject. Inadvertent tilting of the
camera, into the sky for example when taking landscape views, can falsify the reading and in this case lead to
under-exposure. It is best to aim the meter downwards slightly when taking landscapes and similar outdoor
pictures to avoid adverse influence on the reading from the bright light of the sky.


* Against the light, unless you're purposely striving after a silhouette effect, with your main subject very deep in
shade against full highlight detail, then you must open the lens aperture by at least one stop to that indicated by
an exposure meter reading.

* If using color slide film, avoid subjects with great brightness differences. Even a close-up reading of the
shadow areas often results in excessive exposure for the sunlit areas, which then appear too light and burnt out
when the slide is projected. A straightforward average brightness reading under conditions of uniform frontal or
side angled lighting yields slides of good color saturation which correspond most closely to the natural color
impression.

* In extremely dim lighting, the Exposure Meter Needle [15] may rest near the right- hand edge of the
transparent window. Should this occur, place your hand close in front of the Exposure Meter Window [23] and
watch the needle carefully. If the needle moves when you block the meter cell the exposure meter is able to
function in the existing light - remove your hand and determine exposure in the normal way. However, if no
needle movement occurs when you place your hand in front of the meter cell the existing light is insufficient
and the exposure meter cannot be used. In this event, either a time exposure or use of a flash gun is
recommended.
View original page 11
Page 12 · Read text
Setting the camera and lens controls

Shutter Speeds
Lift the Shutter Speed Dial [5] and turn it until the required speed aligns with the index dot in the center of the
dial (see p.9). Release the dial, making sure it drops fully home and is correctly lined up, and the speed will be
set. Shutter speeds may be selected before or after the Film Transport Lever [1] has been wound. However, the
following points must be observed to avoid mechanical damage: (a) Always lift the Shutter Speed Dial before
turning it to another speed and lower it fully before shooting; (b) Always turn the Shutter Speed Dial to one of
the marked speeds (30. 60, etc. that indicate fractions of a second, or B. that indicates a hand controlled time
exposure) - NEVER to a position between marked speeds; and finally (c) DO NOT turn the Shutter Speed Dial
the short distance between B and 500.

Long Exposure Times (Time Exposures)
Time exposures of one second duration or longer. enable you to take photographs in lighting conditions that
would be too poor for normal picture-taking, e.g. city streets at night or dimly lit interiors. To take a time
exposure with your Zenith set the Shutter Speed Dial [5] to B'. At this setting the Shutter will remain open for
as long as the Shutter Release Button [2] is pressed down. A sturdy tripod is really essential for this type of
work, though sometimes it is possible to find an alternative firm support (a street lamp or church pew, for
example). A cable release, preferably the locking type, is also recommended for extra steadiness. If such a
release is not available the shutter can be kept open for extended periods, via the 'T' lock, simply by pressing the
Release Button [2] down firmly and turning at the same time in an anti-clockwise direction, (as seen from top of
camera) until it stops.


The shutter will remain open for as long as desired and is closed on completion of exposure by pressing down
the Release Button once more and returning same, clockwise, to its normal position. To reduce the risk of
vibration it is recommended that a piece of black card (or even one's hat) be held in front of the lens as the
Release Button is pressed and turned -the lens is then uncovered for the required time (using a stopwatch or
slow count) and then recovered to end the exposure while the Release Button is returned to its normal position.
Obviously this procedure only applies to long exposures of several seconds.

Note: After using the 'T' or Time lock on the Release Button always make certain that the Release Button [2] is
turned fully clockwise and with the Zenith EM, that the Rewind Release Ring [3] is still turned fully clockwise
and the three dots are properly aligned. This will ensure correct operation of shutter and exposure counter in
subsequent pictures.
View original page 12
Page 13 · Read text
www.butkus.us


Your camera's Tripod Bush accepts a standard A," Whitworth screw. When fitting a tripod or other bush
mounted accessory (e.g. flashbar) care should be taken to see that this is screwed in just finger-tight only (this
applies to the carrying -case retaining-screw also). If there is a safety locking nut on the accessory, turn the
main screw up to three revolutions only, then hold it in position and lock into place with the safety nut.

Apertures
First the Helios 44M, the standard lens supplied with the Zenith EM camera; this is designed to be used in
Automatic or Manual mode. When the Auto/Manual Switch [36] is set to 'A', the aperture remains fully open
for viewing and focusing and closes down automatically to a pre-selected f/number value when the Shutter
Release Button [2] is pressed down. When the Auto/Manual Switch [36] is set to 'M', the aperture closes down
immediately to whatever f/number has been selected on the Aperture Ring [24]. Thereafter apertures are
changed manually by moving the Aperture Ring into any of its click stop' positions. Normally the lens would be
used in Automatic mode, in which case the lens opening required (f/2, f/2.8, f/4, etc.) is selected b turning
Aperture Ring [24] until that f/number (or position mid-way between marked lens openings, so indicated by the
Exposure Meter Aperture Indicator Dial [18]) aligns with the red Distance/ Aperture Index Mark [11 ] (see p.9).
As soon as pressure is taken off the Shutter Release Button, the aperture automatically returns to its wide-open
position. For Zenith E & B cameras the standard lenses are the belies 44 with pre-set aperture mechanism or the
lndustar 50 with a purely manual, non-click stopped mechanism.
View original page 13
Page 14 · Read text
Operation is as follows:
Helios 44 - Turn the Diaphragm setting ring (which has click-stops at full apertures) until the f/number required
is set against the red index dot on the front ring of the lens. Now turn the Pre-set Diaphragm Ring until its red
index dot is also aligned with the dot on the front ring and the lens is at full aperture for viewing and focusing.
After focusing turn the Pre-set Ring as far as it will go in a clockwise direction (as seen from top or back of
camera) - this closes the lens down to the pre-selected aperture in readiness for picture taking. With practice you
do not even have to look at the lens after initially setting the aperture required - with the camera held to the eye,
simply turn the Pre-set Ring fully anti-clockwise for wide aperture viewing and focusing, then turn it fully
clockwise after focusing to take your picture, assured that the aperture will be closed down to its predetermined
setting. You can even change apertures without taking the camera from your eye; first set the lens to full
aperture, then turn Diaphragm Setting Ring each click to the left selects one larger aperture, each click to the
right selects one smaller aperture. Remember of course to close down to the newly selected aperture with the
Pre-set Ring as previously described.


Industar 50 -Turn the Diaphragm Setting Ring at the front of the lens until its index dot aligns with the figure
3.5 on the Diaphragm Scale, viewing and focusing at eye level. You must now take the camera away from your
eye, since the aperture required for picture taking can only be set after focusing (it is usually too difficult to see
or focus clearly when the lens is closed down, since less light enters the viewfinder).


Choosing shutter speeds and lens openings

As seen from an earlier illustration, your exposure meter indicates various combinations of shutter speed and
aperture that will each produce good results under given conditions of lighting and film sensitivity. However,
you will often need to select a particular shutter speed or aperture to suit your subject so how do you choose ?
For example, the suggested shutter speed of 1/125th second, while fast enough to stop most normal subject
movement (people walking etc.), would not be enough to freeze the really fast action of subjects such as
children at play, sports events or racing cars- here a speed of 1 /250th or 1 /500th second would be best.
View original page 14
Page 15 · Read text
www.butkus.us


Again, if taking a landscape type picture, a small aperture of say f/11 or f/16 would be needed to obtain
maximum sharpness (see Depth of Field). Summarizing then; with moving subjects, choice of shutter speeds is
of most importance, to stop the motion use the fastest speed possible that lighting conditions will allow; where
you need your subject to be sharp over a long range from foreground to background, then choosing a small lens
aperture is more important. It's worth knowing too the relationship between shutter speed and aperture settings
(especially important if using exposure tables, as these generally detail changes of aperture according to lighting
conditions at a fixed shutter speed - most commonly our suggested 1/125th second). These settings are so
designed that altering from one figure to another on either scale, will double or halve the amount of light
reaching the film. An aperture of f/5.6 is wider than, and will transmit twice as much light as, an aperture of f/8.
and at the sometime is smaller than. and will transmit half as much light as, an aperture of f/4. Likewise a
shutter speed of 1/125th second is slower than, and will transmit twice as much light as, a speed of 1 /250th and
is at the same time faster than, and will transmit half the amount of light as, a speed of 1 /60th second. Thus if
you start from a given combination, say 1/125th at f/8, and you decide that a shutter speed of 1 /250th would be
better for the subject and you want to finish up with the same amount of exposure, you will need to compensate
for the fact that only half the necessary light is reaching the film by opening the aperture one division to f/5.6. If
you had decided that 1 /500th were the best speed you would need to open the aperture by two divisions (from
f/8 to f/4) since 1/500th is two divisions up from, or a quarter the speed of, 1/125th second. Remember though
that all combinations of shutter speed and aperture are a compromise. There is really no 'correct' exposure for
any subject. it all depends on the effect you want.
View original page 15
Page 16 · Read text
Viewing and focusing

First make sure your lens is securely attached to the camera by turning it clockwise until no further movement is
possible.
Look through the viewfinder eyepiece [30] and you can feel safe in the knowledge that there'll be no parallax
problems (no more cut-off heads in close-up portraits and the like) as you are viewing and focusing, by means
of a ground-glass screen, through the actual lens that takes the finished picture. There's a built-in safety margin
of course, in common with many other modern single lens reflex cameras, the viewfinder showing an overall
area some what smaller than the total film area. This ensures that everything you see in the viewfinder appears
in the finished picture despite the fact that slide mounts and masks in printing equipment actually cover part of
the film's image.


Focusing should always be carried out with the aperture wide open, unless of course you want to preview
'depth-of-field', so follow the previous instructions concerning aperture operation for the three standard lenses.
With the camera held to your eye turn the Focusing Ring [12] towards the right for close distances or towards
the left for far distances, until the subject is sharp and clear on the large ground-glass screen. The Zenith EM
camera has in addition in the center of its screen, two aids for speedier critical focusing, a microprism spot
which is composed of literally hundreds of tiny prisms that distort and accentuate an out-of-focus image.
Simply focus the lens until you obtain a single undistorted image at the center and you are at the point of
sharpest focus. This microprism works well for the majority of subjects and conditions but for subjects lacking
in contrast or color the fine ground-glass collar around the central spot is probably more helpful - it's quite
handy when using long telephoto and wide angle lenses too. (Aim your camera at this instruction book from
about 2 feet away and you'll see how these focusing aids work). You can of course also use the Distance Scale
[26] of your lens, which is calibrated in metros, to set the focus. Generally there's no need to check distance, it's
almost always easier to use the viewfinder; the only time it becomes necessary is when taking flash pictures (see
p. 26) or when 'depth -of-field' is important.

* The Red 'R' just to the right of the Distance Indicator [11] on the Helios 44M shows the correction required
for infra-red films. When using infra-red films, first focus in the normal manner, and note the indicated
distance. Then move the Focusing Ring [12] so that that distance is now aligned with the Red 'R'. Remember -
this is needed only when using infra-red films which are sensitive to light rays which focus at a slightly
different plane than ordinary light rays.

* A 16mm diameter prescription lens can be inserted into the Viewfinder Eyepiece [30] and held in place by
Retaining Ring [31]. Spectacle wearers may find this helpful for critical work.
View original page 16
Page 17 · Read text
www.butkus.us


On certain E/EM models the detachable Retaining Ring (31) has been replaced by an optional 'slip-on' holder. If
difficulty is experienced in obtaining either of these accessories we recommend you contact Visual Aids, East
Street, Bromley, Kent, BR1 1QX.


Depth-of-field

All photographic lenses, when focused on a given subject, will show some objects in front of and behind that
subject more or less sharply. This 'range' of extra sharpness is called 'depth-of-field' and varies with different
lenses; it's greatest with wide-angle lenses, and least with telephoto lenses. With any lens, you'll find your
depth-of-field is always greater (more things in focus) at small lens apertures such as f/11 or f/16 and lesser
(fewer things in focus) at larger lens apertures such as f/3.5, f/2.8 or f/2. Depth -of -field is also greater in cases
of more distant subjects than it is with close-up subjects and increases nearly twice as much beyond the subject.
your main point of focus, than it does in front of the subject (towards the camera).

If your picture is such that you want both nearby and distant objects to be in sharp focus then generally the
smallest possible aperture should be used. However, the aesthetic quality of a picture can often be improved by
having the principal subject in sharp focus while other objects in the scene are soft and out-of-focus. Here a
larger aperture is necessary to produce the 'differential focus' that de-emphasizes distracting background and/or
foreground detail and thus isolates, and concentrates your viewer's attention on, the principal subject.

You may want to 'preview' depth -of -field prior to exposure. This can be done in two ways, first by pressing the
Shutter Release Button [2] smoothly until it reaches the definite stopping point, just before firing the shutter.
This closes the aperture
down to its pre-set value and enables you to get an idea (despite the dimness) of what will or will not be sharp -
the final photograph will be at least as sharp if not sharper than the viewfinder image. The second method is to
turn the Auto/Manual Switch [36] to the M position which has the effect of manually closing the aperture down
to the pre-selected lens opening-this is probably easier to master than the first method but you must remember
to return the Switch after use to the 'A' position ready for normal operation. With the Hellos and industar 50
lenses, follow the previous instructions regarding aperture operation and
you'll see that even though they lack the automatic aperture closing feature, depth-of-field can still be previewed
prior to taking the picture.

Using the depth-of-field scale [25]

The scale consists of the aperture numbers repeated each side of the Distance Index [11 ] and shows, at any
given focus distance, the nearest limits and furthest limits of acceptable sharpness. Taking the Hellos 44M lens
as an example, if this is focused at 4 metros, the depth -of-field stretches from 3 meters to 6 meters at an

aperture of f/5.6 while at an aperture of f/16 objects from 2 meters to infinity (           ) will be acceptably
sharp in the final picture. Note: For the sake of reading clarity some figures are omitted from the scale;
however, it's a simple matter to 'fill in' those missing if you remember they follow the aperture sequence
View original page 17
Page 18 · Read text
exactly, with those proceeding left from the index [11] showing the near limits of sharpness and those
proceeding right showing the far limits. Now for some practical examples

(a) You're taking a landscape view where you want everything needle sharp from the foreground all the way to
the background. Easy you say, close the aperture right down to f/1 6 - the snag is that the sky has clouded over
and the light is too poor to use
this aperture at a reasonable shutter speed. The remedy obtain the maximum depth-of-field required with the
minimum of 'stopping-down' (decreasing aperture size). Focus through the viewfinder on the closest object and
note the distance (say 3m) registered against the Index [11], then focus on the most distant part of your subject
and note this distance (say 10m) also. Now look at your lens and move the Focusing Ring [12] until both
distances appear just between an identical pair of aperture numbers (f/8. in above example), on the Depth -of-
Field scale [25]. Set the lens to the aperture thus found, use your exposure meter to determine the correct shutter
speed for an exposure at this aperture, then set this speed on the Shutter Speed Dial [5]. Everything between the
two distances (3 to 10 metros) shown by the matching aperture numbers (f/8) on the Depth-of-Field scale [25]
will appear sharp in the final photograph.

(b) If you need absolute maximum depth-of-field at any given aperture focus on the 'hyperfocal distance'. This

is found by aligning the infinity mark (           ) against the Distance Index [11]. The distance then found to be
aligning with the near limit of depth-of-field for the aperture required will be the 'hyperfocal distance'. If the
lens is now refocused so that this distance aligns with the Index [11] everything will be sharp from half the f
distance to infinity.

(c) To obtain a 'differential focus effect, determine the closest and most distant parts of your subject as
described in example (a) above, then refocus the lens so that the distance of the important part of your subject
aligns with, or is near to, either the near or far limits (according to whether you want foreground or background
out-of-focus) on the Depth-of-Field scale [25] when using a largish aperture, say f/4. Set lens and camera
controls as necessary and you'll be assured of obtaining a picture of high subject impact.


Here we can see that the 10 meter focal setting is in fact the hyperfocal distance for an aperture of f/8 which
gives us the maximum depth-of-field possible from that lens, extending from half that distance (5 metros) to
infinity.
View original page 18
Page 19 · Read text
www.butkus.us

                                    Taking the picture

Poor first-time results are largely attributable to camera shake, so it's very important to ho/d the camera steady
using both hands. You will probably find it most convenient to grip the camera firmly with your right hand and
fire the Shutter Release Button with your right fore-finger This way your left hand can easily turn the Focusing
Ring and give extra support at the same time. Always press the Shutter Release Button downwards smoothly
and firmly - NEVER jab at it (On the Zenith EM make sure you do not accidentally restrict movement of the
Shutter Speed Dial while depressing the Release Button)


For each Successive Exposure . . . just move the Transport Lever until fully wound and you're ready for your
next shot. If lighting conditions have not changed it is only necessary to frame the subject, focus and fire the
shutter. If taking a photograph in a slightly different direction or if the sun clouds over, take a further meter
reading or consult film exposure tables and make any adjustments to camera and lens controls that might
become necessary before firing the shutter.


Note: the extra support the left hand gives without obstructing Meter Window [23] Note also 'correct' finger
position f or smooth release of shutter.


NOTE: Keep an eye on the Frame Counter [4]. When this registers a figure indicating that the entire length of
film has been exposed, or if the Film Transport Lever cannot be turned, it is time to rewind the film into its
cassette ready for processing. DO NOT try to get an extra exposure if the Transport Lever is wound forcibly the
film may be damaged and disengage from the cassette making it impossible to rewind.
View original page 19Page 20 · Read text
Removing exposed film

(1 ) Before attempting to rewind a film put the cap. supplied with your camera, back on the lens. This is simply
a precautionary measure to prevent any portion of the last frame being exposed to light, since the Rewind
Release has the effect of firing the shutter even if, as sometimes happens, the Transport Lever is only partly
wound when the end of the film has been reached.

(2) Releasing the film for rewinding. Zenith E and B models have a Rewind Button (see below) which must be
pressed and held down firmly during the entire rewinding operation. The Zenith EM has a locking device which
permits rewinding without constant application of pressure. To engage it first press the Shutter Release Button
[2] then turn the Rewind Release Ring [3] folly anti-clockwise. Make sure the Ring is turned until no further
movement is possible and you'll then be able to rewind the whole film quite freely.

(3) Rewinding. The Rewind Knob [22] should be gripped firmly and rotated in a clockwise direction (as
indicated by the engraved arrow). While resistance is felt you are rewinding the film back into the cassette (the
knob will turn freely without resistance when the film has been fully rewound).


Zenith EM rewind release


* On Zenith B models the Rewind Knob is ready to hand. On Zenith EM and E models it is spring-loaded and
recessed within the exposure meter controls and must there fore be raised first into rewind position by gently
pressing against the top of the knob and turning it anti-clockwise at the same time.

Remember the Rewind Release Button on Zenith E and B models must be held down firmly until the film
has been fully rewound.
View original page 20
Page 21 · Read text
www.butkus.us


Zenith E & B rewind release

(4) Having rewound the film, remove the camera from its case, raise the Back Catch [20] and swing the Camera
Back [38] open. Pull the Rewind Knob [22] upwards fully and take the cassette of exposed film out of its
Chamber [27]. Your film is now ready for processing.

(5) The camera can now be reloaded (after observing precautions on p. 6). If you don't want to reload till a later
date return the Rewind Knob to its 'closed' position.


Taking flash pictures

When the light is poor some form of auxiliary lighting will be required. This is why your Zenith has a built-in
synchronizer which enables you to use either electronic or bulb/cube flashguns. There are pros and cons for
each type - if you think you will only be taking occasional flash pictures (at party times etc) then a bulb or cube
gun is best. since its advantages of low initial cost, compactness and lightness in weight may well outweigh the
nuisance factor and high running costs of having to use a new bulb for each picture (or a new cube for each four
pictures).
View original page 21
From the M. Butkus Camera Manual Library. Original publisher and archive notices are retained.
Check the model and edition against your equipment.
PDF verified 2026-10-10.