All 4 available source parts are included below.
Part 1
THE NEEDLEBAR Archive at ISMACS International
Manuals Section
R. M. WANZER
SEWING MACHINE
MANUFACTURERS
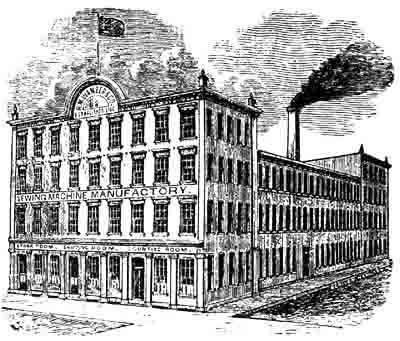
HAMILTON
PROVINCE OF ONTARIO,
DOMINION OF CANADA
_________
ADVERTISER STEAM PRINTING OFFICE, LONDON
1872
PART ONE
MESSRS. R. M. WANZER & CO. have recently brought out and perfected three distinct Sewing Machines, the Wanzer D, Wanzer E and Wanzer F.
These Machines have a range of work from the most delicate muslin to the thickest and heaviest cloths and leather. It has been the object of the manufacturers to place before the public Machines simple in construction, easy to run, noiseless, durable, easily managed and easily kept in order; to have a large steel shuttle holding more thread than those generally in use, and an appliance for spooling the bobbin without running the Machine; to be able to lengthen or shorten the stitch without interfering with the work or stopping the Machine; to be able to sew backward as well as forward while the Machine is in motion; to be able to sew light goods as well as heavy; to be able to sew all kinds of goods with all kinds of threads; to enable the operator to fasten the threads at the beginning and ending of seams; also, to strengthen any part where it may be desired, by sewing backwards and forwards over it without stopping the Machine; to have the stitches when sewing backwards the same as when sewing forwards. All this they have accomplished in the most satisfactory manner.
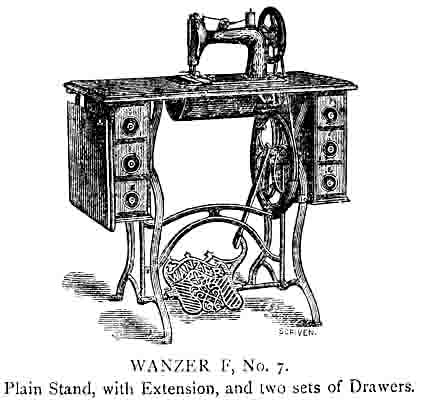
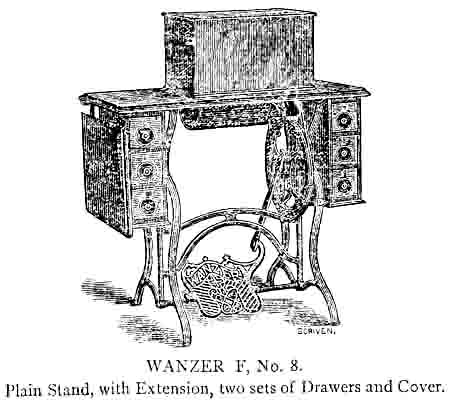
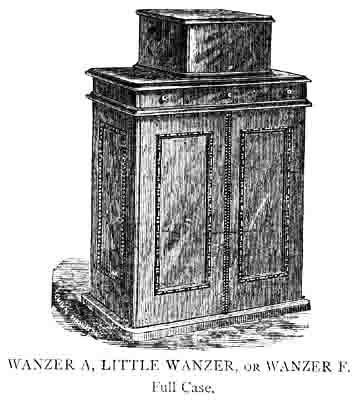
They have adapted the reverse motion solely to the Wanzer F Machine, which is the only Machine in the market that has this great advantage. They now manufacture five distinct Machines, from which the public can select one to do the work for which it may be required.
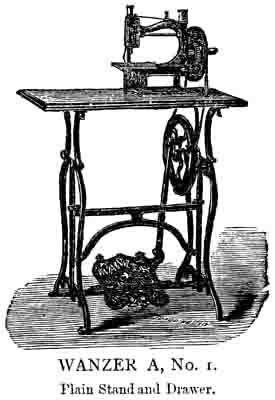
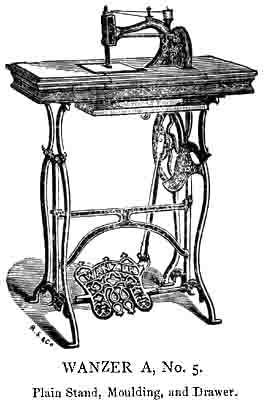
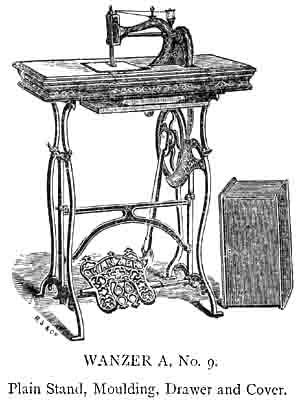
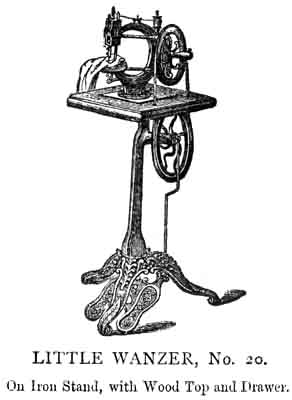
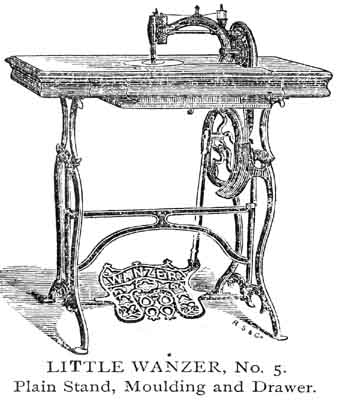
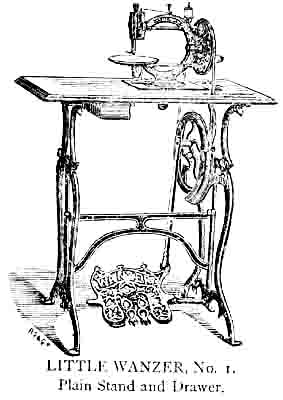
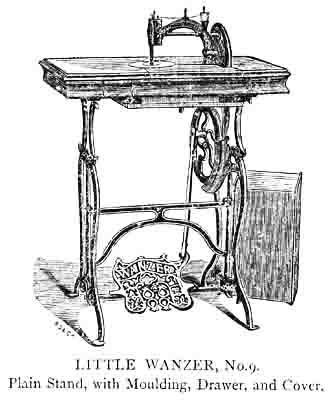
The Little Wanzer and Wanzer A can be worked by either hand or foot. The Wanzer D, E and F are purely Treadle Machines. Each of the above Machines will be noticed in its proper place in the catalogue.
Messrs. Wanzer & Co. have recently added to their already extensive establishment a large FOUNDRY for their castings, which enables them to turn out their Machines in the most perfect manner. Their instruction books are printed in 32 different languages. Their Machines are now used in all parts of the civilized globe. They have been introduced into the schools of Austria. The Board of National Education for Ireland has pronounced the "Wanzer" the best Sewing Machines, and has selected them to be used in their 7,000 schools throughout Ireland. The Church Education Society for Ireland has also adopted the Wanzer Machines to be used in their Educational Establishments and Schools.
The honors and testimonials the Wanzer Machines have received are too numerous to mention. A few of them will be found on the following pages.
The Wanzer Machines
RECEIVED THE FOLLOWING
UNPRECEDENTED DISTINCTIONS
AT THE VIENNA EXHIBITION, 1873:
TWO MEDALS OF MERIT
a distinction not obtained by any other Sewing Machines
at the Exhibition
One Grand Silver Medal,
for the best Family and Manufacturing Sewing Machines.
____________
His Majesty the Emperor of Austria has conferred upon
MR. R. M. WANZER
THE IRON CROSS
And Knighted him with the Order of
FRANCIS JOSEPH THE FIRST,
for his valuable services in the Sewing Machine business, which were the highest honors conferred at the Exhibition.
____________
MR. WANZER
is the only
SEWING MACHINE MANUFACTURER
IN
GREAT BRITAIN AND ITS COLONIES
That received these honors.
R. M. WANZER & CO.
SEWING MACHINE
MANUFACTURERS,
Were awarded the Highest Premiums over all competitors
|
At
|
the
|
London |
Provincial
|
Fair | ..................................................................................... |
1861
|
|
"
|
"
|
Toronto |
"
|
"
|
..................................................................................... |
1862
|
|
"
|
"
|
Montreal |
"
|
"
|
..................................................................................... |
1863
|
|
"
|
"
|
Kingston |
"
|
"
|
...................................................................................... |
1863
|
|
"
|
"
|
Hamilton |
"
|
"
|
...................................................................................... |
1864
|
|
"
|
"
|
London |
"
|
"
|
................................................(extra Prize)................. |
1865
|
|
"
|
"
|
Toronto |
"
|
"
|
.................................................(extra Prize)................ |
1866
|
|
"
|
"
|
Kingston |
"
|
"
|
.............................................(not exhibited)................ |
1867
|
|
"
|
"
|
Hamilton |
"
|
"
|
.............................................(4 first Prizes)................. |
1868
|
|
"
|
"
|
London |
"
|
"
|
.............................................(not exhibited)................ |
1869
|
|
"
|
"
|
Montreal |
"
|
"
|
.............................................(4 first Prizes)................. |
1870
|
|
"
|
"
|
Montreal |
"
|
"
|
................................(Diploma for best collection)..... |
1870
|
|
"
|
"
|
Western | Fair, London | ............1 first & 1 second Prize, also a Diploma..... |
1870
|
_______________
EUROPEAN EXHIBITION
|
At Vienna, Capital of Austria, Royal Diploma, 1864. At the National Exhibition of the British Isles, held in Dublin, First Prize Medal, 1866. At the British Exhibition, held at Dudley and York, two First Prize Medals, 1867. At the great World's Exhibition, held in Paris, France, we were awarded the First and Highest Prize Medal for Family Sewing Machines, eighty-seven competitors, 1867. At Manchester and Cheltenham, England, two First Prize Medals, 1868. |
________________
GOLD MEDAL, SYDNEY (AUST.), 1871.
S. AMERICA, GOLD MEDAL, 1872.
MOSCOW (RUSSIA), GOLD METAL, '72.
VIENNA, THREE MEDALS, 1873.
Part Two | Part Three | Part Four
|
Part 2
THE NEEDLEBAR Archive at ISMACS International
Manuals Section
Part Two
INSTRUCTIONS FOR USING
THE WANZER D, E AND F,
SEWING MACHINES.
__________
SETTING THE NEEDLE
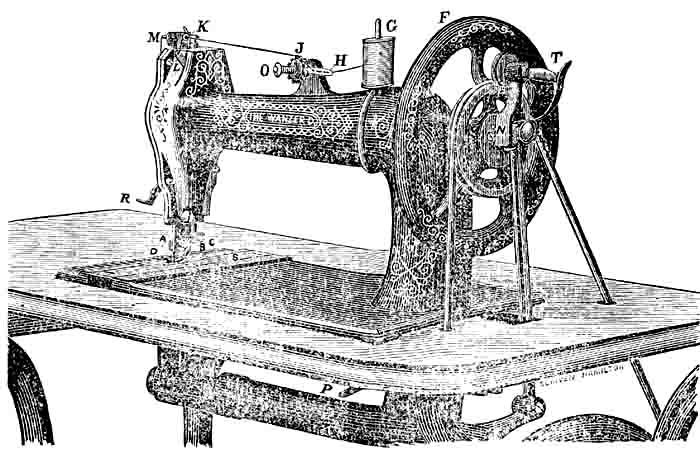
Set the needle with its head or shank in the needle yoke A, with its eye ranging from left to right, with long groove to the left; secure it by screwing up the centre screw B, at the lower end of needle bar E. Set the needle so that in its descent it will pass through the centre of the needle hole and pass as close as possible to the left of the shuttle without touching it, and its eye about 3/16th of an inch below the point of shuttle, so that shuttle will enter the loop of thread formed at the right side of the needle on its rise. If the thread is improperly twisted it may throw the loop one side instead of square into the shuttle race. In that case the needle should be slightly turned in an opposite direction, to counteract this tendency to throw the loop away from its proper position. Sometimes the shuttle will miss the loop because the needle sets too far from the shuttle, and at other times the shuttle may strike the needle because the needle sets into the shuttle race. To adjust the needle nearer to or father from the shuttle, turn the two frout screws, C and D, on the end of needle bar E, in or out as the needle requires to be nearer to or father from the shuttle. Care should be taken to turn both screws the same, otherwise the needle will not be in a straight line with the needle bar.
Turn the hand wheel P so that the mark on front edge of needle bar E will be even with top of arm; then the eye of needle, if properly set, should be on a level with plate.
THREADING THE NEEDLE
Place the spool on spool-pin or wire G, on top of the arm of machine, so that it will turn freely. Pass the thread backwards and forwards through the five holes in thread guide H, passing it through the first hole of thread guide from the far side, so that the thread, in passing through the fifth hole, will be drawn to the front. Pass the thread over the top and round the tension wheel J, letting the thread lie in the V shaped groove formed by the interlocked teeth of the tension wheel, passing it once around the wheel. If the thread is fine, or should slip without turning the wheel, pass it twice around the wheel. Pass the thread thence through wire eyelet K, from right to left, down through the hole in the end of the take-up lever L, from right to left; thence up through the tube M, on top of needle bar E, and down through eye of needle, from left to right, letting the thread rest in slot in needle clamp, leaving three inches of thread.
THREADING THE SHUTTLE
In working, the bobbin T revolves inside the shuttle. The operator must be careful to place bobbin properly inside shuttle. On the inside of shuttle, at the front or forward end, is a centre, acted upon by a spring; into this one point of the bobbin should be placed, with the thread drawing off from the lower side, then press the other point of bobbin in at heel of shuttle, pushing it down gently until a slight snap is heard, or until it enters the small hole or bearing. The thread must be then passed up through the slot farthest from edge of the shuttle, and down through the upper slot, thence through the hole nearest back or heel end of the shuttle, then in through hole nearest point of shuttle and lastly out through short slot under the spring. Should a greater tension than this would give be required, thread through five instead of three holes, being careful always to pass the thread out of the short slot last, leaving an end of thread three inches long.
SPOOLING THE LOWER THREAD
Place the spooler attachment N on the top of outside connection. Turn the balance wheel of machine so that the small wheel of spooler will be even with the belt groove in balance wheel F. Pass the belt from groove in balance wheel F to groove on the pulley wheel. Place one end of the bobbin in spooler spindle N, the other end in the point in the centre of spring, and having attached the thread, work the machine the same as when sewing. Oil the spooler spindle and point of bobbin, working in point of spring, before using. Care should be taken in winding bobbin to lay the thread on as evenly and tightly as possible.
REGULATING THE TENSION
Care must be taken in regulating the tension of lower and upper threads. Produce tension enough on the upper thread to draw the lower loop or lock into the fabric by turning the nut O on tension wire. If the tension be too tight the thread will break or the fabric will be gathered; if not sufficiently tight the loop or lock will not be drawn up into the fabric, but will lie in a succession of loops on the under side of fabric.
To increase the tension turn the nut towards the right. To lessen the tension, turn the nut towards the left.
TO REGULATE THE STITCH
The machine feeds the fabric through itself, the operator only guides it. To make a long stitch, press down the lever P, at the right hand side underneath machine, To make a short stitch raise lever up.
TO SEW
Be seated before the machine. Withdraw the back slide which rests over shuttle, turn balance wheel until the points on shuttle carrier are visible, place the shuttle between the two points, with point of shuttle to the front. Close the slide. Place one or both feet upon the sandals; start the machine by turning the balance wheel F towards you with the hand - never turn it backwards. Raise the needle bar E by turning the wheel. Raise the presser foot by lifting the lever R attached to the presser bar in front of the machine, place the fabric beneath it. Let the presser foot drop upon the fabric to be sewed.
| GENERAL INSTRUCTIONS |
1. Before attempting to sew, learners
should make themselves perfectly familiar with the foot motion. In practising
raise the presser foot by lever R that the teeth of feed will
not scratch the same. Take out the shuttle, unthread the needle, place
both feet upon the sandals, start the machine by turning the wheel towards
you with the right hand, adapting the feet to the motion. Learners should
practice turning the machine, starting and stopping the same until a
perfect forward motion is obtained; a reverse or backward motion will
entangle or break the thread. |
2. The upper thread should pass through the eye
of the needle from left to right, the ends of the same being about three
inches in length. The shuttle is then to be placed in the shuttle carrier
by removing back or sliding place S, the point of the shuttle
towards the operator. The same length of thread to be left as from the
needle. Make the revolution of the wheel, so that the needle will descend
and the threads interlock. By then gently drawing on the upper thread
you will be enabled to bring the under one though the needle hole in
the throat place, so that both will be together between plate and presser
foot. |
3. When a seam is completed draw the upper thread
from spool with the left hand; detach the same close to the fabric;
let it extend through the eye of the needle (about three inches) a proper
length for starting; raise the presser foot, take out the work, and
detach the under thread, leaving the same through needle hole in cloth
plate. Attention to this suggestion will prevent springing and breaking
of needles, especially the finer sizes. |
4. The feed carries the fabric along, and the operator
as a general ruse should neither assist it with the right hand nor retard
it with the left, but allow it to pass at will, holding and guiding
it steadily. |
5. A little care in arranging the tension will
produce a perfect stitch on both sides. Heavy fabrics usually require
more tension than others. Should loops occur on the under side, first
ascertain whether you have threaded the machine properly, then gradually
increase the tension by turning the nut O towards the right until
the loops are drawn up and the stitch assumes the same appearance on
both sides. |
6. Missed stitches are occasioned either by the
needle being set too high or too low, or so as to descend too far to
the left of the needle hole. |
7. Should there be any difficulty in driving the
needle through thick fabrics (if the needle is not blunted), it will
be caused by the belt having stretched and slipped on the balance wheel.
This may be remedied by cutting a piece off the belt and making a new
hole where the ends are clasped together. |
8. With a machine it is not necessary to use as
coarse cottons or silks as for hand sewing, two threads being used instead
of one. As a general rule the size of thread for the material to be
sewed should first be determined, then care should be taken to make
the proper adaptation of needles. |
The following sized needles are suitable for the following sized threads, viz.:
| For | No. |
100
|
to |
100
|
cotton | or |
000
|
twist | ................................................ | No. |
00
|
needle
|
|
"
|
"
|
80
|
to |
90
|
"
|
00
|
"
|
................................................ |
0
|
"
|
||
|
"
|
"
|
60
|
to |
70
|
"
|
0 & A
|
"
|
................................................ |
1
|
"
|
||
|
"
|
"
|
40
|
to |
60
|
"
|
B
|
"
|
................................................ |
2
|
"
|
||
|
"
|
"
|
20
|
to |
36
|
"
|
C
|
"
|
................................................ |
3
|
"
|
||
|
"
|
"
|
10
|
to |
20
|
"
|
D & E
|
"
|
................................................ |
4
|
"
|
||
|
Coarse cotton, linen or twist No. 4.................................................................
|
5
|
"
|
||||||||||
We have needles expressly adapted for our sewing machines, and after a long practice and thorough test in our office, we find that they are the only needles to give satisfaction.
THE MACHINE SHOULD BE KEPT CLEAN
Care should be taken that the running parts of the machine do not get dry for want of oil. Only a few drops of oil are required at a time, and these should be supplied more frequently to those parts having the greatest motions, such as the needle bar, the main shaft, shuttle driver, slide, &c. None but the best oils should be used; pure sperm oil is excellent for sewing machines. Should the machine become gummy and run heavy this will be from the use of impure oil or from want of proper cleaning. Spirits of turpentine or kerosene will be useful in cleaning away gummy material.
KEEP SHUTTLE DRIVER WELL OILED.
ADDITIONAL INSTRUCTIONS
FOR
WANZER E MACHINE.
To lengthen the stitch of the E machine loosen the thumb screw on the left of the feed and slide it from you. To shorten the stitch slide the thumb screw towards you, being particular in each case to fasten the screw when the length of stitch required is obtained.
____________
ADDITIONAL INSTRUCTIONS
FOR
WANZER F MACHINE.
Regulate same as Wanzer D, with the exception of the Short Lever. To lengthen the stitch, press the Short Lever down, then press Long Lever down as far as it will go. If the stitch should be too long, raise the Long Lever until you get the length required, and bring the Short Lever up to meet it.
To reverse the Feed, in order to sew towards the operator, press the Long Lever up as far as it will go.
 |
 |
 |
 |
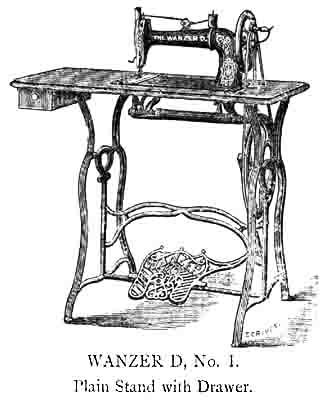
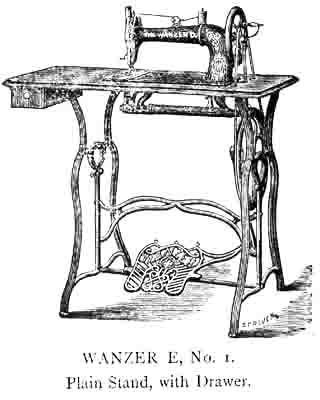
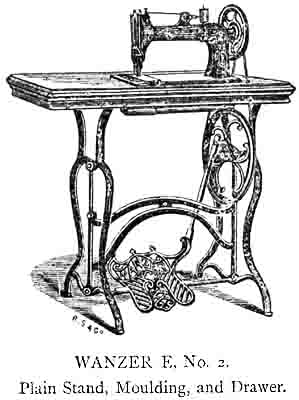
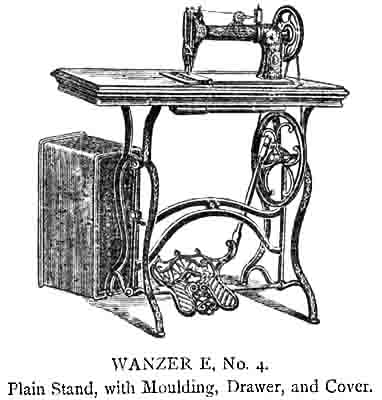
WANZER E,
WITH WHEEL FEED FOR LEATHER WORK & GENERAL MANUFACTURING.
Instructions for using this Machine are same as given for WANZER D (page 7), with the addition marked E for this Machine.
 |
 |
 |
|
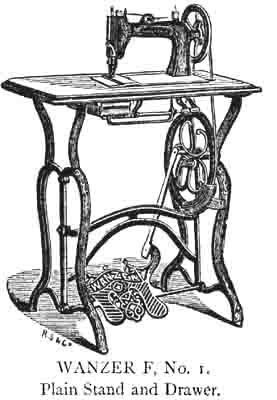
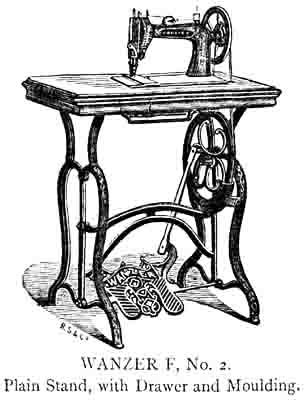
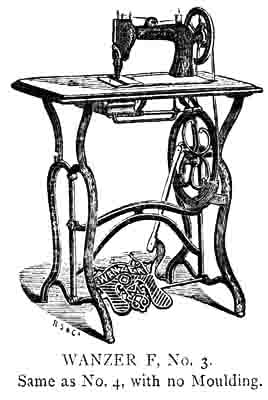
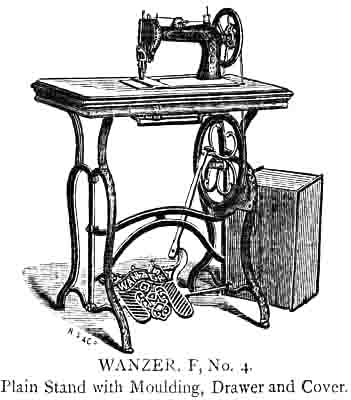
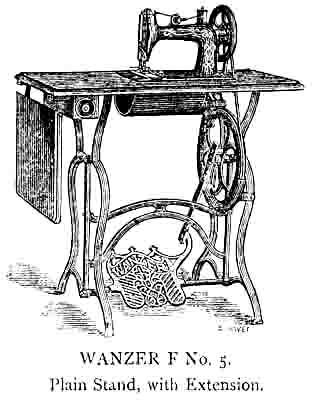
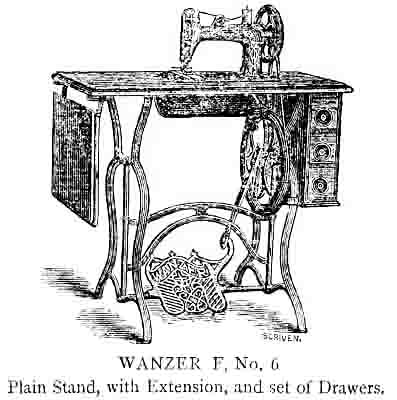
WANZER 'F'
FOR
FAMILY USE
AND LIGHT
MANUFACTURING WORK
WITH
REVERSIBLE FEED,
ENABLING THE OPERATOR TO
FASTEN THE THREADS
At the beginning and ending of seams; also,
to strengthen any parts, liable to extra strain, by
S E W I N G
BACKWARDS AND FORWARDS
OVER THEM
WITHOUT STOPPING THE MACHINE
INSTRUCTIONS
For using this Machine are same as given for WANZER D (page 7),
with the addition marked F for this Machine.
 |
 |
 |
 |
 |
 |
 |
 |
Part One | Part Three | Part Four
|
Part 3
THE NEEDLEBAR Archive at ISMACS International
Manuals Section
Part Three
INSTRUCTIONS FOR USING
THE WANZER A
FAMILY SEWING MACHINE,
BY HAND OR FOOT.
_____________
SETTING THE NEEDLE
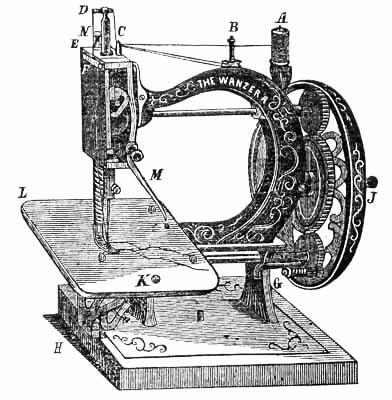
Set the Needle with its head or shank in the Needle Bar D, with its Eye ranging from left to right, with long groove to the left; secure it by the screw in lower end of Needle Bar; set the Needle so that in its descent it will pass through the centre of the Needle Hole, and pass as close as possible to the left of the point of the Shuttle without touching it. Turn the Balance Wheel from you so that the mark on front of Needle Bar D will be even with top of arm, then the eye of Needle, if properly set, should be on a level with the Cloth Plate K.
THREADING THE NEEDLE
The operator must observe particularly in what manner the Needle is threaded. The following is a description of the proper method: - Place the Spool upon the Spindle A, then pass it through the Eyelet C, from left to right, then back around Tension Post B, between Tension Plates, then through the Eyelet C, and up through tube in the Needle Bar, then down between the small flat spring and head of Machine, and through Needle from left to right, leaving three inches of thread.
SPOOLING THE LOWER THREAD
Wind the Lower Thread upon the metallic Bobbin by placing it upon the Spooler, and work the Machine as when sewing. While spooling raise the cloth presser, the Spooler must be oiled, as well as the back point of the Little Shuttle Spool, or Bobbin, when it is being filled; and when it is in the Shuttle both points must be oiled; the Spooler will be found beside the lower small gear; place the Bobbin into the Spooler by springing the spindle with the small gear to the right until sufficient space is opened to admit the Bobbin. The cogs of both gears working together by turning the balance wheel from you the same as when sewing. In winding the Bobbins, or small Shuttle Spools, care should be taken to lay the thread on even and tight.
THREADING THE SHUTTLE
In working, the Shuttle Bobbin revolves inside of Shuttle; the operator must therefore be careful to place the Bobbin in the Shuttle properly. On the inside of Shuttle, at the front or forward end, is a "centre", acted upon by a spring, into this one point of the Bobbin should be placed, with the thread drawing off from the lower side, then press the other point in notch at heel of Shuttle, pushing it down gently until a little snap is heard, or until it enters the small hole or bearing. The thread must then be passed out through the one hole under the wire inside of Shuttle, then in through hole nearest point of Shuttle. Should a greater tension be required, bread through five instead of three holes, being careful always to pass the thread out through the lower hole last, leaving two inches of thread.
Place the Shuttle into the Shuttle Carrier, by springing towards you the Spring Clamp, or holder, then turning it to the right until sufficient space is open to admit it; then spring it back till a click is heard, which secures the Shuttle in its place.
THE TENSION
Care must be taken in regulating the Tension of the lower and upper threads; produce tension enough upon the upper thread to draw the lower loop or lock into the fabric, by turning the Nut on the Tension Post B. If turned too much the thread will break or the seam be puckered; if not sufficient, the loop or lock will not be drawn up into the fabric, but will lie in a succession of loops on the other side. To increase the Tension, turn the Nut towards you; to lessen it, turn the Nut from you. The tension of the under thread is regulated by passing it through a greater or less number of holes in the Shuttle; by the former it is increased, by the latter decreased.
TO REGULATE THE STITCH
The Machine feeds the cloth through itself, the operator guides it; to make a long stitch, draw the short lever under the right hand corner of Cloth Plate towards you; to make a short stitch press it from you.
TO SEW BY HAND
Place the Machine upon a common table or stand. Be seated before the Machine, rise the cloth presser and place the cloth beneath it. Let the cloth presser drop upon the goods to be sewed. Start the Machine by turning the Balance Wheel from you with the hand; never turn it backwards.
TO SEW WITH THE STAND
Be seated before the Machine, place one or both feet upon the Sandals; start the Machine by raising or depressing the toes; or turn the Balance Wheel from you with the hand, to assist; never turn backwards; raise the Needle Bar by turning the wheel, also raise the Cloth Presser and place the cloth beneath it. Let the Cloth Presser drop upon the goods to be sewed.
GENERAL INSTRUCTIONS
With a machine it is not necessary to use as coarse cottons or silk as for hand sewing; two threads being used instead of one. As a general rule, the size of the thread should be taken to make the proper adaptation of needles. Attention to the following Tables will save much trouble and aid in the production of neat work: -
|
Sizes of NEEDLES
|
Cotton Thread
|
KINDS OF WORK
|
|
00 0 1 |
200 to 150 100 to 80 70 to 60 |
Finest Muslins, Linens, Handkerchief, Baby Linen, Shirt
Fronts and Collars.
|
|
2
|
40 to 50
|
Dressmaking, Quilting, &c.
|
|
3
|
16 to 36
|
Woollen Goods
|
|
Sizes of NEEDLES
|
Linen Thread
|
KINDS OF WORK
|
|
2
|
70 to 100
|
Fine Woollen Goods
|
|
3
|
40 to 70
|
Medium Woollen Goods
|
|
4
|
24 to 40
|
Heavy Woollen Goods
|
|
Sizes of NEEDLES
|
Silk Thread
|
KINDS OF WORK
|
|
0 to 1
|
Finest Sizes
|
Silk and Satin
|
|
1 to 3
|
Medium
|
Silk and Mantle Cloths
|
Part One | Part Two | Part Four
|
Part 4
THE NEEDLEBAR Archive at ISMACS International
Manuals Section
Part Four
TUCKING GUIDE FOR LITTLE WANZER
Given with the Machine.
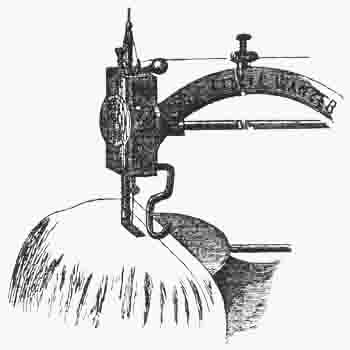
This attachment is useful in Marking Tucks, &c., where the plain iron guide cannot be used in consequence of the width of the work. Should the end of wire be either too large or too small to fit accurately, it can be adjusted to the proper size by either slightly opening or compressing the end of the wire which is split for this purpose. This attachment will also quilt.
The Wanzer A attachment is fastened by the thumb screw to side of head next the operator, and acts as above.
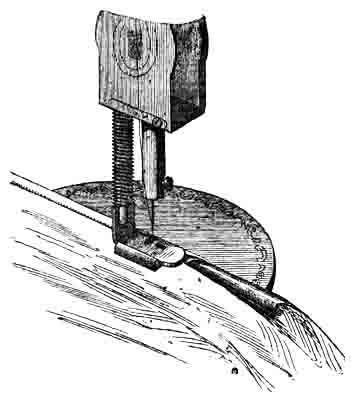
PATENT HEMMER
Given with the Machine.
The Patent Hemmer is useful for hemming Pocket-handkerchiefs, Muslins, &c.
To use the Patent Hemmer, slide the Hemmer on to the Presser foot, having raised the latter for that purpose; to make a narrow hem roll the edge of the cloth near one corner slightly with the left hand, hold it tightly with both hands, guide it into the curl of the Hemmer and there draw it backwards and forwards once, with the right hand, gently drawing the cloth into the mouth of the Hemmer, then turn the Presser foot by the tightly held cloth, when down the sewing may be commenced; care should be taken that the cloth always fills the furl of the Hemmer.
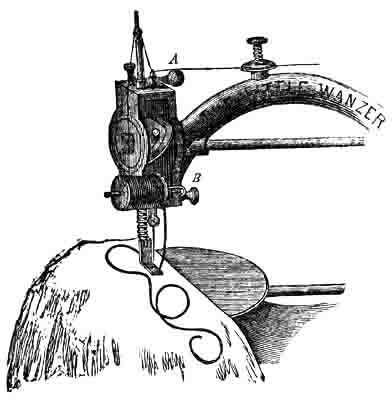
BRAIDING WIRE ATTACHMENT
Given with the Machine.
To braid, secure wire B to Machine as in drawing with Thumbscrew, given with Machine - place reel of braid (which should be proper size to fit easily in the hole in foot) on wire; the braid should then be passed through the small hole in Presser foot and under the Needle; then lower Presser foot and proceed to sew; the material can be turned in any direction at pleasure of operator, and braid will be securely stitched down.
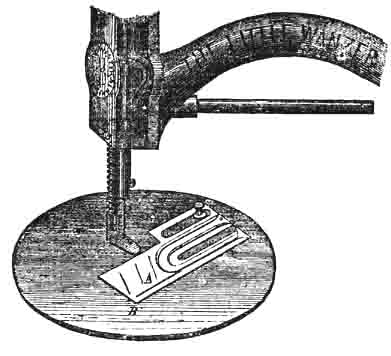
THE SELF-SEWER
Given with the machine.
Secure the Self-Sewer to the plate so that it is close to the presser foot as in drawing. When adjusted to distance required, raise the presser foot; the fabric should then be placed between the two plates A and B and the presser foot lowered and sewing commenced.
The Self-Sewer is very useful for Sewing pleats; it holds the material firmly so that the seam is quite straight.
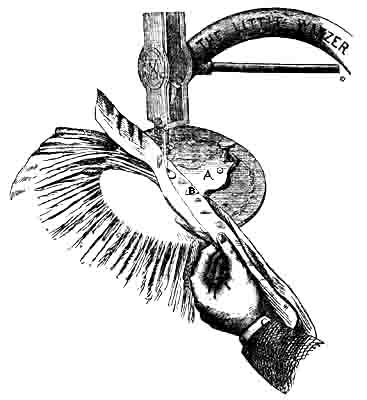
THE FRILLER
Fasten the Friller to the Cloth plate with the Thumb screw, as in above drawing, so that the plate of the Friller is upon the feeder close up to the hole through which the needle passes, then slide the intended frill between the friller and the cloth plate, bring the material on to which the frill is to be sewn between the two plates A and B, lengthen the stitches considerably and commence to sew, being careful to hold both materials towards the right, close against B.
As the feeder does not touch the upper material draw it onwards a little at first, till a few stitches have been made and the lower material draws the upper one with it.
To frill fuller hold the upper material slightly back and the lower will frill;; up quicker.
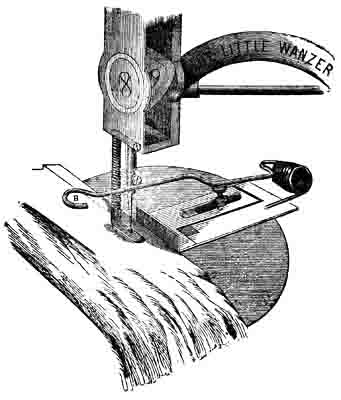
THE TUCKMARKER
Fasten the Tuckmarker and the Ruler to the cloth plate with the thumbscrew. The distance of the ruler from the needle to be regulated according to the width of the tuck required, while the distance between the needle and the spot marked by the spring B, indicates the distance of the next tuck.
Then place the spring B immediately under the screw at bottom of needle bar, as indicated in the drawing, and begin to sew; a tuck is then sewn, and the distance of the next tuck indicated by the striking of the spring B. In order to sew several tucks the preceding must always be turned under, so that all the tucks may be on the same side of the material.
 |
 |
 |
 |
The demand for this world-wide favorite machine is greatly increasing, which is
the best guarantee of its usefulness and adaptation to the wants of the public.
NEARLY 200,000 OF THESE MACHINES
- ARE -
NOW IN USE!
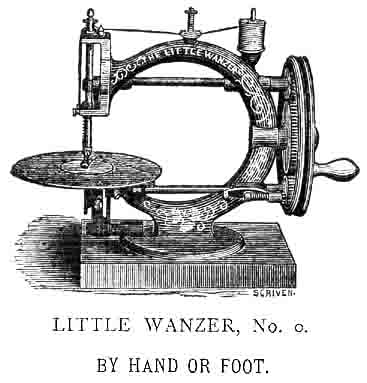
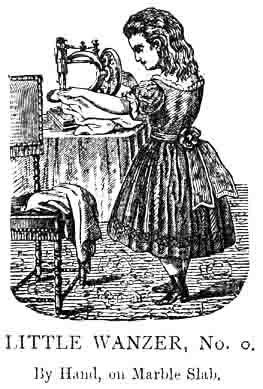
LITTLE WANZER, No. 0
BY HAND OR FOOT.
Instructions for using this Machine the same as for WANZER A, on page 20.
 |
 |
 |
 |
 |
|