All 4 available source parts are included below.
Part 1
THE NEEDLEBAR Archive at ISMACS International
Online Manuals Section
Manual supplied courtesy of Claire Sherwell
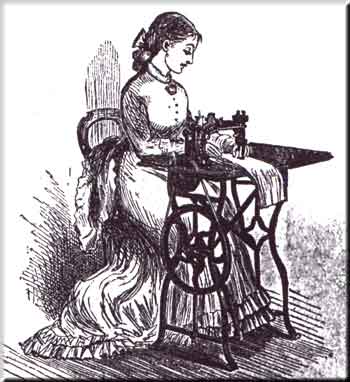
.
INSTRUCTIONS FOR USING
WHEELER & WILSON'S
No. 8
SEWING MACHINE
(Treadle or Hand)
.
NOTICE
These directions should be carefully studied and followed by persons learning to operate the machine.
Allow no person interested in the sale of other Sewing Machines to handle the machine in any manner whatever.
Allow the machine to be adjusted or repaired by no one but an authorized agent, or at one of our offices.
If the machine needs repairing take it off the table, enclose it, with the hemmer, bobbins, and bobbin cover, in a small box, with the name and address of the owner written plainly and tied to it, and send it to some office or agency for the sale of our machines, and it will be put in order and promptly returned.
-----------------------------------------
The following articles are furnished with each No. 8 Machines.
12 Needles; 1 Thumb Screw; 1 Extra Needle Set Screw; 4 Bobbins; 1 Bobbin Cover; 1 Plate Gauge; 1 Quilting Gauge; 1 Coarse Throat Plate; 1 Screw Driver; 1 Oil Can; 1 Emery Wheel; 1 Black Wrench; 1 Steel Wrench; 1 Braider; 1 Gathering, 1 Side-cut, and 1 Corder Glass; 1 Hemmer; and 1 Copy Printed Instructions.
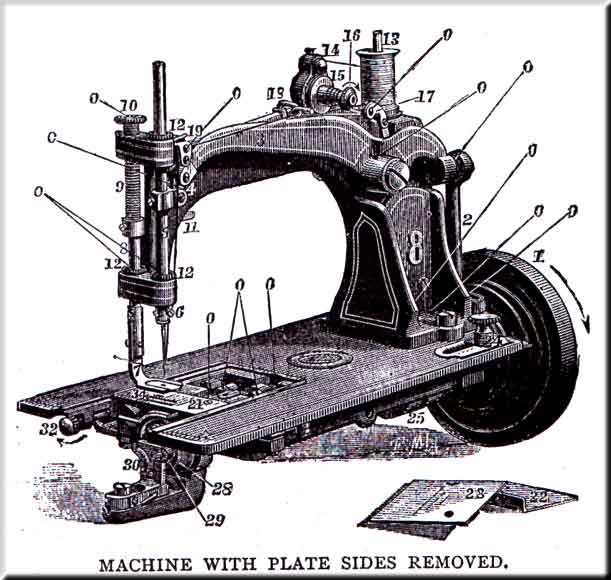
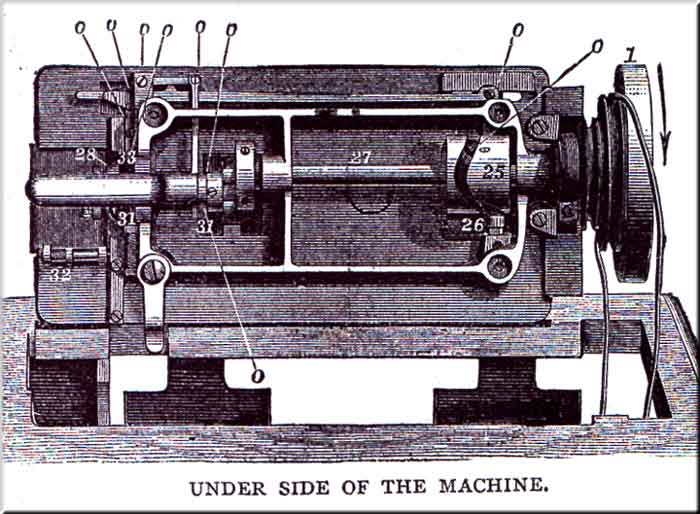
Parts of the Machine
| 1. Band Wheel |
13. Spool Wire |
25. Take-up Cam |
| 2. Connection |
14. Thread Check |
26. Take-up Cam Roller |
| 3. Needle Lever. |
15. Tension Pulley |
27. Main Shaft |
| 4. Needle Lever Link |
16. Tension Nut |
28. Rotating Hook |
| 5. Needle Lever Bar |
17. Take-up |
29. Bobbin and Cover |
| 6. Needle Lever Set Screw |
18. Thread Leader |
30. Bobbin Holder |
| 7. Presser-foot |
19. Guide Roller |
31. Feed Cams |
| 8. Presser Bar |
20. Needle Bar Thread Guide |
32. Lower Tension Screw |
| 9. Presser-foot Spring |
21. Throat Plate |
33. Feed Bar |
| 10. Pressure Thumb Screw |
22. Front Plate Slide |
34. Feed Points |
| 11. Presser Lifter |
23. Back Plate Slide |
. |
| 12. Oil Cups |
24. Stitch Regulating Knob |
. |
DIRECTIONS
FOR USING
Wheeler & Wilson's No.8 Sewing Machine
(TREADLE OR HAND)
~~~~~~~~~~~~~~~~~~~~
To Oil the Machine -- Use the best Sewing Machine Oil, to be had of our agents, and at out offices. Oil at all places indicated by the letter O, in the cuts, at the bottom of the connection, and around the feed-bar, wherever there is friction. The parts on the underside of the machine may best be cleaned and oiled by removing the belt and turning the machine back, as shown in the cut.
NOTE -- When the machine is turned back, as for cleaning and oiling, the little ball in the take-up cam may slip down into the notch made for entering it, and prevent the machine from turning. If so, it should be raised out of the notch with the end of the finger before turning the machine down.
Below the table, oil the bearings of the treadle; the pins through each end of the pitman, and the balance-wheel shaft through two holes above it.
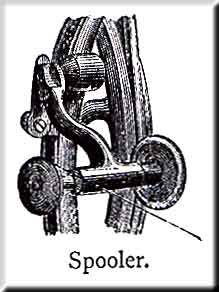
Oil the spooler occasionally.
After oiling, remove the bobbin and case, raise the presser-foot, and run the machine rapidly a minute; then wipe off all superfluous oil, to prevent soiling the goods. If the machine runs hard at any time, it is certain that some part has not been oiled.
~~~~~~~~~~~~~~~~~~~~
Use the fine throat plate with needles from No. 1 to No. 5; for larger the coarse one must be substituted, as the fine one would chafe off the thread.
Make yourself familiar with the motion of the treadle by running the machine without thread and with the presser-foot raised, until a regular motion is attained.
 (Never
run the machine with the presser-foot down, except when sewing, as it will scratch
the foot and dull the feed points)
(Never
run the machine with the presser-foot down, except when sewing, as it will scratch
the foot and dull the feed points)
To Set the Needle -- Loosen the needle set screw, insert the needle with its long groove towards the right; be sure to push the needle as far into the socket as it will go, and secure it firmly with the set screw.
To Wind the Bobbin -- Throw off the belt, turn down the spooler, and place the bobbin on the spindle. See that it runs true. Hold the end of the thread with the right hand, and with the left wind the thread several times around the bobbin, or until the end is secured, and then break off the end to prevent its being caught up and sewed into the seam before the bobbin is empty. Then wind the bobbin by operating the treadle, holding the thread firmly between the thumb and finger, and allowing it to pass from one side of the bobbin to the other, that it may be wound tight and even.
To Place the Bobbin -- Draw out the plate-slide, loosen the bobbin-holder and draw it back. Place the bobbin within the ring and lay both in the fork of the bobbin-holder, with their lower edges within the cavity of the rotating hook. Let the ring be next to the bobbin-holder, with the thread winding from the bottom of the bobbin and toward the operator, push up the bobbin-holder and tighten the screw firmly.
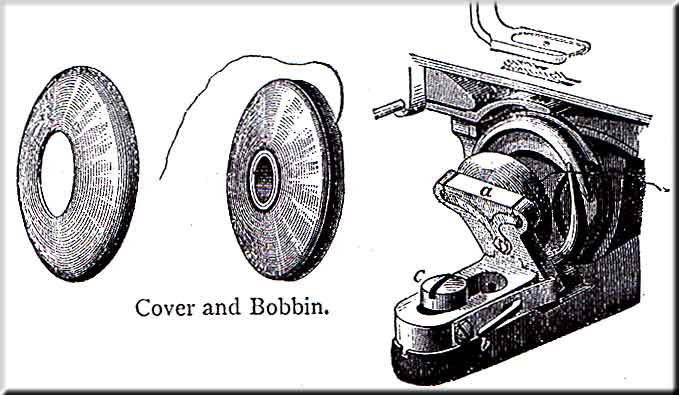
To Place the Bobbin in those Machines fitted with a Hinged Bobbin-Holder -- Press the lever (b), and turn back the drop (a). Place the bobbin within the cover, and lay both upon the drop, with their lower edges within the cavity of the rotating hook. Let the cover be next to the drop and the bobbin next to the rotating hook, the thread winding from the bottom of the bobbin toward you, as shown in the cut. Turn up the drop till secured by the catch.
(NOTE -- Before inserting the bobbin, the inside of the cover should be wiped out with an oiled rag, to remove lint or dirt, and to oil the inside of the cover)
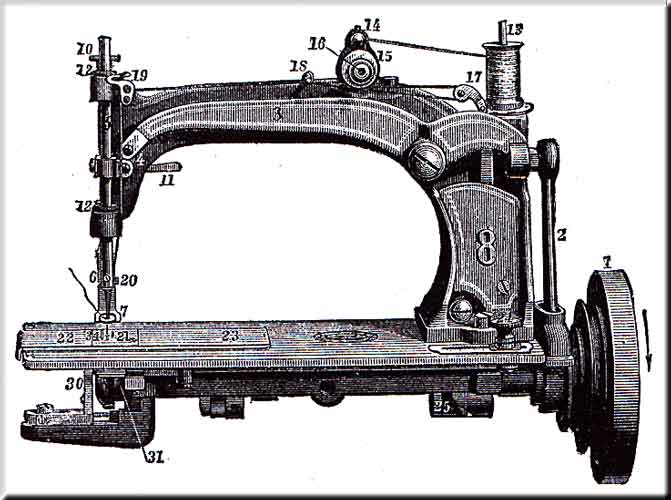
To Thread the Machine -- Place the spool on the spool-wire, pass the thread over the thread-check, down the left side of the tension pulley, once round it in the groove, and through the take-up; loop it through the leader, over the guide-roller, through the needle-bar thread-guide, and thread the needle from right to left, all as shown in the cut. Let the thread extend through the needle two or three inches when the take-up is fully back. Now hold the end of the upper thread loosely between the thumb and finger, and turn the machine carefully while the needle goes down and up once, then draw the upper thread and with it the under thread up through the hole in the throat plate, and pass them both back under the presser.
To Commence Sewing -- Place the cloth beneath the needle, and let down the presser-foot by dropping the presser-lifter. Place your finger upon the ends of the threads till one or two stitches are taken. Start the machine by turning the band-wheel towards you. Do not pull or push the work -- the machine feeds it. If it does not, the feed is turned off.
The Length of the Stitch -- is governed by the stitch regulating knob. Push the knob to the right to lengthen, and to the left to shorten the stitch. Keep the knob screwed down sufficiently to prevent it from moving by the running of the machine, but not so tightly as to prevent it sliding easily when pressed against by the thumb and finger.
Regulate the Tension -- of the upper thread by turning the tension nut, Turn it as indicated by the arrow (page 2) to tighten the tension, the other way to loosen it. To tighten the tension of the under thread, turn the tension screw as indicated by the arrow (page 2), and the other way to loosen it. In sewing soft, thin fabrics, the tension of both threads should be loose; on thick and heavy goods it should be tight. In sewing seams where strength is required, the tension should be alike on both threads, in order that the lock may be in the centre of the goods. In stitching, however, where the upper side is the right side, the under tension may be tightest, that the lock may be below the centre. And if the lower side is for the right side, the upper tension may be the tightest, that the lock may be drawn above the centre.
The best way is to regulate the tension of the upper thread before starting, so that when pulling the thread some tension will be felt, but not near enough to break it. And then while sewing adjust the under tension (by turning the screw) till the lock is as desired. If both tensions are then found to be too tight or too loose, change the upper one first and regulate the under one to correspond as before.
The greatest secret of perfect sewing lies in the proper adjustment of the tensions.
To Remove the Work -- Stop the machine just before the take-up is fully back, which is before either thread is tightened. Take hold of the thread near the needle arm and pull two or three inches of thread from the spool. Raise the presser-foot and draw out the work from you, far enough to draw out the slack thread, and cut both threads near the cloth, by drawing them across the thread-cuter at the lower end of the needle-bar. Pass the thread back under the presser-foot in position for starting again.
Regulate the Pressure of the Presser-foot -- by turning the thumb-screw. Heavy goods require more pressure than light. Have only enough to keep the work down.
~~~~~~~~~~~~~~~~~~~~~~
Part Two
Part Three
Part Four
Part 2
THE NEEDLEBAR Archive at ISMACS International
Online Manuals Section
Wheeler & Wilson No. 8
Part Two
GENERAL DIRECTIONS
To Turn a Corner -- Stop the machine with the needle in the cloth, after it has been down and come partly up. Then lift the presser-foot, and turn the work in the manner desired, using the needle as a pivot.
To Swing the Presser-foot out of the way -- for any purpose, turn the machine to raise the needle to its highest pint, raise the presser with the thumb and finger, and turn it around to the right.
Needles may be Sharpened -- on the emery wheel by placing it on the spooler-spindle. Grind the point long and tapering.
The Belt -- should be only tight enough to move the machine without slipping. Should it become too loose, a piece must be cut out near the belt hook, and another hole made and hooked again.
For ordinary purposes the belt should pass around the smaller part of the band wheel and the larger part of the balance wheel. To obtain more power for heavy work, or to have the machine run easier, place the belt in the other groove of both wheels.
To Clean the Machine -- Remove the front and back plate slides, throat-plate, and the bobbin-holder, and wipe off all the parts; particularly about the needle-bar, rotating hook, and feed. In replacing the bobbin-holder, be sure and push it as far to the right as it will go, and turn the screw down tightly with the screw-driver. After cleaning, oil as before directly.
If the machine has been neglected and has become gummed, use kerosene oil or turpentine, and wipe thoroughly to remove all old oil and dirt, after which use sewing machine oil as usual.
Causes of the Machine not working properly -- will usually be found in the tension not being properly adjusted, the thread being too coarse for the needle, the needle and thread too coarse for the throat-plate, or in the needle being bent, blunted, or imperfectly set. See that the needle is pushed up as far as it will go into the needle-bar, and that it goes perfectly true through the hole in the throat-plate. If it does not, spring the point in the requisite direction, till it goes all the way alike.
If the machine misses stitches when using hard twisted cotton thread, loosen the set screw and turn the long groove of the needle slightly towards you (to throw the loop more directly in front of the rotating hook).
Do not let the thread check, or the groove in the tension-pulley become clogged with lint, dirt, or knots of thread.
In using fine silk, should it slip around the tension-pulley without turning it, wind it twice or more times around the pulley.
Do not let the guide-roller, or the roller in the upper end of the take-up, become clogged, but frequently oil the screws on which they turn, so that they may turn freely.
To adjust the Feed -- Should the feed-bar be worn down by long use, it may be raised by turning the middle screw in the feed point, with the screw-driver on the small steel wrench. Turning to the right will raise, and to the left will lower the point.
It should never rise more than one thirty-second of an inch above the plate, or enough to raise the hemmer slightly.
The feed is always adjusted properly when the machine leaves the office.
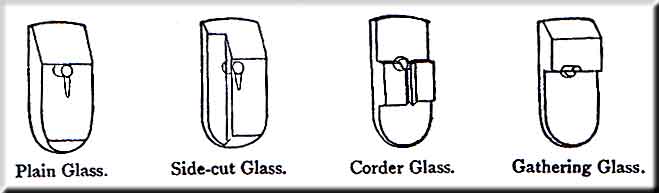
The Plain Glass is for all ordinary sewing and stitching.
The Side-Cut Glass is for stitching close to, and parallel with very thick seams, and also to be used with the plate gauge, for narrow tucking, etc., where it is desirable to place the gauge very near the needle.
To Cord with the Corder Glass -- Insert the corder glass into the presser-foot. Place the cord between the cloth where you desire to stitch it, and crowd it into its place as close as possible with the point of the scissors or some similar instrument, by rubbing it along near the cord on top of the cloth. Place the work under the presser-foot, with the cord in the crease in the bottom of the glass, and stitch as usual.
To Gather -- Insert the gathering glass into the presser-foot; use for the upper thread a much larger one than usual, say No. 36 for ordinary muslin, while you use the ordinary size, say 70, below. Make the tension of the upper thread tight, and that of the under thread as loose as possible; stitch the cloth where it is to be gathered, regulating the fulness by means of the feed; the longer the stitch the greater will be the fulness. If the fulness is too great even with the shortest stitch, reduce the upper tension. If desirable in any case sew with threads as above, with the upper tension only tight enough to gather the work slightly, and finish by drawing up the upper thread by hand.
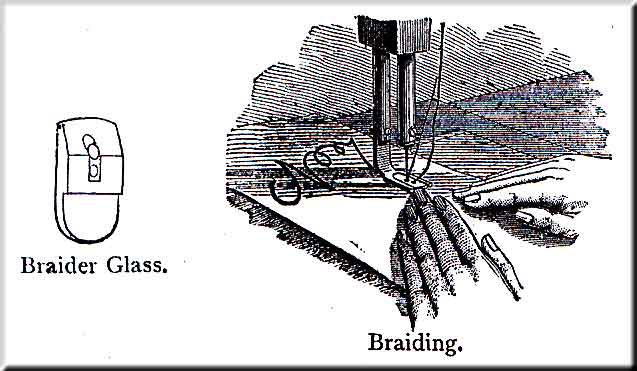
To Braid -- Insert the braider glass in the presser-foot, pass the braid through the extra hole and under the needle, so that it may pass through it, and stitch the fabric where you wish to lay the braid. By having a pattern first stamped or marked upon the goods, the braid may be stitched on in beautiful designs.
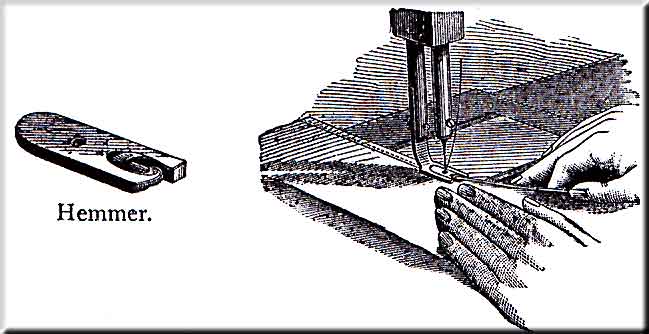
To Hem -- Insert the hemmer in place of the glass. Roll the corner of the cloth slightly, enter it into the scroll of the hemmer, and draw it along to the needle, and proceed to stitch as usual, and the hemmer will turn the hem; keep the edge of the cloth in the hemmer only far enough to surround the tongue within the scroll, as if too much or too little is kept in the hemmer it will leave a raw edge. If the seam is not on the edge of the hem, it is probably because the needle is bent, in which case spring it till it is perfectly true. If it does not then strike the hem right, it is because the presser-bar has been turned, in which case loosen the screw which holds the bar from turning, and move the hemmer slightly in the direction required, and tighten the screw again firmly.
The hemmer is always in proper position when sent out, so that the needle will strike the hem in the proper place; and the bar should not be moved unless rendered necessary by accident.
To make a wide hem, fold the cloth over
to the width of the hem desired, crease it down smoothly, and pass the edge
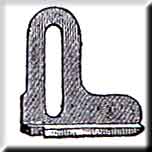 through
the hemmer, which will turn the edge under while it is being stitched down.
through
the hemmer, which will turn the edge under while it is being stitched down.
To Fell with the Hemmer -- First seam up the two edges, one a little wider than the other; a good rule for getting them of the proper width is to keep the edge of the upper piece of cloth under the notch in the end of the hemmer, and let the under piece project beyond the upper as far as the side of the hemmer. Then open the cloth and pass it under the presser-foot, allowing the raw edge to pass through the hemmer, which will turn it under as in hemming. Nearly the whole secret in felling is in getting the edges the proper width in sewing the first seam.
 The
Plate Gauge -- is attached to the plate by means of the extra thumb-screw, and
is used for stitching at a regular distance from an edge.
The
Plate Gauge -- is attached to the plate by means of the extra thumb-screw, and
is used for stitching at a regular distance from an edge.
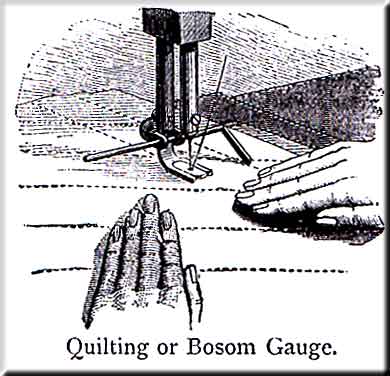
To Quilt -- Attach the quilting gauge to the presser-foot, as seen in the cut, and adjust it to the width desired.
Let the finger of the gauge rest upon the cloth-plate for a guide while stitching the first seam, then raise the finger enough to let the quilt pass under without touching, and keep the seam last stitched directly under the finger, to insure the seams being equal distances apart.
To Stitch Shirt Bosoms -- Set the gauge as far from the needle as you wish to have the stitching from the edge of the fold or plait, and guide the work so that the edge of the plait will follow the gauge.
.
~~~~~~~~~~~~~~~~~~~~~~
Part One
Part Three
Part Four
Part 3
THE NEEDLEBAR Archive at ISMACS International
Online Manuals Section
Wheeler & Wilson No. 8
Part Three
EXTRA ATTACHMENTS
Various attachments for special kinds of work are made, among which are the following, which may be purchased from our Agents
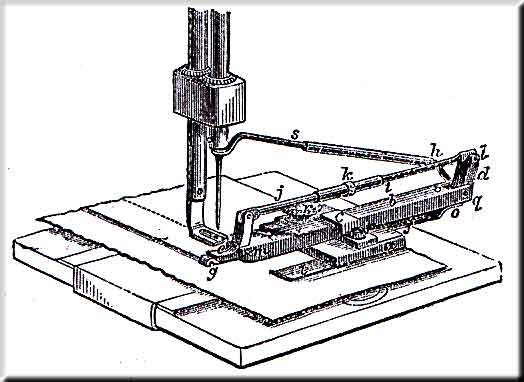
Improved Tuck Marker -- Insert
the loose end of the Connecting Rod (j) into the tube (k) and
attach the Marker to the Cloth-Plate by means of the Screw which accompanies
it, setting the Gauge (a) as far from the Needle as you 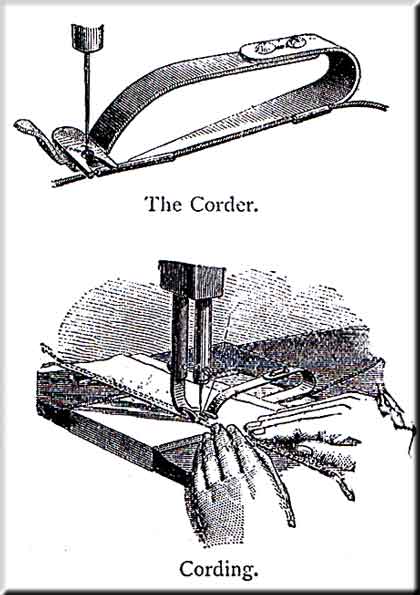 desire
the width of the Tuck, and after threading the Needle, place the end of the
Operating Lever (s) under the end of the Needle-bar, with the Needle
passing through the eyelet. Loosen the Clamp Screw (p) on the Gauge and
set the Creaser (g) as far forward of the Needle as you wish to fold
the cloth for the next Tuck, and tighten the screw. Place the cloth beneath
the spring (t) and the Creaser, and regulate the Creaser to make a good
mark by means of the Connecting Tube (k). Turning the Tube to screw the
Screw out, increases, and in, diminishes the pressure. (Have only pressure enough
to make a good mark). If the cloth does not follow the Gauge evenly, it is usually
because the Gauge does not stand true. If, when the Gauge does stand true, the
cloth works away from the gauge, it is because the point of the Needle is sprung
too far back (i.e. towards the Gauge), and if the cloth climbs upon the Gauge,
the Needle is sprung too far forward. See that the Needle goes perfectly
true through the hole in the Cloth plate. Oil the joints at the back end
of the Tucker and the Operating Lever where it slides in the Tube, and occasionally
put the least drop possible in the joints of the Rocker (e) at the front
end. If too much oil is put there it may run down and soil the goods. The under
side of the Rocker may require oiling if used constantly, especially by steam
power. If so, oil the edge of a bit of cloth slightly, and draw it under the
Rocker.
desire
the width of the Tuck, and after threading the Needle, place the end of the
Operating Lever (s) under the end of the Needle-bar, with the Needle
passing through the eyelet. Loosen the Clamp Screw (p) on the Gauge and
set the Creaser (g) as far forward of the Needle as you wish to fold
the cloth for the next Tuck, and tighten the screw. Place the cloth beneath
the spring (t) and the Creaser, and regulate the Creaser to make a good
mark by means of the Connecting Tube (k). Turning the Tube to screw the
Screw out, increases, and in, diminishes the pressure. (Have only pressure enough
to make a good mark). If the cloth does not follow the Gauge evenly, it is usually
because the Gauge does not stand true. If, when the Gauge does stand true, the
cloth works away from the gauge, it is because the point of the Needle is sprung
too far back (i.e. towards the Gauge), and if the cloth climbs upon the Gauge,
the Needle is sprung too far forward. See that the Needle goes perfectly
true through the hole in the Cloth plate. Oil the joints at the back end
of the Tucker and the Operating Lever where it slides in the Tube, and occasionally
put the least drop possible in the joints of the Rocker (e) at the front
end. If too much oil is put there it may run down and soil the goods. The under
side of the Rocker may require oiling if used constantly, especially by steam
power. If so, oil the edge of a bit of cloth slightly, and draw it under the
Rocker.
To Cord -- Insert the steel-corder into the presser-foot in place of the glass, as shown in the cut. Draw the cord through the tube, and place one thicknes of cloth above and the other below it, and stitch as usual, being careful to guide the cloth so as to lay the sord close up in the fold, or to the cord last laid.
The tube should be so set as to deliver the cord into the groove in the bottom of the corder, and the presser-foot so set as to bring the line of stitching close to the cord.
 The
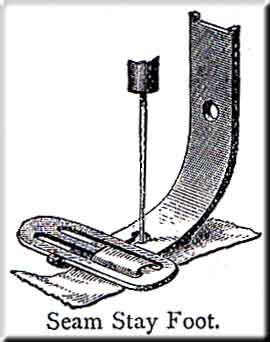
Seam Stay Foot or Trimmer -- is used, i some kinds of manufacturing,
in stitching stay binding over seams to strengthen them, and also in stitching
trimming upon ladies' and childrens' clothing.
The
Seam Stay Foot or Trimmer -- is used, i some kinds of manufacturing,
in stitching stay binding over seams to strengthen them, and also in stitching
trimming upon ladies' and childrens' clothing.
Remove the steel presser-foot and insert the seam stay foot in its place. Pass the stay binding up through the first and down through the second slot, adjust the gauge to the width of the binding and the presser-foot so that the needle will strike the binding in the proper place. To use the above as a trimmer, insert the trimming the same as the stay binding and guide the garment to stitch the trimming in the place desired.
Improved Ruffler -- Connect the end of operating lever (2) with the projection on the needle-bar thred-guide, and screw the ruffler firmly to the machine by means of the thumb-screw, being careful that the needle passes through the centre of the hole in the spring under the presser-foot.
Insert the piece to which you wish to sew the ruffle beneath the lower blade, and the ruffle between the two lower blades of the ruffler. Set the machine for a short stitch to insure fine gathers.
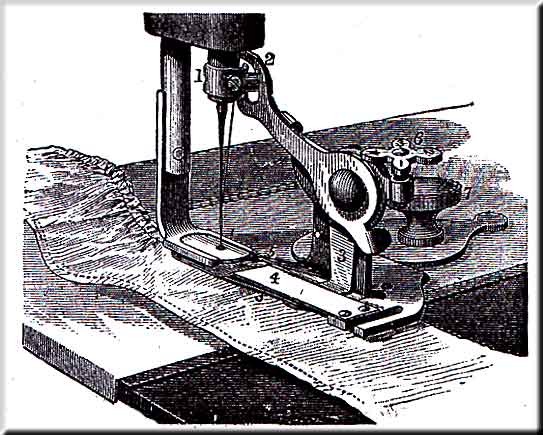
Regulate the width of the seam by the adjustable gauge (5), and the fulness of the ruffle by means of the screw (6). Turning the screw in, increases, and out, diminishes the fulness.
It will often be found most convenient to gather and stitch
the ruffle upon a narrow strip or band, and afterwards sew 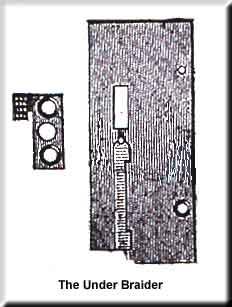 to
the garments, using the band for a facing. The pressure on the presser-foot
should be quite light for ruffling light, but should be greater for heavy material.
Keep the wearing points properly oiled.
to
the garments, using the band for a facing. The pressure on the presser-foot
should be quite light for ruffling light, but should be greater for heavy material.
Keep the wearing points properly oiled.
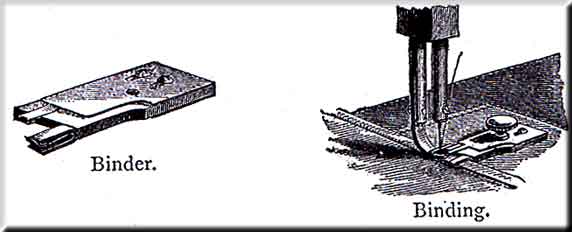
To Bind -- Pass the end of the binding through the binder, and set the guides to the width of the binding.Attach the binder to the cloth plate by means of the thumb-screw, and substitute the presser-foot which accompanies the binder for the ordinary one. Adjust the binder upon the cloth plate, so that the needle will strike the binding in the proper place. Pass the edge of the material through the binder and stitch as usual.
Note --Binders are made for all kinds of special work, and may be ordered through our agents. To avoid mistakes in ordering send sample of binding and material.
To Braid with the Under Braider
-- Substitute the feed points and throat plate of the braider for those upon
the machine. Pass the end of the braid 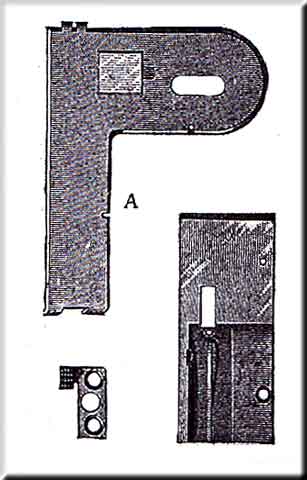 through
the slot in the throat plate and back over the feed points. Have the pattern
stamped upon the back side of the material. Stitch as usual, following the pattern,
and the braid will be stitched upon the right side of the material in the same
design as the pattern. These throat plates are made in three sizes -- for coarse,
fine, and medium braid.
through
the slot in the throat plate and back over the feed points. Have the pattern
stamped upon the back side of the material. Stitch as usual, following the pattern,
and the braid will be stitched upon the right side of the material in the same
design as the pattern. These throat plates are made in three sizes -- for coarse,
fine, and medium braid.
The Adjustable Under Braider -- is used the same as the one before described, but may be adapted to any width of braid. Pass the braid through the slot, and beneath the small spring on the under side of the cover (A), and so adjust the slot to the width of the braid. Place the cover over the throat plate, so that the needle will strike the braid as desired, and secure it by means of the thumbscrew.
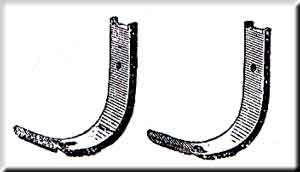
Extra Presser Feet -- The steel presser feet are used for some special kinds of manufacturing; the slotted one being for any which requires the use of very poor or rough thread on coarse work.
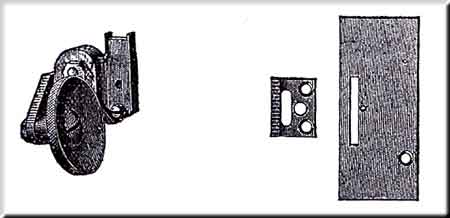
Leather Work -- The roller presser-foot, leather feed-points, and throat plate, are preferable where machines are required for leather stitching, and may be readily substituted for those which accompany the machine.
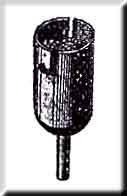 The
Thread Oiler -- The object of the thread oiler is to prevent the thread
from breaking when using poor thread, or in sewing hard, stiff goods, and also
to keep the needle from gumming up when stitching patent leather. If preferable,
however, the surface of patent leather may be slightly oiled before sewing,
and the hard, stiff goods may be rubbed, where it is to be sewed, with hard,
white soap.
The
Thread Oiler -- The object of the thread oiler is to prevent the thread
from breaking when using poor thread, or in sewing hard, stiff goods, and also
to keep the needle from gumming up when stitching patent leather. If preferable,
however, the surface of patent leather may be slightly oiled before sewing,
and the hard, stiff goods may be rubbed, where it is to be sewed, with hard,
white soap.
Attach the thread oiler to the machine by inserting its stem into the hole at the right of the tension pulley, and secured by tightening the set screw in the arm. Saturate the pad with oil, and let the thread between the spool and the tension draw over it. When not required it may remain as in use, and the thread can be passed by the side of it.
~~~~~~~~~~~~~~~~~~~~~~~~~~
Part One
Part Two
Part Four
Part 4
THE NEEDLEBAR Archive at ISMACS International
Online Manuals Section
Wheeler & Wilson No. 8
Part Four
INSTRUCTIONS FOR USING
WHEELER & WILSON'S
No. 8 HAND MACHINE
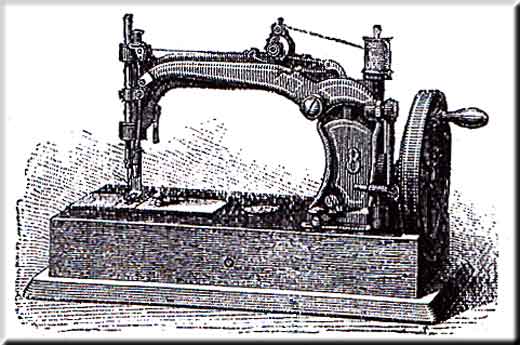
The foregoing instructions are equally applicable to the No. 8 Hand Machine, with the exception of the following:--
To Work the Spooler -- Turn the pinion of the spooler, so that it may run in the teeth of the driving wheel. To release the spooler, lift it up slightly and turn the pinion away from the wheel.
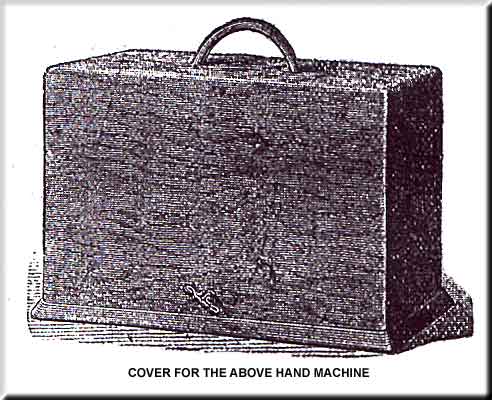
To Fix the Driving Handle -- When the Hand Machine is uncovered, The Driving Handle will be found folded inwards; bring it into its proper position and fix by turning upwards the spring at the back of it. NOTE -- The spring must be turned downwards before the handle can be folded inwards again.
~~~~~~~~~~~~~~~~~~~~~~~
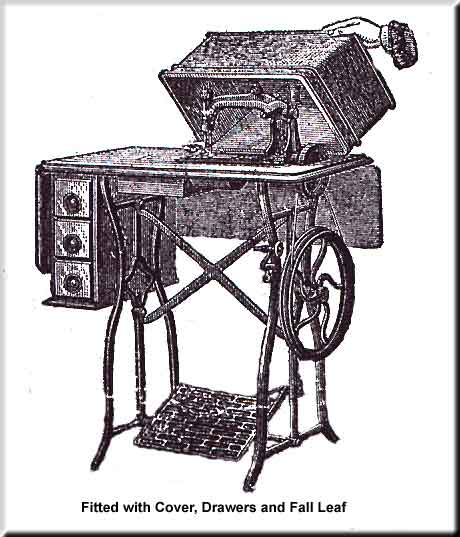
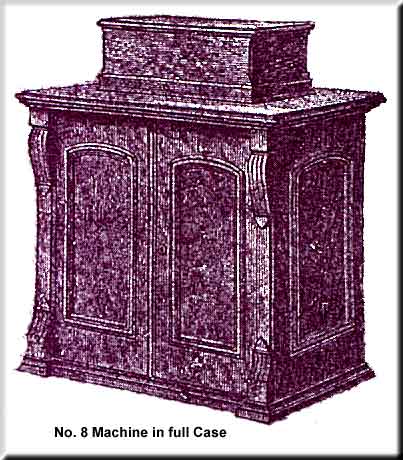
Wheeler & Wilson's No. 8 Machine
~~~~~~~~~~~~~~~~~~~~~~~~~~~~~~~~~~~~~
Part One
Part Two
Part Three