Film cameras
BETTER THE LUBITEL 120 CAMERA User manual
User manual for BETTER THE LUBITEL 120 CAMERA. 29 pages in English. Read the original PDF, download or print a copy without registration.
29 pagesEnglish8.3 MB PDF
Loading your manual…Open PDF directly
Document details
- Brand
- Lubitel
- Model / document
- BETTER THE LUBITEL 120 CAMERA
- Document type
- User manual
- Language
- English
- Pages
- 29
- File size
- 8.3 MB
- Category
- Film cameras
- Document date
- Not specified in catalog
Search available document text
Find a term, then jump to its page in the original PDF. Image-only pages may not be searchable; check the PDF for exact wording and diagrams.
Page 2 · Read text
CA,l"tt.F a .fren,r rufED FOR
  FL A 5H S Yi\t'',9RONIZf.R


              "Lubitel" represents o modern
           development of the twin-lens
           type of comero, lt shows you
           the picture before you toke  it,
          ond incorporotes mony refine-
            ments which moke picture-tok-
           ing eosier, ond good results
           more certoin.
                    It is o precision instrument ond
           should receive coreful ond in-
               telligent hondling
            This monuol gives )'ou quickly
           ond simply the essentiols of co-
           mero ooerotion.
           Reod it corefully.
View original page 2Page 3 · Read text
www.butkus.us


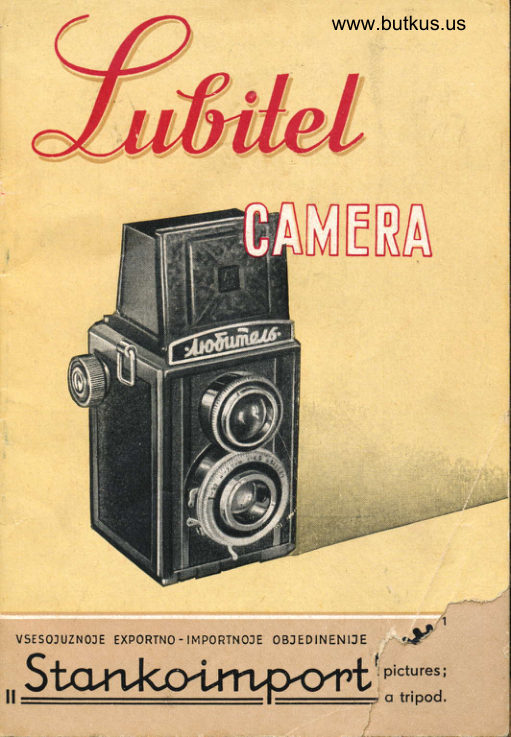
The "Lubitel" is o hond-held comero (Fig. 1) designed for
omoteur photogrophers.  lt uses o film with 6x6 cm size
of picture ond moy be looded in doylight. The comero is


                                                                       FIs. 1

 looded with roll film, the spool copocity being 12 pictures;
  it con be operoted either hond-held or set on o tripod.
View original page 3Page 5 · Read text
The comero body is built of plos-
                               tics ond is hondsomely finished.
                        The comero is equipped with two
                            view-finders, one of the opticol
                                  (mirror) type, ond the other of the
                                direct (frome) type.
                        The "Lubitel" is fitted with o cen-
                              trol type shutter hoving on iris
                         diophrogm ond giving outomotic
                      exposure speeds ronging from
                                     t/rno to tlrn of o second. The "B"
                             setting permits to keep the shut-
www.butkus.us               ter open for much longer inter-
                                 vols.
                  The greot odvontoges of the
                              "Lubitel" comero ore incorporot-
                    ed in its speedy operotion ond
                           convenient hondling.

                          The mirrorview-finder hoving been
                      opened, o distinct ond lorge
                      imoge will be seen in the lighr
                              protective hood bockground, thus
                           ollowing for the comero position
                           to be eosily determined when the
                           object hos been olreody selected
View original page 5Page 6 · Read text
www.butkus.us

 or when o new interesting object
 is being looked for.
 Focusing of the imoge is ochiev-
ed by slightly turning the knurled
lens mount.
Meons for speedy setting ore pro-
vided by convenient orrongement
of distonce, lens opening ond ex-
posure speed scoles.
The number of exposures mode is
indicoted by figures printed on
the film protective poper ond op-
peoring in the red film window.
The mirror view-finder ollows for
photogrophing with the comero
held in vorious positions; for in-
stonce, lifted obove the operotor's
heod or turned ot o right ongle to
ossume horizontol position, etc.
The frome view-finder is used for
photogrophing ot eye-level; this
is especiolly convenient when the
omoteur photogropher hos mos-
tered correct focusing by meons
of the distonce scole.
View original page 6
Page 7 · Read text
,-Epecif icq,tions


 Size oi picture              6x6 cm

 Film spool copocity             12 pictures

 "T-22" type lens:
         focol length            75 mm
            full operture                        I l4.s
 Lens opening scole                 lla.st  I ts.6;  t l8;  t 111; t 116; tl22
 Distonce scole                      1.3; 1.5; 2; 2.5; 3; 5; 10 m, ond
                                              infinity
 Shutter exposure speeds,           t/ro; t/rri l/soi 1/rooi r/roo of o sec'.
                         ond "8" (Bulb)

 Comero overoll dimensions:
         folded                90x95x120 mm
          in operoting position   .   90x95x170 mm

 Comero weight                580 g
View original page 7Page 10 · Read text
www.butkus.us


15


                www.butkus.us


         tlo.  z
     t-lilm winding knob; 2-Light-protective hood; 3-Front
     hood ponel; 4-Front of hood beoring monufocturer's trode-
     mork; s-Viewing lens; 6-Toking lens; 7-Lens opening
     lever; 8-Exposure speed setting lever; 9-Topped hole
     for coble releose; lo-Shutter releqse lever; 11-Shutter
     winding lever,
       Fis. 3:
    l2-Hood lock; l3-Film window; l4-Film window cover
     knob; 15-Filter receptocle cover.
View original page 10Page 11 · Read text
Figs. 2 ond 3 show generol view of the comero.
The Camera body is mode of plostics. A receptocte
in the comero side woll fitted with o cover is orovided
for storing the filters.
A bushing in the comero bottom ollows for toking pic-
tures from tripod.
Fig.4:  1-Mognifier;  2-View-linder  lens with ground gloss;
        3-Mirror; 4-Viewing lens; 5-Toking lens; 6-Film.
View original page 11Page 12 · Read text
www.butkus.us
The taking objective  is o
 three-lens onostigmot giving
 shorp imoges ond ensuring
superior quolity of the pic-
 tures token.
The optical view-finder  is
o combinotion orrongement of
the view-finder proper ond o
ground gloss representing o           The filter receptocle
smoll circle in the middle of o
biconvex lens with o hinged
mognifier instolled obove  it
(Fig.    ). The view-finder is fitted
with o metol light-protective
hood which opens by opening
 its front ponel.
The view-finder should be clo-
sed in o de{inite order: first
the mognifier is to be closed
ond then, in sequence, the         The opticol view-finder
hood side wolls, the reor hood
ponel ond the front hood po-
nel until it cotches.
The viewing lens full oper-
ture 112.8 is much lorger thon
thot of the toking lens ond
is occordingly more sensitive
when focusing.


                                      The frome view-finder
View original page 12Page 13 · Read text
lmage focusing occurs simultoneously on the ground
gloss circle ond on the film, os both lenses ore coupled
by toothed mounts. The neorest distonce for focusing
 is 1.3 m. Photogrophing of objects ot closer distonces
colls for supplementory lenses.
Focusing is to be mode in the motted circle centre.
Should the imoge, thot is desired to be shorp, be loco-
ted ot the edge of the picture, the comero is to be
slightly turned while focusing, ond restored to its originol
position prior to shutter releosing.
The magnifier is ottoched to the opticol view-finder
hood on the inside ond is used for criticolly shorp focus-
ing. lt is set to operotion ofter hoving been pulled to-
words the photogropher. The hood itself con be chon-
ged into o frame view-finder by pressing the front
of the hood (beoring the monufocturer's trodemork)
bock until it cotches. The view-finder is closed by pressing
bock slightly on the reor hood ponel.
The comero should be held ot eye-level when focusing
ond the object viewed through the squore window in
the reor hood ponel ot o distonce of which the window
edges "coincide" with those of the front hood ponel
opening. The boundories of the field of view thus set
sholl olso be boundories of the photogroph.
View original page 13
Page 14 · Read text
www.butkus.us
 The distance scale is engroved on the viewing lens
 mount. The divisions on the scole (in meters) indicote
 settings ot vorious lens-to-object distonces, With the
 lorgest lens opening ond the lens set to the stop (indi-
 coted by -)  excellent shorpness will be obtoined ot dis-
tonces ronging from 18 m to infinity.
The shutter exposure speeds ore chonged by turning
the exposure setting lever until index line is opposite
figure indicoting the desired speed. Any one of the
 five outomotic exposure speeds tlroo, t lroo, tf uu, 'f ,u ond
 'lrn of o second con be selected.
Previous to moking the exposure, the shutter should be
wound by pressing the winding lever down to the stop.
When releosing the shutter the releose lever (or releose
coble) is to be smoothly depressed,
Night scenes (or when the light is not bright enough)
require exposures much longer thon the meosured  inter-
vols provided on the shutter. For such pictures the "B"
(Bulb) setting is used. After setting the shutter ot "8" the
releose lever is pressed down ond held. The shutter will
remoin open os long os the relecse lever is depressed.
You con hold the comero in your honds for exposures
of t/2e0, 'lroo,'luo, or rlzs of o second; for longer expo-
sures, the comero must be ploced on o tripod or other
firm support.


                                                                               13
View original page 14Page 15 · Read text
The diaphragm is positioned inside the shutter be-
tween the objective lenses ond controls the lens open-
 ing, or in other words the omount of light thot posses
through the lens while the shutter is open. The size
of the lens opening is chonged os the lens opening
 lever is moved ocross the scole.
The opening is smollest when the lever is ot fl2T.
Eoch succeeding setting odmits, in o given exposure
time, twice os much light os the one before    1116                                                    -
fets through twice the light of 1122, f/11 twice thot of
t116, ond so on until f/4.5, the lorgest opening,  is
reoched.
Eoch shutter setting with which the comero con be
hond-held olso gives on exposure twice os long os the
one directly preceding  it. For exomple, of t/,oo second,
twice os much light reoches the film os ot 1/roo.

                                             exomple,Now,  if you give twice the exposure time - for
                                   use of the next'luo of o second insteod of tlroo - the
smoller lens opening will permit the some omount of
light to reoch the film: t/uo of o second ot f/1 1 odmits
the some omount of light os t/,oo ot ll1.
The figures engroved on the shutter ond lens opening
scoles show only froction denominotors; for exomple,
50 insteod of r/6e, 4.5 insteod of f/4.5, etc.
View original page 15Page 16 · Read text
www.butkus.us
The depth of field  is the distonce between the
 neorest ond forthest objects in o scene which will be
shorp in the picture. Note thot the depth of field in-
creoses os the lens opening is mode smoller, or os
the distonce focused upon is increosed.
A greot ronge of shorpness  is desiroble in mony pictures,
 porticulorly in londscopes. Since most objects of interest
ore of o consideroble distonce from the comero in such
pictures, no difficulty is usuolly encountered in obtoining
the required ronge of shorpness. However,  it is some-
times desiroble to record shorply on object neor the
comero os well os objects ot on extreme distonce. In
such coses, reference to the toble will help you set lens
opening ond focus to get o depth of field which will
cover objects ot both positions (see depth of field toble).
The toble shows thot with certoin overoge lens open-
ings ond certoin overoge focusing distonces, procticolly
oll objects of distonces from 3-4 m ore reproduced
with sufficient shorpness. These overoge lens opening
(-  f/10) ond overoge focusing distonce (.- 8 m) ore
cleorly morked in red dots on the corresponding scoles
of the "Lubitel" comero. Thus, under good lighting con-
ditions, the "red dot" setting will give sotisfoctory results,
ond the photogropher will not hove to worry obout
focusing.
View original page 16
Page 19 · Read text
Fig,5: 1-Comero bock locking springs; 2-Spool holder tong;
       3-Toke-up spool; 4-Film winding knob; 5-Film winoow;
       6-Film window cover knob.
View original page 19Page 20 · Read text
Comero looding with stondord  roll film www.butkus.usmoy be perform-
 ed in doylight. Follow these steps for eosy looding:
 1. Roise both locking springs I (Fig,5) ond open the
   comero bock,
 2. Breok the seol on the roll of film, insert the end of
   the film protective poper into the slit of toke-up
   spool 3 ond fold it. Turn the film windin! knob 4 until
   two or three loyers of poper ore wound on the spool.
3. After checking proper tension of the poper, insert the
   film spool into the lower film comportment, reploce
   the comero bock, moking sure it is securely closed ond
   locked.
4. Turn the film window cover knob 6 counter-clockwise
  ond open the window cover. Then, slowly turn the
   winding knob until the first signolling morks ond loter
   the figure "l" oppeor on the film protective poper in
   the red film window 5. Close the film window cover
The comero is now reody for operotion.
View original page 20
Page 21 · Read text
@s
               To toke the picture, hold the co-
                 mero ond compose the subject on
                the ground gloss os you wont it
                   to oppeor in the finished picture.
             A lower or higher position moy be
                    desiroble to get just the effect you
                    wont, When using the frome view-
                   finder hold the comero ot eye-
                       level, so thot the edges of both
                   reor ond front hood ponel open-
                    ings coincide.
                   Follow these steps:
                            1. Focus by turning the knurled
                    lens mount until the ground
                    gloss imoge is shorp, or by
                     estimoting the distonce ond
                        setting this figure on the dis-
                   tonce scole.
                          2. Adjust lens opening, occording
                      to the light condition, by mov-
                        ing lens opening lever 7 (Fig.z)
                     ocross the scole.
View original page 21Page 22 · Read text
www.butkus.us


3. Adjust the shutter, occording to
   the type of subject, by turning
  the exposure setting lever 8
   until index line is opposite
   speed desired. Press down the
   shutter winding lever 11.
4. Moke the exposure by slowly
   pressing the shutter releose le-
   ver 1 0. Toke core notto move the
  comero during the exposure, or
   the picture moy be blurred.
5. Open the film window cover
  by turning the cover knob 14
   (Fig. 3). Slowly turn the wind-
   ing knob 1 (Fig.2) until the next
  exposure number oppeors in
  the red film window. Close the
  window cover, ond you ore re-
  ody for the next picture. Get
   into the hobit of odvoncing
   the film immediotely ofter tok-
   ing eoch picture.
View original page 22
Page 24 · Read text
www.butkus.us
4, Remove the spool with the exposed film, seolthe end
   of the protective poper ond hove the film developed
   os soon os possible. Do not ollow the film to unwind
   from the spool, or it will be fogged.
5, Move the lower empty spool into the upper film com-
   portment, core being token to hove the slotted end
   of the spool directed towords the winding knob.
6. Reploce the spool holder ond turning the film wind-
  ing knob clockwise moke sure the spool is rototing.
View original page 24
Page 25 · Read text
Sct


www.butkus.us


    Complete comero set (Fig.6) includes:
     "T-22" type lens,
    comero toke-up spool,
     lens cop,
    coble releose,
     shoulder strop,
     instruction monuol ond certificote of inspection.
View original page 25Related documents and language editions

From the M. Butkus archive. Original publisher and archive notices are retained.
Check the model and edition against your equipment.
PDF verified 2026-10-10.