Film cameras
LUBITEL User manual
User manual for LUBITEL. 21 pages in English. Read the original PDF, download or print a copy without registration.
21 pagesEnglish0.6 MB PDF

Loading your manual…Open PDF directly
Document details
- Brand
- Lubitel
- Model / document
- LUBITEL
- Document type
- User manual
- Language
- English
- Pages
- 21
- File size
- 0.6 MB
- Category
- Film cameras
- Document date
- Not specified in catalog
Search available document text
Find a term, then jump to its page in the original PDF. Image-only pages may not be searchable; check the PDF for exact wording and diagrams.
Page 2 · Read text
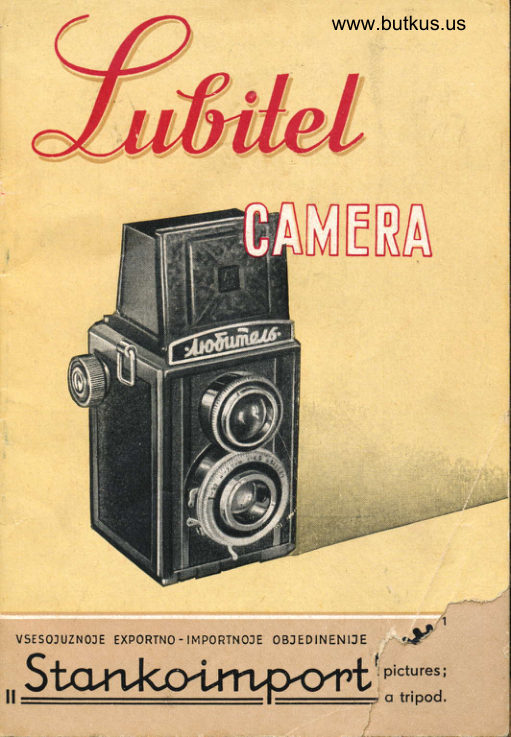
Tt|HITEI OAI$ERA
  INSTRUCTION- MANUAL


                                                           :


l|$E$OJIITI{OJT EXPORIilO,IHFORTI{OJE OIJEOIHEilIJE
       .,SIAIIltt}IHP{}NTI'

                 ffio$cow-tl$$n
View original page 2Page 3 · Read text
"Lul-ritel" represents a modern development of the
trvin-leir'; t-vpe of camera. It sltorvs you lhe picturc
bel'ore you take it, and incorpotates nlally refinc-
menls rvhich mahe picture'taking easier, and good
results rnore certain.
   It is a precision instrument aud sirould receive
carcful antl intelligent handling.
  This rnanual givcs you rltiickly atrd simply the
essentiuls of camera operatiotr.
  Ilead it carefullv.


                      www.butkus.us
View original page 3Page 4 · Read text
GENERAI. F'EATURES                          4'r)                        f^P
  The "Lubitel" is a hand-held canera (Fig. 1)
 designed_for amateur photographers.  It uses a-fltm
 with 6 X 6 cm size ol picture ancl ntay be loaclecl
 in daylight.
  The camera is loaded rvith roll  f,i,[m, the spool
 capacity being 12 pictures; it can be operated eiiher
 Itand-held or set on a tripod.
  The camera bodv is built of plastics and is hand-
somely finished.
  The camera is equipped with  two  view-finders,
one of the optical (mirror) type, and the other of
lhe direct (frame) tvpe.
  The "Lubitel" is fitted with a central type shut-
ter having an iris diaphragrn and giving automatic
exposure speeds ranging from 1/200 to 1/10 of a
second. The "B" setting permits to keep the shutter
open for much longer intervals.
  The great advantages of the "Lubitel" camera are
incorporated in its speedy operation and convenient
handling.
 The mirror view-finder having been opened, a
distinct and large image rvill be seen in tire light-
                                           ,3
View original page 4Page 6 · Read text
q UF

 protective hood background, thus allowing for the
 camera position to be easily determinerl i"tr""  ifr" object has been already se"lected or when a new interesting object is being lookeJ for.
   Focusing of the- imagJ is achicvcrl by slight,ly turning either of the t#o knurled rens mounts.
          for speedy setting ar,e provirl"a- fry _,Y:ur1 nlent arrangement, of  dist,ance, lens opening"o,iue_and exposure speed scales.
   - The nl.rmber of exposures made is indicaterl bv
 figures. printed on rire fitm  ;;;;J";';;;;'^;i appearing in the red filn:  n,indou,.
  The       mirror                vierv-finder                          ailows                                  for photographing'positilons'; with      the         camera                held in                           various                                                     toi instance, lifted ahove the operat..,r's head or turnecl at..a right angle to assume horizontaf position,- etc.   'l'he frame vierv-finrler is usecl for photogr"lifri"!
 at eye-level; this is especially co've'ie't  ,in"i,  tt,.
 a.mateur photographer has mastered correet foe.-slng by means of the distance scale.

              SPECIT"ICATIONS
Size of picture          6Xo cm
Film spool capacity              12 pictures
"T-22" type lens:
      focal length       .75mm
       full  aperture                        t14.5
Lens opening scale  .      "  t/4.b;  f /5.6;  f /8; tlrr;
                             t/16; fl22
Distance scale  .           .  1.3; 1.5; 2; 2.5; B; b;
                       10 m and infinity
View original page 6Page 7 · Read text
Shutter exposure speeds    rlt0; r/25; r,t50; 1/100;
                          11200 of s second and
                                "8"  (Bulb)
 Camera overall dimensions:
         folded            90 X 95 X tZO mrn
      in operating position .90 X 95 X 170 rror
 Camera rveight           580 g

         CAMERA CONSTRU CT'ION
    Figs. 2 and 3 show general view of the carnera.
    'I'he camera boda is made of plastics. A receptacle
 in the camer:a side wall fitted rvith a cover is pr<l-
 vided for storing the filters.

                                                                                                                                                                                                                                     i  A bushing in the camera bottom allows for taking
pietures from tripod.
   'I'he taking ob.iectiue is a three-lens anastigmat
giving sharp images and ensuring superior cluality
 o1' the pictures taken.
   T'Ite optical uiew-finder is a combination  arrarrge-
ment of the vierv-finder proper and a ground glass
representing a small circle in the middle of a
biconvex ,lens with a hinged magnifier instalrled
above it  (Fig. a). The view-finder is fitted with a
metal light-protective hood rvhich opens by opening
its front panel.
  The view-finder should be closed in a definite
order: first the magnifier is to be closed and then
in sequence the hood side walls, the rear hord
panel and the frontwww.butkus.ushood panel until  it  catches.
6
View original page 7Page 9 · Read text
_ The uiewing lens full  apcrture f/2.8 is muchlarger than that of the taking lens ancl is accor-
dingly more sensitive rvhen focusing.
  lmugle focusirtq occurs simultaneously on thcground glass circle and on the filtn, as both lenses
are couplerl bv toothed rnounts. The nearest dis-
tancc for  focusiug is 1,3 rn. Photographing of
obiects at closer distatrces calls Ior supplemetttary
lcnses.
  Ifocusing is to be made in the matted circle
centre.
  Should the image, that is desired to be sharp,
Irc located at the edge of the picture, the c,amera is
lo be slightly turned rvhile focusitrg, and restorcd
to its original positiou prior to shutter rclcasing.
   'I'|rc ntaglnifier is attached to the optical vierv-
f inder hood on the inside and is used for cliticelly
sharp frrcusing. It is set to operation after having
bcen pulled ton'ards the pholographeir
     'l'lre hood itsell can be changed ilrto a frantt:
uiew-f iruler by plessing lhe front of the hootl
(hcaring the manufacturer's trademark) back until
it  catches. The  view-finder is closcd by  pros-
sing back slightly on the rear hood panel.
   'I'he camera should be held at eye-level when
focusing ,and the object vierved lhrough the squalc
s'indou' in the rear hood pitnel at a clistatrce at
rvhich the  'windorv edges "coincide" rvith thosc
ol' llre frorrt hood patrel opeinittg. 'I"he ]routrdarics
of the field of vieu' [hus sct shall also be boundaries
of the photograph.
  Tlte distance scale is engraved cn the viewing
lens mount. The divisions on the scale (in meters)
                   www.butkus.us
8
View original page 9Page 10 · Read text
l
Fie.:  S: 12 * Hood lock; lJ * iilm  window; 14 * Fitm
       window eover knob; 15 * Filter reeelltacle covef,
                                                      I
View original page 10Page 11 · Read text
ilt<Iic:rle settings at various lens-to-obiect distances.
\\rilh the largest lens opening and the lens set to
the .stop (indicatecl by - ), excellcnt sharpness  rvill
bc obtained at distances rangiltg from 18 m to
infinity.
  TIrc shutter exposure speeds are changed by tur-
trirrg the exposLlre settirrg ler.er until index line is
opposite figurc indicating the desired speed. Any
one of the five autom,atic exl)osure speeds 11200,
lll00,  1150, Il25 and lll}   of a second can be
selected.
  Previous to rnaking the exposure, the  shtrtl.cr
sltould be N'ound by pressing 15"  lf ilrding levcr
dorvn to the stop.
  \Vhen releasing the shutter the release lcver
(or release cable) is to be smoothly depressecl.
  Night scenes (or when the light is not bright
enough) require exposures much longei. than the
tneasured intervals provided on the shutter. For
such pictures the "8" (Bulb) setting is used. After
setting the shulter at "-B" the release lever is pres-
sed down and held. The shutter will remain
opeu as long as the release lever is depressed.
 You can hold the camera in vour hands for
exposures of 11200, llIO0, 1/50 or lttzb of a second;
I'or longer exposures, the camera must be placcd
on a tripod or other firm support.
  The diaphragm is positioned inside the shutter
between the objective lenses and controls the lens
opening, or in other. words the amount of light
that passes through the lens while the shutter  is
                                                                                                                                                                                                     ""'_open. The size of the lens opening is changed as tlie
lens opening lever is moved across the scale.
                    www.butkus.us
10
View original page 11Page 13 · Read text
1122. Each succeedin$ setting admits, in a given
  _cxposure time, tN'ice as much Ught as the one
   lgfore    tlt6  lets^ tlrrough twice the lighr ot tfiZ,   f/11 twice-    that of f/16,-and so on ,rrriit f7A.f,'tt   largest opening is reached
     Iiach shutter sctting with which the camera ean
  be hand-held also- gives an. exposure twice as long
  as the one direc.tly preceding'  it. For exampf", oi
   lll00 second, trvice as uruch"light reaches the fihn  as at l/200.
   Now, if you give twice the exposure time _ for
  example, ll50 of a second insteacl oI 1/100 _  thc
   ttse of the next srnaller lens opening rvill pennit
  the same amount of light to reach iire fihn': l/JO
   oi' :r second at f/11 adrnits the same amounl ol.   light as tlt00 at f/8.
   The figures engraved on the shutter antl leus
  opening scales show only fraction denorninators;
   tor,      _ example, 50 instead of  llb}, 4,5 instead ol'   f/{.5. ctc.
.   The depth of field is the distance between the
  nearest and farthest objects in a scene which u,ill
   b.e_ sharp in the prcture. Note that the depilr ot
  field increases as ihe lens opening is rnade smallcr,
  or as the distance focused upon is increasecl,
         . A great ranfle _of sharpncss is de,sirable in many  pictures, particularly  il  landscapes. Since                                                    -ori  objects of interest are at a coniiderable distaucc
  frcm the camera in such pietures, no difficultl- is
  usualliy encountered in obtaining the required
  lange _of sharpness. However,  ii  is  sometirnes  desirable to record                     sharply an object near the                         www.butkus.us
  72
View original page 13Page 14 · Read text
.qF

camera as well as obiects ar an extrcrne clistarrce.
In such cases. refererrce to the table will help you
set lens opening and focus to get a depth of fiekl
which will cover obiects  at both positions (see
depth of field table).
   'I'he table shor,r's that with certain average lens
openings and certain average focusing distances,
practically allr objects at distances from 3-4  rn
are reproduced with sufficient sharpness, These
average letrs opening ( - f/10) and average focu-
sing distance  ( o 8 nt) are clearlv marke,d in red
dots on the corresponding scales of the "Lulrilel"
carnera. Thus, uncler good lighting conditions, the
"red dct" setting will give satisfactory results and
lltt: photogralrher rvill not have to worry about
focusing.

          CAMERA LOADING
  Canrera loading rvitlr standnrd roill  I'ilnr ntay
be performed in daylight. Follow these steps f<-rr.
""i1     i""l3JT"rn locking spings I (Fig. b) and openthe camera back.
  2. Break the seal on the roll of film, insert the
end of the film protective paper into the slit of
the take-up spool 3 and fold it. Turn the film win-
ding knob 4 until trvo or three layers of paper are
wound on the spool.
  3. After checking proper tension of the paper,
insert the film spool into the lower film compart-
ment, replace the camera back, making sure it  is
securely closed and locked.
                                                   13
                                    d
View original page 14Page 16 · Read text
Fig. 5: 1 * Camera baek locking springs; 2 ."'. Spool holder          tansi S;Take-up spool; 4*  Fllrn windins knob;         E * Film windowi 6 * Film window esver knob,
                                                  1S
View original page 16Page 17 · Read text
4. Turn the film window cover linob 6 counter-
 clockwise and open the rvindo\v cover. f'hen. slowlv
turn the winding knob until the first si6;nalling mark,s
and. later the figure "1" appear on the fil*m pnr-
tective paper in the red fihn window 5. Close thefilm window cover.
  The camera is now ready for operation.

          TAKING THE PICTARE
  To take the picture, hold the camera and corn-
pose the sub.iect on the ground glass as you rvunt
it to appear in the finished picture. A lower  .)r
higher position may be desirable to get just the
el'fect you want. When using the frame vierv-fincl-
er hold the camera at eye-level so that the edges
of both iear and front hoorl panel openings coin-
cide.
  Follow these steps:
   I. Focus by  turning the knurled lens mount
until the ground glass image is sharp, or by esti-
rnating the distanee and setting this figure on thc
distance scale.
  2, Adjust Lens opening, according to the light
condition, by moving lens opening lever. T (Fig.-2)
across the scale.
    _3.- Adjust the shutter, according to the type of
subject, by turning the e,xposuie setting lever
8 until index line is opposite speed desired. press
down the shutter winding lever  ll.
  4. Make the exposu-re by slowly pressing the
shutter release lever. www.butkus.us10, Take care not io movt the
15
View original page 17Page 18 · Read text
qsr

camera during the exposure, or the picture may
be blurred.
  5. Open the film window cover by turning the
cover knob 14 (FiS. 3). Slowlv turn the winding
linob I  (Fig. 2) until the next exposure numJrer
appears in the red film windorv. Close the rvindorv
cover and vou are ready for the next picture. Get
into the habit of advancing the film immediately
after taking each picture.


         CAMERA UNI,OADING

  After the twelfth (last) expos;ure has been made,
the film protective paper should be completely
rvinded. Turning of the knob is sometimes inter-
fered with when the rvinding is almost completed;
however. this should not prevent unloading the
camera in daylight
  1'o unload the camera follow these steps:
   1. Open the camera back.
   2. Pull out the film winding knob a (Fig 5) and
turn it slightly to secure it in the out position.
   .3. Slving the  spool holder out of the camera
body by turning the holder tang 2 (Fig. 5) towards
  4. Remove the spool with the exposed film, seal
tlre eud of the protective paper and have the fitm
developed as soon as possible. Do not allow the
film to unwind from the spoo,l or it will be fogged.
   6. Move the lorver empty spool into the upper
film compartment, care being taken to have the
                                                   17
View original page 18Page 20 · Read text
slottcd end of the spool clircctcd tori'lrds  the
rl,inding knob.
  6. Rcplace the spool hol<ler ancl turtrinil  the
l'ilm winding hnob clockwise nrake sut'e lhc spool
is roterting.

                  c.rJ/E?.{ ^srrr
  Complete camera set (Fig 6) itrclttdes:
"'l'-22" l1'pc leirs,
canlera lalie-uil spool,
lcns cn1l.
cable release,
slrouldcr slrap,
itrstrtiction manual aud  celtificate of inspecti:n.
View original page 20Page 21 · Read text
CONTENl'S
                                            Pages
 General features
 Specifications                                                                .J.5
Camera construction                  .6
Camera loading                   .13
Taking the picture                  .76
Camera unloading                  .77
Camera set                     .19


                     Vneslrtorgizdat
Order No, 1210   www.butkus.us Printed in the USSB
View original page 21Related documents and language editions
From the M. Butkus archive. Original publisher and archive notices are retained.
Check the model and edition against your equipment.
PDF verified 2026-10-10.