Film cameras
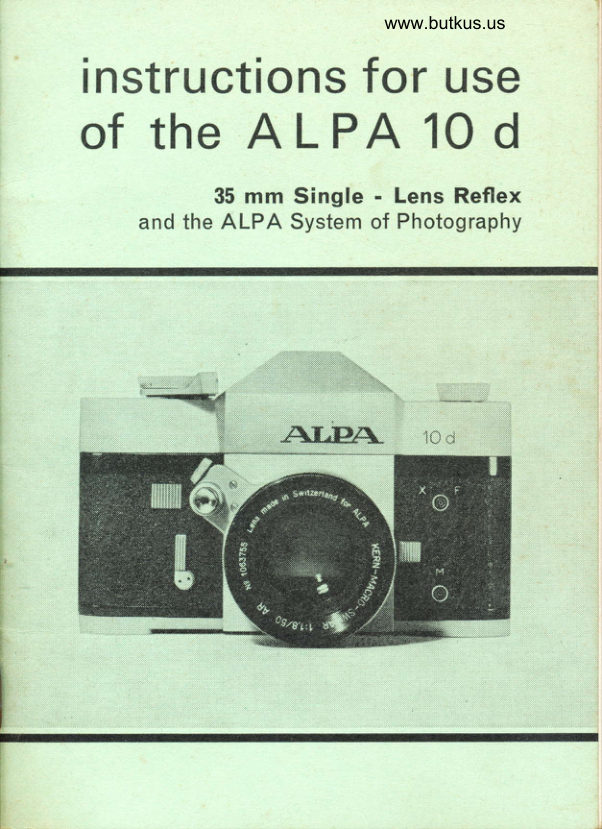
Alpa Reflex 10d SHORT User manual
User manual for Alpa Reflex 10d SHORT. 17 pages in English. Read the original PDF, download or print a copy without registration.
17 pagesEnglish3.5 MB PDF

Loading your manual…Open PDF directly
Document details
- Brand
- Alpa
- Model / document
- Alpa Reflex 10d SHORT
- Document type
- User manual
- Language
- English
- Pages
- 17
- File size
- 3.5 MB
- Category
- Film cameras
- Document date
- Not specified in catalog
Search available document text
Find a term, then jump to its page in the original PDF. Image-only pages may not be searchable; check the PDF for exact wording and diagrams.
Page 3 · Read text
Perfect knowledgeof your
       ALPA, all its                     functions
       and features will girseyou
        the bestphotographic results.
       Pleasestudy theseinstructions
         carefully.


PIGNONS S. A. CH - L338 Ballaigues (Switzerland)


                         www.orphancameras.com
View original page 3Page 4 · Read text
Instructionsfor use
   of the
  ALPA 10 d


The ALPA 10d and the complete ALPA    rewind  crank. etc.-everything   is dyna-
system of photography are the culmina-    mically streamlined for  instant fingertip
tion  of over 30 years of  research and    controls, quickest operation and lapid
development,to meet the most demand-    actron photography.
ing  requirements of  today's  photo-   ALPA's  ingenious, electronic behind-
graphers.                                  the-lens meter system thinks  for  you.
Purpose of  this manual is to give you    Foregoing inaccurate and delicate link-
complete   instructions   for   the   best   age systems,  it couples optically-with
possible performance from  your ALPA    a.ny lens, any  lens accessory, at  any
equrpment.                                 distance,  tor  an  extreme  film  speed
For general information on photography,    range from 3-6400  ASA. The 3 CdS
please refer to the many excellent photo-    cells with  highly sensitive galvanometer
graphic handbooksavailable.             compute  absolutely  precise  exposure
                                                settings.
                                    The precision ground prism with  paral-
A. THE ALPA lod  . GENERAT    lax-free, through-the-lens viewing  sys-
  D E S C R I P T I O N                teming andguaranteesdepth-of-fieldprecisecontrol-withframing, focus-any
                                              lens, at any distance. You have your
A   masterpiece  of   Swiss   precision    choice  of  attractive chrome  or  deep
engineering, the ALPA  10d  is  literally   satiny black finish, with black, dark red
custom built to your order like the finest    or dark green leather covering that  is
S wiss w a t c h .   lt     i s  a n  A L L - l N - O NE    scuff proof, sweat proof and unaffected
camera of  unbelievable versatilitv with    by heat, cold and other climatic influ-
all desirable features, yet compabt and    ences.
lightweight  for  maximal convenience.  The  ALPA   1Od's  uncompromisingly
                                              solid                                          and                                                   exclusiveHighly                                                                          light                                                               metal                                                                       construc-       automated                 and  functional-the                                                                                                                                                         'l                                                  tion,                                                               is geared                                                                     for                                                    moreALPA                                                                  than                                                                    00,000      10d                 is  virtually                          foolproof,  for
utmost handling ease. Easy to  frame,   operations, withstands the most rugged
easy to focus, easy to expose, it  is the    use, for lifelong durability. lt  is virtually
dream of  picture taking simplicity. You    impossible to  deform  the ALPA  body.
can  completely concentrate on  your   The  complete  range   of   functional
photographic assignment, without fum-    accessories, more than 20 ALPA  lenses
bling for a dial, a ring, or a knob-even    and  supplementary equipment   f it  the
when wearing gloves.                         earlier ALPA models, 4-5-6-7-8, 4b-5b-
Automatic,  instant  exposure  readings,   7b-8b, 6c, 9d and 9f, with a few minor
clear visibility of exposure needle, dials   exceDtions.
and figures, rapid diaphragm and speed   Every  precaution  has  been  taken  to
settings, quickchange  bayonet  lens   make the ALPA  10d  as foolproof as
mount, high speed, short stroke wind-     possible.   Nevertheless,  we   strongly
ing lever (without removing ALPA from   recommend that you carefully read these
your  eye),  high  speed  parallelogram    instructionsbefore using your ALPA 10d.
View original page 4Page 5 · Read text
For  f ine adjustments you have a choice
                                                        of 2 each intermediate click stop settings
                                                b e t w e e n ( F i g . 1 ) .
                                         Depress the outer ring of the speed dial
                                                                                ( P) and turn the black index mark oppo-
                                                      site  the  desired black  figure  or  any
                                             intermediate ca libration   in  the  blank
                                                  sector. To  facilitate the ASA  setting
                                          you can turn the speed dial first to one
                                                        of  the  2  extreme speed  settings  of
                                           1/1000 second or B (see below).

                                                     3) Setting  of Shutter  Speeds
                                        The ALPA 10d features a Swiss preci-
                                               sion   movement   with    electronically
                                                  tested,  equidistant  click  stop  speeds,
                                                calibratedin white on black (T).
                                           Turn the outer ring of the speed dial (P)
                                                        to the desired setting, indicated by the
                                               red  line  across the  transparent disc.
                                      Do not try to force the red line past the
                                               black  sector. Shutter speeds can  be
                                        changed at any time, whether the shutter
                                 . ' . . ' ' . . . . i ' i . ' ' . ' . . &                       is cocked or not. Their calibrated range
                                            corresponds to  international standards:
                                                1 / 1 0 0 0 , 1 / 5 0 O , 1 / 2 5 0 , 1 / 6 0 , 1 / 3 0 , 1 / 1 5 ,
    Fis.1                                      1 /8, 1 /4, 1 /2, 1 second.                                        B permits you to take time exposures of
                                                a ny desired length. The sh utter remains
                                            open, as long as you keep the release
   B. EXTERNALCONTROL       knob depressed. For longer time expo-
                                             sure or  if you mount your ALPA on a
    1 ) W i n d i n g                                     tripod,  use  a  cable  release with  set
   The  high speed, short stroke winding    screw.
    lever  (A  Fig.  1)  cocks  the  shutter,
   advances the film and counts the expo-        I mportant:   For slower speeds such as
    sures. Because of  the  short  travel  of    1 /8, 1 /4, 1 /2, 1 second or longer, either
    o n ly  1 60"  a nd  its 3 separate f u nctio ns    disconnect  the  automatic  diaphragm
    you feel a certain resistance. lf you do    control  of  you r  automatic  lenses, or
    not wind  the  lever completely to   its   make  sure  that  the  shutter  release
    positive stop, the shutter release will be    remains depressed for  the  entire dura-
    blocked. Just wind  it once more, without    tion of the exposure.The setting of 1/60
    any force, to unblock it.                   second  is marked in red, indicating that
   The  high  speed winding  lever never      it  is the fastest shutter speed for syn-
    interfereswith your viewing, so that you    chronization with electronic flash. lf you
    can. rapidly release?ld wind your ALPA     try faster speeds, the moving  slit of the
    again and again, without ever removing    focal plane shutter will only expose part
       it from your eye.                                 of the frame.
                                                Selection  of  the  correct shutter speed
    2) Setting  of ASA  Film Speed Rating     usually depends on the mobility of your
   The  equidistant click stop  settings of    subject.   Consider  speed,   direction,
    the extreme film speed range are cali-    distance as  well  as focal  length and
    brated in black and correspond to  inter-    stability of  your camera. For maximal
    national standards: 3-6- 12-25-50-1 00-    sharpness, use one of the faster shutter
    200-400-800- 1 600-3200- 6400 ASA.        speeds.

2
                            www.orphancameras.com
View original page 5Page 6 · Read text
Fig.2


4) Shutter  Release                       provides  f or  lig ht  readings, previewing
                                             depth-of-field and  accidental exposure
Located o n the fro nt of the ALPA  1 0d    prevention. The lock does not  f u nction, if
(D Fig. 2) the hair-triggerreleaseinstan-   you use a cable release in the releasetaneously         operates                   the quiet,                                lightning-                                           button of the camera itself.fast  reflex-            mirror and                                   -g liding,                     smooth
vibration-free shutter. Press your thumb    For  extreme wide  angle  lenses with
against the camera back in the opposite   protruding  rear  elements, the  ALPA
direction, so as to  hold your ALPA as    mirror can be locked in  its flip-up posi-
steadily as possible. The conical thread    tion. Wind the high speed winding lever,
inside  the  release butto n  accepts  a    ho lding  it  in  its extreme position  a nd
cable release.All lenses with automatic   depress  the  camera  release  button.
diaphragm have integrated release but-   Then  release both  release button  and
tons, which  in turn depress the release    lever. For  smoothest  possible shutter
button  on  the  camera. The  flip-up    release with  extreme telephoto  lenses,
reflex-mirrorimmediately returns to   its    for  ultra  close-ups, photomicrography,
normaI  position,  after  the  sh utter  is    etc.  depress the  release button  very
closed, even   if you  keep  the  release   slowly, so that the mirror flips up  first
button  depressed. Any  vibration you    a nd  the  sh utter  is released af terwards
may  feel  is  caused by  the  flipping    only.
down  of  the  mirror, which  has  no    Intentional double  exposures can  be
longer any influence on  the sharpness   taken as follows:  After the  first expo-
of the picture.                             sure press the rewind  release knob  at
                                                                                       t h e b o t t o m o f   t h e A L P A   ( O  F i g . 6 ) ,
lmportant:      lf  you   still depress the    while operating the high-speed winding
releasebutton when starting to wind the    lever the second time. The film will not
camera, the mirror may not  flip up  for    advance, so that a second exposure can
your next exposure and one frame would    be taken on the same frame. However,
be lost.                                     perfect registration cannot be  guaran-
The  shutter release lock  (V  Fig.  2)    teed, as the take-up spool is still turning.
View original page 6Page 7 · Read text
Fig.4

                                                                    (L)        (L)
           Out of focus.                                                        ln focus.
5) Selftimer                                second.   lf  you   try  faster speeds,  only
T h e b u i l t - i n s e l f t i m e r ( R F i g . 2 )  c a n b e     part  of  the image  will  be exposed. At
adjusted    f rom  1 -2O  seco nds.  Turning     s l o w s p e e d s u p  t o 1 / 1 5 s e c o n d , y o u c a n
the  lever to  its extreme position  corres-    also  use  this  contact  with  the  more
ponds   to   a  delay   of  approximately    economical  flashbulbs for  central shut-
20 seconds. lf moved  90' only, the delay     ters, which  have a short peak  (class F
w i l l b e a b o u t 6 s e c o n d s .                      b u l b s w i t h 5 m i l l i s e c o n d s d e l a y ) .
Wind  the ALPA   first, set the  selftimer,   T h e     l o w e r M  c o n t a c t   ( F i g . 2 )        i s   f o r
then  depress the  release button  com-     synchronization with  class FP bulbs  for
pletely. This sets the delayed action into     focal  plane shutters. They have a  long
motion, giving you plenty of time to take    peak  that  gives  uniform   illumination
up your position "in the picture".             over  the  entire image,  at most  shutter
                                           speeds.
lmportant:   When  using  the  selftimer,
disengage the  automatic  diaphragm  of
your      automatic                  lenses.                        Otherwise                                       the  C - F R A M I N G . F O C U S I N Gpicture           will  be  taken                             at                                      full  aperture.
 lf you use the selftimer with  the shutter     A N D D E P T H - O F - F I E L Dset on B, the exposure time will be about
3  seconds. This  long  exposure time  is    CONTROL
invaluable for pictures taken under poor
 l i g h t i n g  c o n d i t i o n s  o r  a t   v e r y  s m a l l                                                    1) Single  Lens  Reflex Systemapertu res.
The  extremely  gentle  release  by  the    The   precision  ground  ALPA   prism
selftimer  permits  vibration    f ree  expo-    provides   a    reinverted   groundglass
sures, especially usef u I  at slow  shutter    image  of  exactly  25 x 35   ffiffi,  i.e. 24x
speeds.  lf  for  any  reason a  picture  is    36 mm  less a 1/2 mm safety margin on
not  taken  after the  selftimer has been    each  side. This corresponds to the 23 x
set,  simply  lock   the  release  button    35 mm frame of standard slide mounts,
(V Fig. 2), then keep the release button    so  that  there  are  no  cut-offs  on  the
depressed until the  lever (R)  returns to     projection   screen,  which   guarantees
 i t s o r i g i n a l p o s i t i o n .                          absolutely accurate composition.
                                       The  finest  grain  groundglass  offers  a
6) Flash  Synchronization                     b r i l l i a n t   i m a g e    i n  1 : 1  L I F E  s i z e   ( w i t h
T h e u p p e r X  a n d F c o n t a c t   ( F i g . 2 )    i s    standard  50 mm  lenses). This  means
for   synchronization   with    electronic    that the image appears just as large as
f l a s h  a t  s h u t t e r  s p e e d s  u p     t o  1 / 6 0     the subject, when you view   it with your


                         www.orphancameras.com
View original page 7Page 8 · Read text
naked eye. And   it can  still easily be
seen, when  stopping down  to  small
aperturesfor depth-of-field control.
When using longer telephoto lenses or
close-up attachments, the  upper edge
of the image may become slightly shad-
ed, because the  reflex-mirror does not
reflect the  entire cone  of  light  rays.
However, this has no effect whatsoever
on the actual picture.            'lThe eyepieceof the ALPA  0d is equip-
ped with a large, soft-rubber eyecup to     Fig. 5
exclude extraneous stray light. lt can be
rotated for taking horizontal and vertical
pictures. lts bayonet mount  offers in-
stant interchanging with  a magnifier or    photograph. And  last but not least, it  is
angle  viewfinder. The  standard  1:1    indispensable for extreme close-ups at
ocular of the ALPA viewing system can    high  magnifications and  photomicro-
be replaced by a special 1 :0,7 eyepiece,   graphy. The image  is  in  perfect focus
so that people who wear glassesor have   when both the aeriat image and one of
recessed eyes  easily  see  the   entire    the two  lines (L  Fig. 4) appear equally
image. An adapter with standard diop-    sharp.
ter or  prescription lenses snaps easily   Both  semi-circular prisms  will  appear
into the eyecup.                           u n ifo rmly b rig h t u n d e r n o rma l condi-
                                               tions.  Under   certain  circumstances
                                           (smaller lens apertures.close-up photo-
                                        graphy) one of the semi-circular prisms
2) Focusing                        may appear to be shaded. In this case
Turn the focusing ring on the lens to    you can align your image between the
set the proper distance. You have your    other, bright prism  of  the  split-image
choice of 3 focusing methods:             a n d th e cle a rg la ss rin g .
                                             lmportant:   The perfected optical sys-a) Groundglass. Turn distance setting  ilng                                                te m o f th e A L PA 1 0 d with 1 :1 L IF E size
    until image is critically sharp.              magnification  on    the   groundglass
b) 45'  Diagonal  Split-lmage  Rangefinder    makes focusing remarkably easy. How-
                                            ever. this should not tempt you to take
The standard groundglass screen has a    photographs of  subjects which  cover
built-in  optical rangefinder with  a  45'    only a small part of the entire area. You
diagonal split-image, formed by a  pair   can  easily avoid  this  by  comparison
of  prisms which  appear as  2  semi-    with the 3 rapid referencescales on the
ci r cles (Fig. 5 ). Y o u c a n p i n p o i n t f o cu s   ALPA  groundglass: The  diameter  of
for  both  horizontal or  vertical  lines   the rangefinderis 3 mm, the width of the
instantly-with any lens, at any distance.   clear glass ring  is 1 mm which  brings
Select a specific detail in the subject to    the total diameter to 5 mm. The overall
be photographed and turn the focusing    length  of  the  cross-hair  is  10 mm
ring until the image in the 2 semi-circles     ( F i g . 3 , 4   a n d 5 ) . T h e s e 3   r e f e r e n c e
is in perfect alignment, with no displa-   scales clearly indicate when a  different
c ement at  t h e d i v i d i n g  l i n e . N o w  y ou r    (telephoto) lens ought to be used. They
focus is perfect (Fig. 3 and 4).              are even more useful for measurements
                                     and  comparisons  in  macro-photogra-
The  clear  g lass  ring  (aeriaI  image)    phv.
a ro und  t he rang e f i n d e r ( d i a m . 5 mm)
permits you  to  see everything visually    c) Distance  Scale
sharp, which  is  in front or behind the
depth-of-field zone of sharpness on the   ALPA  interchangeable lenses are  cali-
groundglass. You can  also use   it  for    brated with  distance scales to  preset a
rapid location of the subject you wish to    specific distance, where focusing on the
View original page 8Page 9 · Read text
groundglass or with the rangefinderis
                                           impractical.When taking flash pictures,
                                         the availablelight may be so dim that
                                      groundglass focusing can become diffi-
                                       cu lt, especially if  the  lens is stopped
                                 down  to  a smaller aperture. In sports
                                     photography you  frequently have no
                                        time to do any focusingat all.
                                       Locationof the film plane is visibly indi-
                                       cated by  the  exacting ca libration  o n
                                   camera top, to the right of the reflex-
                                   pnsm.

                             D. LOADING AND
                       UNLOADING
                                            1) Loading
                                                      Lift the hinged key  ( M  Fig. 6)  at the
                                     bottom and turn it to the right clockwise,
                                      as far as it will go. Pull the key to remove
                                          the combined camera back and bottom.
                                    Always  lift off the back upwards andF i g . 6                                      never downwards  to  avoid damaging
                                          the film pressureplate. Fig. B shows you
                                          the best method of how  to  ho ld the
                                          cartridge to insert the film leader in the
                                                          slit (marked by an arrow) of the empty
F i g . 7                                     take-up  spool. Keep  the  film  edge
                                        against the lower flange of the spool.
                                            Pull out just sufficientfilm, so that the
                                          cartridge can be placed in  its chamber.
                                     Turn the take-up spool by advancing
                                         the film with the high speed winding
                                           lever once, so that at least 1 layer of
                                              film is wound around it. Make sure that
                                          the sprockets engage in the film perfo-
                                            rations. You do not necessarilyhave to
                                     wind the film until the sprocketsengage
                                         the perforationson both sides (Fig. 9).
                                            After the  film  is  correctly positioned
                                        replace the camera back from above
                                       holding it b y  t h e k e y . L o c k  i t b y  t u r n i n g
                                          the key to  the  left counter-clockwise.
                                  Wind the high speed winding lever and
                                  make sure that  the central screw  in
                                          the high speed parallelogram  rewind
                                       crank  rotates  (Fig.11), wich  proves
                                              that  the  film   is actually  advancing.
                                  Wind and release the shutter 2  or 3
                                       times in succession,in order to  elimi-
                                       nate the fogged film leader before you
                                        take the first picture.
                                  The automaticframe counter (C Fig. 7),
                                     which always starts 3 numbers below 0,
                                   advancessimultaneouslyto 0.

                         www.orphancameras.com
View original page 9Page 11 · Read text
exposed frames as  indicated by  the
                                     exposure counter, before rewinding the
                                               film into  its cartridge and opening the
                                   camera back. The  automatic counter
                                          returns instantaneously to  zero when
                                     you removethe cameraback"

                                                   2l Unloading
                               When the cou nter indicates the  1 9th
                                              or 35th frame of your 20 or 36 exposure
                                                     roll, wind the high speed winding lever
                                           with caution" According to your way of
                                          loading,you may obtain 1 or 2 exposures
                                   more or iess than the specified number.
                                                                          lf you feel a stronger resistancewhen
                                         winding, do not use any force. Other-
                                       wise you may tear the perforations or
                                      detach the filmend from the cartridge,
                                      which makes rewinding impossible.
                                   The  high-speed parallelogram rewind
                                       crank rewinds the  fully exposed film
                                            quickly, within  seconds. Depress the
                                     rewind rel e a s ek n o b ( O F i g . 6 ) ,  i n o r d e r
                                                to disengage the sprockets. lt remains
                                     depressed during rewinding and auto-Fis" 1 1                                          maticallyjumps out, when you wind the
                                     high-speed winding lever again to ad-
                                    vance the new film. Pull out the high-Whenever possible load the ALPA  in                                    speed   parallelogram  rewind   cranksubdued light to prevent f ogging of the                                            (Fig. 11) a n d  t u r n  i t   i n  t h e d i r e c t i o no ffilm. lf no other shade is available,turn                                          the arrow. While rewinding the film, youyour back to the light.                                                feel a  distinct resistance at  first. Once
                                          the film has been completely rewound,lmportant:   lf you have a partially expos-                                     you hear an audible signal that indicatesed film, make a note of the number of                                          the separating from the take-up spool.
                                Open the ALPA and remove the origi-
                                            nal cartridgewith the exposedfilm.F i g .1 2
                                                                                   I mportant   :   lf yo u depress the rewind
                                        releaseknob accidentally,while winding
                                          the camera, this may cause a double
                                     exposure (see page 3). Releaseshutter
                                           with  lens cap  over  lens frame and
                                   advance the  film  once, making sure
                                             that the rewind releaseknob jumps out
                                         again, which re-engagesthe film trans-
                                              port sprockets.

                            E . A L P A L E N S E S

                                              1) Ghanging the lenses
                                     Press the    l e n s  l o c k b u t t o n  ( O F i g . 2 )
                                    and  turn  the  lens anti-clockwise. To
                                             insert the new lens line up the two red

                         www.orphancameras.com
View original page 11Page 12 · Read text
Galvanometer                                              Potentiometer


 Galvanometer                                                Ph otoresistor
                                                                  compensafes  light needle visible
                                                                     entenng
                                                                               the eyepiece

                                                                                Fig. 1 3

dots, press lens lightly to  the camera    of the more than 20  lenses, any lens
body and turn it clockwise until it clicks   accessory, at  any  distance, for  an
tn .                                   extreme f ilm speed range f rom 3- 6400
                                   ASA.
2l ALPA lenses                                 All    f /stops,  shutter speeds and ASA
                                           ratings are directly cross-coupledto theALPA  has  chosen an  incomparable
selectionof lenses produced by the most    highly sensitive galvanometer for  ins-                                              tant  exposure settings, automatically-                        Kern,                               Kinoptik,          manufacturers:well-known                                 Zeiss.   or manually. Two CdS cells take accu-                 Zoomar                         and          Schneider,Ang6nieux,                                            rate overall light readings with  predo-Each lens undergoesa rigorouscontrol of                                    minance on the center area, while thean extremely high standard. The lenses                                               third CdS  cell  electronically compen-have a range of focal lengths between                                        sates for  light entering the  eyepiece,24  and 600 mm  and  their bayonet                                                  for  absolutely precise exposures. Themountingsystemhas remainedunchanged                                            well iltuminated needle is always clearlysince 1952. Among this fine selectionof                                                visible, either at eyelevel in a separatelenses are three exclusiveto ALPA- the
welf-known Kern Macro-Switar 1.9/50   window below the viewing screen,or at                                          waistlevel in a second window  in themm (the standardlens of the ALPA) and                                    accessoryc l i p o n   t h e c a m e r a t o p . T h ethe Kinoptikapochromats.                                   camera  release button  automatically
                                          activatesthe 2 standard Mallory mercury
F. EXPOSUREREADINGS       batterieslife  to  2 ( PXyears450),or  extendingmore. G o ldPlatedbattery
                                        co ntacts g u arantee accurate   f u nction -
1) Basic Principles                         ing  of  the  meter system, even while
Fig. 13  illustratesthe ingenious, elec-    batteryvoltage decreases.
tronic behind-the-lens CdS meter sys-       I mportant   : Always check ASA  rating,
tem which couples optically-with any   when changing your film (see page 2)
View original page 12Page 13 · Read text
2) Two Methods                            3) Recommendations

    a)  Correct  Aperture  for  given  Shutter
      Speed                                                Light readingscan also be taken without
    Usually you set your shutter speed first,   locking the sh utter release. Either yo u
   based on  the  moving  or  stationary   read the exposure before the camera is
    subjects (Fig. 7). Slide shutter release  wou nd,  or  you  carefu lly  press the
    lock towards  lens (V  Fig. 14).  Keep   release button and stop down the dia-
    release button   ( D  Fig. 14)  depressed  phragm, before releasing the  shutter.
    a n d  t u rn d ia p h ra g m ring until the well       lf you cannot center the needle,there is
    illuminated needle  is  centered (see   not enough  (   -   sign) or too much
   page 9).   lf  your  picture is  properly     ( + sign) light and you have to change
   framed and focused, simply slide back    the shutter speed or f/stop accordingly.
    lock (V) a nd press release butto n   ( D )    At  your  convenience you  can  also
    to take your picture.                    change f/stops or shutter speeds ma-
                                                 nually, independentof the meter system,
    b)   Correct  Shutter  Speed   lor  given     for personalexposurecontrol.
        Aperture                         Keep your eye as close as possible to
   As an exceptionyou may wish to set the    the  large, rotating soft-rubber eyecup
    aperture first, based on  the  required  w h i l e t a k i n g a   l i g h t r e a d i n g . T h i se l i m i -
    depth-of-field. Slide the shutter release   nates  strong  reflections caused  by
    lock  (V)  towards  lens. Keep release  eyeglasses or incident light, which may
    button  (D)  depressed with  diaphragm   not sufficiently be compensated by the
   stopped down to preset f/stop and turn    third CdS cell. lf you center the needle
   speed  dial  u ntil  needle  is  centered.   at waistlevelin the window on top of the
    Slide back lock (V) and press release  camera, cover the eyepiece either with
    button (D) to take your picture.           your hand or the lens cap.


   F i s .1 4


1 0
                             www.orphancameras.com
View original page 13Page 14 · Read text
4) Range of CdS Meter System
 Film speeds           Range of
ASA   D IN        Sh utter Speeds
                                f astest         slowest
   3 6          /60         second
   6 9         /125                )
  1 2    1 2     /250                 )
  2 5    1 5     /500                )
  5 0    1 8      /1 000               )
 100   21      /1 000         / 2 )
 200   24      /1 000        /4    D
 400   27     /1000           / 8 )
 800   30      /1 000            / 1 5  D
1600   33      /1 000    /3O   )      F i g .1 5
3200   36      /1 000     /60    ))
6400   39      /1 000     /125  )
 lf the speed required is outside these    Insert 2 new standard Mallory Mercury
ranges,the correct setting can be easily   PX 450 batteries,both with the +  sign
determined, as  the ASA    f ilm  speed   facing outwards i.e. towards the camera
ratings are directly proportional to  the   bottom (Fig. 1 5 ) .
shutter speeds and  f/stops  (with  the
exceptionof the maximum apertureson
certainlenses).                                6) Filter Factors
Example: You wish  to  take a  picture   Exposure factors caused by  filters are
with an ASA 12 film at a shutter speed   automatically compensated for  by  the
of 1/1 000 second. The fastest possible   behind-the-lens  CdS  meter  system,
shutter speed is 1 /500 second. Assum -    except for certain red filters.
ing the correct f/stop with 1/5OO second
is f/5.6, you simply open the apertureto
t 14 and set the shutter speed to  the
desired1 /1 000 second.
lf the shutter speed exceeds 1 second,
you can easily determine the exposure
based on  the ASA  film speed rating.
Example: You wish  to  take a  picture
with a 25 ASA film. The lens is set at
full aperture and the shutter speed at
1 second, but the needle still cannot be
centered. Change the ASA  setting on
your dial until the needle is centered.
Assuming that  it indicates 100 ASA, i.e.
2 stops above your film speed of 25
ASA, yo u  easily determine the  exact
shutterspeed of 4 seconds.

5) Battery Change
lf the needle no longer moves, while
you  depress the  release butto n,  the
batterieshave to be changed. Make sure
there is no  film  inside your ALPA-
(counter must be 3 numbers below 0,
see page 6)-and  remove the camera
back. U nscrew the large lid of the bat-
tery housing at the bottom with a coin.

                                                                        1 1
View original page 14Page 15 · Read text
G. USEFUT ALPA HINTS          only extensive knowledge and skills, but
                                               also  special  tools.  Your  guarantee
   ALPA cameras are well known for their   becomes void,   if  the ALPA  or ALPA
    exceptionally solid and exclusive light-    lenses are serviced by any unauthorized
    metal construction that withstands the    person or service station.
    most rugged use. This has been proved
    time and again under the most trying    8) The ALPA  is not watertight. Special
    climatic conditions, in many expeditions   water-tight  cases  are  available  for
    to  the   artic,  the  tropics,  the  ocean    underwater photography. lt the camera
   depths and up  the  highest mountains    is dropped accidentally into the water,
     of the world.                                                       it should be dried immediately and sent
    Nevertheless, the  ALPA    is   also  a     at once to an authorized service station
    precision  instrument,  which  deserves    or  to  the ALPA  factory.   lf  dropped
    your continued care, so as to maintain    into  salt water,  the camera must  first
     its  high  performance  standards. The    be  rinsed several times  in  fresh water
   same principle applies to  all ALPA len-    before being  dried.   lf  salt water  dries
    ses and accessories. Please pay special    inside   the camera,   the   increasing
    attentionto the following points:            concentration of  salt  will  erode  the
                                            metal  components  including  chrome,
    1)  Protect your  ALPA  from  sudden   and destroy the mechanism.
    blows  and  falls, by  using  a  carrying
    case. Avoid  continuous vibration (on    9)  Standard 35 mm film cartridges may
    the floor of a car close to the propeller   sometimes  be  faulty. When  loading
    shaft, on the luggage grid  of a motor-    your ALPA  make sure  that  the  film
    cycle, etc.).                           moves  easily out  of  the  cartridge and
                                                   that its lips are not too tight or dented.
    2) Do  not  leave your ALPA  wound        lf  the  film  does  not  pull  out  freely,
    during prolonged periods of time.           gently  insert a penknife blade between
    3) Keep your ALPA  away  from  dust,    the back of the film and the  lip of the
   wind-blown sand and too much humi-    cartridge and open the mouth  slightly.
     dity. In the tropics keep it in an airtight   Make sure that there are no loose velvet
    container together with  a  desiccating   threads hanging from the cartridge lips.
    agent such as silica gel. In winter. when   They may tear lose and get caught in the
    carrying  your  ALPA   from   outdoors    film window, which produces shadows
    into  a warm  room,  metal and  glass   on your photographs.
    surfaces may become misted over with
    condensation. Do not wipe this off, but    10) Register your ALPA with the agent
    wait  until the  mist disappears as the     in your country or with the factory to
   camera warms up.                           validate the warranty.
    4) Clean the film channel and pressure   11)   lf  your ALPA   is  lost  or  stolen,
    plate from time to time with a piece of    report the serial number of both camera
       f luff-free  cloth  (never  use  cotton  or   and  lens  to  your  dealer, the ALPA
    wool).                                  agents in  your  country  or  the ALPA
                                                factory immediately. This  is  the  only
    5) Do not touch  the  reflex-mirror with    possible method of  finding the camera
    your  fingers, which  may smudge  or   and  returning  it  to  you. We  strongly
    scratch  its surface. Your nearest dealer   recommend that you insure your ALPA
    or service station will be happy to clean   equipment.       it for you.
    6) Do  not  try  to  lubricate the ALPA    12) Over 4Oo/ool the ALPA  factory are
   mechanism  and   shutter.  They   are   engaged  in  most severe, total  quality
   geared for more than 100,000 operations   controls, certified by an inspection label
    without lubrication.                       attached  to  every  ALPA.  And  each                                   ALPA  carries a  world-wide  guarantee
    7) Do  not  attempt  to  dismantle the       f or  highest mechanical, electronic and
   ALPA.   This   operation   requires  not     optical performance.
                                                                                                                                                                                                                                                                          I

1 2                             www.orphancameras.com
View original page 15Page 17 · Read text
S\MTZEFILAND


        PIGNONS S.A. CH- t338 Ballaigues


Printed  in Switzerland  5 0085 7www.orphancameras.comGB 3-72                                           Haefeli
View original page 17Related documents and language editions
From the M. Butkus archive. Original publisher and archive notices are retained.
Check the model and edition against your equipment.
PDF verified 2026-10-10.