Film cameras
Belca Belfoca User manual
User manual for Belca Belfoca. 17 pages in English. Read the original PDF, download or print a copy without registration.
17 pagesEnglish1.7 MB PDF

Loading your manual…Open PDF directly
Document details
- Brand
- Belca
- Model / document
- Belca Belfoca
- Document type
- User manual
- Language
- English
- Pages
- 17
- File size
- 1.7 MB
- Category
- Film cameras
- Document date
- Not specified in catalog
Search available document text
Find a term, then jump to its page in the original PDF. Image-only pages may not be searchable; check the PDF for exact wording and diagrams.
Page 5 · Read text
A. Loading and Changing the Film
The Belfoca Camera takes the standard 2%X3yo" (6X9 cm)
roll film spool B II for B.axposures 2%X3tA" (6X9 cm), or
12 exf)osures 2%X2yn" (6 X 6 cm), according to choice.

1. Opening the carnera back
  Push aside the catch (1) underneath the carrying strap and
  pull away the camera,back from the body. The camera back


                                                          Ill. No.3


   is hinged to the bodlr so that it can be left hanging don'n
   (Ill. No. 3 and 4).

                        www.butkus.us

                                                                                                                                 j
View original page 5Page 6 · Read text
2. Inserting the fihn sPool
  swing out the film spool bearer in the lowerfilm ehamber (16)'
  remo\re tho empty spool and insert a new film spool, placing
   it so that the colored (red) surface of the protective paper
   faces the outside when the film is being rolled off' Pull out
  the film-transport knob (2), swing up the upper film spool
  bearer in the film chamber (1a) and insert the empty film


   spool (taking care that the slit end of the spool lies in the
   direction of the fiIm-transport knob (2). After swinging the
   film spool bearer back into its former position, push in the
View original page 6
Page 7 · Read text
filnr-tyansport knob (2), turning it slightly forward, until it
   clid<s into the r,lote,h of the film spool. Pull the paper tongue
  projecting from'the.'film across the two gliding rollers (I3)'
   fix it into the slit of the empty spool, and rotate the film-
  transport knob two to three turns, until the film lies per-
  fectly flat. Make sure that the film runs quite smoothly
  without rubbing the flanges of the rec,eiving spool.

3. Closing the camera had<
  Close down tho camera back, pressing it to the body, until
  the spring lod< snaps in audibly.

                        www.butkus.us
View original page 7Page 8 · Read text
4. Film-transport
  Open the pan-proof cover of the film window in the camera
   back, turn the film-transport (2) forward, until the number "l"
  appears in the window. The window in the middle is for
  the 2",4,X2r/4" (6X6 cm) size, and the window at the
  lower edge of the camera back for the2r/+X3rl" (6X9 cm)
   size. After the pan-proof cover has been closed again, the
  camera is ready for the first exposure.

5. Removing the film
  The opening of the camera back has already been described
  in point (1). After opening the bad<, pull out the film'
   transport knob (2), whereupon the upper spool bearer with
  tho exposed spool can be swung out. Remove the exposed
   film spool carefully and paste down the gumstrip. Take the
  empty spool from the lower film dramber (16) and immedia-
   tely place it into the upper spool bearer, thus preparing
   the camera to take the new film. In this way the camera is
  always provided with an empty spool.

6. How to use the mask for the 2%X2%' (6X6 cm) format
  The picture mask (IB) can be inserted or removed only be-
   fore a new film is put into the camera or after an exposed
   film has been talcen out.

B. Technique of Exposing
 1. Opening the eamera
   Press the knob (3) below the film-transport knob and, nhen
  the camera springs open, pull down the baseboard until
   the struts (4) snap in.
View original page 8
Page 9 · Read text
TAI(E CARB NOT TO TOUCH THE RELEASE KNOB (6)
  WHILE OPENII\G THE CAMERA

2. Setting the distanee
  The object is focused by turning the milled ring (10) round
   the lens. The distance can be regulated between infinity (-)
  and 5 feet (1.5 rneters) and is always measured from the
  camera badr to the object. Turn the lens back to infinity (oo)
   bef ore closing the camera  !

3. Setting the shutter speeds
  The BELFOCA is available with either of the three follow-
  ing shutters: the JUNIOR Automatic shutter, the PRONTO,
  or the PRONTOR S.
I
                         www.butkus.us
View original page 9Page 10 · Read text
Ill. No. 7

a) The Junior Automatic Sh,utter, for  instantaneous ex-
   posures of  7/zsth, 1/soth, and 1/rooth second, and time
   exposures of any desired length (B or T). Vhen closing
   the camera take care that the shutter is not set at'0T".
  Instantaneous exposures:  Turn the milled ring (R)
   until the noteh (K) stands above the desired number.
  The corresponding exposure of  rlzr,th, liroth, or thooth
   second is made by pressing the body shutter release (6),
   or a wire release connected to the body shutter releasl'.
   Tinte ex,posures (B or T) t  Turn the milled ring  (R)
   until the notch (I() stands above the B or T mark. At B,
   the shutter will open when tlae release knob is pressed
   and remains open until the pressure is relaxed after any
   length of time. Vhen set at T, the shutter opens when
   the release knob or wire release is pressed and remains
  open until  it  is pressed a second time.
b) The Pronto Shutter  for  instantaneous exposures of
   tlzsth, liroth, 1/rooth, and 1/zooth second, and time ex'
   posures of any desired length (B).
   Instantaneous exposures: Turn the milled ring (R) until
   the  (l[) mark stands above the desired number. Vind
   the shutter by moving the winding lever (Sp) to the left
View original page 10
Page 11 · Read text
-TT
            ffi

                              Ill. No. B                                      Ill. No.9
      unril  it  clicks in  (Ill.  I\o. g). The exposure is made by
     pressing the release knob or the wire release.
    Instantaneous exposures with setf.release: Having set
     the shutter and wound up the lever (Sp) until   it
     clicks ir,  press the lever (v) on the lower part of the
     shutter down to the left as far as it  \,vill go (Ill. Nr.9).
     Pressure on the body shutter release or the wire release
      will  first set the delayed-action spring working (about
     l0  seconds), whereupon the exposure takes place.
    Time exposures (B).' Turn the milled ring (R) until
     the (M) mark stands above the B. Press the winding lever
     (sp) to the left until  it clicks in  (Ill. No.9). The shutter
                                                                                                                                  r    opens by pressure on the release knob or the wire release                      't1
    and remains open until, after any desired length of time,
     the pressure is relaxed. For time exposures  it is advisable
     to use a tripod. One tripod socket is built into the base
     of the camera (for upright pictures), and one into the            Irii     side (for horizontal pictures).
  c) The Prontor-S Shutter  for  instantaneous exposures
     of I to Lf zr,oth second and time exposures of any desired
    lensth (B).

IO
                       www.butkus.us
View original page 11Page 12 · Read text
ffi

                Ill. No. 10                                             Ill. No.ll

Instantaneous exposures; Turn  the milled  ring  (R)
until the desired number stands above the (M) mark.
Vind  the shutter by moving the winding lever (Sp) to
the left  until  it  clicks in  (Ill.  1\o. 1l). The exposure  is
made by pressing the release knob or the wire release.
 Instantaneous exposures uith   self-release: Having
set the shutter and wound up the lever (Sp) until   it
clicks ir, press the lever (V) on the lorver part of the
shutter down to the left as far as it will go (Ill. No. 11).
Pressure on the body shutter release or the wire release
will  first set the delayed-action spring working (about
I0 seconds), whereupon the exposure takes place.
Time exposures  ( B).' Turn the milled ring (Rt until
the B stands above the (M) mark. Move the winding
lever (Sp) to the left until  it clicks in  (Ill. No. 1I). The
shutter opens by pressure on the release knob or the wire
releaso and remains open until, after any desired length
of time, the pressure is relared. It  is advisable to use
a tripod for time exposures.
Important  - when setting the Pronto and Prontor-S
 shutters ! Use eonsiderable pressure in  winding  the
                                                                       II
View original page 12Page 13 · Read text
lever (Sp) at the high speeds. In order to avoid causing
     a displacement of the lens carrier, one should get used
      to moving the lever with the index finger of the right
     hand, at the same time exercising counter-pressure on
     the shutter with the right thumb.
      Flashlight exposures: All the shutters are provided with
       flashlight connection (YA  Ill. B to rr). By means of this
      synchronization, the ignition of the flash lamp takes place
      precisely at the moment the shutter opens for the ex-
      posure. The duration of the flashes is 1/aoth second, and
      in order to make use of the light to full advantage, a
      shutter speed longer than Ll+oth second should be chosen,
      e. g. llzsth second. (At longer speeds it  is advisable to
     use a tripod.)
    Our illustration No. 12 shows the BELFOCA connected
      to the Exakta Flash l]nit  of Ihagee Cam,era Vorks,
     Dresden A 16. Atry other standard flash unit may also
     be used. The manufacturers will give details on enquiry.
     Fundamentally, the arrangement will always be the soms
     as shown in our picture.

-X. Setting the diaphragm
  The sliding lever (B) below the objective regulates the
  apertures. The smaller the aperture (which means the larger
  the number on the diaphragm scale), the longer will have
  to be the exposlrre (Compare section C).

5. The finder
  The Belfoca is equipped with a trvo-format direct-vision
  frame finder (5). By pushing up the chrorned finder cap            t
  at its back edge the finder springs into working position.
  For the 2%X3tl"  (6X9 cm) size the knob on the left has

12
                         www.butkus.us
View original page 13Page 15 · Read text
w
           there is hardly any risk of moving the camera and blurring
          the picture.
       A wire release may be screwed into the body release (6) at
           option, an advantage when using a tripod  for time ex-
           posures. Vhen the camera is closed, the release knob auto-
          matically slips out oft the way into the camera body and
          cannot be released by mistake. (See the next paragraph.)
        Long time exposures (as in night photography) can be made
          with the aid of a special wire release giving the so-called T


                                                                      Ill. No.13
               .'.].
           setting in,connection with thePronto and Prontor-S shutters.
         Underneath the press-button of this wire release is a milled
          plate which, when pressed down and turned to the right,
            rernains. fast and permits releasing the shutter in the usual
          ryay. If the milled plate is loosened by turning  it  to the
              l:eft, the release may be employed for the T setting, which
        means that the shutter remains open until the milled plate
            is loosened by light prqssure.
        \4
                                www.butkus.us
View original page 15Page 16 · Read text
r-       i                                                                   \

      I
          7. Closing the eamera
  'I        Transport the film immediately after each exposure until
         the rrext number appears in the filrn window (see section A,
         paragraph 4). Readjust the lens to infinity  (-   l, take the
        camera into both hands and loosen the upper joints of the
           struts by pressing them back into rhe camera body (Ill.1\o.r4).


                                          ,d


      The objective. slips in, and the camera can be completely
        closed until the catih snaps audiblyo
        very importanr; Take care not to touch the release knob (6)
      when closing the camera. As already mentionetl, this knob
          ,s pushed in automatically.

                                                               15
View original page 16Related documents and language editions
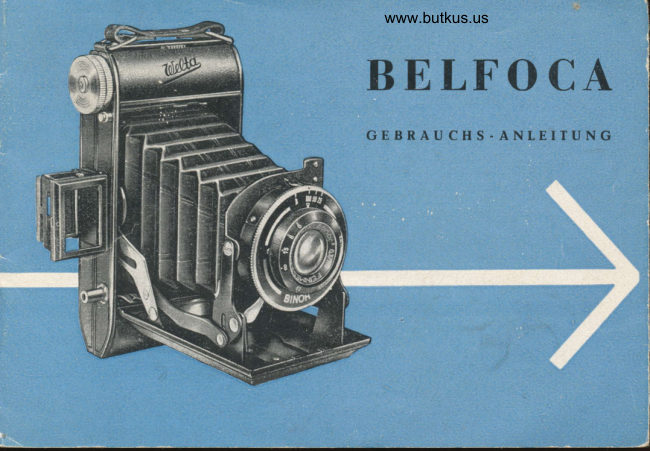
From the M. Butkus archive. Original publisher and archive notices are retained.
Check the model and edition against your equipment.
PDF verified 2026-10-10.