Film cameras
Beseler Topcon Auto 100 User manual
User manual for Beseler Topcon Auto 100. 29 pages in English. Read the original PDF, download or print a copy without registration.
29 pagesEnglish1.5 MB PDF
Loading your manual…Open PDF directly
Document details
- Brand
- Beseler
- Model / document
- Beseler Topcon Auto 100
- Document type
- User manual
- Language
- English
- Pages
- 29
- File size
- 1.5 MB
- Category
- Film cameras
- Document date
- Not specified in catalog
Search available document text
Find a term, then jump to its page in the original PDF. Image-only pages may not be searchable; check the PDF for exact wording and diagrams.
Page 2 · Read text
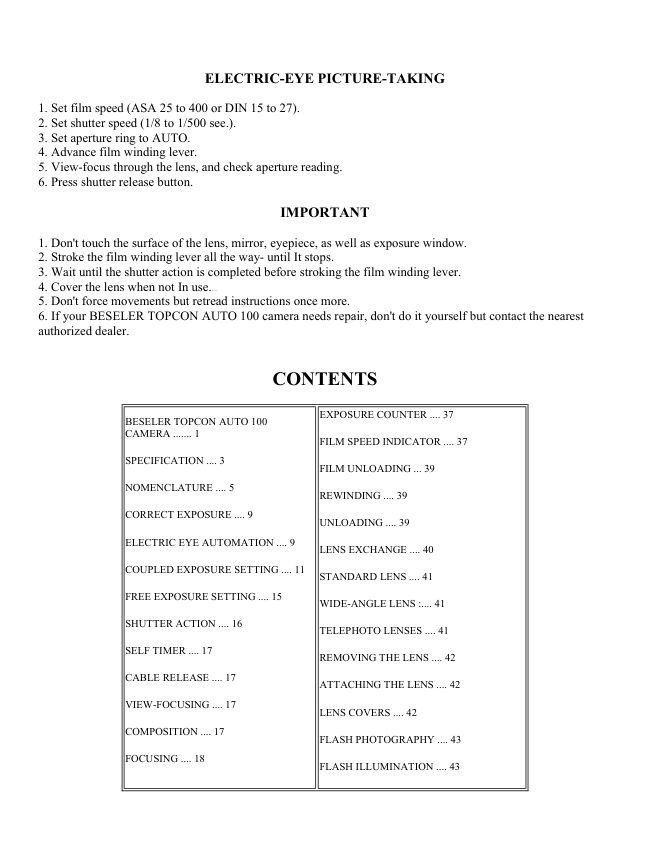
ELECTRIC-EYE PICTURE-TAKING

1. Set film speed (ASA 25 to 400 or DIN 15 to 27).
2. Set shutter speed (1/8 to 1/500 see.).
3. Set aperture ring to AUTO.
4. Advance film winding lever.
5. View-focus through the lens, and check aperture reading.
6. Press shutter release button.

                        IMPORTANT

1. Don't touch the surface of the lens, mirror, eyepiece, as well as exposure window.
2. Stroke the film winding lever all the way- until It stops.
3. Wait until the shutter action is completed before stroking the film winding lever.
4. Cover the lens when not In use. 4.butkus.org
5. Don't force movements but retread instructions once more.
6. If your BESELER TOPCON AUTO 100 camera needs repair, don't do it yourself but contact the nearest
authorized dealer.

                  CONTENTS


                                         EXPOSURE COUNTER .... 37
             BESELER TOPCON AUTO 100
            CAMERA ....... 1
                                             FILM SPEED INDICATOR .... 37

              SPECIFICATION .... 3
                                             FILM UNLOADING ... 39

            NOMENCLATURE .... 5
                                         REWINDING .... 39

            CORRECT EXPOSURE .... 9
                                        UNLOADING .... 39

              ELECTRIC EYE AUTOMATION .... 9
                                           LENS EXCHANGE .... 40

            COUPLED EXPOSURE SETTING .... 11
                                       STANDARD LENS .... 41

             FREE EXPOSURE SETTING .... 15
                                          WIDE-ANGLE LENS :.... 41

             SHUTTER ACTION .... 16
                                         TELEPHOTO LENSES .... 41

              SELF TIMER .... 17
                                       REMOVING THE LENS .... 42

             CABLE RELEASE .... 17
                                         ATTACHING THE LENS .... 42

             VIEW-FOCUSING .... 17
                                           LENS COVERS .... 42

             COMPOSITION .... 17
                                          FLASH PHOTOGRAPHY .... 43

             FOCUSING .... 18
                                          FLASH ILLUMINATION .... 43
View original page 2Page 3 · Read text
DEPTH OF FIELD .... 20             FLASH SYNCHRONIZATION ... 44

             INFRARED INDEX .... 31            FLASH EXPOSURE .... 44

             HOLDING THE CAMERA .... 32       TOPCON ACCESSORIES .... 46

             HORIZONTAL HOLDING POSITION .... TOPCON FILTERS .... 46
                32
                                        TOPCON LENS HOODS . .... 47
             VERTICAL HOLDING POSITION .... 33
                                        TOPCON CLOSE-UP LENSES .... 50
              FILM LOADING .... 34
                                        STORAGE & CARE .... 50
             OPENING CAMERA .... 34

             LOADING CAMERA .... 34

             CLOSING CAMERA .... 35

            ADVANCING THE FILM .... 36


BESELER TOPCON AUTO 100 CAMERA


Congratulations, on your choice of the BESELER TOPCON AUTO 100 camera which has been designed by
our engineers and optical scientists to give an ideal camera fulfilling the following basic requirements:--

1. Single lens reflex--for viewing and focusing of the exact subject image as it will be captured on the film.

2. Electric Eye automation--for automatically setting the correct exposure to the camera simply by pointing it at
the subject.

3. Complete lens interchangeability--for changing from the standard to the wide-angle or telephoto as the
requirements of the picture may demand.

4. Superior UV lens coating--for producing crisper black-and-white shots and true-to life color pictures.

But, besides these basic requirements, the camera also incorporates all the complicated mechanism that make
picture-taking completely automatic, such as:--

1. Fully automatic instant re-opening lens diaphragm action--for holding the lens at wide aperture, for view-
focusing ease, but stopping it down automatically to the selected aperture for the shutter action and then re-
opening it once more to wide aperture.

2. Quick-as-a-wink mirror action--which, in coupled action with the automatic lens diaphragm action, swings
the mirror up and out of the way for shooting and then snaps it down once more, quick-as-a-wink, for view
focusing.

3. Single stroke film winding lever action-- not only advances the film one frame, but advances the exposure
counter, charges the shutter and sets up the automatic lens diaphragm action.
View original page 3Page 4 · Read text
4. Automatic re-setting additive exposure counter.

5. Automatic pop-up rewind button.

And, as an additional bonus, the camera also has:--

1. Complete electric eye automation with all interchangeable lenses.

2. Special UV filter effect on all interchangeable lenses.

3. Aperture scale visible in finder, even with electric-eye automation.

4. Manual over-ride of electric-eye automation for shutter coupled exposure settings or complete freedom in
exposure settings.
In other words, the camera is the ideal family camera because it can be used by every member of the family,
from the person who only wants an automatic camera to take care of all exposure setting problems, the person
who wants a built-in exposure meter coupled to the camera for some freedom to adjust exposures, the person
who wants a camera with a choice of wide angle or telephoto lenses, which are not auxiliary lenses or which
leave behind some component and merely exchange the front elements, to the person who would just rather set
exposures according to experience,--because the camera is not a simple automatic camera but a well-built and
designed camera which will satisfy even the demands of the advanced amateur.
While operation is very simple, may we suggest that you read the instructions through carefully so that you
familiarize yourself with its working parts before you even load film in the camera.


SPECIFICATION

Lens: UVTopcor 1:2 f-53mm 6 element standard lens. Fully automatic instant re-opening lens diaphragm.
Straight helicoil focusing from 70cm to infinity.. Bayonet mount lens interchangeability of complete lens.
Apertures: f/2, 2.8, 4, 5.6, 8, 11, 16 and 22.

Shutter: SEIKOSHA SLV behind-lens type.

Speeds: B. 1, 1/2, 1/4, 1/8, 1/15, 1!30, 1/60, 1/125, 1/250 & 1/500 sec. MXV-switch (for M and X settings flash
synchronization and self-timer).

Finder: Fixed eye-level Pentaprism finder, with 0.75X image (standard lens), and 34.5 X23mm finder screen.
With TOKOBRITE fresnel lens plate and micro-prism focusing spot. Meter needle and aperture scale, indicates
aperture readings.

Exposure: AUTO--Electric-eye automation. Range: EV 5 to EV 18, with ASA 100 film.

Film speeds: ASA 25 to 400 (DIN 15 to 27). Shutter speeds: 1/8 to 1/500 sec.

COUPLED--Shutter coupled exposure setting. Range: EV 5 to EV 18, with ASA 100 film. Film speeds: ASA
25 to 400 (DIN 15 to 27). Shutter speeds: 1/8 to 1/500 sec.

MANUAL--Complete freedom in apertures/shutter speeds. Range: EV 2 to EV 18, with ASA 100 film. Film
speeds: ASA 25 to 400 (DIN 15 to 27). Shutter speeds: B. 1 to 1/500 sec.

Film Winding: 180 ° single stroke.
View original page 4
Page 6 · Read text
(11) Distance [aperture) index

(12) Distance scale

(13) Distance focusing ring

(14) Film plane indicator

(15) Eyepiece

(16) Accessory shoe

(17) Shoulder strap lug

(18) Back cover lock 4.butkus.org

(19) Rewind button


                  (20) Film speed
                   scale

                  (21) Film speed
                 adjustment
                  catch

                  (22) Film speed
                 index

                  (23) Lens
                  locking lever

                  (24) Tripod
                  socket

                  (25) Film
                 Carthage shaft
View original page 6Page 7 · Read text
(26) Film take-up spool slit

                                                (27) Film take-up spool serrated flange

                                                (28) Film transport sprocket

                                                (29) Film pressure plate

                                                (30) Back cover lock

                                                (31) Bock cover catch

                                                (32) Flash socket

                                                (33) MXV-switch

                                                (34) Battery cover


CORRECT EXPOSURE

One of the most important factor for taking better pictures is correct exposure, which is the relationship
between--

1. The shutter speed, and
2. The aperture (lens opening), as decided by
3. The brightness of the subject, and dependent on
4. The sensitivity (speed) of the film loaded in the camera.
In other words, it is important to be able to correctly judge the brightness of the subject, in order to determine
the correct aperture to be used, because film speed is pre-determined by the film used and shutter speed is, more
often than not, decided by the action of the subject

In the BESELER TOPCON AUTO 100 camera three methods of setting the correct exposure adjustments to the
lens and shutter are possible--

1. Electrrc-eye automation.
2. Coupled exposure setting.
3. Free exposure setting.

ELECTRIC-EYE AUTOMATION:

Presuming that the film is already loaded in the camera and the film speed set to the camera, the only actions
required for taking pictures are:--

1. Set the shutter speed ring (7) to one of red-colored speeds 1/500 to 1/8 sec., by revolving the ring until the
required speed is opposite the index. The shutter speeds will click-stop into place. Use the shutter speed guide
for choosing the most suitable speed for the lighting condition or action.

2. Set the aperture ring (8) to AUTO, which will set the electric-eye system into operation.
View original page 7Page 8 · Read text
3. Check the aperture seen on the left border of the finder and if the exposure needle is not in the red warning
areas and is satisfactory, press the shutter button (6), and the picture will be taken. If the exposure needle is in
the top red area, the picture will be under-exposed, while, if in the bottom red area, the picture will be over-
exposed. If the former, revolve the shutter speed ring to the left, and, if the loser, to the right, which will have
the affect of moving the exposure needle towards the middle area, in both cases, where the picture can be
taken.4.butkus.org
When revolving the shutter speed ring, in the above instances, do not move the shutter speed scale outside the
1/500 to 1/8 sec. range.
The shutter can be released even when the noodle is in the red areas so the position of the needle must always
be checked.

Of course, it is taken for granted that the film winding lever is also advanced, as well as view focusing being
undertaken, before the shutter is released.


COUPLED EXPOSURE SETTING:
When the subject has too much contrast, or the bock-light is brighter than the front-light, or if you want to take
a close-up reading and then move back for the shot, or other wise want to adjust the aperture setting to take into
account possible over- or under-over exposure on electric-eye automation, try coupled exposure setting:--

1. Set the shutter speed to one of the rod colored shutter speeds, i.e., f ram 1/500 to 1/8 sec., the same as for
electric-eye automation.

2. Take the aperture ring off AUTO, by revolving it to any other setting on the ring.
View original page 8
Page 9 · Read text
3. Point the camera lens at the subject and
                                           read the aperture setting indicated on the
                                            aperture scale in the finder.

                                                4. Transfer the aperture reading to the
                                            aperture ring, i.e., revolve the aperture ring
                                                  until the same aperture is opposite the index
                                               (11), or modify it and then transfer it, if this
                                                      is preferred.

                                                5. Press the shutter release button.
                                               Incidentally, if the exposure needle is in the
                                           red warning areas, revolve the shutter speed
                                                 ring, in the same manner noted for electric
                                        eye automation, but within the range 1/500
                                               to 1/8 sec., and find the right combination
                                            of shutter speed and aperture.


Coupled exposure setting is suitable for those shots in which--

1. The background is very light and covers a greater area than the main subject of interest, which is also darker;
because the exposure reading will be dominated by the lighter background and the main interest will be under-
exposed. For example, shots against distant scene, or against snows capes, etc.
2. The opposite of the above, such as in night clubs, circuses, etc., in which the reading will be dominated by
the darker background and the main interest will be over-exposed.
3. The main subject is back-lighted, because the subject's face will not be illuminated by the main light and will
be under-exposed, if the reading is taken for the full subject area.

4. The main subject is in the shade, because the reading will again be dominated by the surrounding light and
will thus be under-exposed.

For the above shots, as well as for other shots, the exposure reading should be taken as follows:--

1. Landscape: Shield the camera taking lens (34) f ram the light reflected by the sky and point it so that it will
be taking a reading of an area having less sky than the general overall scene, because the sky is much brighter
than the general scene and if too much sky is included the overall effect will be over-exposure.

2. Subject against the open sky: When shooting airplanes, flags, buildings, etc., against an open expanse of sky,
take an exposure reading of a similar object with the light striking it at the same angle as the subject and modify
it by 1/2 stop loss.

3. Contrasty subject: First decide what effect you are looking for in the final picture and take an exposure
reading of the portion which interests you the most, letting the contrasty portion (lighter or corker portion) get
lighter or darker, as the case may be.

4. Inaccessible subjects: If the subject is too far off, take an exposure reading of a similar subject i.e.., same
texture and lighting condition) at close distance.
View original page 9Page 10 · Read text
5. Back lighted subject: The best method is to move in and take a close-up exposure reading of the front-lighted
subject area only, using care to see that the bock-light does not effect the reading. Otherwise, modify the
exposure reading taken at the picture-taking position 3 or 4 times to take into account the excessive contrast
between the back-light and the front-lighted area.

6. Portrait: Move in close and take a reading of the face area that should stand out in the final picture. If contrast
is extreme, between the high-lights and shadows, take a reading of both portions and average it, if you want
both portions, or otherwise take a reading of the interesting portion at about 4 inches or so. See that the camera's
shadow is not cost on the area being read.

Note:
(1) When using the f/3.5 wide angle or f/4 telephoto lenses, it is not possible to take shots at larger apertures
than the maximum aperture of the lens attached to the camera. Thus, if the exposure needle indicates a reading
of f/2 or f/2.8, etc., the shutter speed ring should be revolved to a slower speed, in order to bring the needle
within maximum opening of the lens used.

(2) When using film other than ASA 100 and 200, the exposure reading can be unusable even when the
exposure needle is not in the red warning areas. This is especially when a fast Elm is used at a slow shutter
speed, or o slow film used at the fastest shutter speed. The following combinations of shutter speed and f stops
should never be relied upon for setting exposure.

ASA 400 film - f/2 & 1/8 sec.

ASA 50 film f/22 & 1/500 sec.

ASA 25 film f/16 & 1/500 sec.

(3) To use a shutter speed slower than 1/8 sec., use the aperture reading for 1/8 sec. in order to take a reading.
Then re-adjust, by stopping down the lens diaphragm by the same number of steps as the exposure time is
increased, as follows:--

Shutter speed:   1/8--1/4--1/2--1
Aperture:         4-- 5.6 -- 8 --11


FREE EXPOSURE SETTING:
Although only full numbers are used on the ring, it should be remembered that 500 is 1/S00 sec., and 1 is a full
1 sec. and that, therefore, the larger number is the faster speed, meaning that the shutter remains open only for a
1/500 sec. duration during which time the light passes only 1/2 as long as the preceding larger number and vice
versa; thus if lighting conditions remain unchanged, decreasing the speed will mean that the aperture will have
to be opened to compensate for less light.

The choice of shutter is dependent on the lighting condition, as well as the need for stopping action. The
brighter the light, the faster the speed that may be used, and vice versa. On the other hand, for stopping action, it
should be noted that (1) a faster speed is required for a speedier subject, (2) a faster speed is needed for
movement nearer to the camera, (3) a faster speed is required for a subject moving parallel to the camera, while
a slower speed may be used for movement towards or away from the camera, and (4) the degree of stopping
required will also determine the speed to be used.
View original page 10
Page 11 · Read text
The aperture ring has apertures or openings, called f/numbers, with exposure ratios, as follows:--


Aperture            2      2.8     4      5.6     8      11     16     22

Exposure ratio        1/4     1/2     1      2      4      8      15     30


The aperture or lens opening controls the amount of light that enters the lens and passes through to the film
plane, by adjusting the lens opening as required. It can be seen that the larger numbers are the smaller openings
and vice versa and that each smaller aperture permits only 1/2 the amount of light of the preceding larger
aperture and that, therefore, if lighting conditions remain unchanged, stop ping down will require a
corresponding increase in the shutter speed.

In other words, if the shutter speed is originally set to 1/60 sec. for f/8, then it must be increased to 1/125 if the
aperture is opened to f/5.6 or to 1/30 if the aperture is stopped down to f/ 11.

Exposure settings in this case will have to be decided by:

1. Using o suitable exposure meter, or,
2. Using an exposure chart, such as is usually included with the film, or,
3. Making your decision based on post experience.

SHUTTER ACTION:
Since all the UV TOPCOR lenses are equipped with the fully automatic lens diaphragm action, the lens opening
is always opened at the widest aperture for view-focusing ease. This means that the lens diaphragm must
automatically close down to the required opening when the shutter button is pressed, and then open immediately
back to the widest aperture

--but, besides this, there are various other related actions which all take place in less than l/10th of a second
when the shutter is pressed, such as:--

1. The shutter blades close down completely.
2. The reflex mirror rises, the film blind opens fully and the lens diaphragm is stopped down.
3. The shutter blades open and close (for taking the picture).
4. The film blind opens, the mirror returns to reflex viewing position, and the lens diaphragm opens fully.
5. The shutter blades open fully.

The action of the lens diaphragm is the result of the "fully automatic instant re-opening lens diaphragm action",
while that of the reflex mirror is the product of the "quick-as-a-wink mirror action", both of which are required
to produce the fast action required for taking the picture without loss of image.  4.butkus.org

When using slow shutter speeds, always wait until the shutter action is finished before advancing the film
winding lever.


SELF-TIMER:
For the purpose of delaying the actual shutter release action for 10 sec., after the shutter release button is
pressed, use the built-in self-timer. After all preparations for taking the exposure have been completed, shift the
MXV-switch 133) until V is aligned with the index, and then press the shutter release button as usual.
View original page 11
Page 12 · Read text
By utilizing the self-timer, it will be possible to take your own photograph, or hold lighting equipment or
reflector, or used it for minimizing camera vibration on the tripod.

Even when the self-timer is used, Electric-Eye automation takes place and the correct exposure for the lighting
condition when the shutter is released is set to the camera.

Always return the MXV-switch to X-setting when not in use.

CABLE RELEASE:
When using the camera on the tripod, etc., use a cable release screwed into the shutter release socket, instead of
pressing the shutter button, as it will eliminate camera vibration.

VIEW-FOCUSING
Two other important factors for getting better pictures are:--

1. Correct composition of the subject within the film negative area, and
2. Accurate focusing of the image on the film plane.

In the BESELER TOPCON AUTO 100 camera both these factors are taken care of by single system, i.e., view
focusing through the camera lens.

COMPOSITION:
Since the reflected light from the subject, which passes through the camera lens to the film plane for taking the
picture, is intercepted by the reflex mirror, which is placed in the light path, and reflected upwards to the
finder's focusing screen:--

1. Parallax is completely eliminated, because the viewing and taking lens are the same, and you can compose
exactly as it will be taken in the picture, and
2. The same area seen in the finder will be covered in the final picture.

Furthermore, the eye-level Pentaprism finder, which reverses the laterally reversed image reflected upwards by
the reflex mirror, gives the following advantages:--

1. A right side up laterally correct image, moving in the same direction as the actual subject, is especially
valuable for moving subjects.
2. Because of the erect laterally correct image, both eyes can be used, one for looking through the finder and
one for viewing the general scene.
3. Eye-level viewing also means correctly lateral and erect images in vertical formats.

FOCUSING:
Since view-focusing is through the camera lens, all focusing adjustments are made directly on the lens itself by
revolving the distance focusing ring (13). and checking the effect on the focusing screen in the finder.

The focusing screen has:--
1. A micro-prism focusing spot.
2. A fine focus ring, around the spot.
3. A full-area ground glass, boosted by fresnel lens.
View original page 12
Page 13 · Read text
Micro-Prism Focusing Spot:

                               The focusing spot in the center is made up of
                                 numerous microscopic prisms which break up
                                        the image when it is not in focus so that the
                                 image is seen indistinct and blurred. When the
                                        distance focusing ring is revolved and the
                                        subject is accurately focused, the image in the
                                      focusing spot will be seen distinctly and sharply.

                                      Subjects with linear features will be particularly
                                          effective for focusing because the straight lines
                                          will look ragged and broken up when out of
                                      focus but will be seen straight when in focus.

When in doubt, revolve the distance focusing ring either ways from what is considered optimum focusing and
check the effect.

Fine Focus Ring: Around the micro prism focusing spot can be seen a clear ring which is made of extra-fine
ground glass only. This ring may also be used, either singly or in combination with the focusing spot, for
focusing of subjects without linear features.

When the distance ring is revolved and the subject is correctly focused, the finder image will be seen distinctly
and sharply, while, if focusing is not correct, the subject will be seen blurred and indistinctly. As with the
focusing spot, revolve either ways of the optimum focus to check whether focusing is correct or not.

Full-Area Ground Glass: The full-area of the focusing screen, except for the focusing spot and fine focus ring, is
fine ground glass backed by a fresnel plate lens for obtaining a brilliantly illuminated subject field from edge to-
edge, without dark corners. In other words, the whole subject area is always distinctly seen and may be focused
on the full ground glass area.

Focusing is done in the same manner as for the fine focus ring and focusing spot.

For speedier focusing, use the full focusing screen, combining all the focusing means, i.e., focusing spot plus
fine focus ring plus full ground glass, because it will also mean that composition and focusing can be
undertaken at the same time.

The distance actually focused can be checked by reading the distance scale (12) opposite the distance index
(11).
View original page 13Page 14 · Read text
DEPTH OF FIELD:

                                  When you have focused on a certain subject (plane),
                                                                          it will be seen that not only that subject but other
                                                     subjects, both in front and behind the main interest,
                                                     will also be seen sharply, although this will not be
                                                     true for everything before or behind the main
                                                          interest.

                                                  In other words, when a subject has been focused at a
                                                     certain distance, the lens presents an apparently
                                               sharp image not only at the focused distance but also
                                                         at somewhat farther and nearer distances. This zone
                                                 of apparent sharpness is known as the depth of field
                                           and the rules governing the extent of the depth of
                                                        field are:--


1. The depth of field is greater as the diaphragm (aperture) is closed down, and least as the diaphragm is opened
up. In other words, the wide-open aperture of the fully automatic lens always shows the least depth of field and
is valuable for precise focusing.

2. The depth of field is greater as the focused distance increases and least as the camera-to-subject distance
decreases.

3. The depth of field is greater behind the focused subject (in the background) and shallower before the focused
subject (in the foreground) but grows progressively equal as the focusing distance gels shorter.

4. The depth of field increases when the UV TOPCOR 35 mm wide-angle lens is attached and decreases when
the UV TOPCOR 100 mm telephoto lens is used, both in comparison to the standard UV TOPCOR 53 mm lens.
The depth of field of the lens can be utilized for getting pictures with backgrounds or foregrounds out of focus,
or for getting subjects in the foreground and background sharply, or for covering the deepest possible range in
action shots, etc.
Depth of Field Scale: The depth of field scale (9), on the lens barrel, is utilized for checking the scope of the
depth of field because it shows at a glance the zone of apparent sharpness at any lens opening or distance.
The depth of field scale is next to the distance scale (12) and is made up of identical pairs of apertures on both
sides of the distance index ( 11 ), which also represents the widest aperture of f/2. These identical pairs of
apertures indicate the distance that will be in focus at these lens opening.

1. Finding the depth of field: example, if the lens opening is f/11 and the distance focused is 10 meters (as in the
illustration), read the distances opposite the aperture f/11 (the line between 8 and 16) on both sides of the depth
of field scale which will show that the depth of field extends from approximately 4.5 meters to infinity. On the
other hand, if greater depth of field is required, see which lens opening will cover the required field. If, for
example, the zone should extend from 3 meters, it will be seen that f/22 will give the required depth of field
which will be from about 3 meters to infinity.. Of course, shutter speed will have to be decreased to compensate
for the reduction in the effective amount of light.

2. Zone focusing: When it is required to cover two subjects at different distances from the camera, first focus on
the nearest subject, for example, 2 meters, and then the farther subject, say, 5 meters, both found with the
distance scale. Next, revolve the distance focusing ring until these distances are opposite identical apertures
(approx. f/16, in this case) and use this lens opening for the shot.
View original page 14Page 15 · Read text
3. Fast zone focusing: When there is not enough time for finding the two limits for the above zone focusing
method, focus on a subject about two fifths of the way into the required zone of sharpness and choose an
aperture which will give sufficient sharpness over the whole field.

Increase the depth of field, whenever possible, by stopping down the lens opening rather than by increasing the
focusing distance, or by using the UV TOPCOR 35 mm lens.

Depth of Field Table: For greater accuracy in the depth of field, because the depth of field scale figures are in
round sums, use the depth of field tables on pages 23 to 30.
In all instances, measure the distances from the focal or film plane (indicated by the marking (14) on the
camera's top deck) to the main subject.
For critical pin-point sharpness, always use wide aperture and focus on the main plane, because everything
within the depth of field is not of equal sharpness but, on the contrary, grows less sharp as it gets farther from
the plane of focus.

See last pages for chart.


INFRARED INDEX:

                                             For infrared photography, infrared
                                                 film is used which is sensitive only to
                                                   the blue-violet infrared wave lengths
                                            whereas panchromatic film is
                                                     sensitive 10 all the colors of the
                                               spectrum.

                                              Since focusing is done with the
                                                      visible point, seen in white light,
                                       some focusing adjustment must be
                                      made because the infrared
                                             wavelengths are longer in wave
                                                  lengths and not visible to the naked
                                                  eye. The infrared index (10) is the red
                                                       line representing f/4 opening on the
                                              depth of scale, which should be used
                                                     for making such adjustments.
                                                  In other words, once focusing has
                                            been done in the regular manner (say,
                                                   the distance is 10 meters), shift the
                                                  distance obtained to the infrared
                                                  index, as in the illustration.

For infrared photography, use a suitable red filter and read the instructions, enclosed with film, for determining
exposure settings.
View original page 15Page 16 · Read text
HOLDING THE CAMERA


Another important factor for obtaining superior pictures is the proper support of the camera, not only to provide
a steady and comfortable position for holding the camera but also one that will permit speedy handling for
taking successive pictures.

Horizontal Holding Position:
This is the holding method for taking pictures in the horizontal format, which is the most common. Take a firm
grip on the distance focusing ring (13), with the left thumb and left forefinger, resting the camera body on the
palm of the left hand. Next, place the right thumb against the film winding lever (1), with either the right
forefinger or middle finger on the shutter release button (6) and the rest of the hand cradling the right side of the
camera body. The right hand will advance the film and take the picture, aiming the camera at the same time,
while the left hand will do most of the holding and also take care of focusing.
The camera should be raised to the right eye, leaving the left eye free to take in the whole field. The elbows
should be pressed against the body for support and the camera should also be pressed against the forehead to
minimize camera movement.

Vertical Holding Position:
Without changing the basic holding position for the horizontal format, turn the camera around until the film
winding lever is topmost. Now the left side of the camera body will be supported by the left hand. The right
elbow will not be pressed against the body but will jut out into space, not giving any support to the camera; but
this version is superior to turning it around the opposite way because the winding lever can still be used for
speedy action.

To keep camera shake at a minimum:--

1. Spread the legs wide apart for body steadying purpose. Use the body or as much of it as possible for
steadying the camera, such as digging the elbows into the body, pressing the camera against the forehead, etc.
2. Don't tense the fingers but hold the camera firmly and leave the fingers free to do their work.
3. Don't jerk or strongly press the shutter button but press it smoothly and gently.
4. Whenever possible use the tripod, especially at the slower shutter speeds 1/15 sec. and slower.
5. Use props, like desk, chair, tree or anything that does not move, when the tripod cannot be used.
6. Pull the neck strap taut, looping it around the wrist, if necessary, to brace the camera against the body. 4.butkus.org
View original page 16
Page 17 · Read text
FILM LOADING

                                                          Use 35 mm film in daylight
                                                                            cartridges which will give
                                                                               either 20 or 36 exposures of
                                                            24 mm X 36 mm size black-
                                                                   and-white pictures. There are
                                                                          also colors films of 12, 20
                                                              and 36 exposures in the same
                                                                                   size.

Load and unload films away from direct sunlight or strong artificial illumination, although it will not be
necessary to get into a darkened room. Get in the shade, whenever possible, even if it is your own body shade,
and place the camera on the table or lap so that it will not be dropped accidentally.

Opening Camera:
1. Shift the back cover lock (18) and press it strongly. The back cover will spring open, and, therefore,
2. Pull it open all the way.

Loading Camera:

                                                                                3. Pull up the rewind knob
                                                                                     (4), as far as it will go, and
                                                                                 insert a fresh film cartridge
                                                                             into the empty film chamber.
                                                          The leading end of the film
                                                                   should be pointed in the
                                                                            direction of the take-up spool
                                                                                                  slit (26).

4. Push the rewind knob back down into position. If it does not catch the film cartridge, revolve the rewind knob
slightly until the slot on the film cartridge shaft (25) catches.

5. Pull out the film about 14-15 cm from the cartridge and insert it as deep as possible into the take-up spool slit
(26). If the slit is not visible, revolve the take-up spool, with the serrated flange (27) until the slit is topside.

6. Check whether the bottom perforation of the film engages the teeth of the film transport sprocket (28) and
advance the film winding lever (1) carefully, checking once more whether the top perforation are also fully
engaged.

Closing Camera:

7. If the top and bottom perforations are fully engaged, close the back cover by pressing it tightly until it catches
and does not open.

8. Slowly turn the rewind knob (4), in the direction of the arrow engraved on it, which will tension the film
inside the cartridge. Each film winding lever action will now revolve the rewind knob counter-clockwise, thus
indicating that the film is being advanced properly.
View original page 17Page 18 · Read text
Advancing the Film:

9. Push the film winding lever with thumb of the right hand until a full stop is made, as otherwise the shutter
button cannot be pressed.

Each film winding lever action takes care of the following actions:--

1. The film is advanced one frame.
2. The exposure counter is advanced one frame.
3. The shutter is charged.
4. The automatic lens diaphragm mechanism is set up for action.

10. Press the shutter release button (6).

11. Repeat actions (9) and (10) once more. The two blanks shots just finished will mean that two frames have
been advanced and that the next film winding action will place the third frame into position for actually taking
the first shot.

The two blank shots are required because the first two frames are usually exposed in film loading.

EXPOSURE COUNTER
For keeping track of the number of exposures taken, the BESELER TOPCON AUTO 100 camera has an
automatic exposure counter (2) which works automatically with the opening and closing of the camera's back
cover. In other words, whenever the back cover is closed, the exposure counter automatically returns to the
starting mark "S".

The two blank shots made in loading the film puts the exposure counter on the second white dot, indicating that
the next film winding action will place the counter on " 1".

The counter has numerals 1...5...10...15, indicating every fifth shot, up to 35 exposures, with white lines in
between to show each shot.

The numeral 20, as well as the line after 35, are red-colored, to show when the 20 or 36 exposure film is all
exposed.


FILM SPEED INDICATOR

                      Upon loading the film, the film speed index should be set to the proper
                      Elm sensitivity [speed) of the film loaded in the camera, because it is of
                          prime importance for obtaining correct exposure.

                              Pull the film speed adjustment catch (21), on the shutter speed ring knob
                                  (7), outwards, which will free the film speed scale, and revolve the ring
                               to sot the required film speed to one of the following three indexes:--

                        2 ...to be used for the f/2 standard lens

                                   3.5...to be used for the f/3.5 wide-angle lens

                        4 ...to be used for the f/4 telephoto lenses
View original page 18Page 19 · Read text
There are 13 click-stopping ASA film speeds from 25 to 400, with the dots between numerals indicating
intermediate film speeds.

Check instructions enclosed with the film for the correct film speed, and if speeds other than ASA are indicated,
use the following conversion table for finding the corresponding ASA film speed.


ASA 25   32   40   50   64   80   100  125  160  200  250  320   400
DIN  15   16   17   18   19   20   21   22   23   24   25   26    27

FILM UNLOADING

                                            After the last exposure is taken, the film should be
                                             returned to its cartridge and then taken out for
                                         development.

                               When the exposure counter indicates that the last
                                         exposure has been made, do not advance the film any
                                    more or you will tear it or pull it out of its cartridge. 4.butkus.org

                                              In any case, if the winding lever does not move easily,
                                        check the exposure counter to see whether it is the last
                                         exposure or not. If so, do not advance the winding lever
                                            but leave it half-advanced, as it is, and proceed with
                                         rewinding the film.


At any rate, don't open the back cover, at this time, or you will ruin your exposed film.

Rewinding:

    1.  Depress the rewind button (19) strongly.
        2. Unfold the rewind crank (5) from its storage position and revolve it clockwise, in the direction of the
       arrow. Rewind smoothly and at an even speed BECAUSE erratic or too rapid rewinding may cause
         static electricity marks on the film.
        3. Rewind until tension lessens as the film end slips out of the take-up spool and then stop rewinding.
     Do not rewind the leading end back into the cartridge but leave the tip protruding.
        4. Open the back cover, as already noted.
        5. Pull up the rewind knob and lift out the cartridge.
        6. Bend the end of the film (as a sign that the film has been exposed) and place it in its original package
        until development.

       Note:
      The rewind button may be left depressed because the next film winding lever action will automatically
      pop it up.
View original page 19Page 20 · Read text
2. LENS EXCHANGE
       Besides the standard lens which is supplied with the camera, three other lenses are available separately
      and may be used interchanged with the standard lens.

       All UV TOPCOR lenses have been specially designed for use on the single lens reflex camera and are
       not inferior to, if not superior to, other more expensive lenses found in focal plane shutter cameras in its
       resolving power and rendition.
       All UV TOPCOR lenses have been specially coated to cut the ultra-violet (UV) rays and thus give
       breath-taking true-to-life color renditions of outdoor scenes at all times, and eliminate the need for an
    UV filter outdoors for black and-white camera work.
       All UV TOPCOR lenses are straight helicoid focusing and incorporate the electric-eye automatic
       exposure system, the fully automatic instant re-opening lens diaphragm action, as well as being coupled
       with the quick-as-a-wink mirror action, and, moreover, are fully interchangeable, without any lens
       element being left behind in the camera, nor are they simple auxiliary lenses which are attached to the
        front of the standard lens.
     An exclusive bayonet mount permits simple, accurate and speedy exchange of the lenses, while the
     SEIKOSHA SLV No. 00 shutter is incorporated behind-the-lens, in the body.

      Standard Lens:
      The standard UV TOPCOR lens is a 553 mm focal length optic, with a fast speed of f/2, and has 6
       elements in 4 groups. The lens focuses down to a close distance of 70 cm.


                                      Wide-Angle Lens:
                                     The UV TOPCOR wide-angle lens has a shorter-than-
                                               standard-focal length of 3S mm, and a speed of f/3.5.
                                     The lens construction is 6 elements in S groups, and the
                                   minimum focusing distance is 40 cm. The lens covers a
                                          wider field of view, than the standard lens, at the same
                                              camera-to-subject distance, and shows an image which
                                                          is much smaller and a depth of field which is much
                                               deeper.
                                     The wide-angle, because of these characteristics, is used
                                                  for shooting where it is not possible to back up, such as
                                                  in architectural shots, interior shots, groups in small
                                          rooms, etc., as well as for candid shots (because of the
                                            deeper depth of field) and exaggerated perspective shots
                                            (because of its wide field of view).

Telephoto Lenses:
The UV TOPCOR telephoto lenses when compared to the standard lens, cover a more narrow field of view,
show a smaller picture area, a larger image pulled in closer and a shallower depth of field. The lenses are thus,
used for shooting distant objects, which cannot be approached close enough to isolate and emphasize, and for
portraiture because of their natural perspective and because their shallow depth of field eliminate distracting
backgrounds.
Both telephoto lenses have 5 elements and a maximum aperture of f/4, but the shorter is 100mm in focal length
and focuses down to 1.5 meters, while the longer lens has a 135mm focal length and focuses down to 1.7
meters. The former has a 24° field of view and the latter a 18° angle.
View original page 20Page 21 · Read text
Removing the Lens:


                                              Press the lens locking lever (29), which will disengage
                                               the lens locking system. Rotate the lens counter-
                                            clockwise until it stops, release pressure on the lens
                                             locking lover and continue rotation until it makes a full
                                              stop again. Then lift it out gently.


Attaching the Lens:
Line up the red dot, that serves as the distance index (11), with the red dot on the body flange and insert the lens
carefully. When well-seated, revolve clockwise until it stops and clicks into position.

Lens Covers:
When not in use, protect the lens surface with the lens cap. Cover the rear ends of lenses detached from the
camera with rear lens coos.


FLASH PHOTOGRAPHY


                      When available light is not sufficient for taking pictures at the desired
                                 aperture or speed, or if there is a total lack of illumination, or if the
                                 subject is in the shadow and details are obscured, use artificial
                                  illumination, such as photo lamps, flash bulbs or electronic flash.

                        As a portable and economical method of artificial illumination, simply
                          mount a flash unit in the accessory shoe (16) on top of the Pentaprism
                                    finder, and insert the flash cord plug into the flash socket (32). Larger
                                  units should be used with a suitable bracket.

                          The bracket should be fixed to the bottom of the camera, with the
                                  fixing screw locking it to the tripod socket (24).
View original page 21Page 22 · Read text
Flash Illumination:
The various types of flash bulbs which may be used with the flash unit are classified according to their time-to-
peak (firing delay) or the time it takes from contact until peak brightness is reached. Class M and Class F bulbs,
as well as electronic flash, can be used with the BESELER TOPCON AUTO 100 camera.


1. Class F: The firing delay is 4-6 milliseconds. Although light output is low, the stopping action is a fast 1/200
sec. 2. Class M: The firing delay is 16-18 milliseconds. The light intensity is very great and, therefore, it is used
when maximum light output is necessary.
In this class are included the small miniature flash bulbs and all-glass (AG) no base flash bulbs, both of which
give great light output inspire of their very small sizes.

3. Electronic Flash: There is no firing delay with electronic flash or strobe-lights. The intensity is not very
great but they may be re-used many times, after a suitable re-cycling period. Of course, the initial outlay is
comparatively expensive and is only suitable for those users who require artificial illumination quite often. The
speed is a very fast 1/500 or 1/1000 sec. or better, stopping most actions.

Flash Synchronization:
Since the flash bulbs and electronic flash units, which can be used with the BESELER TOPCON

AUTO 100 camera have different firing delays, the shutter action must be synchronized so that it will fire the
bulb by closing the flash contact at the appropriate moment for the time-to-peak of the bulb being used.

Two settings, M-setting and X-setting, are built into the camera to take care of flash synchronization when
Class M and Class F flash bulbs, as well as electronic flash units, are used. Simply shift the MXV-switch (33) to
M or X, and the flash circuit will be set up for use of the various flash bulbs and electronic flash. The shutter
speeds that may be used when the various flash illuminations are used at either of these settings are shown on
the following table.
V-setting is for use of the self-timer; flash synchronization will only be possible on X setting when the self-
timer is used.

Flash Exposure:
In flash photography, do not use the exposure meter because it will not work. Consequently, take the aperture
scale off "AUTO".
View original page 22
Related documents and language editions

From the M. Butkus archive. Original publisher and archive notices are retained.
Check the model and edition against your equipment.
PDF verified 2026-10-10.