Film cameras
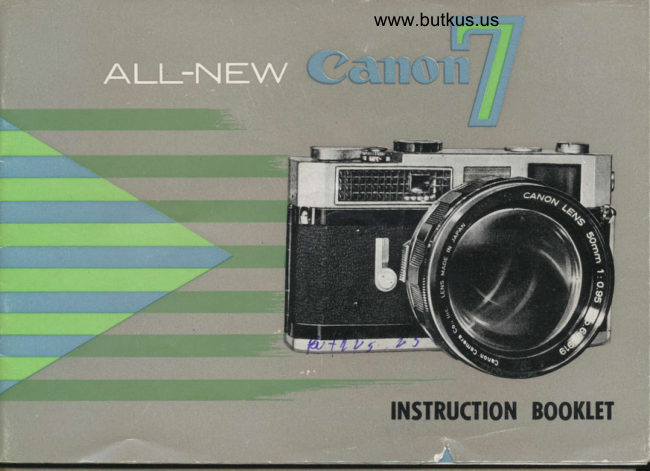
CANON 7 (color) User manual
User manual for CANON 7 (color). 41 pages in English. Read the original PDF, download or print a copy without registration.
41 pagesEnglish9.4 MB PDF
Loading your manual…Open PDF directly
Document details
- Brand
- Canon
- Model / document
- CANON 7 (color)
- Document type
- User manual
- Language
- English
- Pages
- 41
- File size
- 9.4 MB
- Category
- Film cameras
- Document date
- Not specified in catalog
Search available document text
Find a term, then jump to its page in the original PDF. Image-only pages may not be searchable; check the PDF for exact wording and diagrams.
Page 3 · Read text
.Thank you for buying the Canon 7
The Canon 7 is the newest and- finest
member of the Canon family.  It  is the
result of more than 25 years of unlq.ue
optical and mechanical precision.
                    proud- of tfr" Canon!Ve, of Canon , are
7 . .  . and- we hope you will  be, too.
                 Sincerely yours,

                                                                                                             .           ^,4  -                                et/,V.?'fur-.f-
                Dr. T. Mitarai
                   Pre s i d-ent
View original page 3Page 6 · Read text
www.butkus.us
                        Contenls

                                  Page                                     Page
Canon 7 Specifications              6     Unloading Film                  22-23
Winding Film and Cocking Shutter 7-LO     Flash Synchronization           24-25
     Film Winding                                                   Self-timer                       26     Sh utter Button
     Exposure Counter Dial                    Double Exposures                  27
     Shutter Button Safety Device
     Shutter Button Safety Lock                  Special Care of Lenses           28-3I
Exposure Setting                 11--15          Changing Lens                                                         Distance Scale
     Setting the Shutter Speed                             Depth-of-Field
     Setting the Lens Aperture                           Infra-Red Photography
     Using the Light Meter                                          Film Plane Mark                   29     Changing the Sensitivity of the Light
      Meter                                 Loading Film into the Magazine   32-33
     Setting the Film Speed
                                     Canon Lenses                    34 -35Focusing                        T6_T7
                                           Proper Care of your Camera         36     Ra nge-Viewf inder
     Ra nge-Viewf     i nder Selector               To Sum maraze                     37
Film Loading                    L8-20
How to Hold the Canon 7           2L
View original page 6Page 7 · Read text
Model 7 Speciflcqtions
Lens :                 Model 7 accepts Canon's unique bayonet-mount Canon
                         lens 50mm F 0.95, as well as all thread-mount Canon                         lenses from 25mm to 1000mm.
Shutter :                    All metal focal plane shutter. Single-pivot, rigid shutter
                                              from 1/1000th to 1 sec., B                        ilTi,t': j.lf1?jlilcaribrated
Exposure Meter:        Built-in light meter coupled to shutter speed dial.
                           Sensitivity range is from LV6 to LV19.
Finder:                Universal viewfinder for 35, 50, 85, 100, and 135mm
                    Canon lenses. Parallax error corrected automatically
                   when focused.
Lens Mount:        New dual mount takes all thread-mount Canon lenses
                     as well as the new bayonet mount 50mm F 0.95
Focusing:            Double-image superimposing system.
Film Wind:              Single-stroke winding lever.
Exposure Counter :       Self-resetting-type.
Film Rewind :           Rapid crank system.
Film :                Any 35mm film cassette.
Film Speed Indicator: ASA 6 to 400 (DlN 9 to 27) on the shutter speed dial
Flash Synchronization :  FP and MX synchronization. Continental-type flash
                          socket.
Size :                  140 x 31 x81mm (5-Il2xL-314 x 3-1/B//)-body only.
Weight:             About 670 grams (23-ozs.)-body only.
View original page 7Page 8 · Read text
www.butkus.us


Winding Film ond                                                          ,
        Cocking Shutter                      .,,.li:    i

FILM WINDING    .
Pull the winding lever the full length
of its run until it stops. The film
will then be advanced to the next
exposure and the shutter cocked. At
the same time, the exposure counter
dial is advanced to the next number.


N OTE:
o Before winding the winding lever,
  be sure to return the film rewind
  ring index to the " A " position.


                                                                          www.butkus.us
View original page 8Page 9 · Read text
o The lever will return automati-
 cally when released. lt will not return
 to the original position,  i. e. close to
 the body. lt will be about L14"-I12"
 from the body. But you can advance
 the  f ilm  f rom this position. When
 the camera is not in use return the
 lever to its original position against
 the body.
  Several short strokes, instead of one full stroke, can be used to wind the film.
 The lever locks when winding is complete.
o When the film is loaded, sometimes winding is not completed in one full stroke
 for the first film wind. lf such is the case, the shutter locks and cannot be depressed.
To obviate this situation. it is advisable to wind the lever twice for the first film
 wind.
View original page 9
Page 10 · Read text
www.butkus.us


SHUITER BUTTON     .
When the shutter button is pressed, the film can be wound again with the lever
after the shutter is actuated.
o Cable release can be attached to the shutter button.

EXPOSURE COUNTER DIAL,
The film advanced whenever the film winding lever is completely wound and the
exposure counter dial is advanced by one number indicating the number of exposed
 f ilms. The exposure counter dial returns to the " S " starting position automatically
when the back cover is opened.
View original page 10
Page 11 · Read text
c,clnoffF

:-.iii.i I lL tr tJiJ I luf\ SAi I tY' tJi_vt(,t
The shutter button's safety device locks the shutter if the film is not completely
wound. Unintentional double exposures cannot occur.
                                                        Red Dot
:ilillTTt fi rJUilON SAi'I lY  L()('l^,                                                                                               I
Af ter the shutter is cocked,  if you put the                                                      II
index of the rewind ring on the red dot,                                                                 II
the shutter button is locked, and you                                                       I4I                                I' .-"?                                                rs",&tPcannot release the shutter even if the                                                                                                                                                                                    ll?rf,               _
button is pressed. This is an added                                        *+T        ,]safety device when carrying the camera                              ftr\
with shutter cocked. This also enables
you to attach the cable release after the
shutter is cocked without fear of actu-
ating  it.
View original page 11Page 12 · Read text
www.butkus.us

Exposure Sefiing
 Exposure adjustment is done by adjusting
 the shutter speed and the lens aperture.
 Correct exposure is easily determined by
 the coupled, built-in light meter.
SETTING THE SHUTTER SPEED.   .
 Turn the shutter speed dial and set it to
 the index mark.
The shutter can be adjusted to speeds of 1 second, Ll2, t l4th, 1/8th, 1/16th, 1/3Oth, 1/6Oth, Ill2sth, 250th, l/sOoth, and 1/1OOOth of a second as well as " B " (bulb) and "T"  (time) exposures and "X."
The'"B" exposure is used for exposures of over 1 second. The shutter stays openas long as the shutter button is kept depressed. The "T" exposure is used for
 long exposures. When the shutter button is pressed,  it will remain depressed, even
 after your finger is removed, leaving the shutter open. By turning the shutter speed diaf slightly in either "B" or "X" direction, the shutter button snaps back into its
former position and the shutter closes.
The "X" scale reading is used for speedlight (electroflash) synchronization. The
 shutter speed is approximately 1/6Oth of a second ; however, the effective time ofthe exposure in this case depends on the peak performance of the speed light used.
O The figures on the shutter speed dial represent fractions of a second.
O Do not set the shutter speed dial between two figures. lt must be set exactly  on a "click" stop.
View original page 12
Page 14 · Read text
m                                                           ? r0?00www.butkus.us                                                                                                   Ill  I1;l-T                                                         uauairI n

                            lonUSING THE LIGHT METER                                                         rfiEt 7/
When the light meter is faced in the
direction of the subject, the needle in the
light meter indicator window moves ac-
cording to the light condition of the
subject. The correct exposure can be
obtained by following these steps  :                         Guide Line
                                                               Light Meter Aperture Scale
                                                      Needle
   When the shutter dial is pre-set to the desired speed : Read off the figure of
   the aperture scale on the light meter indicator window where the needle rests.
   Then set the lens aperture ring accordingly.
    Follow the black and white guide lines, which are between the needle and the
    aperture scale, to determine the correct aperture reading. Between the needle
   and the aperture scale are black and white guide line areas. To obtain the
    correct aperture scale reading, read from the guide line area opposite the needle.
  O For changing the sensitivity of the light meter, see page 14.
View original page 14Page 15 · Read text
F " stop : .Turn the shutter2  When the lens aperture ring is pre-set to. the desired "     dial and match the aperturJreading on the lqte.r indicator window to the guide     line where the needie rests. The-shutter dial should be set where  it click-stops'
   NOTE:                                                     T " exposures or when using  O The light meter cannot be used for " B " and "
       speedlight.
  O Wnen u-sing the light meter, be sure that YOUR HAND DOES NOT COVER THE
     PHOTOCELL.
CHANGING THE SENSITIVITY OF THE LIGHT METER . .  .
Ordinarily, low sensitivity (black dot) is used for brightness outdoors. High sensitivity
forjnge Obt) tor indooriand before-or-after sunset outdoors.  lf your subject is in sobright-a light that it causes the needle to scale out, or ylen the.subject is too darkioEine sufTicient impulse to the needle,. the-sensitivity of the l.ight meter is changed
by'iurning the sensitivity shifting knob. lf the orange 4ot-91 the sensitivity shifting
knob is riatched to the-index mark, indicating the need of high sensitivity (becausethe subject is dark), the aperture reading must be read off from the orange scale.                                                                                      of low                                                                    the need                                                mark, indicating                                                index                                          to the                        5t'act<                     Uot is matchedConvers'ely,           '(becauseif the                                                                                                          off                                                            be read                                                            reading must                                               aperture                                              the                                           is too bright),                   the subjectiensitivity
from the white scale.


    www.butkus.us
View original page 15Page 16 · Read text
www.butkus.us                                                                                   Film Speed
                                                                                               Indicator Button
                                                                  Film Speed
                                                                           Indicator Window
St, IIING TIJI FiLM:JF'Ei,t)
When using the light meter, the speed of the film
used should be set on the film speed indicator
window on the shutter speed dial.  In order to set
the  f ilm speed, turn the shutter speed dial while
pressing the film speed indicator button. In case
the speed of the film used is not indicated on the
window,  it may be set between two figures.
o Using ASA 1OO rDlN 21t film, the sensitivity of
  the light meter is   :
   High-sensitivity range Light Value 6-13 (with F 1.4   (oranse dot)                                to F 22                        7/\<\,'
                                                1,1i3,r"".                                                trs":.6  Low-sensitivity-range Light Value  l2-19 (with F 2          u  ,:o{   ibrack dott                                                                                               *,.."                                           l,t?t?,,i8;b1.                           ,r'\                                                                 ).':,                   qo When the background is brighter than the sub-
  lect, measure the correct exposure from as
  close as possible.
   tlf you cannot get close to the subject, open the
  lens aperture by one or one-and-a-half clicks.  )
                                                                      {h.'*."...-                                                                                           l5
View original page 16Page 17 · Read text
Focuslng
      The lens has a " stopper " at the infinity
       position. Release the lens by pressing
      the stopper and rotating the lens barrel.
      The lens will move back and forth by
       rotating the lens barrel, which is coupled
      to the rangefinder, enabling you to focus.
      Canon telephoto lenses do not have a
       stopper.


     RANGE.VIEWFINDER . .  .
     When you look through the range-view-
       finder eyepiece and rotate the lens barrel,
      you will see two images either coincide
       or remain apart within the comparatively
        bright circle in the center. When they
        coincide, your lens is in focus.

16
View original page 17Page 18 · Read text
www.butkus.us


                                   Out of focus
                                            ln correct focus

r#*#i                                          -rrr+>
RANGE.VIEWFI NDER SELECTOR
When you look through the range-viewfinder, you will see a white frame and a figure.
The figure indicates the focal length of the lens, and the view seen within the white
frame in the viewfinder is that which will be recorded on the film. The field of
view indicated by a white frame varies according to the focal length of the lens
used when the range-viewfinder selector is shifted. The range-viewfinder can be
used for the focal lengths of 35mm, 50mm, 85mm, 1OOmm, lenses. You will see
a double white frame for 85mm and 100mm focal lengths. Within the outer
white frame is the field of view for an 85mm lens. In the inner white frame area
is the field of view for a lOOmm lens.


O The white  f rames are coupled to the focusing
  mechanism. Parallax compensation is auto
  matic.
View original page 18Page 19 · Read text
d   il
  To open theffback cover, turn the magazine opening key counter'clockwtse.
   Pull down the hinged back lock while holding the back cover with your fingers. The
  camera back will then swing open.
   Rotate the take-up spool until you can slide the end of the filnr leader into  tlre
  groove. Then engage ttre second perforated hole of the leader wrth the snrall hook
   inside the groove. Adjust the film so the filnr perforation fits the teeth of the film
   sorocket.
View original page 19
Page 21 · Read text
1


    7. Then turn the magazine opening key clockwise to "close," and return the knob to its
        former position. Do not turn the magazine opening key before closing the back cover.
    B. Wind the lever and press the shutter button with the lens cap on. By doing this
       twice you will have cleared the two frames exposed to the light while you were load-
         ing. .. and the exposure counter dial will advance to "O" from "S." Wind the
        lever again and you are ready for the first shot.
    O The film is properly loaded and transported  if the rewind crank lever rotates when
          the film wind lever is wound. lf the rewind crank lever does not rotate, it means
         the film was not loaded properly. lf such is the case, take out the film - - as
           illustrated on pages 22-23 -- and reload the filn1.
    o After you have finished loading the film, be sure to set the speed of film used on
       thefi|mspeedindicatorwindow'Refertopage15f@
20
View original page 21Page 23 · Read text
Unlooding Fitrn


                          r,
 Turn the film rewind ring to ,,R,, from the ,,A,, position.
 Raise the rewind crank to its operating position and turn crockwise, as shown
by the arrow' watch the rotation of the film transport indicator while rewinding
the film' when the rotation suddenly stops... then stop rewinding immediatery.
Return the film rewind ring to ,,A.,,
Turn the magazine opening key to the left.
open the back cover by puring the back cover rock outward.

                                      -
View original page 23Page 24 · Read text
www.butkus.us
When you have finished a roll of film and you try to advarrce the film, you will feel
tension on your finger. You should then stop winding and remove the film frorn
the camera in this manner:


                                             I
      / r*\          t'l d
      i"\.&                             liji F
    Pull out the rewind crank as far as it will go and take out the film cassette or
    magazin e.
    Be sure to put the lens cap on before rewinding the film.
         lf the film is forcibly wound after all exposures have been completed,  it  will
    be impossible to rewind the film    lt will have to be taken out in a darkroom.
             can"f,
View original page 24Page 25 · Read text
Flosh Synchronizof ion
   When the Canon Flash Unit V-2 is fitted
    directly into the  f lash unit connector
    socket, and when the shutter button is
    pressed, it is automatically adjusted for
    the various shutter speeds of synchro-
     flash operation.
    A lens hood is also necessary when
      taking flash pictures.


                                                NOTE  :
     TYPE         OF FLASH                     o For electronic flash. turn shutter         BULB
                                                              dial to " X."
                                 o When using miniature size " F "
                          "B"  1/15-1 sec.           type bulbs  (f or example :  AG 1,                          "B"  1/30-1 sec.                                                                Philips, etc.  ) , be sure the shutter
                                     1/30-1 sec.           speed dial is set at 1/15 sec.

24
View original page 25Page 26 · Read text
www.butkus.us

Perfect electrical contact is made when the Canon
Flash Unit Model V-2 is attached to the flash unit
connector socket. No external wiring is neces-
sary and all synchronization is done automatically
in the camera itself.
To extend the flash unit from the camera. or to
connect a speedlight unit of non-Canon make,use a Canon Extension Cord Va (15-ft.) or Vb
(3-ft.)-
When using a clip-on-type speedlight on the Canon
7, the Canon Flash Unit Coupler, or Accessory
Coupler, should be used. The Canon Accessory
Coupler, which has an accessory clip, is used
also to couple the viewfinder when using 25mm
or 28mm lens or other accessories with a shoe.
      {{$)'
View original page 26Page 27 · Read text
Self -TimerF

        When you are ready to photograph, turn the
            self-timer lever counter-clockwise, as illustra-
           ted, until it can be turned no further. This can
         be done before or after cockirrg the shutter.
        The timing device will start operating as soon
        as the shutter button is pressed . . . and the
          shutter will be actuated approximately 10
          seconds later

       O Once you have cocked the self-timer, it cannot be released unless
           the shutter button is pressed.
           r When using the self-timer, it is advisable to use Canon Cable
             Release, Canon Camera Holder L, and tripod.
View original page 27Related documents and language editions
From the M. Butkus archive. Original publisher and archive notices are retained.
Check the model and edition against your equipment.
PDF verified 2026-10-10.