Film cameras
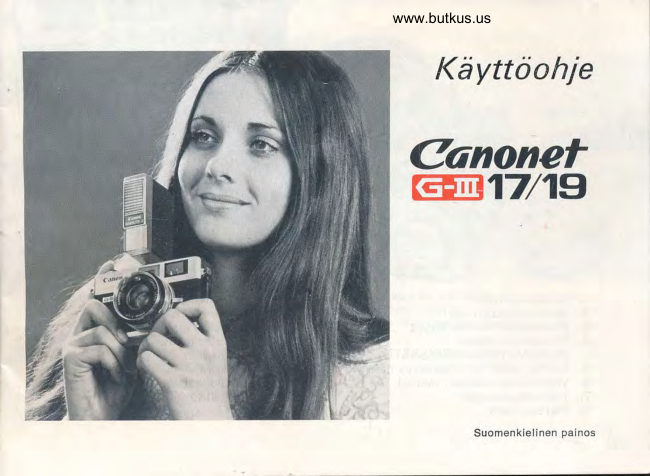
Canon Canonet QL User manual
User manual for Canon Canonet QL. 28 pages in English. Read the original PDF, download or print a copy without registration.
28 pagesEnglish2.2 MB PDF
Loading your manual…Open PDF directly
Document details
- Brand
- Canon
- Model / document
- Canon Canonet QL
- Document type
- User manual
- Language
- English
- Pages
- 28
- File size
- 2.2 MB
- Category
- Film cameras
- Document date
- Not specified in catalog
Search available document text
Find a term, then jump to its page in the original PDF. Image-only pages may not be searchable; check the PDF for exact wording and diagrams.
Page 3 · Read text
www.orphancameras.com                                                          I

                                                                                                           t


O Focusing Lever                 @ f lash Socket Safety Cover
@ Setttimer Lever                 @ f ilm Rewind Crank
@ Strutter Speed R ing                @ f ilm Plane Indicator
@ AUTOMATIC/MANUAL Aperture Ring     @ Accessory Shoe
@ nSn Film Speed Indicator Window        @ rrame Counter
@ Automatic EE Mark               @ st'rutter Button
@ FocusingRing                  @ CaUteReleaseSocket
@ ViewfinderWindow               @ f ilm Advance Lever
View original page 3Page 4 · Read text
www.orphancameras.com


@ Blue Lamp                  @ gulb Exposure Setting Lever
@ Battery Check Button                  @) F ilm Speed Setting Lever
@ Viewf inder Eyepiece             @ Simple Exposure Symbols
@ F ilm Transport Indicator
@ r ilm Indicator
@ Mercury Battery Compartment
@ Tripod Socket
@ rilm Rewind Button
View original page 4
Page 5 · Read text
www.orphancameras.com
  Mercury Bottery Looding
                                         #tr


Before using your Canonet G-III   Insert the battery on the tab in   ReplacingBattery
17, load the mercury battery.       the compartment.             When replacing the mercury bat-
                                                                   I  Be sure the mercury battery   tery,  open  the  cover  of  the 1
To open cover of the battery com-   is inserted only  in  the correct  mercury   battery  compartment
partment, insert a fingernail in the   direction.                      and slowly pull out the tab being
open slot, sliding the cover in the    r  A 1.35V M20 (#625) mercury   careful  not  to   let  the  battery r
direction of the arrow. By using a  battery should be used-equ ivalent  drop  out.
slight pull outward, the cover will   to   the   Mallory  PX-625,   or      I  When the camera will not be
open.                         Eveready E PX-625.              used for a long period, remove the
3                               Presscover to close.                 battery.
View original page 5Page 6 · Read text
www.orphancameras.com
Bottery Checking


     the battery check button (colored red).            lf  the blue lamp lights up, the battery has
                                                       suff icient  power.  Otherwise,  the  battery
                                              should be replaced.
                                                                                r  The battery check button  will  not  light
                                           up at temperaturesof -  1soc(5"F) or under.
                                         The camera will work, however, if the battery
                                            has sufficient power.
View original page 6Page 7 · Read text
www.orphancameras.com
FilmLooding


                                                                       * u j
                                                                                                                                                                                                    .fr


Canon's ExclusiveOuick-LoadinS(Ot) mecha-      Open the cover fully.  When the back cover
nism  in the Canonet G-III 17 accepts any          is opened,the OL cover opens simultaneously.
standard 35mm  film  roll in cartridge. When      Face the film  cartridge as illustrated in the
loading new  film, always avoid direct sun-        line drawing inside the back cover, and insert
light.                                                                                  it into the cartridge compartment. Push the
                                                crank back to its normal Position.
To release the latch of the back cover, raise
the  film  rewind crank, and  pull   it  all the
way up.
View original page 7Page 8 · Read text
www.orphancameras.com


                                                    x-::z


Lay  the  tip  of  the  film  leader above the       Bring down the OL cover to hold the film
"amber"  film  set mark.                                 in place by closing the back cover.

                                            Look through the sprocket window to see ifI  The OL  cover automatically opens and
                                                   the    f ilm   is  correctly engaged with  thecloses with  the back cover.  Do not touch
                                                    sprocket.the OL cover.
                                                                                                  I     lf the  f ilm is sagging,turn the f ilm rewind
                                                crank clockwise.

                                              Close the back cover completely.
View original page 8Page 9 · Read text
www.orphancameras.com
Pre-Settings


Wind the film advance lever until   it stops.       Checking Correct Film Loading
The  first  frame  is now  automatically  in       The  film  is properly loaded and advanced
posttton.                                                                            if the film transport indicator flickers when
                                              you wind the film advance lever.

                                             Checking Proper Winding Film
                                          The film  is wound up  if the color of the
                                                           film  indicator turns red. The indicator turns
                                                  white when the shutter is released.
View original page 9Page 10 · Read text
www.orphancameras.com


                                                      -ffiae-  Canonef     antz                 fr
Film Speed Setting                                   less sensitive.For example, the ASA 400 film
lmmediately after loading film, be sure to            is better for shooting at low  light level than
set the ASA  film speed scale in the proper        the ASA 100 film.
position by pressing the notched film speed
setting lever with your  fingernail, matching
the proper film speed number with the index
of the ASA film speed indicator window.

I  The higher the  film speed number, the
more sensitive the film; the lower  it  is, the                                             8
View original page 10Page 11 · Read text
I
                                   www.orphancameras.com
    Automotic ElectricEye Photogrophy


     'ffid    Cdnoaef      orrz                    f
       For automatic Electric Eye photography, set        Shutter Speed Adjustment
       the aperture ring at the "A"  position.              Turn  the shutter speed ring, and match the
              I  The EE mechanismis fully coupled to the               f ilm  speed setting  lever with  the  simple
     ASA  film speed, the shutter speed and the       exposure symbol of either sunny)O(,cloudy
       apertu re.                                             €,or     indoor ffi-l    . With ASA 1OOfilm for
                                                       example, the shutter speeds are set at 1/5OO
                                                         sec. for sunny >O<,11125 sec. for cloudy
                                                        €    and 1/3O sec. for indoor F-l
View original page 11Page 12 · Read text
www.orphancameras.com


                                                                            Y4


        ,+r;:,                              Y,*Focusing
While looking through the viewfinder, turn
the focusing lever. The subject is in focus
when  the double image merges into one
precise image in the center of the viewfinder.
View original page 12Page 13 · Read text
www.orphancameras.com


                       under exposure mark                  - - - - - - - +               .t3


                                                                                                     - - - - - - - { >


    Checking the Exposure Indicator                                       I     lf  the  indicator  points  to  the  under-
    Point the camera at the subject and check       exposure warning  mark,  turn  the  shutter
    the position of the exposure indicator inside      speed ring clockwise until the indicator moves
    the viewfinder.                                           to  the  proper exposure range, or  use the
    Press the  shutter  button    if  the  indicator       Canolite D or other flash units.
     is inside the proper exposure range.                                 I     lf  the  indicator  points  to  the  overex-
                                                  posure warning mark, turn the shutter speed
        I  The  shutter cannot be released   if  the        ring  counterclockwise until  the  indicator
    exposure indicator  is either over- or under-      moves to the proper exposure range, or use
11 exposurewarning mark.                            a n N D  f i l t e r .
View original page 13Page 14 · Read text
www.orphancameras.com


Compose  the  Picture  within  the  Frame.        Press the  Shutter  Button  gently  to snap a
The subjects which will appear on the film         picture.
can be seenwithin the rectangularframe.


                                                                  T 2
View original page 14Page 15 · Read text
www.orphancameras.com
                           -Using                                    Conolite D  AutomoticFloshPhotogrophy


   The Canolite D  is an  optional  electronic       By  simply attaching the  Canolite D,  the
   flash unit  with  direct contact exclusively       camera, wh ile set at  " A"  ,  is switched over
   designed for the Canonet G-III 17 . There is         to  the automatic flash control  circuit, and
   absolutely  no  necessity to  worry  about        the proper f/stop corresponding to the shoot-
   gu ide numbers. N ight or indoor photography         ing distance is automatically set.
    is now as easy as daylight photography using
   the Canolite D.


1 3
View original page 15Page 16 · Read text
www.orphancameras.com


I  Power Source:  Two  1.5V alkaline AA       Check the Exposure Indicator  in the View-
batteries.                                                                                  f inder.
I  Size: 26 x 57 x 82 mm (1" x 2-114" x                t  When  it  is within  the proper exposure
3-114"1                                           range, press the  shutter  release button.
I  Weight: 1 15 grams (4 ozs.)


                                                                                 L 4
View original page 16Page 17 · Read text
www.orphancameras.com


                                                 - - - -


      I     lf  the exposure indicator  is within  the
   red mark, the subject is too  far or too close.
   Adjust the focusing distance until the indi-
   cator shows the proper exposure.


1 5
View original page 17Page 18 · Read text
www.orphancameras.com


Press the  Shutter  Button  gently  to snap a
picture.

 I  With  the Canolite D, any shutter speed
can be used.
View original page 18
Page 19 · Read text
www.orphancameras.com
 Using Other Flosh Units


  The Canonet G-III 17 has both a directcontact       Three guide numbers are engravedin blue on
  accessoryshoe and conventional flash socket.        the aperture ring. They are for ASA 100 f ilm
  Automatic flash photography is possiblewith        and distance in meters. For conversion to
  flash bulbs and electronic flash units other      ASA  25 and feet see the conversion table
  than the CanoliteD.                               below. With flash bulbs, set the shutter speed
                                                              to  1/30 sec. Any speed may be used with
   Insert the  f lash into the accessoryshoe and        electronicflash units.
  connect its cord  if  it  is not a cordlessunit.                      1 4     2 0     2 8        ( A S A 1 O O: m )
                                                    G u i d e  N o .  23    3 3    46         ( A S A  2 5 : f t . l
L 7
View original page 19Page 20 · Read text
www.orphancameras.com

                            .fu


#**              tf,.a'n;'r'nll            *     rrrr   rrz                                    I
   t  Do  not use  f lash bu lb  (or  unit) with               r   In flash photography using a conventional
  following types of  film because it does not         electronic flash unit or flash bulb when the
  couple properly.                                   proper f/stop  is set according to  the guide
  Flash bulb  of guide number 14 with ASA        number, there is a heavy drain on the mercury
  25  film,  guide number 20 with ASA 8OO,         battery. Therefore, be sure to return the aper-
  and guide number 28 with ASA 40O or higher         ture ring to the " ^"  position after shooting.
  speeds.
                                                                                                        I  When the subject is too  far or too close,
                                                       the shutter button cannot be depressed.
                                                                                  1 8
View original page 20Page 21 · Read text
www.orphancameras.com
  Monuol Control of Aperture


                                                                                                                                                                             |lr*il"q
   For manual control of the aperture, release               I   In manual exposure control, the position
   the aperture ring from the "A"  position. The          of  the exposure indicator  is  in  the upper
   shutter speed and f/stop can be freely set for         red mark.
   achieving specializedtechnical effects. With
   the Canonet G-III 17, special effects in high
   tone or low tone can be obtained in the same
   manner as with more professional cameras.


1 9
View original page 21Page 22 · Read text
www.orphancameras.com
Using Self-timer


The Canonet G-III 17 has a built-in self-timer.               I  The self-timer also operates when taking
To operate the self-timer, turn the self-timer        pictures with  f lash units.
lever in the direction of the arrow until  it                 I     lf the self-timer lever is set, do not return
stops. The shutter will be releasedapproxi-              it to the normal position.  lt  is automatically
mately 1O seconds after the shutter button         returned, after the picture is snapped.
has been pressed.


                                                                                2 0
View original page 22Related documents and language editions
From the M. Butkus archive. Original publisher and archive notices are retained.
Check the model and edition against your equipment.
PDF verified 2026-10-10.