Film cameras
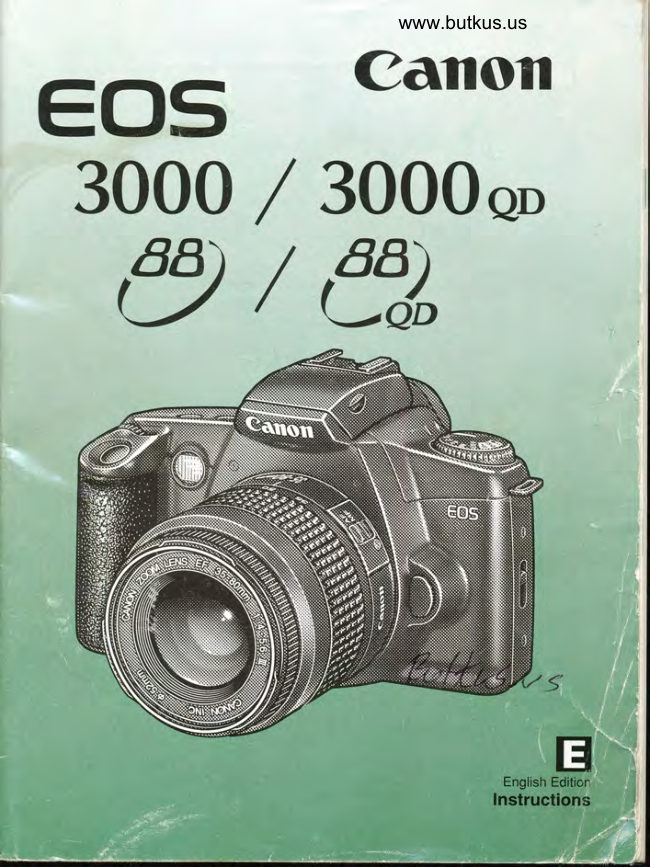
Canon EOS 3000 User manual
User manual for Canon EOS 3000. 71 pages in English. Read the original PDF, download or print a copy without registration.
71 pagesEnglish8.6 MB PDF
Loading your manual…Open PDF directly
Document details
- Brand
- Canon
- Model / document
- Canon EOS 3000
- Document type
- User manual
- Language
- English
- Pages
- 71
- File size
- 8.6 MB
- Category
- Film cameras
- Document date
- Not specified in catalog
Search available document text
Find a term, then jump to its page in the original PDF. Image-only pages may not be searchable; check the PDF for exact wording and diagrams.
Page 3 · Read text
Thank you for purchasing a Canon product.
The EOS 3000 / 3000QD  I 88 l88QD is a very compact autofocus, single-
lens reflex camera. lt can be used for a wide variety of subjects and
situations with fully automatic and user-controlled picturetaking modes.
Read this Instructions booklet and familiarize yourself with your new
camera before taking pictures.

 lSymbols
  rz11 Theproblems.Caution symbol alerts you to actions to prevent picture-taking
   ;;1 The Note symbol gives additional information for basic camera   {l  operation.
   _.9- The Lightbulb symbol offers helpful tips for operating your camera     -Il/'      and taking pictures.

Page numbers in parentheses indicate where you can find more relevant
information.
Also read "Handling Precautions" on page 6 to prevent camera malfunction
and damage.
In this Instructions booklet, the EF 35-80mm tl4-5.6lens is shown in
illustrations for explanatory purposes.
Keep this Instructions booklet handy for easy reference.

 lPrecautions
 . Before using the camera for an important event, be sure to take test
    shots to make sure the camera operates properly.
 . EOS cameras have a lens mount for dedicated operation
    (autofocusing, exposure control, etc.) with EF lenses. Using a non-EF
    lens with an EOS camera may not result in proper camera or lens
    operation.
   Note that the warranty does not cover any camera malfunction or
   damage occurring with the use of non-Canon accessories.
View original page 3Page 6 · Read text
www.butkus.us
Handling Precautions
Camera Care
(1) This camera is not waterproof and cannot be used in rain or under
    water. lf the camera gets really wet, promptly consult your nearest
   Canon Service Center. lf there are any water droplets on the camera,
   wipe off with a dry cloth.  lf the camera has been exposed to salt air,
   wipe with a clean, well-wrung, damp cloth.
(2) Do not leave the camera in places prone to excessive heat such as in a
    car on a sunny day. Excessive heat can cause the camera to
    malfunction.
(3) Use only a blower brush to remove any dust on the lens or in the film
   compaftment. Do not use a cleaner containing organic solvent to clean
    the camera body or lens. For stubborn dirt, consult your nearest Canon
    Service Center,
(4) When you will not be using the camera for an extended period, remove
    the batteries. Store the camera in a well-ventilated, cool, dry place.
   Release the shutter a few times occasionally to make sure the camera
      still works.
(5) Avoid storing the camera in a laboratory, cabinet, etc., where corrosive
    chemicals are present.
(6) Before using the camera after an extended period of disuse, check that
     all the camera controls function properly or take  it to the nearest Canon
    Service Center for inspection. Do this especially before shooting an
    important event or going on a trip.

LCD Panel
In time, the camera's LCD panel display may fade and become difficult to
read.  lf this happens, have it replaced (at cost) by a Canon Service Center.
At low temperatures, the LCD panel's display response may become
slower. And at 60'C or higher temperatures, the display may blacken. In
either case, the display will return to normal at room temperature.
View original page 6Page 7 · Read text
Handling Precautions

Lithium Batteries
(1) The camera operates on two CR123A (or DL123A) lithium batteries.
   Check the battery level in the following cases:
      . After replacing the batteries.
      . After not using the camera for an extended period.
      . The shutter stops working.
      . The camera is being used in a low-temperature environment.
      . You will be shooting an important event.
(2) Before installing the batteries, wipe the battery contacts to remove any
     fingerprints and smudges. This is to prevent faulty connections and ,
    corrosion.
(3) Although the batteries work well even at low temperatures, battery
    performance may decline slightly at freezing temperatures. In such a
    case, keep spare batteries warm in a pocket, etc., and use and warm
    the batteries alternately.

Low Battery Power
When the bc icon blinks on the LCD panel, a picture can still be taken at
the proper exposure. However, there may not be enough battery power to
advance and rewind the film automatically. Replace with new batteries.

Lens
After detaching the lens from the camera,                             electrical contacts
put on the lens caps or put down the lens
with the rear end up to avoid scratching
the lens surface and electrical contacts.
View original page 7Page 8 · Read text
www.butkus.us

                                                                            ,iri'illiirrr'lQuick Start Guide

     L-Q


            Install the batteries.              Attach a lens.
                lnsert two CR123A (or DLl23A)                  Align the red dots on the lens
                lithium batteries as shown by                and camera and turn the lens
             the battery orientation diagram                clockwise until  it snaps in place.
            on the battery chamber cover.               See page 18.
           See page 16.

  ry                   il>
          Xfl %
       uuuuuuuuuooooooood   ilil]ffi
        .__).t                               4r


        Load the film.                   Focus the subject.
              Align the edge of the film leader             Aim the AF frame on the
              with the orange mark on the                     subject and press the shutter
           camera and close the camera                 button halfway to autofocus.
           back until  it snaos shut. See                See page 24.
           page 20.                                          .  lf the < t > icon blinks, pop up
               . The film will then advance to                   the built-in flash. See page
                the first frame automaticallv.                     54.
View original page 8Page 12 · Read text
www.butkus.us


LCD Panel


Aperture display                                                           Multiple exposure icon

                                                             Red-eye reduction icon

Shutter speed display                                                                Self-timer icon
ISO speed display
                                                                       Beeper icon

       frfriftffJo E,fr
          '2.1 .O .1 .2+
           TTTTTIT


Batterv level icon                                        Frame counter
                                                                          Multiple exposure setting
                                                                          Multiple exposure count
                                                            Beeoer off/on indicator
                                                                    Film-ready  indicator
                                                                                        Film rewind comoleted indicator
Exposure scale                                                               Self-timer operation display
  Exposure compensation indicator                                            (counts down)
  Exposure level scale
  Exposure level display
  Metered manual exposure display
  Red-eye reduction lamp lamp-on indicator


The LCD panel is shown with all the information displayed. The actual
information displayed will vary depending on the camera settings and
shooting conditions.
 12
View original page 12Page 13 · Read text
Nomenclature

$"xtiiiiiil,-_q$

    Viewf inder Information


      Paftial metering circle                                                    Center AF frame
     Focusing screen                                                  Wide AF frame


    AE lock indicator

     Red-eve reduction icon
                                                       Exoosure scale
     Flash-ready  indicator                                 Exposure compensation indicator
     Flash-requi red warning                               Exposure  level scale
                                                        Exposure  level display
     Shutter speed display                               Metered manual exposure display
                                                  Red-eye reduction lamp-on indicator
     Aperture display


   The viewfinder is shown with all the information displayed. The actual
    information displayed  will vary depending on the camera settings and
    shooting conditions.
                                                                      13
View original page 13Page 14 · Read text
www.butkus.us
                                                        Nomenclature

iiiili+.liqfiil{x1,i.+11

Command Dial
The Command Dial's settings are divided into four zones.
                                         Cre


                                                           LOCK
                                                                (Turns off the camera.)      .\.iLffi
                                                                             Ft //                                                 4ub


Basic Zone                        Creative Zone
                                               Control the camera to obtain the desiredE  : Full Auto (page 24)
For fully automatic picture-taking.                effect.
. All you do is point the camera and    P       : Program AE (page 36)
  oress the shutter button.          Tv     : Shutter speed-priority AE (page 38)
                                                                                                       : Aperture-priority AE (page 40)Programmed lmage Gontrol     Av
                                                                                               : Manual exposure (page 42)Tone             M
Fully automatic picture-taking to suit the     A.DEP : Depth-of-field AE (page 44)
subject.
. All you do is point the camera and       Function Zone
  oress the shutter button.                    .tl)    : Beeper (page 49)
\a   : Portrait (page 26)             ISO  : Manual ISO speed setting (page 52)
I      : Landscape (page 27)            O..  :Midrollfilm rewind (page 21)
                                                                                               : Lock$     : Close-up (page 28)                   tr
(      : Sports (page 29)

     When not using the camera, turn the Command Dialto <[> (Lock) to
       prevent accidental operation.
View original page 14Page 15 · Read text
This chapter describes the things you
need to know and do before Vou start
usrng your camera.


    Before You Start


    Attaching the Strap
    Pass the end of the strap through the
     camera's strap eyelet from the bottom.
    Then pass it through the strap's clasps.
      Pull the strap to make sure it does not slip
     out of the clasp.
       . The eyepiece cover is also attached to
      the strap. See page 31.


                                           15
View original page 15Page 16 · Read text
www.butkus.us
Installing the Batteries and Checking the Battery Level

  Installing the Batteries

Use two CR123A (or DL123A) lithium batteries.

                                  Slide the battery chamber cover
                                   lever as shown by the arrow and
                          open the battery chamber cover.


                                  Insert the batteries with the
                               contacts (+ and -) oriented as
                         shown on the battery chamber
                                cover.
                                              . Do not mix old and new batteries.


                             Close the battery chamber cover.
                              Press the cover until it snaps
                                 shut.


to
View original page 16Page 17 · Read text
lnstalling the Batteries and Checking the Battery Level


  Checking the Battery Level

Check the battery level after replacing the batteries and before using the
camera.

                            Turn the Command Dial to any
                                  setting except <E>.
                                                 . The camera will then turn on and the
                           LCD panel will display one of the
                                       following battery level icons:
                 EE    : Battery level OK.
                        [E       : The battery level is low. Keep
                                        spare batteries handy.
                                               Battery exhaustion is                                         .rl)       C-f    :
                                            imminent.
                          hr      : Replace the batteries. (See
 EJE    ;                                page 7.) In this case, the
     I -- Battery level icon                       shutter button will not function.

Battery Service Life (With 24-ex. rolls)
   Ambient Temoerature    0% Flash Use   50% Flash Use  100% Flash Use
          At 20'c             60 rolls         25 rolls          12 rolls
         At -10 'C             35 rolls           15 rolls          7 rolls
. The Battery Service Life table above is based on Canon's testing
  conditions using an EF 35-80mm tl4-5.6lens and new batteries.
. Operating the camera without film will still consume battery power. lt will
  reduce the number of rolls that can be taken with the batteries.

             lf nothing is displayed on the LCD panel, the batteries may have been
        installed incorrectly. Take out the batteries and install correctly (See page 16).

       For places where CR123A (or DL123A) batteries may not be easily available,
       take spare batteries with you. Also carry spare batteries for extended
       shootino sessions.
                                                                       17
View original page 17Page 18 · Read text
www.butkus.us
Mounting and Detaching a Lens ffi

 Mountihg a Lens

                        Remove the rear lens cap and the
            % camera body cap.

                                Align the red dots on the lens and
                           camera and turn the lens as                      ffi                         shown by the arrow until it snaps
                                     in place.
                       On the lens, set the focus mode
                               switch to AF.
                                            .  lf the focus mode switch is set to MF
                                         (or M on older lenses), autofocus  will
                                      not operate.
                                                 . While the lens autofocuses, do not
                                  touch the lens where it rotates.

                        Remove the front lens cap.
                                              . Be careful not to lose the front and
                                        rear lens caps.


  Detaching the Lens

                             While pressing the lens release
                                 button, turn the lens as shown by
                               the arrow until it stops. Then
                           remove the lens.
View original page 18Page 19 · Read text
:How the Shutter Button Works
The EOS camera's shutter button can be depressed halfway or all the way.
There is a click stop at the halfway point.

  Pressing the Shutter Button Halfway or Completely
                                                                                    ffiffiThe shutter button works as described below.

                       When  it is pressed halfway:
                                                 . Autofocusing is activated, and when
                                   focus is achieved, the beeper sounds
                                and the viewfinder's in-focus indicator
                                              lights in green.
                                                    . The shutter speed and aperture are
                                       also set and displayed on the LCD
                                     panel and in the viewfinder.
                       When  it is pressed completely:
                                                 . The shutter is released to take the
                                          picture and the film advances bv one
                                      frame.


      Camera movement during the moment of exposure is called camera shake.
      Camera shake can cause blurred pictures.
     To prevent blurred pictures due to camera shake:
          . Hold the camera steady (see page 22).
          . Use the center of your finger to touch the shutter button, grasp the camera
         with your entire right hand, then press the shutter button gently.
                                                                       19
View original page 19Page 20 · Read text
www.butkus.us
Loading and Unloading Film

  Loading Film

After you load the film, the camera  first winds the entire roll onto the
camera's take-up spool. Then each time a picture is taken, one frame of
film is rewound back into the film cartridge.
                            Turn the Command Dial to any
                                  setting except <U>.
                                Slide up the camera back lock-
                                release lever to open the camera
                                back.
                                   lnsert the film cartridge at an
                             angle as shown in the figure.

                              Hold down'rhe film cartridge and
                                     pull the edge of the film leader to
                               the orange mark on the camera.
                           Then close the camera back.
                                             .  lf the edge of the film leader goes     € B e s e E E B B 0 0 0 0 0 0 00
                                 beyond the orange mark, push some
                                           of the film back into the cartridge.
                                                 . After you close the camera back, the film
                                                       will start winding on the take-up spool                                         .rl)                                  and the frame counter will count up. The
                                  camera will then make a shutter-release
                                   sound and the <@> icon and total frame E=   @E                                       count will be displayed
                                             .  lf the frame counter is not displayed,
                                                                       it means that the film was not properly
                                      loaded. Take out the film cartridge
                              and load  it in the camera again.

           . With DX-coded  film, the camera automatically sets the film's ISO speed.
         .lf the film is not DX-coded, set the ISO speed manually. See page 52.
View original page 20Page 21 · Read text
Loading and Unloading Film
                                                                                                                 i,....1.in :j,iri

 a L .Infrared  film cannot be used with this camera.
 17 .The shutter curtains are manufactured  with very    :/ffi=---     highprecision.Topreventdamage,nevertouchlheFtffil.
         shutter curtains. When loading or unloading  film, be  ltl   i I         I I hi     carefu|nottotouchtheshuttercurtainwithyour[Ltr-_eJffi,l
         fingers or the film.                                                                                              ffi

     Unloading Film

After the film's last frame is exposed, the camera rewinds the film
automatically.

                          When the film rewind ends, only the
                      <@> icon will be displayed on the LCD
                                      panel. Check that this icon is
        @                displayed, then open the camera back
                             and unload the film.

                  Rewind Q..  Midroll Film
To rewind the film before reaching the last frame, follow the steps below.

                            Turn the Command Dial to <O.. >.

                              Press and hold down the <O.. >
                               button for at least 1 second.
                                                    . The film will start rewinding. When
                                      the film rewind ends, there will be a
                                         sh utter-release sound.
                         Open the camera back and
                           remove the film.
                                                                            21
View original page 21Page 22 · Read text
www.butkus.us                                            Loading and Unloading Film


              lf you remove the film from the camera in midroll without rewinding and then
       load a new roll of film, the new roll's film leader will only be rewound into the
         film cartridge. To prevent this, close the camera back and press the shutter
       button completely before loading a new roll of film.

Holding the Camera

To avoid taking a blurred shot, hold the camera properly as described
below.


                  For horizontal shootino.            For vertical shooting.
. Wrap your right hand around the camera grip and grasp firmly. Set your
 elbow lightly against your body.
. Use your left hand to hold the lens from underneath.
. Press the camera against your forehead and look through the viewfinder.
. Keep one foot slightly ahead of the other for better stability.


22
View original page 22Page 23 · Read text
:i
                        This section describes the Command
                            Dial's Basic Zone picture-taking modes.  ;.
                 <E>, <S>, 4-tr;,, <g>, and <(>.
                    These modes set all the camera settings    .:
                          automatically. All you do is point the
                    camera and press the shutter button.ffi      These modes override the camera's
                     Main Dial < r:\ > and buttons (except                       ,
                             for <@>, <$>, <O.. >, and the shutter
                             button). This is to prevent spoiled shots              i@                     caused by accidental operation of                                       :
                    camera controls.                                                                                                       .


                Camera-Controlled
               Automatic Shooting

                                            .  lf the <t> flash icon blinks in the
                                       viewfinder while you use a Basic
                             Zone mode, pop up the built-in flash
                                        with your fingers.  lf you pop up the
                                                built-in flash beforehand, it will fire
                                     automatically under low-light or
                                            backlit conditions.
                                                 . The settings set automatically by
                                    the Basic Zone modes are shown
                                 by the "Feature Availability Table"
                              on page 34.
View original page 23Page 24 · Read text
www.butkus.us
    Full Auto ModeE
In the Full Auto mode, all you do is point the camera and press the shutter
button. Photograph any type of subject automatically. The wide AF frame
focuses the subject and anyone can easily take a good shot.

                            Turn the Command Dial to <E>.


                           Look through the viewfinder and
                            aim the wide AF frame on the
                                 subject.
                                                 . To focus a subject outside the wide
                            AF frame, see page 47.


                              Press the shutter button halfway
                                  to focus.
                                                 . When focus is achieved, the beeper
                                                will sound and the in-focus indicator
                                     (O) at the lower right will light.


24
View original page 24Page 25 · Read text
E  Full Auto Mode

                           Check the LCD panel display.
                                            .rl)               . The shutter speed and aperture  will  1\',il     I I                                be set automatically and displayed on
  q=E                               the LCD panel and in the viewfinder.     @E                                             .  lf the <t> icon blinks in the
                                     viewfinder in low-light or backlit
                                       conditions, pop up the built-in flash.
                              See page 54.

                        Compose the shot and press the
                                 shutter button completely to take
                               the picture.


             lf the in-focus indicator blinks, the shutter cannot be released. See pages 48
      and 60.

         .lf you pop up the built-in flash beforehand,  it will fire automatically under
)@:   low-light or backlit conditions.
           . See page 54 for notes on using the built-in flash.

  AF-Assist Lamp

In the Basic Zone modes and Creative Zone modes, the AF-assist lamp
lights automatically when necessary.

Under difficult autofocusing conditions, the AF-assist lamp lights
automatically to illuminate the subject for autofocusing.

      'The AF-assist lamp is effective up to about 4 meters (13.2 ft).
          . Even while an external EOS-dedicated  Speedlite is attached to the camera,
        the camera's AF-assist lamp will be enabled.
                                                                  25
View original page 25Page 26 · Read text
www.butkus.us
W Portrait Mode
                                  This mode blurs the background to
                            make the human subject stand out.
                                                 . When focus is achieved, the beeper
                                                will sound.
                                             . Holding down the shutter button
                                    executes continuous shootino.


                            Turn the Command Dial to <\a>.
                                                    . The picture-taking procedure is the
                           same as with the Full Auto mode
                                      < El > (page 2a).


           . Background  blur is most effective when the subject is captured from the
        waist up. Also, the further away the subject is from the background, the
       more blurred the background  will become.
          . Using a telephoto lens also blurs the background better. lf you have a zoom
         lens, use the longest focal length. (For example, a 35-B0mm zoom lens set
         to B0 mm.)
         .lf you pop up the built-in flash beforehand, it will fire automatically under
          low-light or backlit conditions.
           . See page 54 lor notes on using the built-in flash.
zo
View original page 26Page 27 · Read text
*iffi Landscape Mode
                              This is for sweeping scenery,
                                 night scenes, etc.
                                                 . When focus is achieved, the beeper
                                                will sound.


                            Turn the Command Dial to <I>.
                                                   . The picture-taking procedure  is the same
                                      as with the Full Auto mode . E t (page
                                                 24\.


             lf the shutter speed display blinks, the shutter speed may be too slow to
      prevent a blurred picture due to camera shake. Using a tripod is
     recommended. (The shutter speed will still blink even while a tripod is used.)


      Using a wide-angle lens will further enhance the depth and breadth of the
)@: picture. lf you have a zoom lens, use the shortest focal length. (For example,
     a 35-80mm zoom lens set to 35 mm.)

             lf the Command Dial is set to .I    t, make sure the built-in flash is not
     popped up. lf the built-in flash is popped up in the Landscape mode, the
       picture may not come out properly.
                                                              27
View original page 27Related documents and language editions
From the M. Butkus archive. Original publisher and archive notices are retained.
Check the model and edition against your equipment.
PDF verified 2026-10-10.