Film cameras
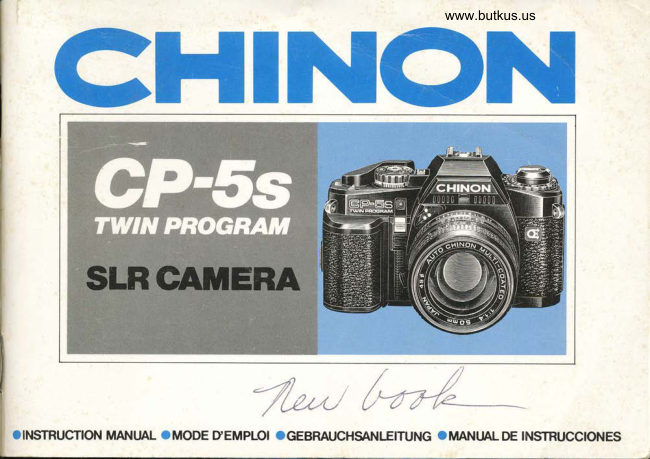
CHINON CP-5S User manual
User manual for CHINON CP-5S. 105 pages in German, Spanish. Read the original PDF, download or print a copy without registration.
105 pagesGerman, Spanish10.9 MB PDF
Loading your manual…Open PDF directly
Document details
- Brand
- Chinon
- Model / document
- CHINON CP-5S
- Document type
- User manual
- Language
- German, Spanish
- Pages
- 105
- File size
- 10.9 MB
- Category
- Film cameras
- Document date
- Not specified in catalog
Search available document text
Find a term, then jump to its page in the original PDF. Image-only pages may not be searchable; check the PDF for exact wording and diagrams.
Page 1 · Read text
www.butkus.us
CHINON


              *4           /,
                      /(/L4/   0"
OINSTRUCTION MANI'AL       DEMPLOI                                  INSTRUCCIONES
                'MODE        'GEBRAUCHSANLEITUNG 'MANIALDE
View original page 1Page 2 · Read text
INTRODUCTION                            INTRODUCTION
Welcome to the exciting world of CHINON            Soyez le bienvenu dans le monde passionnant de la
photography. Your CHINON CP-SS SPOT carnera      photographie CHINON.
is the most sophisticated 35mm SLR available from     Votre appareil CHINON CP-SS SPOT est le plus
CHIONON. The CP-SS is the world's first multi-         sophistiqu6 des appareils 35mm r6flex mono-
mode metering and two-stage programmed AE           objectif de la ligne CHINON. Le CP-SS est le
camera, aperture priority AE and full manual           premier au monde d poss6der la mesure multi-
control. The multi-mode metering makes available     mode, une exposition automatique (EA a double
photographer-oriented spot metering. The two-        programme, avec EA d priorit6 au diaphragme et
stage programmed AE allows you to shoot fast          contrdle manuel total. La mesure multi*mode
moving or slow moving subjects to allow maximum     permet la mesure de spot orient6e sur le
versatility with your creative photographic needs.       photographe. Le double programme d'exposition
Employing a full information electronic viewfinder      automatique vous permet de faire des photos de
with multi-colored digital LED's, the CP-5S camera      sujets se d6plagant rapidement ou de sujets A
is extremely easy to operate even under the most      mouvements lents afin de mettre d votre disposition
adverse lighting conditions. Your CP-SS camera is      les moyens les plus complets pour r6aliser vos
designed with built-in electronic auto focus             photographies. Au moyen d'un viseur dr information
contacts that will permit automatic AF operation       de 6lectronique et diodes 6lectroluminescentes
when used with the optional CHINON 35-70mm AF     multicolores digitales, I'appareil CP-SS est
lens. Total unmanned automatic operation is also        d'utilisation facile m6me dans les conditions
possible when further used with the optional            d'6clairage les plus d6favorables. Votre CP-5S est
CHINON power winders and wireless remote          conqu avec des contacts de mise au point
control unit.                                        automatique incorpor6s qui vous permettront de
                                                vous servir de I'objectif optionnel Chinon 35-7O mm
                                                    AF. Un fonctionnement totalement automatique est
                                                 6galement possible lorsque I'appareil est muni du
                                                    moteur d'entrainement et du dispositif de
                                                d6clenchement A distance par radio.
View original page 2Page 3 · Read text
www.butkus.us

EINLEITUNG                              INTRODUCCION
Willkommen zur aufregenden Welt der CHINON-       Bienvenido al mundo excitante de la fotografia
Fotografie! Die CHINON CP-SS ist die              CHINON. Su cdmara CHINON CP-SS es la mds
fortschrittl ichste 35-m m-ESR-Kamera von C H  I NON.    sofisticada de las cdmaras SLR de 35 mm que se
Die CP-SS ist der Welt erste Kamera mit             pueden obtener de CHINON. La CP-SS es la
mehrfacher Belichtu ngsmessung, zweistufig           primera cdmara en el mundo con medicion de
program m ierter Bel ichtu ngsautomatik,                modalidad multiple y AE programada con dos
Blendenprioritdt und vollmanueller                      etapas, AE con prioridad de abertura y control
Einstellungsmoglichkeit. Die Mehrfachmessung       manual completo. La medici6n de modalidad
ermdgl icht ei ne bedarfsorientierte Selektivmessu ng.    multiple hace posible la medici6n a los fot6grafos
Die zweistufig programmierte Belichtungsautomatik    dvidos de medir en el acto. La AE programada con
gewdhrleistet optimale Aufnahmeergebnisse sowohl   dos etapas le permite tomar fotografias de objetos
von sich schnell als auch langsam bewegenden      en movimiento r6pido o lento facilitando la mdxima
Motiven und sorgt fur hochste Flexibilitdt. Die CP-       versatilidad con sus necesidades de creatividad
55 erfirllt lhre kreativen Anforderungen. Der             fotogr6fica. La cdmara CP-SS, que emplea un visor
elektronische Sucher mit verschiedenfarbigen          electr6nico de informaci6n completa con LEDs
Digital-LEDs versorgt Sie mit allen Informationen,       digitales multicolores, es muy fdcil de operar aun
die Sie brauchen, so daB Sie mit der Bedienung der    bajo las condiciones de luz mds adversas. Su
CP-SS auch bei den schlechtesten                 c6mara CP-SS ha sido disenada con contactos de
Lichtverhiiltnissen keine Schwierigkeiten haben       enfoque automdtico incorporados que le permitirdn
werden. Die CP-SS ist mit elektronischen                   la operacion de AF cuando se utilice con el objetivo
Autofokus-Kontakten ausgestattet, die bei             opcional CFIINON 35-70 mm AF. El funcionamiento
Gebrauch mit dem als Sonderzubehor erhdltlichen     totalmente automdtico tambi6n es posible cuando
Objektiv Chinon 35-70 mm AF automatische              la cdmara se utilice con los bobinadores
Scharfeinstellung ermoglichen. Mit weiterem           motorizados Chinon y la unidad de control remoto
Sonderzubehor, den Chinon Power Windern und        inal6mbrica.
der drahtlosen Fernbedienung, ist vollig
u nbeauf sic hti gter Autom ati kbetrieb gewd h rleistet.
View original page 3
Page 5 · Read text
www.butkus.usINHALTSVERZEICHNIS                               INDICE
Bezeichnung der Teile                           5       Nomenclatura ............                       5
Technische Daten                            12       eipeCiticiciones  .........:::.:::::::::::::::::::::..:.:..................  14
Anbringen des Trageriemens                    17        Instrucciones para la correa                  17Ansetzen des Objektivs  .............                  17       Montaje delobjetivo                        17
Einsetzen der Batterien  ..............                  19        Instalaci6n de las pilas ..........                19Batteriekontrolle                                    21       Prueba de las pilas ..........                      21Einlegen des Films                           23       Carga de la pelicula ...............              23Bildzdhlwerk   ..............                         27       Contador de exposiciones  .........             27Filmtransport  ...............                        27       Avance de la pelicula ................            27
ri   i mem pi ih o  r ic n r.e    i tie i;;6i  i;                                                                                                                                               : : : : : : : : : : : : :........       29        Ajuste ISO ...........                        29                              ilDie ersten Schritte:                                      Operaciones b6sicas:
l.   Scharfeinstellen                             31          l.   Enfoque ..............                       31ll.  Programmierte Belichtungsautomatik  ...........  33          ll.  Modalidades AE (Exposici6n automdtica)lll. VerschluBauslosung und Auslosesperre  ......  37          programadas  .............                     33lV. Entnehmen des belichteten Films           39               lt1.  bisFaiaoor v oroq166  iili ;i;il*d;   :............  37V.  Selbstausloser/Tonsignal-Ein/  Aus-Schalter  41           lv.  Descarga de la pelicula expuesta          39Vl. Blitzaufnahmen   ..........                   45         V.   Interruptor I autodisparador y de encendido/
Fortgeschrittener  Betrieb:                                  apagado de la seflal audible                 41
l.   VerschiedeneBelichtungsmeBarten          49     Vl  Fotografia con flash                      45ll.  MeBwertspeicher                       57       Para una utilizaci6n avanzada:lll.  Zweistufig programmierte Belichtungs-                       l.   Medicion de modalidad mriltiple           49     automatik                                   61           ll.  Memoria de exposici6n  .............             57lV. Fotografieren in A-Betrieb  ..........           65          lll. AE programada con dos etapas              61V.  Fotografieren in M-Betrieb  ..........           69      lV. Toma de fotografias en la modalidad A  .........  65Vl. Belichtungskompensation    .........            75     V. Toma de fotografias en la modalidad M  ........  69Vll. Langzeitbelichtung                       77      Vl. Compensaci6n de exposici6n              75
Vlll. Mehrfachbelichtung  ............                79        Vll. Tiempo de exposici6n                     77
lX. Schdrfentiefe  ...........                         81          Vlll. Exposiciones mriltiples                   79
Systembetrieb:                                     lX. Profundidad de campo                      81L   Direktfokussiersystem                   83       Operaci6n delsistema:ll.  Fernbedienungssystem                  87    L   Sistema de enfoque directo                83lll. Datenruckwandsystem                    87          ll.  Sistema de control remoto                87lV. PowerWinder-System..........               89          lll.  Sistema del respaldo de datos             87V. Blitzsystem                                 91       lV. Sistema del bobinador autom6tico  .................  89V1. Mehrfachton-System                    93     V.  Sistema delflash                            91Sonderzubehdr  ..........                       99      Vl. Sistema de sonido m0ltiple               93
Pflege der Kamera  ................                  103       Accesorios opcionales                      99
                                                     Cuidados de la c6mara
View original page 5Page 10 · Read text
www.butkus.us

23. Viewfindereyepiece                               23. Oculaire du viseur24. Metalfocal plane shutter                           24. Obturateur25. Film chamber                                    25. Logement du film26. Film rail                                       26. Couloir du film27. Film guide rail                                 27. Guide film28. Power source contact                              28. Contactd'alimentation6lectrique29. Power window electronic contacts                     29. Contacts 6lectroniques du moteur30. Tripod socket                                  30. Pas de vis pour tr6pied31. Sprocket teeth                                 31. Dents de I'axe d'entrainement du film32. Multi-slotted needle                              32. Bobine r6ceptrice d multiples fentes33. Camera back                                  33. Dos de I'appareil34. Film pressure plate                               34. Guide presseur du film35. Power winder coupler                            35. Couplage boitier/moteur36. Auto Date electronic contacts                       36. Contactauto-date 6lectronique37. Rewind button                                 37. Bouton de rembobinage

23.  Sucherokular                                                                       Ocular del                                                                                              visor                                                      23.24.                                                                     Obturador                                                                       de                                                                                    plano focal met6lico      Metallsch      I itzversch luB                             24.
25.  Filmkammer                                    25. C6mara de la pelicula
26.  Filmauflage                                     26. Carril de la peliculal
27.   Filmfiihrung                                     27. Carril de guia de la pelicula
28.  Stromversorgu  n gskontakt                           28. Contacto para la fuente de alimentaci6n
25.  Elektronische Kontakte  ftir Power Winder                29. Contactos electr6nicos para el bobinador motorizadol30.   Stativgewinde                                 30. Receptdculo para el tripode31.   Zahntransportrolle                               31. Dientes de la rueda dentada32.  Plastikwalze                                    32. Agujas mriltiples para enrollar la pelicula33.  Kamera-Rrickwand                              33. Parte posterior de la cAmara34.  Filmandruckplatte                               34. Placa de presi6n de la pelicula35.  AnschluB ftir Power Winder                        35. Acoplador para el bobinador motorizado36.   Elektronische Kontakte   f tl r                         36. Contactos electr6nicos para el respaldo de datos
     Dateneinbelichtun gsautomatik                        37. Bot6n de rebobinado.37.  Rtickspulknopf
38.  Stromversorg  u ngskontakt
View original page 10Page 11 · Read text
SPECIFICATIONS                                    In-Focus Trlgger: Shutter will not be released
                                                     unless the optional AF lens is in focus.Type: 35mm automatic compact SLR camera with                                                 Exposure Meter: TTL full aperture AVERAGETTL full aperture selectable multi-mode metering                                                        metering and SPOT metering plus capability of(Center Weighted AVERAGE Metering, SPOT                                                  measuring light in accordance with the averagedMetering and SPOT-AVERAGE metering), twin                                                         reading of SPOT and center weighted AVERAGEprogram AE (instant stop-down re-metering),                                                     metering (SPOT-AVERAGE), employing two siliconAperture priority AE, and manual exposure system.                                                          blue cells.        format:Picture           24 x 36mm                                                                                             100.                                                                           ISO                                                        Range:                                                                         atFl .4 50mm,                                                 brposure                       universal bayonet mount (K,         CHINONLens Mount:                                                                   EV                                                                                 metering                                                                    + 1 (F1.4,                                                          weighted                                                                 average                                                   Cehter                                                                                   -KA, RK mount compatible) with built-in CHINON AF                                                    1 sec) to EV + 19 (F22,1/1ooo sec)lens     contacts.                                                     EV + 3(F1 .4, 1/4 sec) to EV + 1 I                                                  Spot metering -Minor:       Quick return mirror with sub mirror.                                                                        sec)                                             FZZ,1/1000Shutter: Electromagnetically controlled focal plane                                                                                                   Built-in exposure                                                 Exposure                                                           Compensation:shutter, stepless speeds from 8 sec to 1/1000 sec                                             memory lock system with audible signal activatedon automatic; maximum operation time at AE (A, P1                                                 by halfway depression on shutter release button ator P2 mode) is 30 seconds, 14 speeds from 8 to 1/                                             SPOT, and by "M" button at AVERAGE metering
1000 sec on manual exposure. Electronically             (Aperture priority AE mode only)controlled automatic and manual exposure.                                                ISO Range= 25-32OO (DlN15-36) with 1 /3EVShutter Release: Electromagnetic type shutter                                                     segment.release with safety lock and provision for cable                                             Programmed AE mode: Two stages available.
release.                                          P1: The programmed AE designed for fast movingViewfinder: Fixed eyelevel pentaprism (silver-                                                                  object. Lens aperture stays open up to thecoated), central split image with micro prism collar,                                                               shutter speed of 1/60 sec. Between 1 /60 - 1/18 digital LED's indicate shutter speeds (green),                                                  1000 sec., the aperture varies in accordanceover/under exposure (red), and program AE (green),                                                              with the programmed shutter speed.Aperture visible in viewfinder (optical type).                                                 P2: The programmed AE designed for slow movingViewfinder magnification: 0.87X at infinity with                                                                objects, depth-of-field well considered AEstandard 50mm lens.                                                              character. Lens aperture stays full open up toViewfinder visibility                           92o/o                                   the shutter speed of 1 /8 sec. At faster than 1 /8                         =Auto Focus Type: Built-in AF contacts for CHINON                                                                     sec., the aperture varies in accordance withAF lens, activated by shutter release.                                                            the programmed shutter speed.
                                                           O
View original page 11Page 12 · Read text
www.butkus.us
 Programmed AE signal: Built-in with flashing "P"       Multiple Exposure: Built-in switch which
 LED, when the aperture is set within 4 stops from      disengages film advance and film counter.
 full aperture opening. Beyond 4 stops from full         Selftimer: Electronically controlled at 10 sec. with
aperture opening, "P" LED will remain "ON" at          flashing red LED and audible buzzer signal.
program AE mode.                               "B" (Bulb) Timer Signal: Built-in with v-ariable
Manual Shutter Speed selector: One-touch           aud   i ble buzzer signals.
activation type by pressing the shutter release        Accessory Shoe: Hot shoe type with "X" sync and
button halfway. Also serves as Exposure Memory     a contact for CHINON dedicated flash.
button at A mode. Depressing the "M" button,         "X" Synchronization: "X" flash sync at 1/100 sec.
shutter speed starts from 1 /125 sec. and goes up     Slow Synchronization: 1/60 sec or slower at
with LED indication. Depressing both "M" button       manual
and shutter release button, shutter speed goes         Special Gontacts for CHINON AF lens: Built-in
down from 1/125 sec. with LED indication in           Special Contact for CHINON Auto Date: Built-in
viewfinder.                                    Power Source: 3 x 1.5V "AAA" (AM-4)
S.C.S. (Shutter speed Change Signal): Built-in with   Power Hold System: 30 sec. at manual exposure
audible buzzer signal along with manual shutter      mode
speed change.                                       Battery Gheck: Built-in with digital LED indicator
M.E.S.: (Manual Exposure Signal): Built-in with        Accessories: CHINON power winders, Dedicated
audible buzzer signal when the proper exposure is     flashes, Info Back-2 data imprinting unit, Auto Date
achieved by turning aperture ring.                       imprinting unit, Super multi-coated lenses, AF
Camera Shake, overlunder warning: Shutter speed    lenses, Deluxe carrying cases and many more.
slower than 1/30 sec., under/over warning with       Dimensions: 136(W) x 88(H) x 51(D)mm.double audible signal.                                     (5.35"x3.46"x2.o1")
Film Advance: Single stroke in an arc of 130' with     Weight: 52Og (18.34 oz)
25" stand off. Motorized film advance with optional
power winder.
Film Loading: Multi-slotted needle type
Film Rewind: By depressing the rewind button and
cranking the rewind lever.
Film Counter: Automatically indicates number of
exposure and resets to "S" when the camera back
is opened.
View original page 12
Page 14 · Read text
www.butkus.us
     sec., I'ouverture varie selon la vitesse            rembobinage et relever la manivelle repliable du
     d'obtu ration program m6e.                       bouton de rembobinage.
Signalen EA programm6: lncorpor6 avec            Compteur de vues: ll indique automatiquement le
clignotement de la diode "P". Lorsque le             nombre de vues exposees et revient e "S" a
diaphragme est 16916 d moins de 4 graduations de      I'ouverture du dos.
 la pleine ouverture, la diode "P" reste allumee en      Surimpression: Bouton de surimpression incorpor6
mode EA programm6.                                   qui d6braye le m6canisme d'avancement du film et
S6lection des vitesses d'obturation manuelles: En      le compteur de vues.
appuyant une fois A mi-course sur le d6clencheur,     Retardateur: Contr6l6 6lectroniquement d 10 sec.
 le systeme est mis en circuit. Sert 6galement de       branch6 sur une diode rouge et sur un signal audible.
bouton de m6moire d'exposition en mode A. En        Signal de chronom6trage "8" (lampe): Incorpor6appuyant sur le bouton "M", les vitesses             avec signaux acoustiques variables.
d'obturation passent de 1/125 sec. aux vitesses      Sabot porte-accessoires: Type d contact direct
plus rapides avec indication par diode. En appuyant   avec synchronisation "X" et un contact pour le
sur le bouton "M" et sur le d6clencheur, les             flash CHINON.
vitesses d'obturation descendent au-dessous de'1 /    Synchronisation "X": Synchronisation de flash "X"
125 sec. avec indication par diode dans le viseur.     au 1/100 sec.
S.C.S. (Signalisation de changement de vitesse       Synchronisation lente: 1/60 sec. ou moins
d'obturation)  : Incorporee avec avertisseur acoustique  manuellement.
pour la s6lection de vitesses d'obturation manuelles.   Gontacts sp6ciaux pour I'obiectif AF CHINON:
M. E.S. (Signalisation d'exposition manuelle)   :           Incorpo16.
Incorporee avec.avertisseur acoustique lorsque la     Contact spGcial pour I'auto-date CHINON:
vitesse d'obturation correcte est obtenue en            Incorponi.
tournant la bague des ouvertures de diaphragme.      Alimentation: 3 x, 1,5V "AA" (AM-4)
Tremblement d'appareil/ Avertissement de sur ou     Systdme de maintien de tension: 3O sec. en mode
sous-exposition: Pour les vitesses inf6rieures A 1l     d'exposition man uelle.
30 sec., avertissement de sur ou sous-exposition      Contr6le des piles: Incorpor6 avec indicateur
doubl6 d'un signal acoustique.                             15lectrolum      i nescent d igital.
Avancement du film: Par un mouvement du levier     Accessoires: Moteur CHINON, flash CHINON, "lnfo
d'armement de '130" aprds 25o a vide. Avance        Back-2"    i m primante, "Auto-date"  im pri mante,
automatique facultative d I'aide du moteur.               objectifs trait6s, objectif AF, 6tuis de transport
Ghargement du film: Dans la bobine r6ceptrice d     DELUXE et nombre d'autres accessoires.
multiples fentes.                                    Dimensions: 138 (L) x 88 (H) x 51 (P) mm
Rembobinage du film: Enfoncer le bouton de           Poids: 520 g.
View original page 14Page 15 · Read text
TECHNISCHE DATEN                          und Unendlichkeitseinstellung)
                                                        Sicht im Sucher= 92o/oTyp: Kompakte automatische 35-mm-ESR-Kamera                                                    Autofokus- Kontakte: Ei n gebaut   f tirmit TTL-Offenblendenmessung, einstel lbarer                                                                 aktiviert durch AusloserBel ichtun gsmeBart (m itten betonte   I ntegra    I messu ng,                                                      Scharfeinstellungs-Ausliiser: VerschluB wird erstSelektivmessung, lntegralmessung),                                                      ausgelost, wenn das Sonderzubehor-Autofokus-Doppelprogra m m-Bel ichtu n gsautomati k (sofortige                                                       Objektiv fokussiert  ist.Arbeitsblenden-Nach messu ng)                                                  Belichtungsmessung: TTL-Offenblenden messu n g,Belichtungsautomatik mit Blendenprioritdt und                                         m itten betonte   I ntegral messu n g, Selektivmessu  n gmanueller Belichtung                                             und Integralmessung (Durchschnitt ausBildformat:24 x 36 mm                                                      mittenbetonter Integral- und Selektivmessung) mitObiektivanschluB : Ch inon-U n iversal-                                                  zwei Si  I ikonblauzel lenBajonettanschluB (kompatibel mit K-, KA- und RK-                                                      Belichtungsbereich:  bei F1.4 50mm, ISO 100AnschluB) mit eingebauten CHINON Autofokus-                                                   Mittenbetonte Integralmessung: LW +1 (F1,4, 1 s)Objektiv-Kontakten.                                                          bis LW +19 (F22, 1/1000 s) bei ASA 1O0/BlendeSpiegel: Schnellrtlckkehrspiegel  mit Nebenspiegel                                                         1,4VerschluB : Elektromagnetisch gesteuerter                                                   Selektivmessung: LW +3 (F1,4,1/4 d bis LW +19SchlitzverschluB, Belichtungszeiten stufenlos von 8   (F22,1/1000  s)s bis 1/1000 s bei Automatik, maximale                                                   Belichtungskompensation:  MeBwertspeicher m itBetriebszeit bei Automatik (Betriebsart A, P1 oder                                                      Tonsignal, aktviert durch halbes Durchdri.tcken desP2) 30 s, 14 Belichtungszeiten von 8 bis 1/1000 s                                                   Auslosers bei Selektivmessung und des "M"-bei manueller Belichtung. Elektronisch gesteuerte                                               Knopfes bei lntegralmessung (nurautomatische und manuelle Belichtung.                                                    Belichtungsautomatik m it Blendenprioritdt)                                 m it                             AusloserAusltiser: Elektromagnetischer                                                 ISO-Bereich: 25 - 3200 (DlN 15-36) mit 1/3-LW-                                                    fttr Drahtausloser.              und AnschluBSicherheitssperre                                              SegmentSucher: Feststehende r (s   i  I berbesc h ic htete r)                                                 Programmierte Belichtungsautomatik  : 2Pentaprismen-Sucher mit waagerechtem Einblick,                                                Programme:Schnittbildindikator  mit Mikroprismenring,  1 8                                                 P1 : Programm-Belichtungsautomatik  fttr sichDigital-L.EDs zur Anzeige von Belichtungszeit                                                            schnell bewegende Motive. Bis zur(Grtin), Uber-/Unterbelichtung  (Rot), Warnung vor                                                            Belichtungszeit von 1/60 s bleibt das Objektiv
langer Belichtungszeit (Orange),                              geoffnet. Zwischen 1/60 und 1/1000 s dndertSelektivmeBanzeige (Rot) und Programm-                                                            sich die Blende gemdB der programmiertenBelichtungsautomatik  (Grtin). Blende wird im                                                             Belichtungszeit.        angezeigt.Sucher                                               P2: Program m-Bleichtu ngsautomati k  f 0r sic h              erung: 0, 8 7f ac h (be i Norm a lobje kt    i vSuchervergrii8
View original page 15Page 16 · Read text
www.butkus.us
    langsam bewegende Motive. Dieses Programm     Power Winder.
     sorgt frir optimale Schdrfentiefe. Das Objektiv       Einsetzen des Films: Plastikwalze
      bleibt bis zur Belichtungszeit von 1/8 s ganz        Filmrtickspulung: Durch DrUcken des
     gedffnet. Bei ktrrzeren Belichtungszeiten dndert     Rtlckspulknopfes und Drehen des Rtickspulhebels.
     sich die Blende gemdB der programmierten         Bildzdhlwerk: Automatisches Bildzdhlwerk mit
     Belichtungszeit.                                   Ruckstellung auf "S" bei Offnen der Kamera-
 ?-rogFr!q- Belichtungsautomatik -signat  :              Rtrckwand.
 Die "P"-LED blinkt, wenn die Blende innerhalb von      Mehrfachbelichtung: Durch Schalter, der den
4 Blendenwerten von der groBten Blendenoffnung       Filmtransport auskuppelt und das Bildzdhlwerk
 eingestellt ist. Bei einer Einstellung von irber 4           desaktiviert.
 Blendenwerten von der vollen Blendenoffnung           Selbstausltiser: Elektronisch gesteuert mit 10 s
hinaus bleibt die "P"-LED bei Programm,                  Vorlaufzeit, Anzeige durch blinkende rote LED und
 Belichtungsautomatik an.                            Su mmsign al zur Kontrol le.
Manueller Belichtungszeitenwdhler:  Aktivierung       "B" (Bulb : Langzeitbelichtung)-Timer-Signal:
einfach durch halbes Durchdrticken des Auslos-ers.      Variable akustische Su m mersignale
Dient auch als MeBwertspeichertaste bei Automatik.    Zubehiirschuh: Mit "X"-Synchronisation und
Durch Drtrcken des "M"-Knopfes beginnt die           Kontakt frlr Chinon Dedizierten Blitz
Belichtungszeit mit 1/125 s und geht mit LED-Anzeige  "X"-Synchronisation: "X"-Bl itzsyn ch ron isation bei
nach oben. Durch Drricken sowohl des "M"-Knopfes-    1/100s.
als auch des Auslosers geht die Belichtungszeit        Synchronisation bei langer Belichtungszeit: 1/60 s
von 1 /125 s mit LED-Anzeige im Sucher nach unten.   oder ldnger bei manuellem Betrieb
S.C.W. (BelichtungszeitenSnderungssignal)    :           Autofokuskontakte  fiir CH INON AF-Obiektiv
Akustisches Summersignal bei manueller              Spezialkontakt flir Ghinon
Bel ichtu ngszeiten u mstel lu ng                           Dateneinbelichtungsautomatik
M.E.S. (Manuelles Belichtungssignal)  : Akustisches     Stromversorgung: 3 x 1,5V "AAA" (AM-4)
Summersignal, wenn die Belichtung                   Spannungsreserve: 30 s bei manueller Belichtung
durch Drehen des Blendenrings richtig eingestellt  ist.    Batteriekontrolle: M it Di gital-LED-Anzeige
Verwacklungsgefahr-,  Uber-/                           Zubehiir: CHINON Power Winder, Dedizierte Blitze,
Unterbelichtungswamung  : Bel ichtu n gszeit ld n ger        Info Back-2-Dateneinbelichtungsgerdt, Auto Data-
als 1 /30 s, Unter-/Uberbelichtungswarnung  mit          Einbel ichtu ngsgerdt, S u per-Objektive m it
Doppeltonsignal                                   Meh rsch ichtenverg ritu n g, AF-Objektive, Del uxe-
Filmtransport: Filmschnellspannhebel mit 1 3Oo        Tragetaschen und vieles mehr.
Aufzugswinkel und Bereitschaftsstellung bei 25o.      Abmessungen: 136 (B) x 88 (H) x 51 (T) mm
Motorischer Filmtransport mit Sondezubehor-         Gewicht: 520 g
View original page 16Page 18 · Read text
www.butkus.us
     completamente abierta a velocidades del           Gontador de exposiciones; lndica
     obturador de 1 /8 de seg. A velocidades             automdticamente el nimero de exposiciones y se
     superiores a 1 /8 de seg., la abertura varia de        repone a "S" al abrir la parte posterior de la cdmara.
     acuerdo a la velocidad programada del obturador.    Exposicion mfltiple: |nterruptor incorporado que
 Senal AE programada: Incorporada con destello del      detiene el avance de la pelicula y el contador de
 LED "P", cuando la abertura est6 ajustada entre cuatro   exposiciones.
 posiciones de parada a partir de la aberura completa.     Autodisparador: Co ntrolado electr6 n   i ca m e n te a  I
 Sobrepasando el 4o. punto de parada desde la posicion   transcurrir 1O segundos; con LED de destellos rojo
 de la abertura completa, el LED "P" permanece          y seflal audible.
 encendido en la modalidad de AE programada.          Senal del autodisparador "8" (Fotografias de
 Selector manual de la velocidad del obturador:           exposicion) : Incorporada con sefi ales audibles
 Activado por un solo toque al presionar el                   variables.
 disparador solamente la mitad. Tambi6n sirve como     Zaqta suplementaria: Zapata de contacto directo con
 bot6n de memoria de exposici6n en la modalidad A.       sincronizacion "X" y un contacto para el flash CHINON.
 Presionando el bot6n "M", la velocidad del                Sincronizacion "X": Sincronizacion "X" para el
 obturador empieza por 1/125 de seg. y aumenta           flash a 1/1OO de seg.
 con la indicaci6n del LED. Presionando  el boton 'M'       Sincronizaci6n lenta: 1/60 de seg. o menos en la
 y el disparador, la velocidad del obturador disminuye     modalidad manual.
 1/125 de seg. con la indicacion del LED en el visor.       Contactos especiales para elobietivo CHINON
 S.C.S. (Senalde cambio de la velocidad del            AF: lncorporados.
 obturador): Incorporada junto con una sefial audible     Contacto especial para el respaldo de datos
 y cambio manual de la velocidad del obturador.        CHINON: Incorporado.
 M.E.S. (Senat de exposicion manual): Incorporada        Alimentacion: 3 pilas de 1,5V tamaflo "AAA" (AM*4).
 con una sefral audible cuando se logre la                Retenci6n de alimentaci6n: 30 seg. en la
 exposici6n correcta girando el anillo de abertura.         modalidad de exposicion manual.
 Advertencia de movimiento de la c6mara, y de          Comprobaci6n de las pilas: Incorporado con
 sobre/subexposici6n: A velocidades del obturador        indicador LED digital.
 inferiores a 1l3A de seg., advertencia de sobre/          Accesorios: Bobinadores motorizados CHINON,
 subexposici6n con sefral audible doble.                    flashes, impresoras de datos Info back-2,
 Avance de la pelicula: Carrera rinica en un arco de       impresoras de datos Auto date, objetivos de capas
i 130' con parada a 25". Avance motorizado de la          mfltiples, objetivos de AF, cajas d6 transporte de
ipelicula con bobinador motorizado opcional.                  lujo y muchas otras cosas mds.
,Qarga de la pelicula: En un receptor de mriltiples agujas.  Dimensiones: 136 mm de ancho x 88 de alto x
lRebobinado de la pelicula: Presionando el boton de     51 de fondo.
 rebobinado y girando la palanca de rebobinado.          Peso: 520 g.
View original page 18Page 19 · Read text
SHOULDER STRAP INSTRUCTONS  MODE D'INSTALLATION DE LA                            COURROIE DE TRANSPORTPlace the end of the shoulder straP
through the retaining ring connected     lnsrSrer I'extr6mit6 de la courroie
to the camera body lug. Fold the       dans I'anneau attach6 ir I'appareil' la
shoulder straP over the retaining         replier puis placer I'extr6mit6 dans
rinq. Place the ends of the straP        I'anneau plastique et la boucle. Tirer
thr6ugh the plastic retainer. Pull tight   fermement Pour assurer la
to secure. Follow the same             fermeture. Agir de m6me pour I'autre
procedure for the other side of the      extr6mit6 de la courroie (Fig. 1' 2).
camera (Fis.1,2).
                           MONTURE D'OBJECTIF
LENS MOUNTING                                   Le CHINON CP-SS Possdrde une
Your CHINON CP-5S is equiPPed      monture d baibnnette "K" CHINON
with a CHINON universal baYonet      (montures compatibles KA'PK)' qui
mount (K, KA or RK comPatible)        accepte tous les objectifs
which accepts all interchangeable      interchangeables munis d'une
 lenses with the "K", "KA" or "RK"      monture e baibnnette "K", "KA" ou
bayonet mount. To attach the lens'     "RK". Pour fixer I'objectif, placer le
match the red dot on the camera       repdre rouge du boitier en face du
bodv with the red dot on the lens       rebere rou6e de I'objectif (Fig.3).
 (Fiq: 3). Then insert the lens into the    pJis ins6rer I'objectif dans le boitier
 cairera body and turn  it clockwise      et le tourner dans le sens des
 until the lens locks with a click. To      aiquilles d'une montre jusqu'd ce
 remove the lens from the camera         qu:il soit verrouillti en produisant un
 body, depress the lens lock release     d6clic. Pour retirer I'objectif du
 lever. turn the lens counterclockwise     boitier. enfoncer et maintenir le
 as far as it will go, and lift it up from     bouton de d6blocage de I'objectif
 the body (Fig. a).                      plac6 sur le boitier, Puis tourner
                                                   i'obiectif dans le sens contraire des
                                               aiquittes d'une montre jusqu'd ce
                                  qul I'objectif soit lib6r6 (Fig.4).                                                   @
View original page 19Page 20 · Read text
www.butkus.us
ANBRINGEN DES                INSTRUCCIONES PARA LA
TRAGERIEMENTS                CORREA DE LA CAMARA
Das Ende des Trageriemens durch      Pase el extremo de la correa a
den an der Kameragehiiuseose          trav6s del anillo de retenci6n
angebrachten Haltering frlhren. Den     conectado con el orificio del cuerpo
Trageriemen r.lber den Haltering        de la c6mara. Pliegue la correa
falten. Die Enden des Riemens          sobre el anillo de retenci6n. Pase los
durch den Plastikhalter frlhren. Zur      extremos de la correa a trav6s del
Sicherung straff ziehen. Dieselben       retenedor de pl6stico. Tire
Schritte auf der anderen Seite          firmemente para fijarla. Siga este
durchfiihren (Abb. 1, 2).              mismo procedimiento para el otro
                                          lado de la cdmara (Figs. 1, 2).
ANSETZEN DES OBJEKTIVS
                           MONTAJE DEL OBJETIVOlhre CHINON CP-5S ist mit einem
CHINON "K"-BajonettanschluB (KA-    Su CHINON CP-SS est6 equipada
, RK-kompatibel) ausgestattet, so       con una montura de bayoneta
daB alle Wechselobjektive mit "K"-,     CHINON "K" (compatible con la
"KA"- oder "RK"-BajonettanschluB      montura de KA,RK) que acepta
angesetzt werden konnen. Zum         todos los objetivos intercambiables
Anbringen des Objektivs den roten      con montura "K" "KA" o "RK". Para
Punkt am Kameragehduse und den      acoplar el objetivo haga coincidir el
roten Punkt am Objektiv aufeinander    punto rojo en el cuerpo de la
ausrichten (Abb.3). Dann oas           cdmara, con el punto rojo en el
Objektiv in das Kameragehduse           objetivo (Fig.3). Luego, inserte el
einsetzen und nach rechts drehen,       objetivo en el cuerpo de la c6mara y
bis es mit einem Klicken einrastet.        girelo hacia la derecha, hasta que
Zum Abnehmen des Objektivs vom     quede bien trabado haciendo un
Kameragehiiuse den ObjektivanschluB-  ruido de chasquido. Para quitar el
Verriegelu ngshebel dnicken, das         objetivo del cuerpo de la c6mara
Objektiv bis zum Anschlag im           presione la palanca de liberaci6n del
Gegenuhaeigersinn drehen und aus      objetivo, gire el objetivo hacia la
dem Gehduse heben (Abb.4).            izquierda tanto como sea posible, y
                                       sepdrelo del cuerpo (Fig.a).
View original page 20Page 21 · Read text
BATTERY INSTALLATION          MISE EN PLACE DES PILES
1. Turn counterclockwise the screw                                       1. D6visser la vis sur le cot6 de la
  on the side of the power grip to        poign6e d'alimentation afin de la   remove the power grip from the                                           dtiposer de l'appareil (Fig. 5).  camera body (Fig.5).                                     2. Placer trois piles alcalines de2. Place three 1.5V "AAA" alkaline                                        1,5V "AAA" (LR-03, AM-4) e   batteries (LR-03, AM-4) in the                                                    I'int6rieur de la poign6e
   power grip (Fig. 6).                           (Fig. 6).3. Attach the power grip to the                                     3. Reposer la poign6e sur I'appareil  camera body by turning the                                              et la fixer en serrant la vis   screw clockwise to secure  it.                                                    lat6rale.
NOTE:                            REMARQUE:1. Make sure that the batteries are                                         1. S'assurer que les piles sont
   inserted correctly,  i.e., check           plac6es correctement en    polarity. The shutter will operate                                            controlant la oolarit6. L'obturateur   only when batteries are correctly                                     ne fonctionne que si les piles   installed and not exhausted.                                         sont plac6es correctement ou ne  When replacing batteries, replace                                         sont pas usag6es. Remplacer les    all three baileries at the same                                                   trois piles A la fois.
   time.                              2. Retirez les piles aprds usage et2.  lf you do not use your camera for                                         conservez-les dans un endroit  a long period of time, remove the                                             sec. Ceci, afin d'6viter que les
   batteries, and store in a dry              piles ne coulent et endommagent   location. This will prevent the                                           votre appareil.   possibility of battery leakage and
  damage to your camera.


                                                                                                         (D
View original page 21Page 22 · Read text
www.butkus.us
               EINSETZEN DER BATTERIEN       INSTALACION DE LAS PILAS
                          1 . Die Schraube an der Seite des       1. Gire hacia la izquierda el tornillo
                        Batteriefachs im                       situado en el lado de la
                      Gegenuhrzeigersinn drehen, und      empuRadura para poder separar
                    das Batteriefach kann vom             6sta del cuerpo de la c6mara
                     Kameragehiiuse entfernt werden         (Fig.5).
                       (Abb.5).                           2. Ponga tres pilas alcalinas tamafio
                   2. Drei 1 .5-V-"AAA"-A|kalibatterien       "AAA" de 1,5V (LR-03 o AM-4)
                       (LR-03, AM-4) in das                en el interior de la empurladura
                        Batteriefach einsetzen Gbb. 6).          (Fig.6).
                   3. Das Batteriefach wieder an das     3. Ponga la empunadura en el
                     Kameragehiiuse ansetzen und        cuerpo de la cdmara y fijela bien
                     durch Drehen der Schraube im         girando el tornillo hacia la
                       Uhrzeigersinn Sichern.                derecha.
              ZUR BEACHTUNG:               NOTA;
                         1 . Sicherstellen, daB die Batterien 1. Cerci6rese de que las pilas est6n
                           polaritdtsrichtig eingesetzt sind.     correctamente insertadas,                     Der VerschluB kann nur betdtigt    compruebe para ello la polaridad.                     werden, wenn die Batterien         El obturador funcionar6
                            richtig eingesetzt und nicht leer      solamente cuando las pilas est6n                         sind. Wenn die Batterien          bien instaladas y no est6n                     ausgewechselt werden miissen,   desgastadas. Al cambiar las                          gleichzeitig alle drei Batterien       pilas, cambie las tres al mismo                     durch neue ersetzen.              tiempo.
                   2. Bei ldngerem Nichtgebrauch der   2. Si la cdmara no va a utilizarse                  Kamera die Batterien entfernen    durante un largo periodo de
                    und an einem trockenen Ort          tiempo, quite las pilas y
                                                             guSrdelas en un lugar seco. Esto                     aufbewahren. Dadurch wird die
                                                                             posibilidad de que las                       Moglichkeit eines Auslaufens der     evitar6 la                        Batterien und eine Beschiidigung p6rdidas de las pilas puedan                      der Kamera ausgeschaltet.      dafrar la c6mara.
@
View original page 22Page 23 · Read text
BATTERY TESTING             CONTROLE DES PILES
1. Set the Exposure Mode Select       1. Positionner le s6lecteur de mode
   Dial to the "P1" position (Fig. 7).        d'exposition sur "P1" (Fig.7).
2. Look through the viewfinder and     2. Tout en regardant dans le viseur,
   depress the shutter release            enfoncer le d6clencheur A mi-
   button halfway down to confirm at     course pour confirmer qu'au
   least one of digital shutter speed       moins une diode digitale s'allume
   scale LED indications in the          d I'int6rieur du viseur (Fig.8).
   viewfinder illuminates (Fig. 8).       3. Si rien ne s'allume, remplacer les
3. When nothing illuminates,                piles par un jeu complet ou
   reolace the batteries with a fresh         v6rifier si elles sont bien plac6es.
   set or check to ensure the
   batteries are correctly installed.    REMAROUE: Le controle des piles
                                  ne peut pas se faire tant que le
NOTE: Battery testing cannot be       s6lecteur de mode d'exposition est
accomplished with the exposure        positionn6 sur "L" ou "8".
mode select dial set at the "L" or
"8".


                                                   @
View original page 23Page 24 · Read text
www.butkus.us
               BATTERIEKONTROLLE           PRUEBA DE LAS PILAS
                            1 . Den Belichtungsartenwahlring auf  1. Ponga el anillo de selecci6n de
                     "P1" stellen (Abb. 7).                  modalidad de exposici6n en la
                   2. Durch den Sucher sehen und den        posici6n "PL" (Fig.7).
                      Ausloser halb durchdrucken. Es    2.  Mire a trav6s del visor y
                 muB mindestens eine der Digital-        presione el disparador
                    LED-Anzeigen im Sucher              solamente la mitad oara
                       leuchten (Abb.8).                       confirmar que se ilumine al
                    3. Wenn keine LED leuchtet, alle         menos uno de los indicadores
                        Batterien auswechseln bzw.               digitales LED (Fig.8).
                        nachkontrollieren. ob die         3. Cuando no se ilumine nada.
                        Batterien richtig eingesetzt sind.        cambie las pilas por otras
                                                          nuevas o compruebe que est6n              ZUR BEACHTUNG:                                                            correctamente instaladas.                      Batteriekontrolle  ist bei auf "L" oder
                   "B" eingestelltem                                             NOTA: La prueba de las pilas no                    Belichtungsartenwahlring  nicht                                                    puede efectuarse estando el anillo                     moglich.                                                    de selecci6n del modo de
                                                          exposici6n en la posici6n "L" o "B".


@
View original page 24Page 25 · Read text
FILM LOADING               CHARGEMENT DU FILM
Pull up on the film rewind knob until     Tirer vers le haut le bouton de
the camera back pops open          rembobinage du film jusqu'ri
(Fig. 9). Then insert a film cartridge      I'ouverture du dos de I'appareil (Fig.
into the film chamber with the            9). Ins6rer la cartouche dans son
protruding end of the cartridge          logement, la partie en saillie de la
positioned to the bottom of the         cartouche vers le bas de I'appareil.
camera. Push down the film rewind     Repousser le bouton de
knob and slightly turn the knob in      rembobinage et le tourner
either direction until  it "seats"          l6gdrement dans les deux sens Pour
properly into the film cartridge spool   que I'axe soit bien engag6 dans la
(Fig. 10). Insert the trimmed end of     bobine (Fig. 10). Ins6rer le film dans
the film into a slot of the multi-slot       I'une des fentes de la bobine
needle (Fig. 1 1). Turn the exposure     r6ceptrice (Fig. 1 1). Tourner le
mode select dial to "M" or "X"          s6lecteur des vitesses d'obturation
setting and advance the film while      sur "M" ou "X" et faire avancer le
holding the film lightly down on to        film en le maintenant de I'autre main
the transport sprockets. Release the    sur I'axe d'entrainement. D6clencher
shutter  if necessary and advance        I'obturation si besoin est, et faire
the film until the sprockets engage     avancer le film jusqu'dr ce que les
with the upper and lower performa-     perforations se placent sur les dents
tions of the film (Fig. 1 2). Then close   des deux cot6s de I'axe
the camera back firmly until  it locks     d'entrainement. (Fig. 12) Puis
with a click. Now turn the film rewind   refermer le dos de I'appareil jusqu'd
                                                    qu'il produise un d6clic. Tourner
View original page 25Page 26 · Read text
www.butkus.us
                         EINLEGEN DES FILMS          CARGA DE LA PELICULA
                          Den Filmrrickspulknopf hochziehen,     Tire hacia arriba de la perilla de
                                     bis die Kamera-Riickwand aufklappt   rebobinado de la pelicula hasta que
                                 (Abb. 9). Dann eine Filmpatrone in'      la parte posterior de la cdmara se
                                 die Filmkammer einsetzen und das     abra (Fig. 9). Luego, inserte el
                             vorstehende Ende der Patrone zum     carrete de la pelicula en la c6mara
                           Boden der Kamera weisen lassen.     de la pelicula con el extremo
                         Den Filmruckspulknopf nach unten     sobresaliente del carrete indicando
                                driicken und den Knopf etwas          hacia abajo. Presione hacia abajo la
                              drehen, bis er einwandfrei in der         perilla de rebobinado de la oelicula v-                              Filmpatronenspule sitzt (Abb. 1 0).        girela en cualquier direcci6h hasta
                          Das zugeschnittene Filmende in       que se asiente apropiadamente en
                              einen Schlitz der Plastikwalze             el carrete de la pelicula (Fig. 10).
lo                            einschieben (Abb. 1 1). Den              Inserte el extremo de la pelicula en
                               Belichtungsartenwahlring auf "M"      una de las ranuras formadas por las
                             oder "X" drehen und den Film         agujas (Fig. 1 1). Ponga et anilb de
                                  transportieren, wdhrend er leicht       seleccion del modo de exposici6n
                           nach unten auf das Transportrad      en la posici6n "M" o "X" y haga
                              gehalten wird. Den VerschluB           avanzar la pelicula mientras se la
                                   erforderlichenfalls auslosen und den    sujeta ligeramente en las ruedas
                                 Film transportieren, bis die Zdhne      dentadas de transporte. Apriete el
                           des Transportrads mit der oberen      disparador si fuese necesario y
                          und unteren Perforierung des Films    haga avanzar la pelicula hasta que
                                        in Eingriff kommen (Abb. 12).            las ruedas dentadas se acoplen en
                          Dann die Kamera-Riickwand             las perforaciones superiores e
                                 schlieBen, so daB sie mit einem          inferiores de la pelicula (Fig. 12).
                                Klicken einrastet. Nun den             Luego, cierre la parte posterior de la
                                                          c6mara hasta que quede bien
                                                                   trabada haciendo un ruido de
                                                                   chasquido. Ahora, gire suavemente
                                                                                        la perilla de rebobinado de la
      @
View original page 26Page 27 · Read text
knob gently until all the slack is       doucement la manivelle de
taken up and the rewind knob stops.   rembobinage pour tendre le film
Do not force or further rewind the       jusqu'd ce qu'elle soit bloqu6e. Ne
film (Fig. 13).                        pas forcer et ne pas rembobiner le
Advance the film and release the        film (Fig. 13).
shutter three times (Fig. 14).            Faire avancer le film trois fois en
The rewind knob should rotate         d6clenchant  (Fig. 1a). Le bouton de
counterclockwise as the film is        rembobinage doit tourner d I'inverse
advanced and the "1" marking        du sens horaire d mesure que le film
should appear in the frame counter    avance et le chiffre "1" doit
window (Fig. 15). Turn the exposure    apparaitre dans la fendtre du
mode select dial to the desired        compteur de vues (Fig. 15). Tourner
position. A convenient memo holder     le s6lecteur de mode d'exposition
is provided on the back of Your         sur la position souhait6e. Un support
camera. Whenever You load new        d'identification du film est situ6 sur
film, just cut off the toP of the film         le dos de I'appareil. Chaque fois
box and put. it in the memo holder as   qu'un nouveau film est chargti,
a reminder (Fig. 16).                 d6couper le haut de I'emballage et le
                                        placer dans le support pour identifier
                                                    le film et sa sensibilit6 (Fig. 16).


                                                   @
View original page 27Related documents and language editions
From the M. Butkus archive. Original publisher and archive notices are retained.
Check the model and edition against your equipment.
PDF verified 2026-10-10.