Film cameras
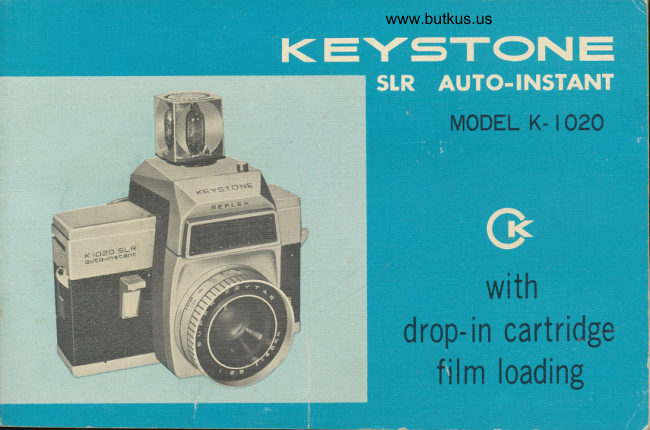
Color Keystone SLR Auto-Instant User manual
User manual for Color Keystone SLR Auto-Instant. 17 pages in English. Read the original PDF, download or print a copy without registration.
17 pagesEnglish7.2 MB PDF
Loading your manual…Open PDF directly
Document details
- Brand
- Various brands
- Model / document
- Color Keystone SLR Auto-Instant
- Document type
- User manual
- Language
- English
- Pages
- 17
- File size
- 7.2 MB
- Category
- Film cameras
- Document date
- Not specified in catalog
Search available document text
Find a term, then jump to its page in the original PDF. Image-only pages may not be searchable; check the PDF for exact wording and diagrams.
Page 6 · Read text
www.butkus.us
We recommend that you read this book over carefully.  lt contains simplified steps to perfect
pictures as well as detailed information. Before you take pictures of a special event or go
on a trip, try taking pictures both outdoors and indoors with flash for practice.

        FILM ADVANCE LEVER
       VIEWFINDER EYEPIECE


EXPOSURE INDICATOR WINDOW


            TRIPOD SOCKET


             DOOR LATCH


     BATTERY COMPARTMENT
View original page 6Page 7 · Read text
for perfect outdoor, pictures automatically
Open the hinged door by moving the Door Latch in  the
dir,ection of arrow. Drop in the film.cartridge, then close
the door. The cartridge automatically sets the electric
eye for the type of film you have selected.
Move wind lever to right and allow it to return. Repeat
until it locks (about six fullstrokes). Film is now at first
picture, and NUMBER ONE will appear in exposure indi-
cator window.
A circle can be seen in the center of viewfinder when
looking through viewfinder eyepiece. By turning lens
focusing ring an object can be seen clearly when properly
focused.  ;
Compose subject in viewfinder, check location of indicating
needle of exposure meter then slowly press shutter release.
Move wind lever through one full stroke and you're ready
for the next picture.
More complete information on each of these steps will
be found on the following pages. For information on tak-
ing FLASH PICTURES, see instructions on pages L2 and 13.
View original page 7
Page 8 · Read text
www.butkus.us
 film to use
Film cartridges for your Keystone
K- 1020 are available almost
everywhere. Ask for size 126
Kodapak  f ilm, in one of  the
following types:

Kodachrome-X   . (KX- l2O)
                        for 20 color slides
Ektachrome-X    . (EX- 126)
                         tor 20 color slides
Kodacolor- X.          . . (CX- 126)
                                                             f or L2 color prints
Verichrome Pan . . . . (Vp- 126)
                       for 12 black-and-
                     white prints

            can also be used when EE  photographi ng.
View original page 8Page 9 · Read text
loading  the  carrlera
Slide the door latch up and turn the camera over
to open the door. Drop in the  f ilm cartridge (with
the largest end toward the door latch). Be sure
it seats properly and lies flat within the camera.    J
Close the door by pressing  it against the body until                                           q
it snaps closed.
After loading cartridge, move the wind lever to
the right and allow it to return. Repeat until  it
locks (about 6 full strokes). This positions the
film for the first picture.
Af ter each picture is taken, move the wind
lever through a full stroke. The exposure indicator
window on the camera back shows the number of
the exposure you are on (one or two of the same
number may appear) and also shows you the type
of  f ilm you have in the camera.
NEVER FORCE THE WIND LEVER.
View original page 9
Page 10 · Read text
www.butkus.us

      (All scenes taken without flash)
    The focusing lens on the K-1020 assures sharp pictures at any distance.
     Circle micro-dia-prism can be seen from viewfinder eyepiece. When an object is not clear
J    through this circle, the distance is not properly adjusted. Turning focus ring can  adjust
     the distance and when the distance is correct the object looks clear.
\


J
t
View original page 10Page 12 · Read text
www.butkus.us

lrr bright light, for example,  if exposure meter neecjle indicates above FB, set the universal
f ocus mar k to ihe  f ocus index mark.
AII objects regardiess of distance will be sharp in your picture.


        UNIVERSAL FOCUS MARK
View original page 12Page 13 · Read text
c ornpose and shoot  !
                             Look through the viewfinder squarely and compose your subject
                                 just the way you want it to look in the picture.
                              Exposure meter needle is located on right hand of viewfinder.
                        When the exposure meter needle indicates w ithin the range of
                                    F 2.8 (small dot below number 4) to F 22 (second dot above number
                                   11) correct exposure is set automatically. When the needle indicates
                              below F 2.8 (under exposure mark)  f lash is necessary for  proper
                                    exposure.
                              Small dot and numbers on right hand of the viewf inder indicates
                                      aperture.   1 Warning Signal.
       (over exposure mark)       Press the shutter release down slowly to take the picture.
                                                   lf  it won't go down, then the  f ilm hasn't been wound to the next
   2  Exposure Meter Needle         picture. Make it a practice to wind the  f ilm af ter each exposure.
                            Helpful hints-  your pictures will always turn out best if  the   3  Warning Signal.                            sun is behind you or slightly to the side of your back.   Don't       (under exposure mark)                             attempt to take pictures when the sun is shining into the cam-
                             era lens.

unload    Before door is opened, and after you have taken the last picture, move the wind
             lever until it locks. The film's paper backing will disappear from the window. Push-ing            the door latch UP and tip the camera so the door opens and the cartridge falls into
           your hand. Have the exposed  f ilm processed immediately.  tl
View original page 13Page 14 · Read text
www.butkus.us

    Two "N" size batteries are needed to take FLASH pictures'
     Ask your dealer for Mallory Mn 9100, Eveready E90, Philco
      P9100, Burgess AL-N, or equivalent. To install the batteries,
       slide open the battery compartment door (on camera bottom)
       arrd put the batteries in, one with +  tip up and the other
     with  l- tip down. Close the compartment door. Have the bat-
      teries checked occasionally to be sure they are still in good
       condition.


k,*
View original page 14Page 15 · Read text
simple steps to                     I Inserting   f lashcube in the cube socket automatically
                                      changes shutter speeds to flash photographing. Make surefine flash pictures"                                      that the flashcube faces direct to the object parallel                                      to the lens.
                                     rFor correct distance turn focusing ring until the object
                                     appears as clear as possible through the circle in vrew- 1
                                                                                                   f inder eyepiece. Alternately measure distance  f rom camera
                                     to the object accurately then adjust distance scale on
                                     the lens focusing ring accordingly.
                                                                                    :i Press the shutter release down slowly to take the picture.
                                                                            I Move wind lever to right and allow it to return. This will   r
                                           rotate flash cube and also advance  f ilm for next picture.
                                                      . Push flashcube ejector button to release flash cube. As
                                                                                                  f lashcube ejects  f rom camera, shutter speeds automatical-
                                             ly change for EE photographing.
                                    Estimate distance to subject accurately.  lf more than one
                                      subject w ill be in the picture, have them placed so that
                                  each one is nearly the same oistance  f rom camera.
                              The maximum subject distances for  f lash pictures are
                          20 feet (7 meters) for Kodachrome-X or Lktachrome-X
                                                                                             f ilms and Kodacolor-X, 25 feet  for Verichrome pan  f irms.
                                      Pictures of subjects farther away may be too dark.
                                                                                                                                                                                                                                                                                                                                                                                                                                                                                        ,
                           CAUTION: - Leaving used  f lash cube on the camera and
                                      shooting pictures will cause inproper exposures. When E E
                                      photographing, be sure to remove the flashcube.
View original page 15Related documents and language editions
From the M. Butkus archive. Original publisher and archive notices are retained.
Check the model and edition against your equipment.
PDF verified 2026-10-10.