Film cameras
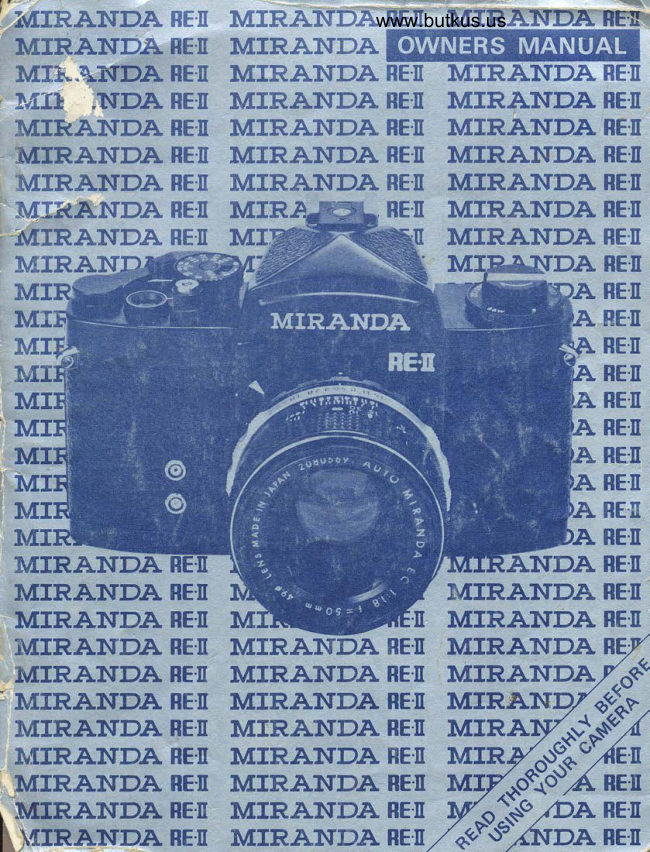
COLOR SCAN OF MIRANDA RE-II User manual
User manual for COLOR SCAN OF MIRANDA RE-II. 25 pages in English. Read the original PDF, download or print a copy without registration.
25 pagesEnglish3.5 MB PDF
Loading your manual…Open PDF directly
Document details
- Brand
- Miranda
- Model / document
- COLOR SCAN OF MIRANDA RE-II
- Document type
- User manual
- Language
- English
- Pages
- 25
- File size
- 3.5 MB
- Category
- Film cameras
- Document date
- Not specified in catalog
Search available document text
Find a term, then jump to its page in the original PDF. Image-only pages may not be searchable; check the PDF for exact wording and diagrams.
Page 7 · Read text
LOADING THE BATTERY


            A2

                            Insert only a 1.3 volt mercury battery (Mallory PX 675
                         or equivalent) into the chamber, flat side (+) facing up.


SETTING THE ASA SPEED
View original page 7Page 9 · Read text
LOADING AND WINDING THE FI LM
             cl
                     ONLY load or.unload film in the shade, never
                                     in the sunlight.
                  To open the back cover, lift the FILM REWIND KNOB
                             all fie way up. The back cover will automatically swing
                      open, and the film counter will return to the starting
                         position 'S'.

            c2
                           Insert the film cassette into the film chamber as shown at
                              left. Push $e FILM REWIND KNOB all the way down to
                                  its original position. lf it doesn't go down, rotate it a little
                           left or right. The film cassette is now engaged by fre
                  FILM REWIND SHAFT.


            c4

                       Using the FILM ADVANCE LEVER, advance the film to
                    check that bo$ top and bottom film perforations are
                      engaged by the SPROCKET WHEEL. Snap trre back cover
                            closed.
View original page 9Page 10 · Read text
www.butkus.us

c5

 Turn the FILM REWIND CRANK clockwise (in the direc-
 tion of the engraved arrow) until all the slack in the film
 cassette is taken up. This occurs when there is resistance
 to further turning of the crank.


D2

 WiNd thc FILM ADVANCE LEVER ANd TEIEASE thE
 shutter a few times until the pointer in the FILM
 COUNTER  is aligned with the second dot after 'S'. Release
 the shutter.
View original page 10
Page 11 · Read text
DETERMINING PROPER EXPOSURE


                 OR                   ffili"?tape*ure

              I3

                      Turn the exposure meter on by rotating the METER CUT-
                 OFF SWITCH so that the two red marks are aligned.


                                    performed step 2a then center the meter                I4a      lf you
                                 n6edle by adjusting the lens aperture.


                                              lf you performed step 2b then center the meter
                                 needle by adjusting the shutter speed.
View original page 11Page 13 · Read text
XPERIMENT WITH YOUR
VIIRAIVDAHE.II


                      C Xigh-speed Action Shots With A Telephoto @ Evening
                                      Long Exposures @ Macrophotos @ Sitfrouette By Under-
                                          exposing Backlit Subjects @ nim The Sensing Area High
                                        For Drama.
View original page 13Page 14 · Read text
www.butkus.usMIRAIVDAHE.II
TECHNICAL DATA
CAMERA TYPE
35mm single-lens reflex (SLR) camera with built-in mechanical focal plane
 shutter and TTL meter.
FILM FORMAT
35mm- 24 x 36mm,43.3mm   f ilm frame diagonal.
STANDARD LENSES
 Miranda Auto EC Somm/f 1.8 or f 1.4, 60 Angle of View.
SHUTTER
 Mechanical, rubberized cloth-blind focal plane shutter with speeds from
B to 1/1,OOO second. Top shutter release button with cable release/
 self-timer socket.
VIEWFINDER SYSTEM
 Interchangeable pentaprism system. Standard finder with 50mm lens
otet 0.92x image magnification, 95% field of view, -1.2 diopter.
EXPOSURE METER SYSTEM
TTL, partial (lower center-weighted) light measuring at open aperture,
 closed down possible with special RE'II CM Converter, CdS cell built
 into mirror assembly, meter cross-coupled to shutter speed/diaphragm/
 film speed controls. Meter activates when shutter is vvound, and deactivates
 with shutter release or special cut'off switch. Light measuring range:
EV 3-18 (ASA l00lf 1.4) ASA: 25-1600, Apertures: f 1.4tot22.
FOCUSING SYSTEM
 Miranda unique fresnel screen with circular multiple split image microprism
 rangefinder in the center. Depth of field preview lever on Auto Miranda
 lenses.
LENS INTERCHANGEABI LITY
 Accepts all Miranda lenses. Dual Miranda mount: four claw and inside
44mm 0 screw mount.
 FLASH SVIVCX RONI ZATION
X and FP contacts on front, and X-contact hot shoe on top. FP
 synchronization at all speeds, X at 1/45 sec.
 FILM ADVANCE/COUNT SYSTEM
 Rapid-load spool, auto-resetting advance counter, single stroke 18Oo film
 advance lever, plastic tipped.
 DIMENSIONS           WEIGHT
 144 x 95 x 82mm (body only)         661 grams (body only)
 *213 x 3-314x 3-1/4 inches             23-113 ounces
                                         *Specifications in this manual are
POWER SOURCE                 subject to change without notice
 One 1.3V mercury battery           due to ongoing technological ad-
 (Mallory PX675, Eveready EPX675). vances.
View original page 14Page 15 · Read text
HOLDING THE CAMERA

                   To avoid blurred photos the camera must be held firmly.
                    The sharpest pictures can be taken only when the camera
                         does not move while the shutter is released.
                        r  Firmly hold the camera with both hands.
              o When the camera is utilized in a horizontat position,
                           comfortably brace your elbows against your body. Rest
                           the camera on your extended right thumb. Take a deep
                              breath, and release half. Then while holding in the rest,
                        smoothly depress the SHUTTER RELEASE BUTTON
                         with the tip of your right index finger. The camera is
                             further steadied by pushing the camera in towards your
                        nose with the last three fingers of the right hand. your
                               left hand should serve to focus and support the lens
                                  barrel.
              o When the camera is held vertically your right hand
                                       is essentially in the same position with the elbow braced
                            against the body. The lefl hand should either function
                          as above or grasp the end of the camera gently pulling
                                       in.
              o The camera should be mounted on a tripod and a
                          cable release used when taking pictures with a tele-
                     photo lens and/or at dow speeds (1115 second or
                              slower). lt is also recommended for microphotography..

     DEPTH OF FIELD: APERTURE
            VISUALLY
View original page 15Page 16 · Read text
www.butkus.us
FOCUSING THE UNIQUE MIRANDA WAY
                    HI
                        The Miranda RE'II has a unique rangefinder
                                    screen. In the center is a microprism spot sur-
                                                                                  an                              rounded by an inner microprism ring and
                                   outer matte (ground glass) ring. Surrounding the
                                    center circles is a matte field for sharp focusing
                               combined with concentric Fresnel rings to height'
                                en image brightness.


                             The central microprism spot and its surrounding
                                 microprism ring act as a circular multiple split-
                               image range'finder. lts unique design makes ex-
                                  tremely rapid and accurate focusing easy without
                          the split'image blackening. Under the most@ffi                                adverse conditions the rangefinder will only
                            darken somewhat. For. focusing the circular
                                   multiple split-image microprism spot and/or the
                                                                                                                                                                  i1                                  matte field can be utilized.

                   IN FOCUS

              H2

                    To focus, look through the viewfinder and rotate the
                     FOCUSING RING right or left as required.


                      For INFRA-RED photography, first focus normally'
                          Next, turn the indicated distance on the DISTANCE
                    SCALE so it is aligned with the red dot and 'R' on the
                    DEPTH OF FIELD SCALE.


                                                                  15
View original page 16Page 17 · Read text
SETTING THE APERTURE
              I6
                          Rotate the APERTURE RING with the thumb and index
                           finger of your left hand. Align the desired aperaturc
                     number (f/stop) with the red dot and line which also
                             serve as the LENS POSITIONING MARKS.

PREVIEWING DEPTH OF FI ELD
             T7                      The Miranda RE.ll is an open aperture camera. Provision
                         for DEPTH OF FIELD PREVIEW is made on the lens,
                      not on t{re camera body. For this reason the method
                        for previewing the depth of field will vary with the
                          lens mounted on the camera.
                        Miranda Auto EC lenses have a PREVIEW LEVER on
                        the lovner left, next to the METER CUT-OFF SWITCH
                   when mounted on the RE.ll. Each Miranda Auto EC
                           lens also features a DEPTH OF FIELD SCALE on the
                     top of the lens. To read the approximate depdr of
                                field, note the aperture number indicated on the APER-
                 TURE RING. The same numbers to the left and right
                    on the DEPTH OF FIELD SCALE point to the dept'r
                            indicated on the DISTANCE scALE.
                         For example: On the Miranda Auto EC 50mm t11.4
                           lens as shown at rig[rt, when the aperture is at f/8 and
                        the subject is at 5 meters (16.25 ftl, the depth of field
                        extends from approximately 4 meters (13 feetl to 10
                         meters (32.5 feet).
                  To visually see the depth of field, stop the aperture
                  down (close the diaphragm) by sliding tre PREVIEW
                  LEVER downward.
              I8
                  DEPTH OF FIELD is the zone of diminishing, but
                                   still acceptabte, sharpness in front of and behind the
                       image plane on which the lens is focusbd. Usually the
                            front depth is smaller than the rear depth.
          Front' Rear
          Depth Deoth
View original page 17Page 18 · Read text
www.butkus.us
              I9
                   Very frequently the composition of a picture can be
                      enhanced by having the main subject in sharp focus vuftile
                      the surrounding objects in the scene are soft and out of
                          focus. This will de-emphasize distracting background ob-
                          jects, and concentrate the viewer's attention on the
                          principle subject.
                     Three factors determine depth of field:
                                            tot#t-ENGTH                        + F/sroP.           *                                        ;,:?^|tJ,
                            small   near           long

REWINDING THE FI LM


             K3
                          Pull the FILM REWIND KNOB all the way up, and the
                     back cover will swing open. Remove the film cassette.
                  Use a blower brush to remove film chips or other
                             particles from inside the camera.
View original page 18Page 20 · Read text
www.butkus.us
UTILIZING FLASH UNITS

                                                     SHUTTER SPEEDS (seconds)

                                                                                                                                                                               1   FLASH                    CONTACT                      FLASH     FLASH SOURCE          1  12 41 E1  1r5 301  X 601   ll?51  1EO  5-00'l   1000-
 SYNCHRO-
  NIZATION        FP    FP CLASS FLASHBULB
   CHART        X     ELECTRONIC UNIT
                 M CLASS FLASHBULB
               LI
                 When available light is low or supplemental lighting is
                          needed, a flaslrgun or an electronic flash unit should be used
                          with your Miranda RE-II.
                           Slip the flashgun or electronic flash unit base into the rear
                          of the ACCESSORY SHOE. lf the flash unit has a locking
                            device, tighten it.

             L2
                    SEE THE FLASH SYNCHRONIZATION CHART                      -                                              ABOVE _
                    When a regular cord-equipped  flash unit is used:
                           rnd you use:     connect the      SEt thc SHUTTER
                                         cord plug to:    SPEEDT DIAL at:
                     FP Class Bulbs   FP.CONTACT      any speed
                                                          (1/1000 to 1 sec)
                      *F Class Bulbs   X.CONTACT     1/30 sec or slower
                   *M Class Bulbs  X-CONTACT     1/15 sec or slower
                            Electronic Unit  X.CONTACT        'X'or slower
                              * Whenever possible use FP Class instead.
                      Keep the FP and X-CONTACTS capped when not in use.

             L3
                  When a hot shoeequipped electronic flash unit is slid into
                     the ACCESSORY SHOE it slrould couple with the X'
                  CONTACT HOT SHOE, and no synchro cord is necessary.
                          Set the SHUTTER SPEED DIAL at'X'.
View original page 20Page 21 · Read text
INTERCHANGING LENSES
                A

                         To attach the lens, align the RED DOT and LINE
                            on the Miranda Auto lens with the LENS PoslTloN-
                        ING ARROW on the camera body. Turn the lens
                                 about 45" clockwise untit  it click locks into place.

                           BTo release the lens, depress the LENS RELEASE
                         LEVER, and while keeping it depressed, rotate the
                                         lens 45" counterclockwise untilthe RED DOT is align-
                            ed with the LENS POSITIONING ARROW. Lift the
                                      lens off.
                        NOTE: Do not expose the lens opening to excessive
                                      sunlight when the lens is removed as this may cause
                                            inq of the film.

   MTRAIVDA AUT    LENS SERIES


     LENS SIZE (mm
    MAXIMUM APERTURE
    MINIMUM APERTURE
            GROUPS/ELE
    CLOSEST FOCUS (m)                                                               (1:2).25/9.8
                                                                                           (1211.22/a.8
     FILTER SIZE  (mm
    LENGTH AT

    WEIGHT


20
View original page 21Page 22 · Read text
www.butkus.usVIEWFINDERINTERCHANGING THE


   STORING AND CARING FOR YOUR
          MIRANDA RE.II
 DO remove the battery if the camera is to be stored.
 DO store the camera with a drying agent (silica gell,
       separate from the camera caie.
 DO make sure the shutter is not cocked, and the
      meter cut-off switch is set at OFF.
 DO use a soft blower brush to remove dust on the
        lens, and foreign matter inside the mirior hous
        ing and film transport system.                      Camera Body #
 DO use a soft dry cloth to clean external metallic     (on Finder Release Dial)
        parts.
 DO use special lens tissue with pure alcohol or ether   S0mm/fl.   Standard Lens #
       only, to clean smudges off the lens or eyepiece.
 DO NOT point the camera directly at, or leave the
       lens exposed to the sun.                                 Dealer's Name
    HAVE YOU RETURNED YOUR
        GUARANTEE CARD?                  Date of Purchase
                                                                         21
View original page 22Page 24 · Read text
www.butkus.us
  ACCESSORIES.  . . . FROM'A' TO'Z'
       '[o broaden yuur photographic horizons, Miranda provides a wide range of photo-optical accessories.
       Carefully look over the many accessories available to you and your Miranda RE-II, letting your imagina-
       tinn and the experience of your Miranda dealer by your guide. From A to Z, experimentation in the
      myriad worlds of photography is now yours. Instructions as required are supplied with the accessories.

       {A] nUgeeR EYECUP-attachesdirectlytotheeyepieceof   thestandardviewfinderortheVF-3(D2).
              It as equipped with an adapter for insertinS (B).
   E fyEStCHT COMPENSATION LENS                                                  -  available in seven different (diopter) pieces; #1 (+1.5);         #2lol; #3 (-0.5); #4 (-1.5); #5 F2.51; #6 ft2.51; #7 (+3.5]'.
   E pnESCRIPTION. EYEPIECES                                          -  attaches directly to the eyepiece of the standard viewfinder or
         the VF-3. Type A (C1) for near or farsightendness, B (C2) for astigmatism.
                                    Miranda unique quick-change interchangeable viewfinders. VF-1 (D1)   D nef LEX VIEWFINDERS -
               is a waistlevelfinder with a magnified image. VF-3 (D2) is a critical focuser allowing either 5 or 15X
          magnification by a flip of the prism. VF-4 (D3) is a critical focuserdesigned  especially for micro-
         photography with a built-in diopter adjustment.
   E exreruSloN TUBEs                                 -  (E1) thru (E3) are non-automatic extension tubes of 32,16, and gmm
           respectively. They can be used individually or in any combination with the AU ADAPTER (E4).
   E AUTO EXTENSION TUBES                                         -  the same as above, but retain auto-diaphragm mechanism when
         such lenses are used.
                                         use Miranda's thin camera body in combination with various   G leruS ADAPTERS -  allow you to
         types of lenses and accessories. CSF (G1) for standard Contax & Nikon S; CTF (G2) for wide-
         angle & telephoto Contax & Nikon; LF (G3) for Leica & Canon screw mount; AUTO (G4)with
          (K) or (L) and {M)'NM (G5) for Nikon; XM (G6) for Exakta & Topcon; PM (G7) for Praktica type.
    Eh UTtVERSAL l-r[:LitOlD - for precision focusing and close-ups.  E nEvensER RtNc
  U sI-IDE DUPLIcAToR
                         compact single track folding bellows unit.   K  f OCneELL S II -
                               deluxe double track precision bellows unit.   E fOCngELL A III  -
                                             for use with (G4).  M oouelE CABLE RELEASE -  N cnele RELEASE
     [d prsrol cnrp
  E rRorur LENs cAP
  @ neen LENS cAP
  E eoov cep
   E urcnoscoPE ADAPTER
                          attaches to the cable release socket for adjustable five to eighteen second delay.   E Sglf-flMER -
                                                          @nverts the open aperture metering svstem   O ng-II CM CONVERTER - unique Miranda invention
           in the Miranda RE-II to a close-down mode.
  M MIRANDA OPTICAL FTLTERS   supptied in ptastic case.                                           -
                                                        adjustable light arms_  W rutnRruDA COPY STAND - complete with   E mlnRmDA [4tcRoeoPY STAND                                             - with built-in bottom iilumination.  M nntnnruDA cArr,irli?A CA$E MH-l15
                             MH_12   E  n11tRnfti);q f,rjr:r ,r,.{A ryAG

}                                                                     23
View original page 24Related documents and language editions

From the M. Butkus archive. Original publisher and archive notices are retained.
Check the model and edition against your equipment.
PDF verified 2026-10-10.