Film cameras
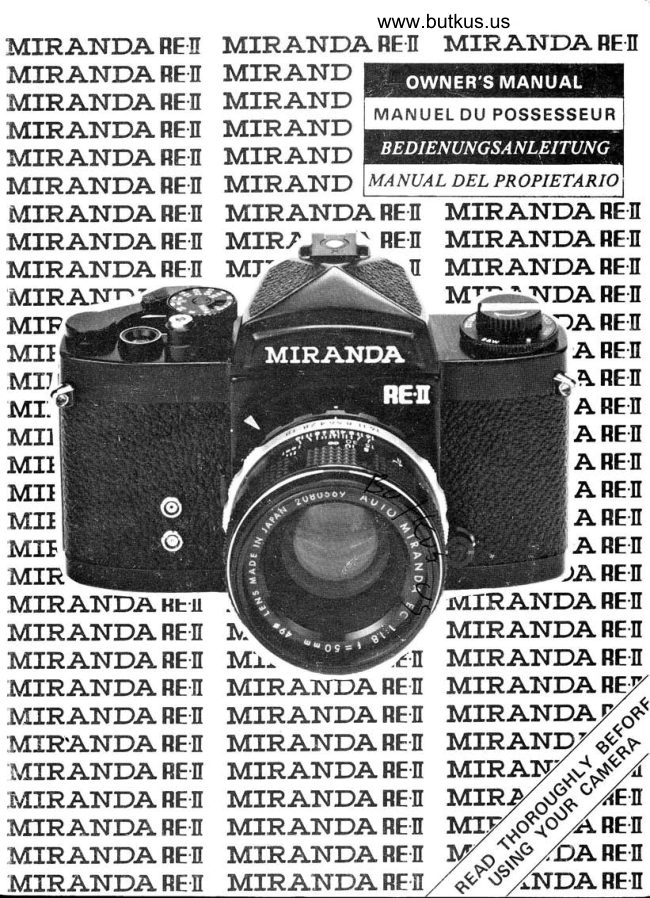
Miranda RE-II Miranda RE-II Manuel Du Possesseur Miranda RE-II Del Propietario User manual
User manual for Miranda RE-II Miranda RE-II Manuel Du Possesseur Miranda RE-II Del Propietario. 49 pages in German. Read the original PDF, download or print a copy without registration.
49 pagesGerman6.8 MB PDF
Loading your manual…Open PDF directly
Document details
- Brand
- Miranda
- Model / document
- Miranda RE-II Miranda RE-II Manuel Du Possesseur Miranda RE-II Del Propietario
- Document type
- User manual
- Language
- German
- Pages
- 49
- File size
- 6.8 MB
- Category
- Film cameras
- Document date
- Not specified in catalog
Search available document text
Find a term, then jump to its page in the original PDF. Image-only pages may not be searchable; check the PDF for exact wording and diagrams.
Page 2 · Read text
WELCOME to the ever widening world of Miranda    Bienvenue dans la famille des possesseurs oe
 photography By purchasing the Miranda RE-ll     boitiers M IRAN DA !  I'achat de ce boitier vous
 you have opened up all new vistas of recording    ouvre aujourd'hui une porte nouvelle sur  re
 the images before you. Your camera is one of    monde qur vous entoure.
 the world's finest, optically advanced, precrsion    Votre appareil, r6sultat d'un choix long et  dif-
 tooled photographic instruments available to     frcrle. ne vous d6cevra pas. Sa pr6crsion. sa
  the discerning photographer of todaV.                      frabilit6, la qualit6 de ses optiques sont d  la
  Miranda cameras are system cameras to be built    mesure des photographes les plus difficiles.
 on, never outdated, always expanding in  ver-   La photo, par sa technologie avanc6e, con-
  satrlrty, and the Miranda RE-ll is a  prime     strtue une industrre de pointe sans cesse d  la
 example We expect that you will  carefully    recherche de perfectionnements et de sophistic-
 read this manual, and fully familiarize yourself    atron "up to date". M IRAN DA est rest6 dans
 with all the mynad features of the Miranda    ce domaine d la pointe du progrds et vous offre
 RE ll  before embarking on your photograpnrc   un svstdme qui constitue l'un des plus com-
 adventures. Through proper care and handling.    plets de la profession et dont votre bortier
 your camera wlll provide you with many years     constitue le premier 616ment.
 of photographic pleasure. Should any questions        ll  est important, avant de commencer vos
 or problems arise, we urge you to first consult   photos de  lire  attentivement  la  notice  d'-
 your local Miranda dealer for quick response     utilisation afin de vous familiariser avec les
 and service, and then, if  necessary, Miranda   commandes de  votre MIRANDA RE-ll. En
 Camera Co, Ltd. at the address on the back cover     6vitant ainsi les fausses manoeuvres vous Dro-
 of thrs manual.                                            longerez d'autant  la vie de votre appareil.
                                                   N'h6sitez pas devant un probldme tecnntque
                                                       particulidrement  difficile d consulter votre re-
                                             vendeur habituel car avec M IRAN DA  il v  a
                                                           touJours une 16ponse simple
                                                 BE.II             Qi*


 Der immer grcisser                   werdende                           Kreis                                 der MIRANDA                                        BIENVENIDO                                                                       ancho                                                                       al siempre                                                                    mundo de                                                                                                                                 la foto-     5W Photographen               begriisst                              Anschaffung                                                   der    grafia                        Sie. Die                                             MIRANDA.                                                                                                       ha                                                                 Al comprar                                                                                              RE-II                                                                                           la hliranda
MIRANDA RE-II bietet lhnen neue Mciglichkeiten     abierto Vd. todas las nuevas posibilidades de grabar
 zum Festhalten lhrer visuellen Bilder. Ihre Kamera ist     las intrigenes de este mundo. Su cdmara es una de las
 eine der optisch fortgeschrittensten  Prciszissionsap-    nns fnas del mundo, opticamente avanzada, un instru-
parate der Welt, die heute dem kritischen photo-    ntento fotogrd.ftco realizado con precisiin para el
 graphen zur Verfiigung stehen.                                  ex igente fotografo de hoy.
MIRANDA Kameras sind Systembaukameras, die    Las camaras Miranda son cdmaras de sistema, nunca
 sich anreichern lassen, nie veralten und an Vielseitig-    fuera de actualidad, siempre expandidndose en versa-
 keit gewinnen, wofiir MIRANDA RE-II ein gutes      tilidad; y la Miranda RE-II es un magn[fico ejemplo
 Beispiel  ist.                                   de lo antedicho. Esperamos que Vd. lea cuidadosa-
 Wir bitten Sie vor Gebrauch der Kamera diesen Leit    menle este manual y se familiarice completamente con
faden aufmerksam durchzulesen und sich mit allen    todos las numerodisimas caracter[sticas de  la
ihren Eigenschaften vollkommen vertraut zu machen.    Miranda RE-II antes de embarcarse en sus aventuras
Bei richtiger Behandlung und guter Instandhaltung     fotogrtifcas. Con un manejo y cuidado adecuados su
bietet Ihnen der Apparat viele Jahre der photo-    cdnnra le proveera con muchos artos de placer foto-
graphenfreude.                                                      grriJico. En caso de que surjan cualquier tipo de dudas
Wenn sich Fragen oder Schwierigkeiten  ergeben     o problemas rogamos a Vd. que primero consulte a su
sollten, bitten wir Sie sich zuncichst, im Interesse    Agente Miranda local para una rdpida respuesta y
schneller Bedienung, an Ihren ortsanscissigen MI-      servicio; y entonces sifuera necesario, puede contactar
RANDA Vertreter zu wenden und dann, wenn ndtig,   a Miranda Camera Co., Ltd. en la direcciin que
an die Firma MIRANDA G.m.b.H., deren Adresse Sie    aparece en la contratapa de este manual.
auf der Rilckseite dieses Leitfadens fnden.
View original page 2Page 5 · Read text
NOM EN CLATU R E             N OM EN CLATU R E
  1. X-contact                          1. Contact flash 6lectronique : X
  2. FP-contact                       2. Contact flash magn6sique  : FP
  3. Lens release lever                 3, Bouton de verrouillage de l'objectif
  4. Depth of field scale                4. Echelle de profondeur de champ
  5. Aperture ring                     5. Bague des diaphragmes
  6. Lens positioning arrow             6. Repdre de positionnement de l'objectif
  7. ASA film speed setting ring         7. Bague de r6glage de sensibilit6 du
  8. Shutter release button                       film en ASA
  9. Film advance lever                          8.  D6clencheur
 10. Film counter                                  9.  Levier d'armement
 1 1. X-synchronization mark               10.  Compteur de vues automatique
 12. Cable release socket                   11.  Repdre de synchronisation  flash
 13. Shutter speed dial                         6lectronique
 14. ASA film speed dial                    12.  Prise pour d6clencheur souple.
 15. ASA index                             13.  56lecteur de vitesse
 16. Accessory shoe                     14.  Indicateur de sensibilite ASA
 17. Hot shoe X-contact                    15.  Repdre d'affichage de sensibilite ASA
 18. Interchangeable pentaprism           16.  Griffe porte accessoire
 19. Film rewind knob                    17. Contact par sabot
20. Film rewind crank                      18.  Viseur interchangeable
21. Film memory dial                      19.  Manivelle de rebobinage
22. Finder release dial                  20. Bouton de d6verrouillage du rebobinage
23. Rewind direction arrow             21. Cadran aide-m6moire du film utilis6
24. Neckstrap eyelet                     22.  D6verrouillage du viseur
25. Lens positioning marks               23.  Indication du sens de rebobinage du film
26. Distance indicator                    24.  Fixation de courroie de cou
27. Distance scale                     25. Repdre de verrouillage de l'objectif
28. Focusing Ring                      26. Repdre de mise au point
29. Meter cut-off switch                  27.  Echelle des distances
30. Miranda Auto EC lens               28. Bague de mise au point
31. Eyepiece                           29.  Interrupteur de circuit de cellule
32. Film guide rails                       30.  Objectif MIRANDA EC
33. Sprocket wheel                      31.  Oculaire de vis6e
34. Rapid load spool                   32.  Rail guide film
35. Cassette stabilizer                    33. Axe d'entrainement du film
36. Pressure plate                      34. Bobine r6ceptrice multi-fentes
37. Rewind button                       35.  Presseur de bobine
38. Shutter curtatn                       36.  Presseur de film
39. Tripod socket                      37. Bouton de d6verrouillage du rebobinage
40. Preview lever                         38.  Rideau d'obturateur
41. Battery compartment cap            39.  Ecrou de pied
42. Film rewind shaft                    40.  Levier de profondeur de champ
                                         41. Bouchon du compartiment de pile
                                        42. Axe de rebobinage
                                             4
View original page 5Page 6 · Read text
www.butkus.us
 BEDIENUNGSELEMENTE       NOMENCLATURA DE LA
                        CAMARA
    I. Blttzkontakt (X)                                  I. Contacto de sincronizaciort X
   2. Blitzkontakt (Fp)                        2. Contacto de sincronizaciort Fp
   3. Bajonettveruiegelung                        3. Palanca de liberalizacion delobjetivo
   4. S chcirfe nt iefe ns kala                        4. Escala de profundidad de campo
   5. Blendenring                               5. Anillo de los dia,fragmas
   6. Index fiir ObjektivanschluJJ, kameraseitig     6. Seiial para colocar el lente
   7. DfN/A SA-Einstellung                         7. Anillo para el ajuste de la sensibitidad
   8. Auslciseknopf                        ASA
   9. Transportschalthebel                      8. Boton disparador
  10. Filmzcihlwerk                              9. Palanca para avanzar la pelfcula
   I I. Markierungfilr Blitzsynchronisation (X)    10. Contador de la pelfcula
   I 2. Drahtauslciseranschtu/J                                       I I. Marca de sincornizacidn X
   I 3. Verschlu/Jzeitenknopf                      12. Receptaculo para el cable disparador
 14. DIN/ASA-Skata                            13. Dial de las velocidades del obturador
  15. ASA-lndex                             14. Dialde la sensibilidad ASA de ta
 16. Zubehcirschuh                                    pel{cula
 17. Mittenkontakt                              15. Indice ASA
  18. Auswechselbares pentaprisma              16. Zapata de accesorios
 19. Rilckspulknopf                          17. Contacto X en zapata de accesorios
 20. Rilckspulkurbel, ausklappbar                18. Pentaprisma intercambiable
 2I . Filmmerkscheibe                          19. Perilla del rebobinador
 2 2. Verriegelung fiir Sucheraufscitze           20. Palanca del rebobinador
 2 3 . R.ic htungspfeil fir Riickspulung               2l . Dial para la memoria de la pelicula
 24. dsenfir Trageriemen                     22. Liberador del visor
 25. Index fi)r Objektivanschlu/J, objektivseitig    23. Flecha de direccion del rebobinado
 26. Index fiir Entfernungseinstellung           24. Enganche para la correa
 27. Entfernungsskala                        25. Marcas para la posicion del lente
 28. Entfernungseinstellring                   26. Indicador de distancias
 29. Batterieschalter                          27. Escala de distancias
30. Standardobjektiv                         28. Anillo de enfoque
 3I . Okular                                 29. Interruptur del fot1metro
32. Filmfiihrungsbahn                        30. Lente MIRANDA Auto EC
 3 3. Transport-Zahntrommel                  3I. Ocular
34. Schnelladespule                        32. Carriles de gu{a de Ia pelfcula
 35. Stabilisatorfir Filmpatrone               33. Rueda dentada de arrastre
36. Filmandruckplatte                       34. Carrete de carga rdptda
3 7 . E ntspe rr knopfft)r Riickspu lung              35. Estabilizador  del cartucho
38. Schlitzverschlu/J                          36. Placa de presi6n
39. Stativgewinde                                           37. Botott del rebobinado
a0. S c hcirfentiefentas te                        38. Cortina del obturador
4 I.  Verschlu/J  filr Batteriegehduse              39. Rosca para el tr[pode
42. Rilckspulschaft                          40. Palanca de pre-vision
                                                        4 L Tapa del receptdculo de la bater{a
                                           42. Eje del rebobinador de pel[cula
View original page 6Page 9 · Read text
/        t,-
                    \                                   $Z)) ACCTISORIOS  .... DE LA '(Af A LA
I' A efectos de ampliar sus horizonlesfotogrdfcos, MIRANDA le suministra una amplia gama de accesoriosfoto-6pticos.
  Observe cuidadosamente los variados accesorios disponibles para Vd. y su MIRANDA RE-II, permitiendo a su imagi-
  naciott.r'la experietrcia del agenle MIRANDA, ser su gufa. De la"A" a la"Z", la experimentaci6n en el amplfsimo
  rnuttdo de lafotograJTa es ahora toda suya. Los accesorios ffaen informaci6n adicional segiln se requiera.

 A) COPA OCULAR DE GOMA. se coloca directamente en el ocular del visor de norma o del VF-3 (D2). Estd equi-
I    pado cort un adaptador para insertar (B).
 B) Letrte de compensaciin de la vista. Disponible en siete dderentes piezas (diotr[as): #I (l],5);  #2 (0);#3 (-0,5);
     #a (- 1,5); #5 (-2,5); #6 (*2,s);#7 (+3,s).
  C) Ocularares de prescripcidn - Se colocan directamente en el ocular del visor de norma o en el VF-3. El tipo A
      (C  I ) es para hipermetropla o miopia, el B (C2) para astigmatismo.
                                                   visores Miranda de cambio rtipido. El VF-I (Dl) es un visor de cintura con D) IlSORES REFLEX - Los singulares
     imagen amplifcada. El VF-3 (D2) es un visor para e4foque critico que permite cambiar la amplifcaci6n de la
      intagen de 5X a I5X con s6lo voltear el prisma. El VF-4 (D3) es un visor de enfoque cr[tico disefiado especialmente
I    poro la microfotografia poseyendo ademds un corrector de diotrias.                                Del (EI) al (E3) son tubos de extensidn no automdticos de 32, 16 y 8mm respec-' E) TUBOS DE EXTENSION -
      tivamente. Se pueden usar individualmente o en cualquier combinacidn con el ADAPTADOR AU (E4).
                                                                           pero funcionan reteniendo el sistema de auto- F) TUBOS DE EXTENSION AUTOMATICOS - Igual que arriba,
     diafragama cuando se utilizan con lentes que tengan tal caracterfstica.
 G) ADAPTADORES DE LENTES - Permiten el uso del cuerpo MIRANDA en combinacidn con varios tipos de
       lenles y accesorios. CSF (Gl ) es para los lentes normales de la Contex y Nikon S; CTF (G2) es para los angulares
    y teleobjetivos de la Contax y Nikon; LF (G3) es para los lentes de rosca de la Leica y Canon; AUTOMATICO
     ((G4) con (K) o (L) o (M); NM (GS) es pora Nikon; XM (G6) es para Exakta o Topcon; PM (G7) para el tipo
      Praktica.
 H) HELICOIDE UNIVERSAL - para enfoques de prectsi6n y acercamientos.
  I) ANILLO DE INVERSION
 J) DUPLICADOR DE SLIDES
                                               de fuelle de extensi6n plegable con un solo carril  K) FOCABELL SII - unidqd compacta
                                       de gran precisi6n cen doble carril  L) FOCABELL AIII - unidad defuelle
  M) CABLE DISPARADOR DOBLE - para usarse con (G4)
  N) CABLE DISPARADOR
  O) MANGO DE PISTOLA
  P) TAPA DELANTERA DE LENTE
 U TAPATRASERA DELENTE
  R) TAPA DE CUERPO
  s) ADAPTADOR DE MICROSCOPIO
  T) AUTODISPARADOR  - se coloca en el receptdculo para el cable disparador pudiindose regular para que dispare
       cotl utl retardo de 5 a l8 segundos.
  U) CONVERTIDOR RE-II CM -  Singular invento Miranda que convierte el sistema de medici6n a aberturd
     completa de la MIRANDA RE-II al modo de diafragma cerrado.
                                                                 de pldstico.  V)'FILTROS OPTICOS MIRANDA - suministrados en caja ' W) MESA DE REPRODUCCIONES    completa con brazos de luz ajustables                                    -
  X) PLATAFORMA PARA MICROCOPIA  - con iluminaci6n en la base.
   Y) ESTUCHE DE CAMARA MIRANDA TIPO MH-IT5
  Z) VALIJA PARA EQUIPO MIRANDA TIPO MH-|2

 il                                          45
View original page 9Page 10 · Read text
ACCESSORIES..I               FROM'A'www.butkus.usTO'Z'                                          '

To broaden your photographic horizons, Miranda provides a wide range of photo-optical accessories. Carefully
 look over the many accessories available to you and your Miranda RE-ll, letting your imagination and the
 experience of your Miranda dealer by your guide. From A to Z, experimentation in the myriad worlds of
 photography  is now yours, Instructions as required are supplied with the accessories.
A RUBBER EYECUP -- attaches directly to the eyepiece of the standard viewfinder or the VF-3 (D2).
       It is equipped with an adapter for inserting (B).
B EYESIGHT COMPENSATION LENS    available in seven different (diopter) pieces: #1 (+1.51, #2 (Ol:   #3 (-o.51: #4 (- 1.5); #5 (-2.51: #6- (*2.5); #7 (+3.s).
C PRESCRIPTION EYEPIECES    attaches directly to the eyepiece of the standard viewfinder or the VF-3.                                    -    Type A (C 1 ) for near or farsightendness,                                 B (C2) for astigmatism.
D REFLEX VIEWFINDERS     Miranda unique quick-change interchangeable  viewfinders. VF-1'(D1) is a                                -    watstlever finder with a magnified                                    image. VF-3 (D2) is a critical focuser allowing either 5 or   'l 5X magnifi-
    cation by a flip of the prism. VF-4 (D3) is a critical focuser designed especially for microphotography  with
    a built-in diopter adjustment.
E EXTENSION TUBES    (E1)thru (E3) are non-automatic extension tubes of 8. 16,32mm respectively.                            -
    They can be used individually or in any combination with the AU ADAPTER (E4)
F AUTO EXTENSION TUBES    the same as above, but retain auto-diaphragm mechanism when such                                    -    lenses are used.
G LENS ADAPTERS    allow you to use Miranda's thin camera body in combination with various types of                         -    lenses and accessories. CSF (G1)for standard Contax & Nikon S; cTF (G2) for wide-angle & telephoto
    Contax & Nikon; LF (G3)for Leica & Canon screw mount; AUTO (G4) with (K) or (L) and (M); NM (G5) for
    Nikon, XM (GO) for Exakta & Topcon, PM (G7) for Praktica type
H UNIVERSAL HELICOID    for precision focusing and close-ups.                              -J  REVERSER RING
K FOCABELL S ll   compact single track folding bellows unit.                     -L  FOCABELL A lll    deluxe double track precision bellows unit.                      -M DOUBLE CABLE RELEASE     fep Lr5s with (G4).                                  -N CABLE RELEASE
O PISTOL GRIP
P FRONT LENS CAP
O REAR LENS CAP
R BODY CAP
S MICROSCOPE ADAPTER
T  SELF-TIMER    attaches to the cable release socket for adjustable five to eighteen second delay.                   -U  RE-ll CM CONVERTER    converts the open aperture metering system in the Miranda RE-ll to the closed-                              -   down mode for use with non-automatic bellows attachments, other lenses, etc.
V MIRANDA OPTICAL FILTERS    supplied in.plastic case.                                     -W MIRANDA COPY STAND    complete with adjustable light arms.                                -X MIRANDA MICROCOPY STAND    with built-in bottom illumination.
Y MIRANDA CAMERA CASE MH- 1                                        -1 5
Z MIRANDA CAMERA BAG MH-12


                                            42
View original page 10Page 11 · Read text
. . . DE AdZII LES ACCESSOIRES.

     Pour6largirvotre horizon photographique, MIRANDA d congu un v6ritable systdme d'accessoires et d'objectifs
 I   permettant de r6soudre tous les probldmes. Regardez soigneusement cette liste et laissez votre imagination I    faire le reste, votre revendeur saura 6galement vous donner de nombreux conseils utiles.
     Maintenant un domaine r6serv6 aux professionnels vous est ouvert de A d Z. sachez en profiter.
     Les notices d'emploi sont jointes avec chaque accessoire.
   A) Oeilleton de caoutchouc d fixer sur l'oculaire des viseurs d prisme ou VF 3. ll est muni d'une monture
I        speciale pour recevoir le correcteur de vue.I   B) Correcteur de vue disponible en sept valeurs de dioptries diff6rentes.
    C) Porte correcteur de vue d fixer sur l'oeilleton du pentaprisme ou du viseur VF 3:
           Type A pour myopes et presbytes
          Type B pour astigmates.
    D) Systdme de vis6e interchangeable rapide
         VF 1 :  viseur capuchon avec loupe de mise au point
          VF 2'. viseur capuchon avec loupe de grossissement 5 et 15 fois poss6dant une protection sp6ciale
                    contre la lumidre parasite
        VF3:  viseur sp6cialement congu pour la microphotographie.   il cmprend une loupe grossissant 5 fois
                      et pouvant 6tre r6gl6e de *  3 e 4 -  4dioptries.
    E) Tubes allong6s: trois bagues de 8, 16 et 32 mm sans prs6lection automatique;  elles peuvent Ctre utilis6es
         individuellement ou dans toutes les combinaisons avec la bague AV.
    F) Tubes allong6s identiques aux pr6c6dents mais avec pr6s6lection automatique
   G) Bagues d'adaptation d'objectifs: elles permettent de monter sur boitier MIRANDA, les objectifs de
         diff6rentes marques: CFS pour Contex  ll et ll A   CTF pour Contex llet  ll A (t616 et grand angle) en macro
                                                             -   macro seulement  NM pour NIKON   XM: EXA,        seulement    LF. CANON, LEICA (sauf M3) pour
                      -         PM: pour PRAKTICA HEXANON, PENTACON,- CONTAX SMD, CONSOL,-     ASAHI       EXACTA, TOPCON,                                -                      42 d vis  G 4 bagues de renvoi de pr6s6lection automatique pour utiliser en K, L,       PENTAX, et tous les                                          -      erM
    H) Bagues h6licoidale pour la mise au point pr6cise et ls vues rapproch6es.
       l)  Bague d'inversion.
    J)  Dupli slide (pour duplication de diapositives)
    K) Soufflet Focabel S ll (compact et pliant, monorail)
    L) Soufflet Focabel A lll (de luxe, d double rail de grande pr6cision).
    M) Double d6clencheur pour utilisation avec G 4.
    N) D6clencheur souple.
   O) Poignee pistolet.
    P) Bouchon avant d'objectif.
   O) Bouchon arridre d'objectif.
    R) Bouchon de boitier.
    S) Adaptateurmicroscopique.
    T) Retardateur 5 a 18 secondes pour fixation sur le bouton d6clencheur de l'appareil.
    U) Bague CM pour mesure de lumidre a diaphragme ferm6.
    V) Filtres.
   W) Statrf de reproduction M IRAN DA.
    X) Statif micro MIRAN DA avec boite d lumidre.
    Y) Sac souple MIRANDA MH-115.
    Zl  Fourre-tout MH-12 pour boitier et accessoares.


                                              43
View original page 11Page 12 · Read text
www.butkus.usSYSTEM.ZUBEHOR VON A-Z

A Augenmuschel mit KorrekturausgleichsfassungJiir Pentaprisma und Critical-Sucher VF-3.
                                                                              Dptr.B  Korrektur-Ausgleichslinsen, il,5;0; -0,5; -1,5; -2,5;1'2,5; I3,5C Korrekturfassung
      (a) fi)r Nah- und Weitsichtfehler
      (b) filr Astigmatismus
                      Lichtschacht VF-1, Criticalsucher VF-3, MeJJlupe VF-4D  Sucher-Au.fsritze -E  Verlcingerungs-Tubensatz 8, I6,32mm mit AU-Adapter.
F  Automqtische  Verlcingerungs-Tuben 8, 16, 32mm
G Adapter zur Verwendung von Fremdobjektiven: (Gt) ftir Standard-Objektive Contax und Nikon; (G2) littr
    Weitwinkel- und Tele-Objektive Contax und Nikon; (G3) fiir Leica und Cannon-Objektive M39mm; (G4) Auto-
    matik-Rittg fiir MlRANDA-Balgengercite;  (G5) fiir Nikon-Objektive; (G6) Jkr Exakta- und Topcon-Objektive;
    (G7)fi)r M42-Objektive  Praktica, Pentax,Ikqrex TM etc.
                          Feineinstell-SchneckeH  Universal Helicoid -
                                                                                                                                                                                                                                                                                                                                                                                               II  Umkehrring
J  Diaduplikator
K  Balgengercit Focabell S-II
L  Balgengercit Focabell A III
M D oppe ldr a ht -A u s lci s er Jiir B a lgen gerrite
N  Drahtauslciser
O Pistolettgrilf
P  Objektivschutz-Deckel                                                                                                                                                                                                                                                                                                                                                                                                                                                                                                                                                                                                                                            '
O Objektiv-Riickdecket
R Gehciuse-Schutzdeckel
S Mikroskop-Adapter
T  Selbsauslciser
                          Ums tellung auf A rbeitsblenden-MeJ|-TechnikU R E -I I C M -C onverter - fi)r
                          Skylight, UV, Polarisation, gelbV MIRANDA-Filter -
W MIRANDA-Kopierstand  mit Leuchtarmen
X  miranda Mikro-Kopierstand mit Durchlicht-EinrichtunC
Y MIRANDA Universalkoffer
Z MIRANDA Universaltasche


                                         44
View original page 12Page 13 · Read text
NOTES OF CAUTION      PRECAUTIONS
WEICHTIGE HINWEISE   PRECAUCIONES
             P1
                       when the lens has been removed, do not expose the camera's lens mount
                           opening to sunlight or other excessive light as you risk fogging film.
                                              lf no shade is available, turn your back to light source and interchange
                                 lenses in the shade of your body.
                             Lorsque vous changez d'objectif, n'exposez pas I'int6rieur de votre boitier.
                        d la lumidre directe du soleil. ou d un 6clairage violent. Si vous n,avez
                            pas la possibilit6 de vous mettre d l'ombre, tourner le dos d la source de
                                  lumidre, afin de prot6ger votre boitier de cette dernidre.

  Achten Sie darauf, daJJ Sie das offene Kamera-Gehciuse beim Objektivwechsel nicht dem direkten Sonnenlicht
  oder qnderer intensiven Lichteinstrahlung aussetzen. Suchen Sie zum objektivwechsel den Schatten auf oder
  nehmen Sie ihn wenigstens im eigenen Kilrperschatten vor.

  Cuando se haya sacado el obietivo de la cdmara no exponga la montura abierta al sol directo u oyafuente de
  luz muy poderosa pues se arriesga la veladura de la pelicula. Le sugerimos que en caso de no tener una
  sombra disponible, ponga su espalda hacia la fuente de luz y utilice la sombra de su cuerpo para cubrir la
  cdmara miestras cambia el obietivo.

           P2
                    Do Nor set any Miranda Auto EC rens at this position when mounted on
                             the Miranda RE-ll as it wirr resurt in incorrectry exposed photos. Note that
                                the APERTURE RING as it rotates crick stops at each aperture mark. and
                                 will meet resistance after the minimum aperture setting. The prctured
                                  position can only be set when pressure is applied. NEVER DO SO.

                     NE PAS fixer quelque objetif de Miranda Auto EC d ce position lorsque se
                        monte sur la Miranda RE-ll. puisque ceci aboutira aus fotos incorrecte-
                        ment expos6es. se noter que le BAGUE D'oUVERTURE comme tourne
                                   s'arrdte avec un clic d chaque marque d'ouverture. et satisfera la r6srstance
                             aprds la fixation d'ouverture minimale. la position illustr6e peut 6tre fix6
                            seulement lorsque la pression est appoliqu6e. JAMAIN FAIRE AlNSl.

 MIRANDA AUTO EC Obiektiv auf MIRANDA EE-II NICHT in diese Stellung bringen, sonst falsch
 belichtete Aufnahmen! Der Blendenring klickt bei jeder Affnungsmarke ein und fndet nach ier kleinsten Ein-
 stellung Widerstand. Die abgebildete Stellung kann nur mit Gewalt erreicht werd,en, die niemals angewendet
 werden soll.

 No ponga cualquier obietivo de Miranda Auto EC en estaposicihn cuando se monta en la Miranda RE-II, ya
 que dard por resultadofotos incorrectamente expuestas. N'tese que el ANILLO DE ABERTURA como gira se
 para con golpecito en cada marca de abertura, y encontrard una resistencia despuds de tafijaciiln de la aber-
 tura mtnima. La posici6n ilustrada puede fiarse solamente cuando la presidn si aplica. iiNce EFECTUE ASI.
View original page 13Page 14 · Read text
-  ,rrl
                        ::,,,q
                                 www.butkus.us


                                                                                                   *q-."*in**-           :;        - *
                                                                                         S/lE                   ANDA RE'I[ EXPOSUmE

                                    .,{.i:i'*'r'
                  ..t.'.,,.     ,,  r,                                  '
                                          ..."


  EXPOSURE METER SYSTEM
  SYSTEM E D'EXPOSITION
  BELICHTUNGSMESSERSYSTEM
  SISTEMA DE EXPOSIMETRO

    1 Shutter Speed 2. ASA 3. Metallic Resrstor 4. CdS Cell
    5 Mirror 6. Pentaprism  7. Meter Movement  8. Meter Cut-off Swrtch                   q9
      9. Resistor 10. Contact 11. BatteryCase 12. Mercury Battery 13. Printed Crrcurl
     with Variable Resistor 14. Draphragm Ring with Metallic Resrstor
        1. Oblurateur  2. ASA 3. R6sastance  M6tallique 4. Cellule 5. Miroir 6. Pentaprtsme  7. Mouvement de la Cellule
    B InterrUpteurclelaCelluleg  R6sistance'lO.Contactll.BoilierdePrlel2.PrledMercurel3.CircuitDot6duneReststatrceVartablt
      14. BaqLre de Dtaphragme Dotee d une R6slstance M6tallique

            I . Verschlusszeit  2. ASA 3, Lletallischer  Widerstand 4. Kadmiumsulfdzetle  5, Spiegel 6, Pentaprisma  7. Messwerk 8. Ausschaltknopf
       9. Widerstand 10. Kontakt   I l. Batteriedose 12. Quecksilberzelle  13. Gedruckte Schallung mil Stellwiderstand  14. Diaphragmaring  mit
      metallischem Widerstand
       t.l/elocidud  tle obturador 2. ASA 3. Resistencia metdlica 4. Celda de CdS 5. Espejo 6. Pentaprisma  7. Movimiento del medidor
       8. Connuttutlor  clel medidor 9. Resistencia 10. Conaclo I I. Caja de Ia bateria  I 2. Bateria de ntercurio  i'3. Circuilo  irnpreso con resisrcnda
       ruriuble  t4. Anillo de tliufragnu con resislencia ntettilica

              Use of the unique Miranda RE-ll         L'emploi de la bague CM vous permet
          CM CONVERTER allows you to          d'utiliser votre cellule en macro photo
                take exposure readings in  the        et dans tous les cas ou le coupage
                closed-down mode with  non-EC         n'st pas arrose automatiquement. U n
                     lenses and attachments.             mode d'emploi d6tail16 est  fournit
                                                           avec la bague CM.

Mit allen anderen Auto MIRANDA-Obiektiven sowie mit        El uso del CONVERTIDOR DE Ch[
Fremdobjetiven   ist die Lichtmessung nur in Arbeitsblenden-           original d ela Mirqnda RE-II le permite
MeJJmethode  mciglich. Fiir die Umstellung auf diese Mef-          tontar las lecturas de la exposicidn en el
methode  tst der nebenstehend  abgebildete MIRANDA RE-II-        modo abajo cerrado. El manual de instruc-
CM Konverter notwendig. Die Handhabung dieses Zubehdrs           ciones se incluye en ella.
 ist in der dem CM-Konverter beigelegten Bedienungsanlei-
tung beschrieben.
View original page 14Page 15 · Read text
SIMPLE RE-2 OPERATION A.B.C.....
L'UTILISATION DU RE-z EN 9 POINTS
DIE BEDIENUNG DER RE-2 IST SO EINFACH
wIE DAS "A,BTC"
OPERACION A,B,C DE LA RE-2
          A                       (See/voi r/Sehen/Ver p. 1o)
                     Load the battery.
                      Mettre la pile.
                            B.itterte etnlegen.
                       Coloque la bateria.

          B                     (See/votr/Sehen/ver  p. 1 1 )
                      Set the film speed.
                         Afficher la sensibilit6 du film choisi.
                     F ilme mpfindlic hke it eins te llen.
                       Adjuste la sensibilidad de la pelfcula.   ff

                                           (See/Voi r/ Sehen/Ver pp. 1 2-1 3l
                     Load the film
                     Charger l'appareil.
                      Film einlegen.
                     Cargue la pelicula.

          D                                         ( See/voar/Sehen/Ver p. 14)
                    Advance the film to cock the shutter.
                     Avancer le film et armer l'obturateur.
                      Film iiber den Schnellschalthebel transportieren.
                     Advance la pel[cula para qrmar el obturador.
View original page 15Page 16 · Read text
www.butkus.us
                       (See/Voir/Sehen/Ver p. 1 5)
  Determine and set the shutter speed.
  Choisir et afficher la vitesse.
   Ve r sc hluJJ g e s c hw indigkeit vorw cihlen.
  Determine y coloque la velocidad de obturaciin.


                          (See/Voi r/Sehen/Ver p. 1 6)
     MARCH E
           (of|)              Turn the exposure meter on.FL DESCONECTADOOFF                 Brancher la cellule.      nnner
         (on) CONECTADO     Batterie einschalten.
      EIN               Active el exposimetro.ON>
G                 (See/voir/Sehen/ver pp. 17-2zl
  Compose the picture and focus.
  Cadrer et faire la mise au point.
  Die schcirfe einstellen und das bild gestalten.
  Componga lafoto y enfoque.


                                          pp. 28-29]'H                 (See/Voir/Sehen/Ver
  Adjust the diaphragm for correct exposure.
  Ajuster le diaphragme pour exposition correcte.
  Die richtige belichtung einstellen.
  Ajuste el dtafragma pqra la exposicidn correcta.


                     (See/Voi r/ Sehen/Ver pp. 3O-3 1 l
  Release the shutter.
  D6clencher l'obtu rateu r.
  D en ver schluJJ auslcis en.
  Dispare el obturador.
View original page 16Page 17 · Read text
LOAD IN G TH E BATTE RY
MISE EN PLACE DE LA PILE
DAS EINLEGEN DER BATTERIE
CARGANDO LA BATERIA
            A1
                        open the BATTERY COMPARTMENT CAP by inserting a coin into the
                                       slot and turning counterclockwise.

                                   Retirer le bouchon protecteur du logement de la pile d l'aide d'une pidce
                     de monnaie en tournant dans le sens contraire des aiguilles d'une
                                monlre.
  Den Deckel des Batteriefaches gegen den (Ihrzeigersinn aufschrauben. Sie verwenden hierliir am besten eine
   Miinze.
   Para abrir la tapa del receptdculo de la bater[a inserte una moneda en la ranura y gfrela en sentido anti-
    horario.
          A2
                                    Insert a 1.3 volt mercury battery (Mallory PX 675 or equivalent) into the
                             chamber, plus side (*)facing  uP.

                              Mettre en place la pile au mercure de 1.3 volt (type UCAR EPX 675)
                             en prenant bien garde de mettre le c6t6 *  (face plate) vers l'ext6rieur.

   Batterie Mallory PX 675, 1,3 V oder vergleichbare  in das Batteriefach einlegen, mit dem glntten Batterie-
   boden (*)  nach oben.
   Coloque solamente una bater{a de mercurio de 1,3 voltios (tipo Mallory PX 675 o equivalente) con el lado
   plano (l)  hacia arriba.

          A3
                              close the BATTERY COMPARTMENT CAP by turning clockwise. Do not
                                   tighten the cap excessivelY.

                           Pour remettre en place le bouchon, tourner dans le sens des aiguilles
                                d'une montre sans forcer.

   Oen Oecket d6 Bottrrief*hes durch Drehen tm Uhrzeigersinn festschrauben. Es empfrehlt sich, die Batterie
    vor dem Einlegen mit einem Tuch abzureiben.

   para cerrar la tapa del receptticulo de la bater{a inserte una moneda en la rsnura y g[rela en sentido horario.
   No apriete la tapa enforma exagerada.     .
View original page 17Page 18 · Read text
SETTING THE ASA SPEEDwww.butkus.us
AFFICHAGE DE LA SENSIBILITE
EINSTELLEN DER FILMEMPFINDLICHKEIT
AJUSTANDO LA SENSIBILIDAD ASA
             B1
                            Check the ASA number recorded on the film cassette.

                                      V6rifier sur l'emballage du film la sensibilit6 en ASA du film charg6.
                                  Filmempfindlichkeit (ASA) anhand des Aufdruckes auf der Filmpackung
                                      ode r F tlmpatrone fes ts tellen.

                                Confirme el nilmero ASA quefgura en el cartucho de la pelfcula.
           B2
                                       Lift up the ASA FILM SPEED SETTTNG RtNG and turn. atigning... the
                            diamond-shaped ASA INDEX with the ASA rating of the film.

  Soulever la molette de 169lage de la sensibilit6 et tourner jusqu'd  .....
  ce que l'indicateur de sensibilit6 de votre film se trouve en face d repdre.


 Den Rrindelring des Verschlufzeitenknopfes  anheben und drehen bis,
 Der orangefarbene Index der Filmempfndlichkeit der gewiinschten ASA-Zahl gegeniibersteht.

  Levante el ANILL0 DE AJUSTE DE LA SENSIBILIDAD ASA y r1teto hasta que  . .  .
 El INDICE ASA de forma de diamante estti alineado con el ntimero ASA que ley6 en el cartucho de la peltcula.


 ASA FILM SPEED DIAL SETTTNGS
 REPERAGE DES SENSIBILITES
 ASA INTERMEDIAIRES
 SKALA TUN FILMEMPFINDLICH-
 KEIT IN ASA
 MARCAS DEL DIAL DE
 LA SENSIBILIDAD ASA
View original page 18Page 19 · Read text
I.OADING AND WINDING THE FILM
CHARGEMENT DU FILM
DAS EINLEGEN DES FILMS
(]ARGANDO Y TRANSPORTANDO LA
l'11I-ICULA
            c1
                       ON LY load or unload film in the shade, never in the sunlight.
                          To open the back cover. lift the FILM REWIND KNOB all the way up. The
                         back cover will swing open, and the film counter will automatically


                           Chargement et d6chargement sont d effectuer d l'ombre du en lumidre
                               att6nu6e (jamais en plein soleil.)
                           Pour ouvrir le dos tirer le bouton de rebobinage. le dos s'ouvre auto-
                            matiquement  et le compteur de vues se rennet sur la position "S".

   Riickspunknopf bis zum (scheinbaren) Anschlag herausziehen; nach Aberwinden des Widerstands springt die
   Riickwand auf. Gleichzeitig geht dqs Filmzdhlwerk auf" S" (start) zuriick.

   La carga y descarga de ta pelictla SOLO debe ser hecha a la sombra y nunca o los rayos del sol.
   Pura abrir la tapatrasera  levante la BOTON DE REBOBINADO enforma total. La tapa trasera se abrird
   uurcnruticarnente y el contador de pel{cula volverd a la posici6n de " S" o comienzo'

          c2
                                    Insert the film cassette into the film chamber as shown at left. Push the
                       FILM REWIND KNOB all the way down to its original position.  lt  is
                               doesn't go down, rotate it a little left or right. The film cassette is now
                           engaged by the FILM REWIND SHAFT.

                                Placer la cartouche de film dans son compartiment comme indiqu6 sur
                                    la figure Repousser le bouton de rebobinage en enclenchant bien d fond
                        dans la cartouche. Au besoin le tourner en poussant jusqu'd ce qu'il
                              s'engage compldtement.
                       A ce stade votre film n'est pas encore accroch6.

   Filmpatrone in die leere Patronenkamer.einlegen,  so daJJ biem Hineindriikken des Riickspulknopfes  ihr Steg
   von dessen Greifer edalt werden kann. Stegseite der Patrone also nach noben'

   Cgloque el cartucho de la pelicula en el receptdculo de pelicula como se muestra a la izquierda' Empuje la
  IIOTON DE REBOBINADO hacia abajo hasta su posici6n original. Si no va totqlmente abajo, gfrela
   cplonces un poco hacia la izquterda o derecha. El cartucho de la pel[cula estard ahora enganchado por el
   EJE DE REBOBINADO DE PELICULA.
View original page 19Page 20 · Read text
www.butkus.us
          c3
                                Insert the film leader into one of the slits in the RAPID LOAD SPOOL.
                       Make sure the SPROCKET WHEEL engages the perforations in the film
                                   leader.

                            Placer I'extr6mit6 de votre film dans une encoche de la bobine multi-
                               fentes. Assurez-vous que la perforation du film est bien engag6e sur la
                              roue dent6e.


                                Filmanschitt in einen der Schlitze der Schnelladespule einJiihren.

Inserte la punta de la pel[cula en una de las ranuras del CARRETE RECEPTOR DE CARGA RAPIDA.
Asegurese que la RODILLO DENTADO DE ARRASTRE haya enganchado una de las pedoraciones en la
punta de la pelfcula.
         c4
                       Advance the film using the FILM ADVANCE LEVER. Check that both
                            top and bottom film perforations are engaged by the SPROCKET WHEEL.
                           and snap the back cover closed.
                A l'aide du levier d'armement faire avancer le film jusqu'd ce que les
                          deux rang6es de perforation soient engag6es sur la roue dent6e. Reformer
                                       le dos de votre appareil.
                             Transporthebel bewegen bis die Zahnritzel der Transport-Zahntommel
                             oben und unten in die Perforation des Ftlms eingrei.fen. Wenn dabei der Trans-
                                porthebel gesperrt wird, weil der VerschluJJ inzwischen aufgezogen worden  ist,
dann den Auskisser betcitigen, damit weitergeschaltet werden kann. Riickwand schlieJJen bis ein Einschnappen
zu hciren ist.
 [Jsando ta PALANCA DE AVANCE DE PELICULA avance la pelfcula para confirmar que tanto las per-
foraciones de arriba y abajo de la pelfcula estin enganchadas por la RODILLO DENTADO DE
ARRASTRE. Cierre la tapa trasera.
          c5
                             Gently turn the FILM REWIND CRANK clockwise (in the direction of the
                           engraved arrow) until all the slack in the film cassette is taken up. This
                            occurs when there is resistance to further turning of the crank.

                          Tourner la manivelle de rebobinage dans le sens des aiguilles d'une
                           montre (suivre la fldche) jusqu'd ce que le film soit tendu. Dds cet instant
                          vous sentez une r6sistance dans la manivelle

                               Riickspulkurbel ausklappen und ganz leicht in Pfeilrichtung drehen, bis ein
                               Wilderstand  anzeigt, daJJ der Film unter der FilmandruckplatteJlach auJliegt.

Gire la PALANCA DE REBOBINADO en sentido horario (en la direcci6n de la flecha grabada) hasta que
toda laflojedad en el cartucho de la pelicula haya desaparecido. Esto ocurre cuando apqrece una resistencia
para poder seguir girando la palanca.
View original page 20Page 21 · Read text
D1
                        wind the FILM ADVANCE LEVER. When it is being operated. the FILM
                   REWIND KNOB should turn in a direction opposite the engraved arrow
                                 indicating that the film is moving properly.

                        Armer d l'aide du levier d'armement. Cette op6ration doit entrainer la
                                  rotation de la manivelle de rebobinage dans le sens contraire de la fldche.
                              Cela signifie que votre film est correctement engag6.

                               Transport-Schalthebel bis zum Anschlag betdtigen. Dabei dreht sich der
                              Riickspulknopf entgegengesetzt  zur eingravierten Pfeilrichtung.

 Cargue la PALANCA DE AVANCE DE PELICULA. Cuando ista es accionada,la BOTON DE REBOBI-
NADO DE PELICULA debe girar en direcci6n opuesta a laflecha indicadora, la que muestra que elJilm se
 e s  t d  t ra ns Do rtando correc tame nte.
                        httvz
                       Wind the FILM ADVANCE LEVER and release the shutter a few times
                                 until the pointer in the FILM COUNTER is aligned with the second dot
                                   after 'S'. Release the shutter.

                          Armer. et d6clencher 2 fois cons6cutives jusqu'd ce que l'index du
                           compteur de vues soit align6 sur le deuxidme point aprds le S.

                       Der Film soll nicht in der prallen Sonne herausgenommen oder eingelegt
                                werden. Auch sollte der Filmweschel nicht an staubigen Plcitzen oder am Meer
                             bei Saltzwind erfolgen, denn das schadet Ihrer Kamera, Achten Sie bitte
 darauf, daJJ Sie beim Filmwechsel das Tuch des Schlitzverschlufes nicht bertihren.
Cargue la PALANCA DE AVANCE DE PELICULA y dispare el obturador algunas veces hqsta que el.
indicador en el CONTADOR DE PELICULA esti alineado con el segundo punto luego de la " 5". Dispare el
obturador.

          D3
                     Wind the FILM ADVANCE LEVER once more, and the counter should
                       now read '1 '. You are now ready for taking the first photo.

                       Armer une fois de plus, votre compteur doit maintenant indiquer "l"
                         Vous 6tes pr6t pour votre premidre photo  .....

                                                                     *1" des Filmztihlwerks der                          Mehrere Leerschaltungen  ausjlihren bis die Zahl
                               roten Keilmark gegenilbersteht, Nun ist die Kamera bereit ftir die erste Auf-
                           nahme,

Cargue ta PALANCA DE AVANCE DE PELICULA una vez mds y el contadornidicard ahora"l"' Estd
pronto Vd. para tomar su primerafoto.
View original page 21Page 22 · Read text
SETTING THE SHUTTER SPEEDwww.butkus.us
CHOIX DE LA VITESSE
EINSTELLEN DER VERSCHUSSGESCH-
WNDIGKEIT
AJUSTANDO LA VELOCIDAD DEL
OBTURADOR
              E1
                               Rotate the SHUTTER SPEED DIAL RING and line up the desired shutter
                            speed with the red line on the top cover. Note that the speeds are in
                                    fractions of a second  . . .1/2.1/4,  1/9, etc.. The SHUTTER SPEED DIAL
                          can be turned in both directions and stops at B in one direction and at
                                                                     l OOO in the other.
                              Tourner la bouton s6lecteur des vitesses jusqu'd ce que la vitesse d6sir6e
                         se trouve en face du repdre rouge situ6 d la base du s6lecteur. Les
                                 vitesses indiqu6es repr6sentent des fractions de secondes  ... 1/2, 1/4, 1/8,
  etc.  ..... Le s6lecteur peut 6tre manoeuvr6 dans les deux directions jusqu'd la pose B dans un sens
  et 1/1OOO dans l'autre.
  Die Empfindtichkeitseinstellung drehen, bis die gewiinschte Verschlusszeit auf der Verschlusszeitskala  mit
  dem Verschlusszeitzeiger iibereinstimmt. Geschwindigkeiten sind in Sekundenbruchteilen angegeben 1/2, 1/4,
   I/8 usw. I und I/30 Sek. sind gelb markiert. Die Ringsperre  blockiert in beiden Richtungen und kisst sich
    bis *8" in einer und bis " 1000" in der anderen Richtung drehen.
  Haga girar el ANILLO PARA EL AJUSTE DE LA SENSIBILIDAD DE LA PELICULA hasta que la
   velocidad de obturaci1n deseada del DIAL DE LAS VELOCIDADES DE OBTURACION esti alineado
   con el INDICADOR DE LAS VELOCIDADES DE OBTURACION.  Tenga en cuenta que las velocidades
   estan enfracciones de un segundo ..... t/2, l/4,1/8, etc. y las velocidades lentas hasta I/30 seg. se marcan en
   amarillo. Et ANILLO puede sir ajustado en cualquier direcci6n, pero s6lo ird hasta'B'para un lado y hasta
   '1000'para el otro.

            E2
                         The 'B' or bulb setting allows you to keep the shutter open as long as
                             the SHUTTER RELEASE BUTTON is depressed. Your camera should be
                          mounted on a tripod when using exposures al 1/15 sec. or longer. A
                                cable release should also be used to avoid shaking the camera.

                              Le choix'B' ou ampoule marque en jaune vous permet de garder l'obtura-
                                 teur ouvet, tant que vous appuyez sur le d6clenheur.  ll sera necessaire
                                     d'utiliser un pied pour la realisation d'expositions prolong6es, et d'une
                              manidre g6n6rale au dessous de 1/15 de seconde. Dans ce cas, l'utilisa-
   tion d'une d6clencheur souple 6vite au maximum les ph6nomends de vibrations

   Die gelb markierte"B" Einstellungfiir lange Belichtungszeiten  htilt den Verschluss oJIen, so lange der Aus-
   lciseknopf betcitigt wird. Bei langen Belichtungszeilen von l/15 oder lcinger, wird Verwendung eines Stativs
   empfohlen. Um Erschiitterung der Kamera zu vermeiden, istferner ein Drahtausldser angebracht.

  La posici6n'B'o bombilla marcada en amarillo le permite dejar el obturador abierto mientras mantenga el
  BOTON DISPARADOR apretado. Su cdmara deberd estar montada en un trlpode cuando utilice exposi-
   ciones de I/15 segundo o mds largas. Se deberd usar ademds un cable disparador para evitar las vibraciones
   en la cdmara.

                                               15
View original page 22Page 24 · Read text
www.butkus.us
FOCUSING           SCHARFSTELLEN
MISE AU POINT       ENFOCANDO
            G1
                            Look through the viewfinder and rotate the FOCUSING RING right or left
                                         until the image comes into focus.

                             Pour effectuer la mise au point, regarder d travers le viseur et tourner
                                          la bague des distances.

                                      Fiir die Scharfeinstellung durch den Sucher blicken und den Entfernungsring
                              nach links oder rechts drehen.

   Paro enfocar, mire a travds del visor y gire al mismo tiempo el ANILLO DE ENFOQUE hacia la izquierda
   o derecha como sea necesario.

          G2
                              For INFRA-RED black and white photography.  first focus normally. Next,
                               turn the indicated distance on the DISTANCE SCALE so it is aligned
                              with the INFRARED DISTANCE INDICATOR (red dot and',R',) which is
                                 located on the DEPTH OF FIELD SCALE. No adjustment is necessary for
                                                                                                             I N FRA- R ED color photography.
                            Pour la photographie  infra-rouge en noir et blanc, faire une mise au point
                               normale, et reporter la distance affich6e en face du point rouge surmont6
                            d'un R situ6 sur l'6chelle de profondeur de champ. Pour la photographie
                                  infra-rouge en couleurs, pas d'ajustement  necessaire.
   Infrarotaufnahmen erforden eine geringfiigige Korrektur in der Entfernungseinstellung.  Zundchst die Scharf-
   einstellung wie gewcihnlich vornehmen. Dann den ermtttelten Entfernungswert auf der Skala lediglich vom
  E n tfe ntu n g s in de x z u m I nfr a ro  t in dex " R " v e r s c h.
   Para fotografa blanco y negro infrarojo, Primero enfoque normalmente;  luego gire la distancia sefialada en
   la ESCALA DE DISTANCIAS de modo que quede alineaa con el INDICADOR DE DISTANCIA PARA
  PELICULA INFRAROJA (punto rojo y'R') en la ESCALA DE LA PROFUNDIDAD DE CHAMPO. Cuan-
   do se use la pel[cula de color enfoque normalmente.

          G3
                              Correct focusing is best achieved by first focusing behind the subject
                             and then adjusting forward until the image is in sharp focus.

                             La focalisation correcte est accomplie en une manidre meilleure premidre-
                         ment par la focalisation du sujet en arridre et ensuite en avant jusqu'd ce
                           que l'image se trouve dans le foyer aigu.

   Fiir die exakte Entfernungseinstellung  empfiehlt es sich, zuerst den Hintergrund scharf zu stellen und dann
  den Entfernungsring weiter zu drehen bis das Hauptmotiv auf der Einstellscheibe des Suchers scharf abge-
   bilder ist.
  Et enfoque correcto es mas fdcil de lograr cuando se enfoca primero detrtis del sujeto y entonces se va ajus-
   tando elfoco hasta que la imagen aparezca con nitidez total.
View original page 24Page 25 · Read text
FOCUSING THE UNIOUE MIRANDA OIS*
WAY
SYSTEME OIS DE MISE AU POINT
MIRANDA
                 r1                            \tt
                                For moving subjects use a fast (1 /25O or higher) shutter speed, and move
                             your camera following the subject. Ask your Miranda dealer to recom-
                       mended photographrc  literature that will explain this and other photo-
                               graphrc principles
                             Pour les sujets se d6placant rapidement,  utiliser le 1/2so (au moins) et
                                survre le mouvement dans le viseur, ainsi le d6placement relatif de ce
                               dernier par rapport d votre apparerl, sera diminu6. N'h6sitez pas e de-
                           mander conseil d votre concessionnaire d ce sujet,  il saura vous conseiller
                              utrlement et pourra vous fournir utilement des ouvrages traitant de ces
                              problemes.
  Bei sich schnell bewegenden Objekten ist eine kurze VerschluJJzeit (I/250 sek oder kirzer) zu beniitzen. Au!-
  erdem bewegt man die Kamera mit dem Objekt auch wcihrend des Auskjsens.
   Para sujetos en movimiento use una velocidad rtipida (I/250 o mds rdpido), y mueva la cdmara (siga la acci6n)
  con el sujelo. Pida a su agente Miranda que le recomiende literatura que trate de dste y de otros principios
   fotograJicos.


       MAIIt  IRTSNLL FIELT)
        LEN'I]LLE DE FRESNEL        IIATI'E FRESNEL LINSE       G8
            (..1 \t PO I R L S,\'. L,L tIA'rf.                  The unique Miranda Ouadrascopic lmage System(OlS*)
                                                  rangefinder  is a four way focusing system, hence-quadra
                                                         (four) scopic (viewing)

                                            Le systeme de mise au point quadrascopic de MIRANDA
                                              (OlS) est absolument unique.  ll permet une utilisation
                                                  pr6cise et rapide dans toutes les circonstances et dans
                                                tous les axes. quelle que soit la position de I'appareil.

                                       Der einzigartige MIRANDA QIS-Entfernungsmesser  bietet
                                        4fache Einstellmciglichkeit,  ncimlich Schnittbild, Mikro-
                                                   prismenspot, Mattscheibenring und die matte Fresnellinse.

                                                El original sistema de teldmeto de imagen cuadrascdpica de
                                            Miranda es un sistema cuddruple de enfoque; de aht cuadra  OUI ER MULlIMICRO         INNER MULTIMICRO
  PR SM RING                PRISM SPOT                (cua tro) scopic (vision),
  ANNEAU DE MICROPRISMES PLAGE DE MICROPRiMES
 EXTERNE             CENTRALE
  A U S S M U            LTI                                                                                       I N N.   II,I U LTI PR  I S III E N    MIRANDA OUADRASCOPIC IMAGE SYSTEM FINDER              L.Y             t'LRtOR  A,\'lLLo              PR  I S IIT EDEN R I NC sPoT
  IIL'LI'1,\IICROPRISIIIA,S  CIRCUI,O IN'I'L,RIOR
                                              I)1, .vUt,7 ilvtcRo       VISEUR MIRANDA OUADRASCOPIC
                                PR]S,ITAS
                              M I RA N DA QI S.EN7-FE RN UNG S ME S S E R
  CIBCULAR            SPLII IMAGE
  IMAGE CIFCULAIRE                A PLAN COUPE              SISTEMA DE TELEMETRO DE IMAGEN
   lrlACI..\' CORl'A I',,N REDONDO                CUADRASCOPICA MIRANDA


                                                   18
View original page 25Page 26 · Read text
www.butkus.usDAS SCHARFSTELLEN MIT DEN MIRANDA
QIS-ENTFERNUN GS MESSER
ENFOQUE A LA SINGULAR MANERA
MIRANDA          QIS
          Gq\rv
                          The OIS-rangefinder screen is composed of a circular split-image dot and
                                    ring which splits any image, vertical, horizontal, or oblique; a multi-micro-
                               prism spot which checker's the image; a surrounding ground glass (matte)
                                    ring that blurs the image; and a matte Fresnel field that blurs the surround-
                                  ing background.
                                This extremely versatile screen  is bright, clear, and sharp. lts unique design
                         when coupled with a condenser built into the pentaprism makes especially
                                  rapid and accurate focusing easy without the split-image ever blackening. UT OF FOCUS                            Under the most adverse conditions the rangefinder will only darken some-
 ORRECTE                      wnat.
  N SC HARF                             There is no other rangefinder like  it.
t-L'L,ll.4 DE                La vis6e OIS* MIRANDA est compos6e surtout d'un stigmomdtre enf'oco                               aruleau, de conception enti6rement nouvelle. Sa particularit6 est de
                               permettre de couper pour la mesure, toute droite situ6e dans le champ de
                                  vis6e, quelle que soit son orientation, verticale, horizontale, oblique, sans
                                  avoir d incliner l'appareil.
                       Ce strgmomdtre situ6 d la jonction de deux plages de microprismes  est
                            avantageusement compl6t6 par ces derniers, qui permettent une mise au
                                point rapide.
                    Un anneau d6poli entoure l'ensemble et est lui-m6me entou16 par une
                                          lentille de Fresnel. donnant un maximum de luminosit6 d cet ensemble.
                                     Ainsi, pour effectuer la mise au polnt, vous pouvez vous baser comme vous IN FOCUS
                                  I'indique les figures sur l'un ou I'autre de la distance est bonne. Les
INCORRECTE                   droites coup6es par le stigmomdtre se trouvent alors dans l'alignement
                                   I'une de l'autre.
EN FOCO                 Ce systdme brevet6 par MIRANDA et unique vous permet d'aborder tous
                                 les probldmes de mise au point avec le maximum de pr6cision et de
                                      rapidit6.
  Die MIRANDA besitzt einen vcillig neuen Schnittbild-Entfernungsmesser.  Er arbeitet sowohl in vertikaler als
  auch horizontqler und diagonaler  Linie. Jede Kante oder Linie, die den Kreis in der Mitte der Sucherscheibe
  schneidet, kann fiir die exakte Entfernungseinstellung  benutzt werden.
  Motive ohne Kanten und Linien lassen sich bequem mit dem Mikroismenspot, dem Mattscheibenring und der
  ma  t t e n F re s ne  I lin se sc harfs te I len.
  Die MIRANDA QlS-Einstellscheibe  ist besonders universell verwendbar und eignet sich sowohl fiir Land-
   schafts-, Gruppen-, Portait-, Kinder-, ja selbst fiir Makro- und Nah-Aufnahmen, gleichgiiltig, ob die Auf-
  nahmen mit Weitwinkel-, Tele- oder Fernobjektiven gemacht werden.
  El tel6metro QIS consta de una pantalla compuesta de un punto de imagen partida circular y un anillo que
   corte cualquier imagen, vertical horizontal u oblfcua; un circulo de microprismas  mtiltiples que descompone
  la imagen; un anillo concdntrico de despulido mate que borrenea la tmagen; y un campo Fresnel mate que
  borronea elfondo.
  Esta pantalla de extrema versatilidad es brillante, clara y nttida. Su singular diserto acoplado al condensador
   interconstrutdo en el pentaprisma hace que el enfoque sen fticil y rdpido sin que jamds se oscurezca ninguna
  parte de la imagen partida. Ain en las mds a adversas condiciones de empleo, este telimetro s6lo se oscurecerti
  No existe otro teldmetro como 61.
View original page 26Related documents and language editions
From the M. Butkus archive. Original publisher and archive notices are retained.
Check the model and edition against your equipment.
PDF verified 2026-10-10.