Film cameras
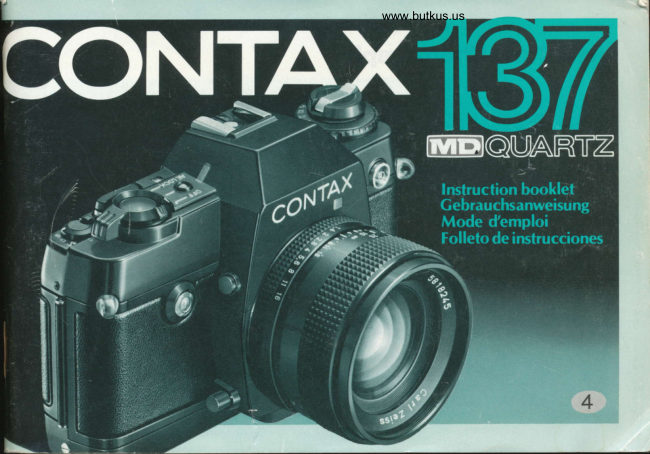
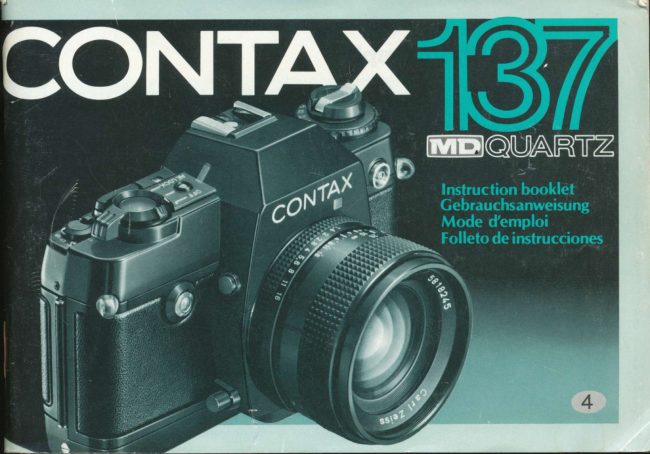
CONTAX 137 MD Quartz User manual
User manual for CONTAX 137 MD Quartz. 57 pages in English. Read the original PDF, download or print a copy without registration.
57 pagesEnglish20.3 MB PDF
Loading your manual…Open PDF directly
Document details
- Brand
- Contax
- Model / document
- CONTAX 137 MD Quartz
- Document type
- User manual
- Language
- English
- Pages
- 57
- File size
- 20.3 MB
- Category
- Film cameras
- Document date
- Not specified in catalog
Search available document text
Find a term, then jump to its page in the original PDF. Image-only pages may not be searchable; check the PDF for exact wording and diagrams.
Page 2 · Read text
RealTime Photogmphy
                                                                                                                                                                                                                                                                                             *,qi  1r :;19er{*.f i:ve r15f; lss, ls.sslwl@
    Congratulations on your purchase of a Contax 137       Wir danken lhnen, daR Sie sich fur eine Contax '137 MD
   MD Quartz.                                          Quartz entschieden haben.
   The 137 MD Quartz is a high quality precision           Bei der 137 MD Quartz handelt es sich um eine
    automatic single-lens reflex camera with the world's      hochwertige, automatische, eindugige Prdzisions-
     first fully integrated micromotor drive system that        Spiegelreflexkamera mit dem ersten vollintegrierten
    controls the film winding and the camera's operation     Mikromotorantriebssystem der Welt, das den
   systems with a single micromotor.                        Filmtransport und die Betriebssysteme der Kamera mit
   A quartz crystal oscillator  is also incorporated to        nur einem Mikromotor steuert.
    control all time related functions in the camera.        AuRerdem findet ein Quarzkristallschwinger
   The "electronic brain" unit, quartz crystal and         Anwendung, der alle zeitbezogenen Funktionen der
    micromotor govern the AE mechanism,               Kamera steuerl. Das "elektronische Gehirn", der
    the information displayed in the viewfinder and            Quarzkristall und der Mikromotor regeln die
    winding the film.                                         Belichtungsautomatik, die im Sucher angezeigte
   Before using your new Contax 137 MD euartz, please    Information und den Filmtransport.
    read this instruction manual carefully. Understanding     Vor Benutzung lhrer neuen Contax 137 MD Quartz
   how to use  it correctly will greaily increase your          lesen Sie bitte diese Bedienungsanleitung aufmerksam
   enjoyment of photography.                               durch. Wenn Sie sich mit ihrer richtigen Bedienung
   *  The instructions in this manual and the accompanying        vertrautmehr SpaR.machen, haben Sie beim Fotografieren viel
   photographs are for a camera with a planar T* 50 mm F1A
    lens attached, but the method of use is the same with otht    "  Die in dieser Bedienungsanleitung und in den Begleitfotos    lenses.
                                                         angegebenen Hinweise gelten fUr eine Kamera mit
                                                             angesetztem Planar-T*-Objektiv 1 :1 , 4150 mm; die Bedienung  ist
                                                                 iedoch bei Verwendung anderer Objektive die selbe.

                                                                                                                                             b.
View original page 2Page 4 · Read text
Venmo @mike-butkus-camera  Ph. 2083
PayPal Name  Lynn@butkus.org      www.PayPal.me/lynnbutkus
View original page 4
Page 5 · Read text
O Main Switch
@ Exposure Mode Selector
@ Electromagnetic Shutter Release
@ Film Rewind Button Cover
@ Main Lamp (Monitor LED)
    Exoosure Counter
    Exposure Counter llluminatorG)o
@ Direct X Contact
@ Auto Flash Contacts
@ Accessory Shoe
@ Shutter Selector
@ Exposure Compensation Dial
@ Film Rewind Knob
@ Film Rewind Crank
@ Film Speed Ring
(D Self-timer LED
a, Lens Release Button
@ Depth-of-Field Preview Button
@ Focusing Ring
@ Release Socket
@ Aperture Ring
@ Lens Mount lndex
@ Aperture Indicator llluminator
@ Synchro Terminal
View original page 5Page 6 · Read text
www.butkus.us


                                                   rrupreu'upteur                                                                                   ipal                                                          Interrrerrut    Hauotschalter                                                                                                          principal                                                     pnncrpaFpnncrpi                                                       urrr                                                                                            Interruptor                               @e                  c                                                      )teur                                                  electelcteur                                                                                                   cdedede                                          modemode                                                   e dd'expexposrtltron                                                                             de                                                                           modo de exposici6n@ Belichtungswahlschalter                                   Qt 56le                                @ Selector@ Elektromagnetischer Ausl6ser          €-, D6clueclencneur6clen<lenche)ncneu:urlurr 6lectr<6lectror€   :tromtromagtagn6ticrque      (! Disparador electromagnetico
@ Abdeckung fUr                    G) uacneCaclCacheacnehedute du                                                                                                                            (cdu bor-boutonboutonboul   dededede              @l Cubierta de boton de rebobinado
     Film rUckspu lknopf                     rembobiremtrembobinagermbobbobinalobinageLgege duduc   filmfilnfilmilm                 de la oelicula
                                   LampeLamLampelmperpere prrrprincilIprincipncipalercipale        @ t6mpara principal@ Hauptlampe           o
@  Bildzdhlwerk                       Gl CompterComCompteuromprelpleur>teur dedede(de vuesvuesr,    rs                 €) Contador de exposiciones@ Beleuchtung fUr Bildzdhlwerk    @ EclairagEclaEclairage: lairagLirage'age ddududuJu   rcomptercomptrc   tpteurpteurteurr doedeoe vulVUESvu€JES       (! Luz del contador de exposiciones
@  Mittenkontakt           @ ContactContContactontacttactrct dirdirecdirectrectrect XX                          (8) Contacto X directo
€)  Bl itzautomatikkontakte       @ ContactrContContactscntacttactsrcts ded,deJele flashfflashfli   1 au'araUlOmiauloluloma)matiqumalnatiqu(rque   @ Contactos para flash automdtico
   Zubehorschuh                              GriffeGriffGrifferiffeer pporte-arporl€prporte-ace-access(e-accessoissoir€;soiresioiresES3                fOl Zapata para accesorios
                                              Selecter56leSelecteurilectercteurteur cdede'deCe vitessevitessev  sserse;e d'Old'obdJ'obtura'obtobturalu ration      (U) Selector de obturador    Ve rsch lu Rwah lschalter             @o@o(}  Belichtungskorrektu  rskala          CA CadranCadtCadranaoranran]nln oeoeoedeI correclcorcorrectiorCOrreCtiCco    :tiontionon d'ed'expord'elr I'ex'expos(posrilonpositro      (!? Disco de compensacion de la
@  Film ruckspu lknopf                 e0 BoutonBoulBoutonoutonton)ntn deoedede rembobinrretrembobirrembobren   rbinagoinageinagegeeol; ducdulur fifilfilmfilm          exoosicion
C4)  Filmruckspulkurbel                          (1i ManivellManManivellelanivelrivelleuellerelle cdedededede rembobremborembr   rbobinrobinagobinag(nageagelge: dudududu filmfilntm  @ Mando de rebobinado de la pelicula
.o  Filmempf indlichkeitsring                      (!! BagueBagrBagueagueueee desdes(cdesdes;;sensibilit€sesensibililsensibiser   rilit6silit6sit6si drdudududu filnfilmfilmfilm         !1) Manivela de rebobinado
@ Selbstausloser-Leuchtdiode           (3 DiodeDiodDiodeiodelerr LEDLlLEDLLEDLED)t (el(electrolu(electrol(elr(electrcrolumoluminrrlumineinesnescerscente)cente)r)        (l5r Anillo de sensibilidades de la
@ Objekt ivent riege lungsknopf            duduouJ retarrelarretardateurr(etardattardateutardateurIeurIeur                               oellcula
                                                                                                  to,v                    ftdt lf O del disparador automdtico@ SchdrfentiefenprUf knopf                 (tt BoutonBoutonBoutcutonton>nrn   rdededede deverrouilde'd6verroudeverrod6v    'ouillaruuillageillagearoYv
(19  Scharfeinstellring                         d'objectd'objectifd'ob.objecljectif-.ctif:ctif                       (D Boton para extraer el objetivo
@) Fe rnauslose rbuc hse                                                                                                                                                                                            rdedede corcontr6lecont16lecontr6lecon   edelarded   lalaa                   (18) Boton de vision previa de la                                     ,,@ BoutonBoutonBoutcutontonlnrn de€i Blendenring                              profondrprofondeurprofcofondondeurndeurrdeurr'ded€dedede chanchamSchalmp'np                   profundidad de campo
@  Objektivf assungsindex              (0 BagueBagueBagtaoueJeoene: dedcdede misemismisemisemise auauau pcpointopointI                     (19) Anillo de enfoque
@ Beleuchtung frlr Blendenanzeige        0i; PrisePrisePrise: dedededede t6l6ct6lt6l6commt6l6ccrlecommanrandedIIUU   -l           @, Orificio del disparador
@) Svnch ron isationsanschluR                  Qt. BagueBagueBagruee: desddesdesdes ououvertureour,ouvertuuresres                      €-1, Anillo de aberturas
                                                       i22 IndexIndexlnde;xdemdededede monmontrmontagerontage d'<d'objed'objecjeclectif           (2? Indice de montaje del objetivo
                                                                ,29  EclairagEclairageirageageage d'indd'incd'indicatj'indicateuteur-.ur dedesles             Q]; Lu. indicadora de la abertura
                                            ouverlurOUVETIU)rIuIUIU TESTESTESres                                04) Terminal para sincronizacion
                                                              (fi, PrisePrise:desyoededede synclsvnchsynchronirisation;ation
View original page 6Page 8 · Read text
www.butkus.us


@  Daten ruckwand- Leuchtd iode   @ Retais de signal LED (diode     @ LED del respaldo para datos
@ Filmkammer                            electroluminescente) de dos    @ C6mara de la pelicula
@ Sucherokular                           dateur              @ Ocular del visor
@, Zahntrommel         @ Compartiment du film       @ Rueda dentada
@ Aufwickelspule         @ Oculaire             @ Carrete enrollador
@ Ruckwandverriegelung     @ Roue dent6e           @ Tope para abrir el respaldo de
@ Befestigungsknopf fur                09; Bobine receptrice                            la cdmara
    Batterief achdeckel       @ Ergot de d6verrouillage du dos   @ Mando de apriete de'la cubierta
@ Batterief achdeckel       @ Bouton de verrouillage du                del compartimiento de las pilas
@ Stativgewinde                          couvercle du compartiment des   @ tapa del compartimiento de las
@ FUhrungsstift                                oiles                                           pilas
@ Filmtransportanzeige       @ Couvercle du compartiment des   @ Rosca para el tripode
@ Memo-Halter                                 oiles              @ Espiga de guia
                @ Embase filet6e pour pied      @ Indicador de avance de la pelicula
                @ Ergot de guidage          @ Portanotas
                                 Q9 Temoin de transport du film
                 @ Cadre aide-memoire
View original page 8Page 9 · Read text
Mounting the Lens
    Insert the lens rnto the camera body mount, matching the red
   dot on the lens mount with that on the camera body. Then,
   gripping the lens barrel firmly, turn the lens clockwise until  it
   locks with a click.


   Removing the Lens
   While keeping the lens release button depressed, turn the
   lens all the way counterclockwise and lift the lens out of the
   mount. Always keep both the camera body mount and the
   lens mount covered with their respective caos when the lens
    is not mounted. Also, cover the  f ront of the iens with the fronl
   lens cap when not in use.
   .  Avoid touching the inside oi the camera or the glass
   surfaces of the lens with your fingers.
   .  Avoid direct sunlight when inlerchanging lenses with film
   loaded in the camera.


10
View original page 9Page 10 · Read text
www.butkus.us


   The 137 MD Quartz uses batteries as the power source to
   perform all necessary functions, including automatic film
   wind, exposure setting, shutter release, etc. Therefore,
   make sure that batteries are installed before using the
   camera. The camera will not operate without batteries.
   Use four 1.5 V size AA dry batteries or four '1.2 V size AA
   nickel-cadmium batteries. Camera performance may be
   impaired, particularly during continuous exposures,  if the
   batteries are not in top condition. Therefore, you should use
   batteries (such as alkaline manganese batteries) which give
   the best possible performance.
   El Lift up the fastening knob of the battery compartment
   cover on the bottom of the camera, turn it in the ,,OpEN"
   direction and remove the battery compartment cover.
 E Insert four batteries with the polariiy indicated by the
   (+) and (-)markings on the attachment case (and also
   inside the battery compartment). The camera will not operate
     if the (+)and (-) ends are reversed.


12
View original page 10Page 11 · Read text
l3 After installing the batteries in the battery case, insert
       it into the battery compartment. Insert the case in the
    g[re_ction shown by the diagram in the battery compartment.
   [4 Fit the mounting hole on the battery compartment cover
    onto the guide pin on the camera,  fit the cover onto the
   camera in its original position, and then lock it in place by
    turning the fastening knob as far as it will go in the direciion
    of the white dot.
   Number of rolls of film which can be exposed with each
   type of battery (under standard exposure conditions)
                           Number of 36-exposure rolls
              Type             exposed (continuous exposure
                                      at room temperature)
      Alkaline manganese dry
               batteries                     about 50
     Manganese dry batteries             about 20
     Nickel-cadmium batteries             about 30


                                                               www.butkus.us
14
View original page 11Page 12 · Read text
www.butkus.us


   Check the batteries by turning the                                            Die Batterien durch Drehen des
   main switch in the direction of                                                  Hauptschalters in Richtung
   "8.C" (battery check).  lf the main                                         "B C" (BatterieprUfung)
   lamp lights up green, the battery                                                 UberprUfen. Leuchtet die
   voltage is normal. As the voltage                                         Hauptlampe grUn auf, ist die
   drops, the lamp gradually                                                   Batteriespannung normal. Bei
   becomes dimmer and the film                                              )pannungsabfall wird die
   winding becomes slower. When                                    Lampe allmdhlich dunkler und
    this happens, please install                                                die Filmumspulung
    fresh batteries.                                                         langsamer. lst dies der Fall,
   The green lamp will not light up                                     neue Batterien einsetzen.
   when nickel-cadmium batteries                                             Die grtine Lampe leuchtet
   are used.This is because the                                                   nicht auf, wenn Nickel-
   rated voltage of nickel-cadmium                                      Kadm iumbatterien verwendet
   batteries is lower than dry batteries, and does not         werden. Dies ist darauf zurUckzufUhren, daR die
   indicate that the batteries will not oerform well.           Nennspannung von Nickel-Kadmiumbatterien niedriger
                                                                                     ist als diejenige von Trockenbatterien; dadurch wird
                                                          jedoch keine schlechte Batterieleistung angezeigt.


16
View original page 12Page 13 · Read text
Baltery Precausions                                  VorsichtmaRregeln flir Batterien
 .  When changing batteries, install 4 new batteries     o Bei Batteriewechsel 4 neue Batterien desselben
 which are all of the same type. Top performance  will       Typs einsetzen. Bei gleichzeitiger Verwendung von
 not be obtained if old batteries are mixed in with the         alten und neuen Batterien ldRt sich keine
 new ones.                                                   Spitzenleistung erzielen.
o The life span of batteries varies with the          o Die Batterielebensdauer ist je nach
environmental temperature. Especially in cold regions,      Umgebungstemperatur unterschiedlich. Die Leistung
performance may drop, causing difficulties in taking        kann besonders in kalten Gegenden abnehmen, wobei
pictures, and the number of rolls that can be exposed      das Fotografieren schwierig ist und weniger Filmrollen
with one set of batteries will decrease. In such a case,       mit einem Satz Batterien belichtet werden konnen. ln
you should use a 137 power pack (refer to page 9B),       einem derartigen Falle sollte ein als Sonderzubehor
which is sold separately, so that the batteries can be         erhdltlicher Batteriebehdlter 137 (siehe Seite 99)
kept warm during use. Batteries which perform below       verwendet werden, um die Batterien bei Verwendung
par because of the cold will recover fully if warmed up      warmzuhalten. Batterien, die wegen der Kdlte nicht die
to normal temperature.                                          volle Leistung liefern, erholen sich ganz, wenn sie auf
o  lf the camera is not used for an extended period         Normaltemoeratur erwdrmt werden.
of time, remove the batteries   f rom the battery case.     o Bei ldngerer Nichtbenutzung der Kamera die
This will avoid damage to the contacts, etc. in the case      Batterien aus dem Batteriegehduse entfernen. Dadurch
from battery leakage.                                        wird eine Beschddigung der Kontakte usw. im Gehduse
                                                       durch auslaufende Batterien vermieden.
View original page 13Page 14 · Read text
www.butkus.us


   The main swtich is operated by setting it at various marked
   positions, using either the affixed lever or protrusion to
   turn  it. The switch can thus be operated smoothly without
   removing your eye from the viewfinder.

  ''OFF"
  When the main switch is turned to "OFF", the camera will not
   operate as the power source to the shutter and exposure
   systems will have been cut off. When not using the camera,
   see that the main switch has been turned to "OFF" to
   conserve batteries.
  Main Lamp (Setting in Main Lamp Position tor
  Normal Operation)                                            along with the self{imer LED on the front of the camera to
                                                        show that the self-timer has been activated.
  When the main switch is turned on (to the main lamp position),        I  When the roll of film reaches the end, the camera's
    all of the electrical circuits in the camera come on, and the          automatic winder stops automatically, and at the same time the
  main lamp lights up red. At the same time, the LED indicators       main lamp flashes to signal that the roll has ended. The main
    in the viewfinder illuminate, showing you the necessary             lamp also flashes a warning when a malfunction occurs (such
  exposure information. When the shutter release button is           as automatic film winding or shutter cocking trouble) before
   slightly pressed or the shutter is released, both the main lamp        reaching film end during picture taking.
  and the LED indicator will light for ten seconds and the switch
   off      automatically.                  And,                     whenever                              you want                                                          the                                               to check                                                               ''AE LOCK"             reading  exposure                      within                          the viewfinder,                                         simply                                                   exert                                             a slight
   pressure on the shutter release again; and continue pressing  it     When the main switch is set at "AE LOCK", the exposure
   further down to take the picture. The main lamp has the               (shutter speed)that was in effect at that time is "locked in".
   following functions in addition to showing that the power is           This feature is useful in such situation as photographing back-
  switched on or off.                                                        lighted subjects or moving subjects in the continuous mode
   I  The lamp goes off and back on again whenever a                 while holding the exposure reading constant. When the main
  photograph is taken, in either the single-exposure or continuous      switch is in this position, the main lamp will continuously stay  lit
  mode.                                                       as a warning not to leave it in the "AE LOCK" position after
   I  When the self-timer is used, the main lamp flashes                  finishing shooting in the "AE LOCK" mode (Refer to page 64).
20
View original page 14Page 15 · Read text
L'interrupteur peut 6tre amen6 sur les diff6rentes positions       dicatrice d'alimentation,  la lampe principale possdde les fonc-
   rep6r6es d I'aide du levier ou de la saillie:  ll est ainsi possi-       tions ci-aprds:
    ble de l'actionner sans avoir d 6loigner I'eil du viseur.             I   Elle clignote une fois lorsqu'une vue est prise, que
                                                               ce soit en exposition simple ou en mode continu.
  "OFF" (arr0t)                                                          I  Lorsque I'on utilise le retardateur, elle clignote en
                                                meme temps que sa LED (implantee en faqade) afin d'indiquer
   Lorsque I'interrupteur se trouve sur la position "OFF",                   qu'il est en service.
    l'appareil n'alimente pas I'obturateur et les circuits de mesure         I  Lorsque la pellicule arrive a sa fin, I'enrouleur    d'exposition sont coup6s. Ne pas omettre d'amener cet in-
    terrupteur sur "OFF" lorsque I'appareil n'est pas utilise afin         automatique integ16 s'arrete automatiquement et la lampe prin-
   d'6conomiser les piles.                                                 cipale clignote afin d'indiquer cet etat de choses. La lampe
                                                                             principale clignote 6galement si un d6rangemenl se produit
   Lampe pilncipale (r6glage sw la position de lampe      avant (panne de bobinage automatique ou d'armement) ou pen-
   principale pow prises de yues normales)                  dant la orise de vue.
   Lorsque I'interrupteur est amen6 sur la position de lampe prin-     "AE LOCK" (verrouillage de AE)
    cipale, tous les circuits electriques de I'appareil sont mis sous
   tension et la lampe principale rouge s'allume. Paralldlement d       Sur la position "AE LOCK", la vitesse d'obturation s6lectionn6e                                                                     est "verrouillee". Ceci se revele tres commode dans des situa-    ceci, les LED-temoins du viseur s'allument afin de visualiser                                                                              tions telles que les contre-jours ou les sujets mobiles en mode
   tous les parametres d'exposition n6cessaires. Lorsque I'on ap-       continu car I'exposition est ainsr maintenue d une valeur con-
   puie sur le declencheur,                                 la lampe principale ainsi qu'une LED         stante. Lorsque I'interrupteur general se trouve sur cette posi-                                                                      .1
   s'allument pendant  0 secondes apids lesquelles elles s'eteig-         tion, la lampe principale reste allumee continuellement afin que
   nent automatiquement. Si d'autre part on desire verifier les             I'on n'oublie pas de modifier le positionnement apres les prises
   parametres d'exposition a I'int6rieur du viseur,  il suffit d'ap-        de vues en verrouillage de AE (voir la page 65).
   puyer legerement sur le d6clencheur afin de I'actionner totale-
   ment pour prendre la vue. Parallelement ir son action  in-


22
View original page 15Page 16 · Read text
www.butkus.us


During normal automatic photography or when
using the exclusive auto flash, the shutter selector
is set on "AUTO". When another flash unit is used
or when taking time exposures, set the shutter
selector to "X" or "8", respectively.

"AUTO"
When the shutter selectoris set on "AUTO", the
shutter speed is automatically controlled to adjust to
the aperture setting and the subject brightness. The
shutter speed is indicated by the LED indicators in the
viewfinder. When the TLA20 auto flash is mounted on
the camera, the shutter selector can be left on
"AUTO" and the auto flash will couple to the camera
automatically at any lens aperture setting.
"X" (Flash synchrcnization speed)                    "8" (Bulb)
Set the shutter selector to "X" when using any flash      When the shutter selector is set on "B", the shutter
unit other than the TLA20 auto flash. The synchro          remains open and exposure continues as long as the
contact of the 137 MD Quartz is an X contact, and the      shutter release is pressed down. This setting is used
shutter speed is 1/60 second.                                   for time exoosures.
View original page 16
Page 17 · Read text
En photographie automatique normale ou d             Position "X" (Vitesse de synctrronis atlon de llash)
I'emploi du  f lash automatique exclusif, le s6lecteur
de vitesse se rdgle sur "AUTO". Choisir respective-       Choisir la position "X" du s6lecteur de vitesse quand
ment les positions "X" ou "8" avec ce s6lecteur        on utilise un flash autre que le flash automatique
quand on utilise un autre flash ou lors de la prise       TLA20. Le contact de synchronisation du '137 MD
de poses.                                               Quartz est un contact X et la vitesse d'obturation est
                                               de 'll60e de seconde.
 Position "AUTO"
                                                          Positionn "8" (pose)Lorsque le selecteur de vitesse se trouve sur "AUTO",
la vitesse d'obturation se regle automatiquement en       Quand le selecteur de vitesse se trouve sur "8". I'ob-
fonction du reglage de I'ouverture et de la luminosit6         turateur reste ouvert et I'exposition continue aussi
du sujet et elle est indiqu6e par les t6moins A diode         longtemps que le d6clencheur est enfonc6. Cette posi-
LED (electroluminescente) du viseur. Lorsque le flash         tion sert donc pour les poses.
automatique TLA20 est instal16 sur I'appareil,  le
s6lecteur de vitesse peut 6tre laiss6 sur "AUTO", car
le flash sera automatiquement coupl6 a I'appareil, quel
que soit le reglage de I'ouverture.
View original page 17Page 18 · Read text
www.butkus.us                                       I

The 137 MD Quartz permits you to choose the                                                                                                                                                                                                                                                                                                                                                                                                I
single-exposure, continuous or self-timer mode,
depending on your photographic objective. The
selection is performed using the exposure mode
selector.

"S n' (Sfngle-exposure)
When the exposure mode selector is set on "S", one
exposure is taken every time the shutter release is
pressed. The film is wound automatically following each
exposure. At the time of exposure, the main lamp goes
off briefly and then comes back on.
"C" (Continuous)
When the exposure mode selector is set on "C", a
maximum of 2  f rames per second will be exposed            with the exposure mode selector on "C" by removing
automatically as long as the shutter release is held          the finger {rom the shutter release after each exposure
down. (The actual rate may be slower than 2 frames
per second  if the batteries are not  f resh, if they are          ,iS.f" (Self.timer)
used in cold weather or if the shutter speed is slower
than 1/60 second.) When the finger is removed  f rom      When the exposure mode selector is set on "S.T",
the shutter release, the camera stops after film winding    when the shutter release is pressed, the self timer LED
is completed. The main lamp goes off briefly during        on the  f ront of the camera and the main lamp start
each exposure, as in the single-exposure mode. Be           flashing. The exposure is taken 10 seconds later.
sure to use fresh batteries when taking pictures in the
continuous mode. Single exposures can also be taken
View original page 18Page 19 · Read text
Avoid direct sunlight or strong artificial light when
loading film. Always use a standard '135 film cartridge.
E Turn the main switch ON and set the exposure mode
selector on "S".
o  lf the exposure mode selector is set on "C", there is a
danger that too much film will be exposed when the dummy
exposures are taken after loading, so be sure to set  it on "S"
E Lift the film rewind knob up lightly at first, then pull it up
more strongly. This will open the camera back.


                                                                      www.butkus.us

@ Insert the cartridge into the film chamber, then push the
rewind knob down to its normal position. The knob can be
pushed down easily  if it is rotated back and forth slightly while
pushing.
View original page 19Page 20 · Read text
@ Pull the necessary length of film out from the cartridge
   and insert the tip into either of the grooves on the take-up
   spool.


 S Press the shutter release to take dummy exposures until
   tne sprockets fit into the film perforations. Make sure that the
   sprockets fit into the performations, then close the camera
   back.

  When taking the dummy exposures, set the shutter selector
   on "X" or remove the lens cap and point the camera where
    light will enter the lens. lf the shutter release is pressed while
   the shutter selector is on "AUTO" and the lens cao is on. the
   shutter will remain open a long time.


34
View original page 20Page 21 · Read text
@ Take additional dummy exposures until "1" appears in the
   exposure counter (this can also be verified using the counter
   visible on the left inside the viewfinder). Now you can start
   taking pictures. When taking the dummy exposures, make
   sure that the film feed indicator on the camera back is
   turning. This indicates that the film is feeding properly. The
   rewind knob will turn at the same time.


   Exposure Counter
  The exposure counter advances every time the automatic
   winding mechanism operates, and returns to "S" (start) when
   the camera back is opened, regardless of whether or not
   there is film in the camera. The exposure counter on top of
   the camera starts with S, then 1, then shows even numbers
   from 2 through 36. The odd numbers are indicated by dots
  between the even numbers. The numbers 12, 20,24 and 36
   are in red since they indicate the final exposures of standard
   length rolls of film. There is also an exposure counter inside
   the viewfinder (refer to page 43).


36
View original page 21
Page 22 · Read text
The ASA or DIN film speed rating specified on the film box
   and instruction sheet indicates the degree of sensitivity of the
    film to light.
   The film speed ring must be set to the speed of the film to
    Insure proper exposure.
   To set: Lift the film speed ring and turn it until the proper
  ASA film speed is opposite the index mark.
  ASA film speed values
   12  25  50  100 200  400 800  1600 3200
              l.               l.                ll.                                lt.ltl
        16 20   32 40   64 80  125 160 250 320 50O 640 10@ 1250 2@0 2500

  Memo Holder       . with ASA/DIN Conversion Scate
   To keep from forgetting what kind of film is in the camera,
    insert an end from the film box into the memo holder.
   Alternatively, the holder can be used for notes, etc.


3B
View original page 22Page 23 · Read text
The viewfinder screen for the 137 MD Quartz has a split-
   image circle in the center, surrounded by a circular
   microprism collar and then an outer matte field. When using
   the split-image center spot to focus, turn the lens focusing
   ring until the two images come together. To locus with the
   microprism collar, turn the focusing ring until the glitter
   disappears. With the matte Jield, turn the focusing ring until
   the image appears clear and sharP.
   . When using a telephoto or other slow lens, or in close-up
   photography, the microprism collar and split-image may
  become dark and difficult to use for focusing.  lt can even
   happen that half of the split image circle becomes totally
   black. In such a case, use the outer matte field for focusing.
                                                                                        ln focus/Scharf/Bonne mise au point/Enfocada
     Eyesight Adjustment Lenses
      Correction eyepiece lenses are
      available for farsighted and
      nearsighted people.
     There are I types available:
     -5D, -4D, -3D, -2D, OD,
     + 1D, + 2D, + 3D. Choose the
      lens that corresponds to your
    own eyesight. These lenses
     should be used with an
     accessory eye cup.


                                                                  Out of focus/Unscharf/Mauvatse mise au potnt/Desenfocada40
View original page 23Related documents and language editions
From the M. Butkus archive. Original publisher and archive notices are retained.
Check the model and edition against your equipment.
PDF verified 2026-10-10.