Film cameras
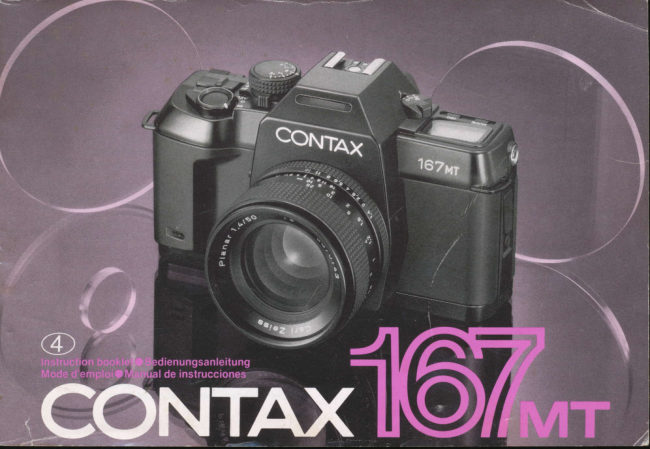
Contax 167 MT User manual
User manual for Contax 167 MT. 69 pages in English. Read the original PDF, download or print a copy without registration.
69 pagesEnglish5.7 MB PDF

Loading your manual…Open PDF directly
Document details
- Brand
- Contax
- Model / document
- Contax 167 MT
- Document type
- User manual
- Language
- English
- Pages
- 69
- File size
- 5.7 MB
- Category
- Film cameras
- Document date
- Not specified in catalog
Search available document text
Find a term, then jump to its page in the original PDF. Image-only pages may not be searchable; check the PDF for exact wording and diagrams.
Page 3 · Read text
-

Thankyou for your purchaseof a Contax 167MT.           Wir dankenlhnen,daBSie sich f0r die Contai167MT
This sophisticatedauto-exposureSLR camera featuresa      entschiedenhaben.
multi-modesystemwhich is digitallycontrolledby a high-     DiesefortschrittlicheSLR-Kameramit Belichtungs"
performanceCPU.Designedwith the latestin cameraand    automatikzeichnetsich durchein Mehrbetriebsarten
electronictechnology,it offers you a numberof            Systemaus,das digitalvon einerHochleistungs-CpU
outstandingfeaturessuch as multi-modeexposureconlrol     gesteuertwird, Dank ihrerAusstattungmit der neueslen
includingprogrammedaulo exposure,spot metering        Kamera-und Elektroniktechnologiebietetlhnendie Coitax
capability,and ultra{ast1/4000sec. shutterspeed.        167MTeineAnzahlvon auBergewohnlichenMerkmalen,
It also provrdesa large-sizedisplaypanelto let you check     beispielsweiseMehrbetriebsarten-Belichtungssteuerung
the cameraoperationand shootinginformationin the         einschlieRlichvon Programm-Belichtungsautomatik,
outsideof the viewfinder.In addition,thereare many        Spotmessungund einer extrem kurzenVerschluRzeitvon
featu:'esthat are designedto facilitateyour picture-taking    1/4000Sek"
and allowyou to shootin any situation.                   Die KameraverfrigtauBerdemUbereinen
Pleaseread this manualcarefullythroughbeforeyou use     groRdimensioniertenMonitorzur Anzeigeverschiedener
the camera.lt will serve you throughmany years with        InformationenUberKamerabetriebsartund Belichtung
propercare.                                       auBerhalbdes Suchers.Zusdtzlichsind eine Vielzahlvon
                                                     praktischenFunktionenvorhanden,die lhnendas
Thoughthis manualis describedwith a multi-modePlanar    Fotografierenerleichternund Aufnahmenin jeder
Tn 50 mm F1.4on the camera,the operatinginstructions    beliebigenSituationerm6glichen.
are the same when other multi-modeCarl Zeiss lensesare     Bitte lesenSie dieseBedienungsanleitungvor
used.too.                                          Inbetriebnahmetjer Kameraaufmerksamdurch.
                                           SachgemdRerUmgangmit lhrer neuenContax167MT
                                                      wird sich in vielenJahrenstdrungsfreienBetriebs
                                                   auszahlen.

                                                   Die ErkliirungendieserBedienungsanleitunggehendavon
                                                     aus,daRein Mehrbetriebsarten-ObjektivplanarT* f 1,4/50
                                mm an der Kameraangesetztist, doch geltendie gleichen
                                                 Bedienungsverfahrenauch fUr alle anderen
                                                      Mehrbetriebsarten-Objektivevon Carl Zeiss.
                            www.butkus.us


                                                                                                                b
View original page 3Page 5 · Read text
Q ExposureCompensationDial
                     (@ CompensatingValueSettingLever
               @ ExposureCompensationIndex
               @ RewindReleaseButton
                         G) ShutterRelease
               @ FilmRewindSwitch
               @ OperatingLever
               @ MainSwitch
               @ StrapLug
               @ LensReleaseButton
                   O GuidePin
               @ Self-timerLED
               @ Depth-of-fieldPreviewButton
               @ LightReceptorWindow
               @ DedicatedAuto-FlashCoupling
                              Contacts
               @ DirectX-Contact
               @ DriveModeSelector
               @ ISOButton
               @ ModeButton
               @ DisplayPanel
               @ LensIndex
               @ ProgramCouplingLever


www.butkus.us
View original page 5Page 6 · Read text
@ ViewfinderEyepiece
@ CassetteHolderShaft
@ SyncTerminal
@ CameraBack OpeningLever
@ CameraBack Lock Release
   Button
@ DX Contact
@ RS Button
@ BatteryCompartmentCover
   Screw
@ TripodSocket
@ FilmCheckWindow
@ CameraBack
@ Sprocket
@ ReleaseSocket
@ Spool
@ BatteryCompartmentCover
@ Data Back Contact
@ Eyecup
@ FilmTransportSignal
View original page 6
Page 10 · Read text
your picture                                                                                    and                                                                                                       shoot.                                                                                lens,                                                               compose                                                        Focusthe                                            the mode                                 depress                            aperture,                at its minimum                                                        but-     J       the lensf   Set          "PROGRAM"                                                     lever.                                      operating                                 with the                    mode                                                                                        den Bildausschnitt           set                                                                                 wdhlen                                                                                                 Sie   ton and                                                                                           scharf,S                                                                     Sie                                                                  das Objektiv                                                                                                {  Stellen
    StellenSie das Objektivauf den kleinstenBleridenwertein,        und machenSie die Aufnahme.
   drUckenSie die Betriebsartentasteund stellenSie die Betrieb-       Faire la mise au point avec I'objectif,composerla photo et     "PROGRAM"    sart                    mit dem Bedienungsschieberein.              d6clencher.
   ReglerI'objectifA son ouverture"PROGRAM"minimum,_appuyerSUrle bou-      Enfoqueel objetivoencuadrela imageny dispare.   ton de mode et r6glerle mode           avec le levier
   d'actionnement.
   Ajusteel objetivoa su aberturamfnlma,presioneel boton de                 "PROGRAM"                                con la palancade opera-   niodo y ajusteel modo
    cion.
                                                                     the desiredshutterspeedwith the operatingleverand                                                             Set                                            the mode but-                                 depress                            aperture,               minimum                at its       the lensC  Set              "Tv"()                                                                 shoot.                                              lever'                            the operating                         with              mode           set    ton and                      7
    StellenSie das Objektivauf den kleinstenBlendenwertein,          StellenSie die gewUnschteVerschluBzeitmit dem Bedie-
   drUckenSie die Bdtriebsartentasteund stellenSie die Betrieb-      nungsschieberein und machenSie die Aufnahme.        "Tv"    sart             mit dem Bedienungsschieberein.                      Reglerla vitessed'obturationd6sir6eavec le levierd'action-
   ReglerI'objectifd son ouverture'jTV"minimum,appuyer.sur.lebou-     nementet d6clencher.    ton de mode et r6glerle mode    avec le levierd'action-         Ajuste la velocidaddel obturadordeseadacon la palancade
   nement.                                                  operaci6ny dispare.
                                     presione                                                         el boton de                             mlnima,                  a Su abertura            objetivo            el    Ajuste                        "Tv"                                     de operaci6n.                                        la palanca                         con                    el modo           ajudte    niodo y

                                 "Av"                             mode with the             Set the desiredaperturewith the aperturering and shoot. r  Deoressthe mode buttonand setO  operatinglever.               7 StellenSie den gewUnschtenBlendenwertmit dem Bedie-
   DrUckenSie die Betriebsartentasteund stellenSie die Betrieb-     nungsschieberein und machenSie die Aufnahme.        "Av"    sart     mit dem Bedienungsschieberein.                     R6glerI'ouvertured6sir6eavec la bagued'ouvertureet                                                "Av"   Appuyersur le bouton de mode et r6gler le mode     avec        d6clencher.
     le levierd'actionnement.                                      Ajuste la aberturadeseadacon el anillode aberturasy dispa-                                          "Av"                                          con la pa-          re.    Presioneel modo de modo y ajusteel modo
    lancade operacion.


                                                                                                             13r1
                                                                                                                    / t
View original page 10Page 12 · Read text
Preparation for taking pictures
                           Vorbereitungen vor dem Fotografieren
i                                PrCparation pour Ia prise de vues
                                              :,,,,,,,,,,,,,,,,,,,,,,,,,,,,,,,,,,,,,,,,,,,,,,,,,,,,,,,,,,,,,,,,,
                                                   l..r'::lt,:l.''   Preparativos para fotografiarI
tIIIII'IIIIIIIL
View original page 12Page 13 · Read text
Preparation for taking pictures
  Vorbereitungen vor dem Fotografieren
       Pr6[)dration pour la prise de vues        ,,,,,,.,.,,,;
        .l],t..,.            Preparativos para fotografiar .,,


www.butkus.us
View original page 13Page 15 · Read text
@
                                                                                                                                         "airfr$\

    All important components and functions of the         E  Insertfour batterieswiththe plus(+)and minus(-)
   Contax 167MTincluding automatic film winding and      endscorrectly,as illustratedinsidethe Battery
    rewinding, shutter operation and display panel are       Compartment.The cameradoes not operateif they are
   battery-powered.The camera does not operate unless     loadedwith wrong(+)and (-) ends.
    batteries are loaded in it.                          To replacethe batterycompartmentcover,fit the guide
                                                            pin on the camerato the hole in the cover,close it and
      Il  Loosenthe BatteryCompartmentCoverScrew on the      lock it with the fixingscrew.
   camera bottomwith a coin and removethe cover.
                                               The camerausesfour 1.5 V AM-size batteries.lt is
                                              recommendedto use high-performancealkaline-
                                              manganesebatleries,becausesome of its functionssuch
                                                    as continuousshootingare affectedby the battery
                            www.butkus.usperformance.
1 8
View original page 15Page 16 · Read text
.   When the Main Switch is at OFF (the red mark is not                                                                   visible),the camerais turnedoff and disconnectedfrom
                                                     power.lf you are not usingthe camera,be sure to turn it
                                                                         off to save battery.
                                                                                                    "    ",                                                                                                                   ll  it is set to  E   the camerais turnedon and set for
                                                       center-weightedmetering.This settingts convenientfor
                                                    normalphotography.
                                                                                                    "    ",                                                                                                        lf it is set to   ol  the camerais turnedon and set for
                                                        spot metering.
                                                                                                          .  For detailson center-weightedmeteringand spot
      Lil:.'                                                 metering,referto page78.
    ln OFFposition                   ln ON position                                                                  "AEL",                                                                             the exposurevaluemeasuredby    PositionAUS                   PositionEIN                                  lf it is set to
                                                        spot meteringis locked.The AE Lock is usedfor shooting
   The Main Switchof the Contax167MThas three positions    backlightedsubjectsor for continuousshootingof moving                             "    "                                 subjectsat a fixedexposure.    for takingpictures: s   for shootingon center-weighted              "6t "                  "AEL"                             .  For detailson the AE Lock, refer to pages84 and 86.    metering,     for spot metering,and       for locking
    the exposureon spot metering.Chooseyour desiredmode
   by settingthe indexoppositethe correspondingmark.
    Set the MainSwitchat the click positionsto prevent
   wrongoperation.
       tr youarenotusingi;;ffi;;,        i;il ;ffi-ih;'iffi;*=+eers@4
     Switchby settingit so that the red mark is not visible.

20
                                                                                                      -----
View original page 16Page 17 · Read text
Lorsque le commutateur principal se trouve i  la
                                                         position OFF (la marquerougen'estpas visible),
                                                             I'appareilest horscircuitet I'alimentationest coup6e.
                                                      Placerle commutateursur OFF pour6conomiserles ptles
                                                      lorsqueI'appareiln'estpas utilise.
                                                   Lorsque le commutateur est sur la position " E ",
                                                               I'appareilest soustensionet 169l6pour mesurepond6r6e
                                                            centrale.Ce r6glageconvientbien pour la photographie
                                                   normate.
                                                   Lorsque le commutateur est sur la position " O",
                                                             I'appareilest soustensionet 16916pourla mesure
                                                        ponctuelle.
                                                                                                          . Pourles d6tailsconcernantla mesurepond6r6e
                                                          centraleet la mesureponctuelle,se reporteren page 79.
                                   possdde                   principal                          167MT                                                         trois                      du Contax   Le commutateur                                                "                                            "                                                   Lorsque le commutateur est sur la position "AEL" la   positions                                                tr                                 pour la                                           vues           pour la prise                   de vues:                                           prisede                              "O"                                 pour mesure          valeurd'expositionmesur6epar mesureponctuelleest   avec mesurepond6r6ecentrale,             "AEL"                   pourverrouillagede I'expositionpour     verrouill6e.Le verrouAE est utilis6pour la prisede vues   ponctuelleet
   mesureponctuelle.Choisirle moded6sireen plagant       de sujetsen contre-jourou pour une prisede vues                                                       continuede sujetsen mouvementd une expositionfixe.    I'indiceen regardde la marquecorrespondante.                                                                                                          . Pourles d6tailsconcernantle verrouAE, se reporteren   Placerle commutateurprincipaldans les positions                                                 pages85 et 87,   crant6esoour 6vitertout mauvaisfonctionnement.

     Si I'appareiln'est pas utilis6,d6senclencherle
    commutateurprincipalen le plagantde manidred ce
    que la marquerougene soit pas visible.   www.butkus.us
22
View original page 17Page 18 · Read text
< Batteriepriifung>
                                       Um die Batterienzu uberprrifen,schaltenSie den
                                                         Hauptschalterein und drUckenSie gleichzeitigdie
                                                               Betriebsarten-und die ISO-Taste.
                                              Wenn alle Anzeigenauf dem Monitoraufleuchten,sind die
                                                                Batterienin einwandfreiemBetriebszustand.Blinkendie
                                                          Anzeigen,so deutetdies auf ein Abnehmender
                                                            Batteriespannung.Obwohlnoch ausreichend
                                                          BatteriespannungfUr den Betriebder Kameravorhanden
                                                                                       ist, solltendie Batterienso bald wie moglichgegenfrlsche
                                                        ausgewechseltwerden.
                                                             Bei fortschreitenderSpannungsabnahmeder Batterien
                                                               blinkendie Anzeigenauf dem Monitorin schnellerem
                                                    Temoo.und die Kameraarbeitetnicht mehr.

       < Battery Check>
       To checkthe batteries,turn on the MainSwitchand press
        the Mode Buttonand ISO Buttonat the same time.
               lf all indicatorsin the displaypanelturn on, the batteries
        are in good condition.lf they blink,it meansthe battery
        voltagehas reduced.Thoughthe batteriesstill have
             powerfor operatingthe camera,it islrliI enough
       recommendedto changethem as soonas possible.
               lf the batteryvoltagehas reducedlurther,the indicatorsin
        the displaypanelwill blinklaster and the camerawill no
        longeroperate.
I
View original page 18Page 19 · Read text
* Thiscameraincorporatesa lithiumbackupbatteryto protect         * DieseKameraist mit einerLithium-Sicherungsbatterie
    the exposurecounlerand film speeddata even if its main            ausgestattet,um die Bildziihlwerk-und Filmempfindlichkeitsdaten
    batteriesare removedwhen there is film in it. lf the backup          bei eingelegtemFilm auch dannzu erhallen,wenn die                                                   "00"    batteryis worn out, the exposurecounterwill returnto     and      Hauotbatterienaus der Kameraentferntwerden.Wenn diese
    the camerawill no longershowthe correctISOspeedand           Sicherungsbatterieerschopftist, schaltetdas Bildzdhlwerkauf                                                                  "00"    exposuremodewhen the mainbatteriesare removed.This              zurUck,und die richtigeISO-Filmempfindlichkeitund
    batterywill last about 10 yearsundernormaluse. For               Belichtungsbetriebsartwerdennicht mehr angezeigt,wenn die
    replacement,contactyour ContaxServiceStation.                 Hauptbatterienentferntwerden.Bei normalemGebrauchder
                                                    Kamerabetragtdie Lebensdauerder Sicherungsbatterieungefiihr
     <Battery Precautions>                                  10 Jahre.BringenSie die Kamerazu einerContax-
        . Alwayschangethe four batteriesal the same time with new       Kundendienststelle,um die Sicherungsbatterieerneuernzu
    ones of the same type and brand.                                lassen.
    o Generally,the batteryperformancewill be reducedtemporarily
     at low temperatures(underabout0'C).                         <VorsichtsmaRregelnliir die Batterien>
   When shootingin cold weather,use new batteriesand keepthe      o TauschenSie immeralle vier Batteriengleichzeitigaus.
    camerawarm beforetakingpictures.The batteryperformance      MischenSie nichtalte und neue Batterienund solche
    aftectedby low temperaturewill returnto normalif you are          verschiedenerTypen.
    shootingin normaltemperature.                              o Bei TemperaturenunterNull nimmtdie Batterieleistung
    o Belore loadingthe batteries,wipe both poles clean with a dry      vorUbergehendab. Beim Fotografierenin kaltemWettersollten
     clothbecausepoor contactmay resultif they are soiledwith        daherfrischeBatterienverwendetund die Kameravor den
    sweat or grease.                                     Aufnahmenwarmgehaltenwerden.Die durchtiefeTemperaturen
        .   lf you are goingon a longtrip, bringa new set ol spare            beeintrdchtigteBatterieleistungwird jedochwiederhergestellt,
     batterieswith you.                                   wenn Aufnahmenspaterbei normalerTemperaturgemacht
       r Do not throw usedbatteriesinto fire or try to disassemblethem    werden.
    becauseil is dangerous.                                    o Vor dem Einlegender BatterienbeidePolemit einem
                                                             trockenenTuch abreiben,da bei einerVerschmutzungder Pole
                                                                    mit SchweiRoder Fett keineinwandfreierelektrischerKontakt
                                                                gewdhrleistetist.
                                                             o WennSie auf langereReisengehen,nehmenSie einenSatz
                                                                       frischerBatterienals Reservemit.
                            www.butkus.usVerletzungsgefo Batterienaufahrkeinenbesteht.Fallin ein Feuerwerfenoder zerlegen,da
26
View original page 19Page 20 · Read text
,ooo-G;;;=-
i                                                   , . u 0 0    1-  J)
                     l-
                               0 g  e l ,


       Three types of film speed setting are available on this     Leverto the left or rightwhilepressingthe ISO Buttonso
       camera. After the f ilm speed is sef in each case, be        that the desiredfilm speed(lSO6-6400) appearsin the
       sure to press the ISO Button to check the film speed      DisplayPanel.
       which has been set.                                 o  lf you loada non-DX-codedfilm in the camera,the film
                                                     soeedwhichwas set lor the previousfilm will remainin
       <Automatic setting>                                  the cameramemory.
      Use a DX-codedfilm. lf you installa DX-codedfilm (lSO
       25-5000)with the MainSwitchat OFF,the camerawill      <Continuance of the previous fifm speed setting>
       automaticallyset itselffor the speedof the film loadedin     You can maintainthe film speedyou havepreviouslyset,
            it.                                                   regardlessof whateverfilm you load in the camera.For
                                                                        this purpose,take out the exposedfilm with the Main
       < Manuatsetting>                                  Switchat ON and closethe CameraBackwhilethe data
             lf you are usingnon-DX-codedfilm, or if you want to             in the DisplayPanelremainson. Thenopenthe Camera
      changethe film speedmanually,movethe Operating       Backand installa new ftlm.
View original page 20Page 22 · Read text
r [ [ [ [ 0


                r 0 0 [ [ 0 D D [ ! ! D  l ] t  l


   E  Pullout film slightlyfrom the cassetteand insertits tip     4 Closethe CameraBack,turn on the MainSwitchand                                "-".   as far as the orangemark                           depressthe ShutterRelease
   Engagethe sprocketteethin the lowerfilm perforations    The camerawill automaticallyadvancethe film in blank                                                                                    "01"   and makesurethe film liesflat on the film channelas          untilthe ExposureCountershows    You are now
   shown                                           readyto takepictures.lf the film is advancingproperly,
                                                        the FilmTransportSignalwill turn.
                                                     o You can checkthe ExposureCounterin the display
                                                    paneland viewfinder.
                                                                                                          . Whilethe camerais advancingthe film in blank,the                                                                             "00"                                                ExposureCountershows
                                                     o The ExposureCounterdoes not advanceunlessthe
                                               camerais loadedwith film @ o @ x                      . The FilmCheckWindowletsyou see at a glanceif
5Z                                                      thereis film in the cameraor not
View original page 22Page 24 · Read text
@ Aperture Value
                                                             Likethe aperturedisplayin the viewfinder,it showsthe shooting
                                                           aperture
                                        O lSO Indicator
                                                                                                   It turnson when the ISOButtonis pressedand the batteriesare
                                                       checked.
                               @ Film Rewind Mark
                                                                                                    It turnson whilethe film is rewinding,and turnsoff after
                                                          rewindingis completed.
                               @ Exposure Counter
                                                Showsthe numberof exposuresof the film. lt also achievesthe
                                                               followingfunctions.
                                                         o Timedisplayduringbulb exposure(00-59).
< Displaypanel>                                          o Displayof the remainingtime on self-timer(10-00).
This DisplayPanelletsyou see all importantshootingdata such            .  Displayof the exposuresequencein automaticcontinuous
as shutterspeedand aperlureat a glance.Also,the exposure      exposure compensalron.
mode,film speedand shutterspeedare set with the Operating      G) MODE Button
Leverwhilewatchingthis panel.lf you movethe OperatingLever     Set your desiredmodeby movingthe OperatingLeverto the right
to the rightor left whilepressingthe MODEButtonor ISOButton,     or left whilepressingthe MODEButton.
the data in the displaypanelwill change.Removeyour finger       You can choosethe normalprogram(PROGRAM),highspeed
f rom the leverwhen your desiredmode or numberappearsin the     program(PROGRAMHIGH),low-speedprogram(PROGRAM
panel.The leverwill returnto the neutralpositionand set the       LOW),aperture-priority(Av),shutter'priority(Tv),and manual(M)
modeand the film speed/shutterspeedthat is displayed.          exoosuremooes.
                                         O ISO Button
O Shutter Speed/Film SPeed                           Use this buttonfor settingyour desiredfilm speedand for
Normally,it displaysthe shutterspeed.                         checkingthe film speedthat is set
However,the ISOindicatorand film speedturn on when the ISO
Buttonis pressed.ln the shutter-priorityauto exposure[v) and
manualexposure(M) modes,you can choosethe desiredshutter
soeedin 1-stepincrementswith the OperatingLeveralone.

                                                                                          35
View original page 24Page 25 · Read text
<C  -  Gontinuousshooting>
                                                    As longas the ShutterReleaseis depressed,the camera
                                                            takespicturesin successionat a rate of up to three
                                                        framesa second.lf you take your fingeroff the button,the
                                                                        film advancesto the nextframe and stops.fl-heshooting
                                                     speedvarieswith the shutterspeedand batterycondition.)
                                                       < S-T -  Self-timershooting >                                                                                           "S-T"                                                                                                                 lf the DriveModeSelectoris set to     and the Shutter
                                                       Releaseis depressed,the selftimerstartsand tripsthe
                                                                 shutterafter 10 seconds.Whilethe self-timeris running,
                                                               the self-timerLED in the camerafront turnson and the
                                                      ExposureCounterswitchesto the self-timermodeto count                                                                         "10"   "0"                                                 down from      to     at 1-sec.intervals.

       The Contax 167MT has a drive mode selector that
         allows you to choose three shooting modes according
          to your subiect and purpose -  single-frame shooting,
        continuous shooting and self-timer shooting.
        < S -  Single-frameshooting >
       Eachtime the ShutterReleaseis depressed,the camera
       exposesone frame and windsthe film for the next shot,
        then stoos.
f|iltrl
                                www.butkus.us

    42
View original page 25Page 26 · Read text
<C  -  Continuousshooting>
                                                    As longas the ShutterReleaseis depressed,the camera
                                                            takespicturesin successionat a rate of up to three
                                                        framesa second.lf you take your fingeroff the button,the
                                                                         film advancesto the nextframe and stops.(fhe shooting       ili,                                          speedvarieswith the shutterspeedand batterycondition.)         $q':.e:l'
                                                     <S-T -  Self-tlmershooting>                                                                                           "S-T"      ,1                                                                                            lf the DriveModeSelectoris set to     and the Shutter
           ;.                                              Releasers depressed,the self-timerstartsand tripsthe
                                                              shutterafter10 seconds.Whilethe self-timeris running,
                                                                ;                   the self-timerLED in the camerafront turnson and the
                                        -_               ExposureCounter"10"  switches"0"   '1-sec.to the self{imermodeto counl                                            trt-            down from      to     at       intervals.

       The Contax 167MT has a drive mode selector that
         allows you to choose three shooting modes according
          to your subiect and purpose -  single-frameshooting,
        continuous shooting and self-timer shooting.
       <S  -  Single-frameshooting>
       Eachtime the ShutterReleaseis depressed,the camera
       exoosesone frameand windsthe film for the nextshot,
        then stoos.
['l1
I
l o  ,
View original page 26Page 27 · Read text
To takesharppictures,the cameramustbe heldsteady.
   Sincecamerashakeis the majorcauseof blurred
    pictures,it is recommendedto practiceholdingthe
   camerasteadyuntilyou get familiarwith it. Placethe
   camerain the palmof your left hand,holdthe focusing
    rrngof the lensso thatyou can turn it with yourfingers,
    holdthe gripwith your righthandand put yourforefinger
    lightlyon the ShutterRelease.Stickthe leftelbowto
    the body,pressthe cameralightlyagainstyourface
   and lookthroughthe viewfinder.Alwaysdepressthe
    ShutterReleasegently.You may holdthe
   cameranot onlyin the horizontalposition,
    but alsoin the verticalpositiondepending
   on the sublect.In any case,studyand
    practicethe posturebestsurtedto you.
      It is alsogood to supportyour bodyor
   cameraon a building,tree,and so on.


                                                                                                                     t. q.
                                                                                                                                 ti           .s

                                                                                                                                                                                                               I
                                                                                                                                                                                                                                                                                   r , . , i :                , l f                            www.butkus.us
                                                                               -o'*11'
44
View original page 27Page 28 · Read text
iit;;tiltittiiiil1vr4ii:"""":            jit"'itii+'i':


                                                        recte/Enfocado

   Focusing ts done with the split-image focusing center,    o Whenusinga slow lensor takingclose-upswith a high
   microprism collar and the surrounding matte screen.      magnification,you may sometimesfind it difficultto focus.
                                                                 In such cases,use the surroundingmattescreento focus.
   < Horizontal Split-image Spot >                       o  lf you are far- or near-sighted,use optionalFl-type
   Whilelookingthroughthe viewfinder,turn the Focusing      DiopterLenses.Threreare eighttypesavailable(- 5, - 4,
   Ringuntilthe upperand lowersegmentsof the image             - 3, -2, 0, + 1, +2, and + 3), whichcan be attachedto
    coincide.lf the imageis out of focus,the two segments      the vieMindereyepiece.
   do not coincide.

   < Microprism Gollar and Matte Screen>
   Turnthe FocusingRinguntilthe imageon the microprism
    collaror mattescreenappearssharp.lf the lens is not cor-
    rectlyfocused,the imageon the microprismcollarwill
46 appeargrainyand that on the mattescreenwill be unsharp.
View original page 28Page 29 · Read text
When the entire roll of film is exposed, the camera       Whilethe film is rewinding,the FilmTransportSignalwill
     will stop winding the film and all indicators in the         turn backwardand the ExposureCounterwill blink,
    display panel, such as the exposure counter, shutter      showingthe numberof the last exposedframe After                                                                                            "00".   speed and aperture, will blink.                         rewindingis completed,it will show
                                                     o Afterthe film has startedrewinding,removeyourfinger
     tr Whilepressingthe rewindreleasebutton,slidethe        from the RewindSwitch lt will automaticallvreturnto its
   RewindSwitchin the directionof the arrow("<") The        originalposition                            "       "   FilmRewindMark O<<  will turnon in the displaypanel
   and the camerawill startrewtndingthe film Whenit is       Z Makesurethe motorhas stoppedand the Exposure                                                                          "00",   completelywoundback intoits cassette,you will heara      Countershows     thenopenthe CameraBackand
   shuttertrippingnoiseand the rewindingoperationwill        unloadthe film.Avoiddirectsunliqhtto unloadit.
   automaticallvstoo.                 www.butkus.us
48
View original page 29Page 30 · Read text
o The film can also be rewoundin the middleof a roll.       o Le film peut 6galement6tre rebobin6au milieud'un
        o  lf rewindinghas stoppedbecausethe MainSwitchwas      rouleau.
        turnedoff by mistakeduringrewinding,turn on the Main            .  Si le rebobinages'est arr0t6car le commutateur
        Switchagainand wind back the film completelywith the       principala 6t6 d6senclench6par erreurpendantle
       RewindSwitch.                                      rebobinage,enclencherde nouveaule commutateur
        o Sendthe exposedfilm for processingas soon as            principalet rebobinercompldtementle film avec le
         possible.                                        commutaleurde rebobinage.
              r After unloadingthe film, be sure to turn off the Main       o Faired6velopperle film expos6dds que possible.
        Switchunlessyou continueto take pictures.                             . Aprdsle retraitdu film, ne pas oublierde d6senclencher
                                                                            le commutateurprincipalsi I'on ne prendplus de photos.
                      a
                                                     o
        o Auch teilbelichteteFilmekonnenzurUckgespultwerden.
        o Wenndas RUckspulendes Filmsunterbrochenwurde,           . La pelfculatambi6npuederebobinarsea mitadde un
         weil der Hauptschalterversehentlichwdihrenddes            cartucho.
        RUckspulensausgeschaltetwurde,den Hauptschalter       o Si se ha detenidoel rebobinadoporquese desactiv6el
        wiedereinschaltenund den Film mit dem RUckspul-       conmutadorprincipalpor error duranteel rebobinado,
         schaltervollstdndigzuruckspulen.                      conecteel conmutadorprincipalotra vez y rebobinede
        o Der belichteteFilm sollteso baldwie m6glichzum        nuevola pellculahastael finalcon el interruotorde
        Entwickelngebrachtwerden.                            rebobinado.
        o SchaltenSie die Kameranach Entfernendes Filmsaus,    o Llevea revelarla pelfculaexpuestalo antes posible.
       wenn Sie keineweiterenAufnahmenmachenwollen.                . Despu6sde haberextraldola pellculacercioresede
                                                         haberdesconectadoel conmutadorprincipala menosque
                                                      deseeseguirfotografiando.


Ii
    50
View original page 30Related documents and language editions
From the M. Butkus archive. Original publisher and archive notices are retained.
Check the model and edition against your equipment.
PDF verified 2026-10-10.